Android ListView with Checkbox using ArrayAdapter
1. Example
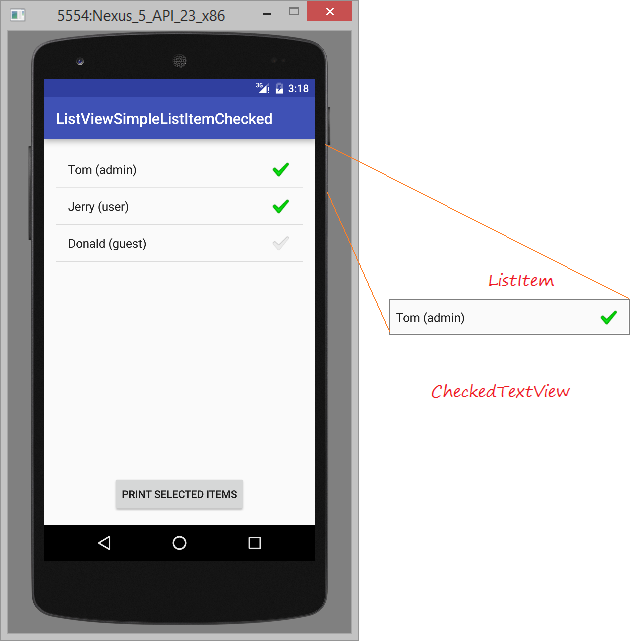
Android pre-builds a simple Layout which ListItem is made by a CheckedTextView. In this example, I will show you how to use ArrayAdapter and android.R.layout.simple_list_item_checked. (Or android.R.layout.simple_list_item_multiple_choice)
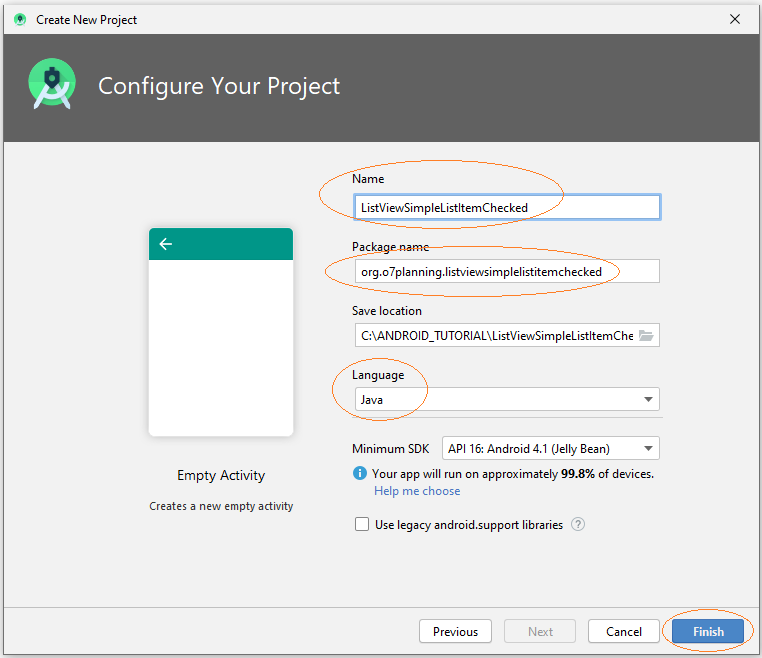
Create a new Android project:
- ListViewSimpleListItemChecked
- Name: ListViewSimpleListItemChecked
- Package name: org.o7planning.listviewsimplelistitemchecked
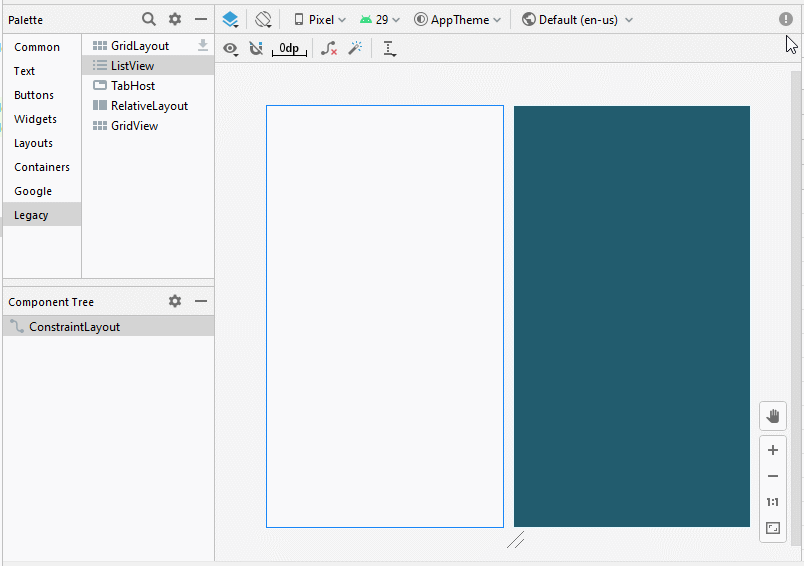
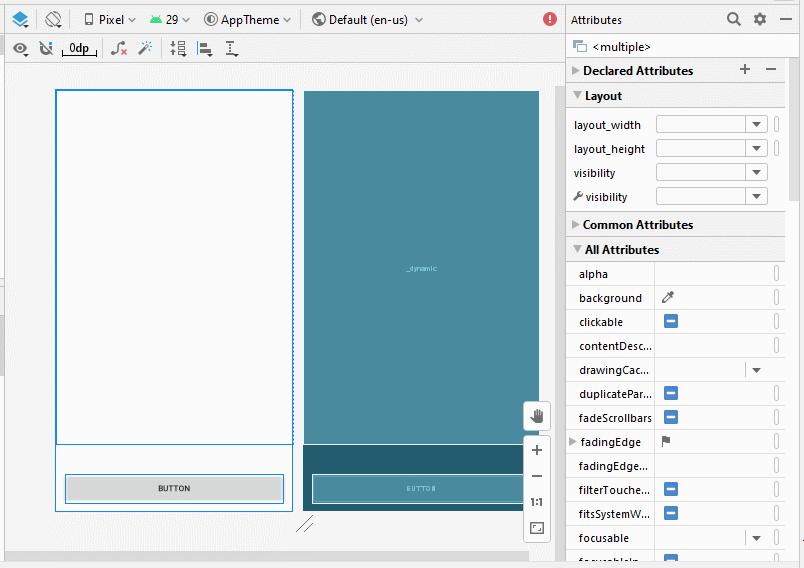
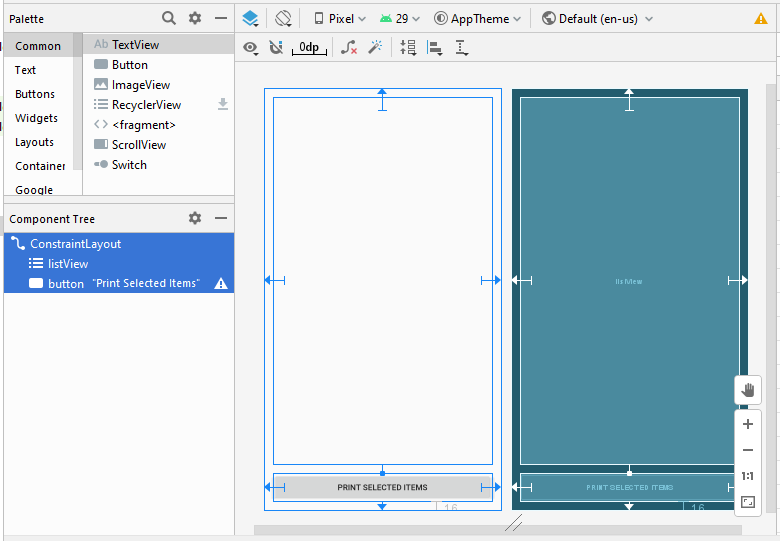
Interface design:
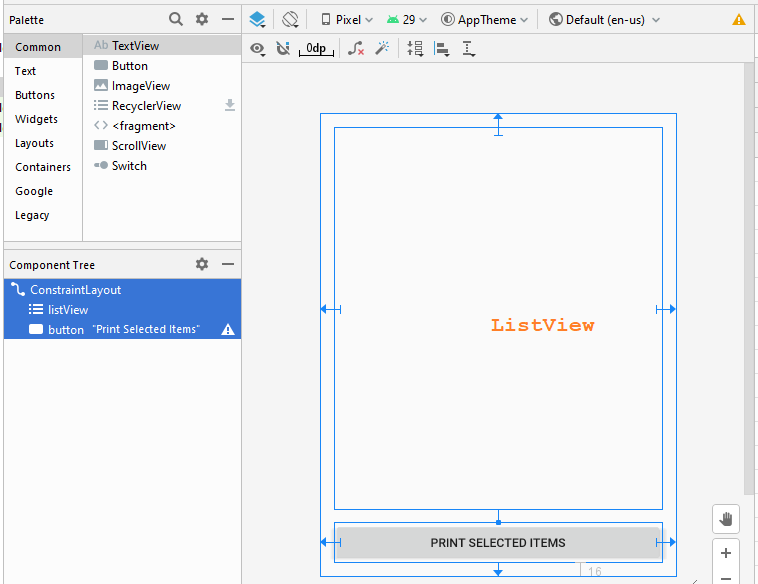
If you are interested in the steps to design this application interface, please see the appendix at the end of the article.
activity_main.xml
<?xml version="1.0" encoding="utf-8"?>
<androidx.constraintlayout.widget.ConstraintLayout
    xmlns:android="http://schemas.android.com/apk/res/android"
    xmlns:app="http://schemas.android.com/apk/res-auto"
    xmlns:tools="http://schemas.android.com/tools"
    android:layout_width="match_parent"
    android:layout_height="match_parent"
    tools:context=".MainActivity">

    <ListView
        android:id="@+id/listView"
        android:layout_width="0dp"
        android:layout_height="0dp"
        android:layout_marginStart="16dp"
        android:layout_marginLeft="16dp"
        android:layout_marginTop="16dp"
        android:layout_marginEnd="16dp"
        android:layout_marginRight="16dp"
        android:layout_marginBottom="16dp"
        app:layout_constraintBottom_toTopOf="@+id/button"
        app:layout_constraintEnd_toEndOf="parent"
        app:layout_constraintStart_toStartOf="parent"
        app:layout_constraintTop_toTopOf="parent" />

    <Button
        android:id="@+id/button"
        android:layout_width="0dp"
        android:layout_height="46dp"
        android:layout_marginStart="16dp"
        android:layout_marginLeft="16dp"
        android:layout_marginEnd="16dp"
        android:layout_marginRight="16dp"
        android:layout_marginBottom="16dp"
        android:text="Print Selected Items"
        app:layout_constraintBottom_toBottomOf="parent"
        app:layout_constraintEnd_toEndOf="parent"
        app:layout_constraintStart_toStartOf="parent" />
</androidx.constraintlayout.widget.ConstraintLayout>
UserAccount.java
package org.o7planning.listviewsimplelistitemchecked;

import java.io.Serializable;

public class UserAccount implements Serializable {

    private String userName;
    private String userType;

    private boolean active;

    public UserAccount(String userName, String userType)  {
        this.userName= userName;
        this.userType = userType;
        this.active= true;
    }

    public UserAccount(String userName, String userType, boolean active)  {
        this.userName= userName;
        this.userType = userType;
        this.active= active;
    }

    public String getUserType() {
        return userType;
    }

    public void setUserType(String userType) {
        this.userType = userType;
    }

    public String getUserName() {
        return userName;
    }

    public void setUserName(String userName) {
        this.userName = userName;
    }

    public boolean isActive() {
        return active;
    }

    public void setActive(boolean active) {
        this.active = active;
    }

    @Override
    public String toString() {
        return this.userName +" ("+ this.userType+")";
    }

}
MainActivity.java
package org.o7planning.listviewsimplelistitemchecked;
import android.os.Bundle;
import android.util.Log;
import android.util.SparseBooleanArray;
import android.view.View;
import android.widget.AdapterView;
import android.widget.ArrayAdapter;
import android.widget.Button;
import android.widget.CheckedTextView;
import android.widget.ListView;
import android.widget.Toast;
import androidx.appcompat.app.AppCompatActivity;
public class MainActivity extends AppCompatActivity {
public static final String TAG = "ListViewExample";
private ListView listView;
private Button button;
@Override
protected void onCreate(Bundle savedInstanceState) {
super.onCreate(savedInstanceState);
setContentView(R.layout.activity_main);
this.listView = (ListView)findViewById(R.id.listView);
this.button = (Button)findViewById(R.id.button);
// CHOICE_MODE_NONE: (Default)
// (listView.setItemChecked(..) doest not work with CHOICE_MODE_NONE).
// CHOICE_MODE_SINGLE:
// CHOICE_MODE_MULTIPLE:
// CHOICE_MODE_MULTIPLE_MODAL:
this.listView.setChoiceMode(ListView.CHOICE_MODE_MULTIPLE);
this.listView.setOnItemClickListener(new AdapterView.OnItemClickListener() {
@Override
public void onItemClick(AdapterView<?> parent, View view, int position, long id) {
Log.i(TAG, "onItemClick: " +position);
CheckedTextView v = (CheckedTextView) view;
boolean currentCheck = v.isChecked();
UserAccount user = (UserAccount) listView.getItemAtPosition(position);
user.setActive(!currentCheck);
}
});
//
this.button.setOnClickListener(new View.OnClickListener() {
@Override
public void onClick(View v) {
printSelectedItems();
}
});
this.initListViewData();
}
private void initListViewData() {
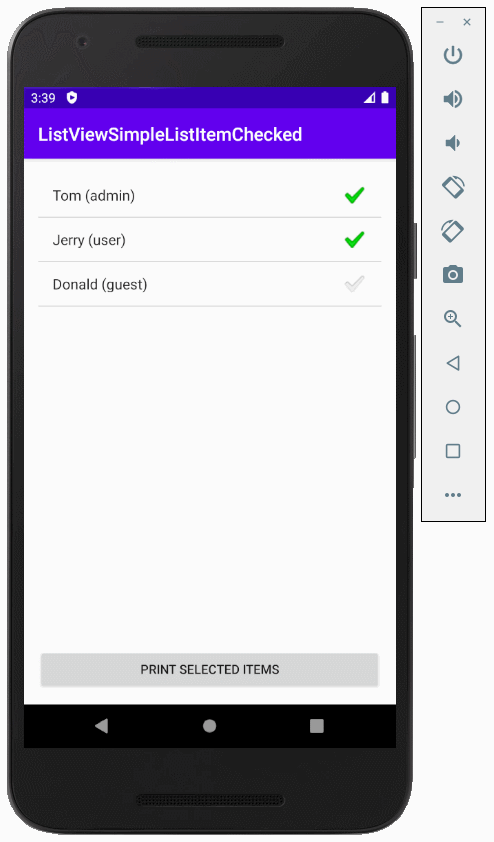
UserAccount tom = new UserAccount("Tom","admin");
UserAccount jerry = new UserAccount("Jerry","user");
UserAccount donald = new UserAccount("Donald","guest", false);
UserAccount[] users = new UserAccount[]{tom,jerry, donald};
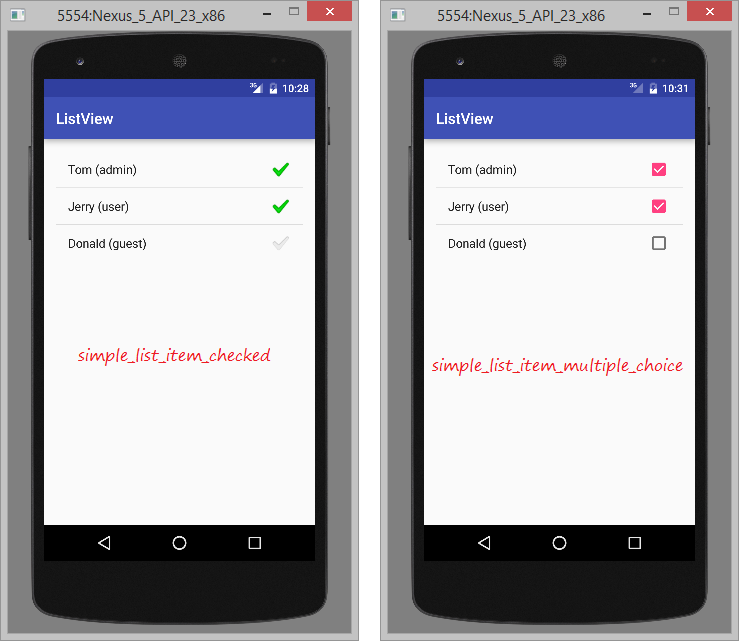
// android.R.layout.simple_list_item_checked:
// ListItem is very simple (Only one CheckedTextView).
ArrayAdapter<UserAccount> arrayAdapter
= new ArrayAdapter<UserAccount>(this, android.R.layout.simple_list_item_checked , users);
this.listView.setAdapter(arrayAdapter);
for(int i=0;i< users.length; i++ ) {
this.listView.setItemChecked(i,users[i].isActive());
}
}
// When user click "Print Selected Items".
public void printSelectedItems() {
SparseBooleanArray sp = listView.getCheckedItemPositions();
StringBuilder sb= new StringBuilder();
for(int i=0;i<sp.size();i++){
if(sp.valueAt(i)==true){
UserAccount user= (UserAccount) listView.getItemAtPosition(i);
// Or:
// String s = ((CheckedTextView) listView.getChildAt(i)).getText().toString();
//
String s= user.getUserName();
sb = sb.append(" "+s);
}
}
Toast.makeText(this, "Selected items are: "+sb.toString(), Toast.LENGTH_LONG).show();
}
}Run this example:
Android also provides you with a Layout similar tosimple_list_item_checked which is simple_list_item_multiple_choice.
The absolute single difference between the two is the visual style of the selected indicator that shows up on an item when it is marked as selected. The one in android.R.layout.simple_list_item_multiple_choice is supposedly more suited for a multi-choice selection, while the one in android.R.layout.simple_list_item_checked is more suited for touch-and-go scenarios. That being said, everything is relative to each and every person's taste, and moreover you could pass your own layout there to match your desired design.
Android Programming Tutorials
- Configure Android Emulator in Android Studio
- Android ToggleButton Tutorial with Examples
- Create a simple File Finder Dialog in Android
- Android TimePickerDialog Tutorial with Examples
- Android DatePickerDialog Tutorial with Examples
- What is needed to get started with Android?
- Install Android Studio on Windows
- Install Intel® HAXM for Android Studio
- Android AsyncTask Tutorial with Examples
- Android AsyncTaskLoader Tutorial with Examples
- Android Tutorial for Beginners - Basic examples
- How to know the phone number of Android Emulator and change it
- Android TextInputLayout Tutorial with Examples
- Android CardView Tutorial with Examples
- Android ViewPager2 Tutorial with Examples
- Get Phone Number in Android using TelephonyManager
- Android Phone Call Tutorial with Examples
- Android Wifi Scanning Tutorial with Examples
- Android 2D Game Tutorial for Beginners
- Android DialogFragment Tutorial with Examples
- Android CharacterPickerDialog Tutorial with Examples
- Android Tutorial for Beginners - Hello Android
- Using Android Device File Explorer
- Enable USB Debugging on Android Device
- Android UI Layouts Tutorial with Examples
- Android SMS Tutorial with Examples
- Android SQLite Database Tutorial with Examples
- Google Maps Android API Tutorial with Examples
- Android Text to Speech Tutorial with Examples
- Android Space Tutorial with Examples
- Android Toast Tutorial with Examples
- Create a custom Android Toast
- Android SnackBar Tutorial with Examples
- Android TextView Tutorial with Examples
- Android TextClock Tutorial with Examples
- Android EditText Tutorial with Examples
- Android TextWatcher Tutorial with Examples
- Format Credit Card Number with Android TextWatcher
- Android Clipboard Tutorial with Examples
- Create a simple File Chooser in Android
- Android AutoCompleteTextView and MultiAutoCompleteTextView Tutorial with Examples
- Android ImageView Tutorial with Examples
- Android ImageSwitcher Tutorial with Examples
- Android ScrollView and HorizontalScrollView Tutorial with Examples
- Android WebView Tutorial with Examples
- Android SeekBar Tutorial with Examples
- Android Dialog Tutorial with Examples
- Android AlertDialog Tutorial with Examples
- Android RatingBar Tutorial with Examples
- Android ProgressBar Tutorial with Examples
- Android Spinner Tutorial with Examples
- Android Button Tutorial with Examples
- Android Switch Tutorial with Examples
- Android ImageButton Tutorial with Examples
- Android FloatingActionButton Tutorial with Examples
- Android CheckBox Tutorial with Examples
- Android RadioGroup and RadioButton Tutorial with Examples
- Android Chip and ChipGroup Tutorial with Examples
- Using image assets and icon assets of Android Studio
- Setting SD Card for Android Emulator
- ChipGroup and Chip Entry Example
- How to add external libraries to Android Project in Android Studio?
- How to disable the permissions already granted to the Android application?
- How to remove applications from Android Emulator?
- Android LinearLayout Tutorial with Examples
- Android TableLayout Tutorial with Examples
- Android FrameLayout Tutorial with Examples
- Android QuickContactBadge Tutorial with Examples
- Android StackView Tutorial with Examples
- Android Camera Tutorial with Examples
- Android MediaPlayer Tutorial with Examples
- Android VideoView Tutorial with Examples
- Playing Sound effects in Android with SoundPool
- Android Networking Tutorial with Examples
- Android JSON Parser Tutorial with Examples
- Android SharedPreferences Tutorial with Examples
- Android Internal Storage Tutorial with Examples
- Android External Storage Tutorial with Examples
- Android Intents Tutorial with Examples
- Example of an explicit Android Intent, calling another Intent
- Example of implicit Android Intent, open a URL, send an email
- Android Services Tutorial with Examples
- Android Notifications Tutorial with Examples
- Android DatePicker Tutorial with Examples
- Android TimePicker Tutorial with Examples
- Android Chronometer Tutorial with Examples
- Android OptionMenu Tutorial with Examples
- Android ContextMenu Tutorial with Examples
- Android PopupMenu Tutorial with Examples
- Android Fragments Tutorial with Examples
- Android ListView Tutorial with Examples
- Android ListView with Checkbox using ArrayAdapter
- Android GridView Tutorial with Examples
Show More