Java Programming for team using Eclipse and SVN
1. Introduction
The document is based on:
Eclipse 4.6, 4.7 (NEON, OXYGEN)
Maybe you are interested:
- Use Eclipse to Clone a GitHub Repository with multiple projects
2. The installation requires
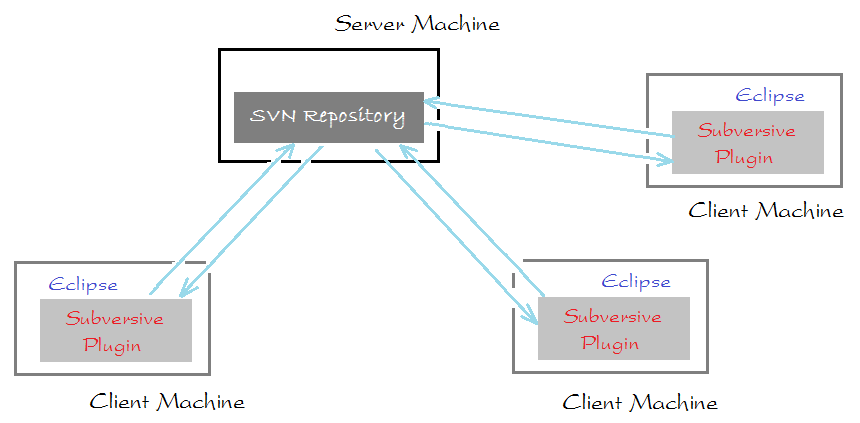
This is a working model for Java team using Eclipse and SVN:
VisualSVN Server

To get SVN Repository, you need to install a SVN Server like Visual SVN on some computer, and it will be a SVN server. You can see the instruction of installing and configuring Visual SVN at:
- Use SVN Repository for free XP-Dev
Subversive

Next, Subversive must be installed on each Eclipse program of each member. You can see the instruction at:
3. Share Project to SVN Repository
First, a member needs to share the code of the initial project on SVN Repository.
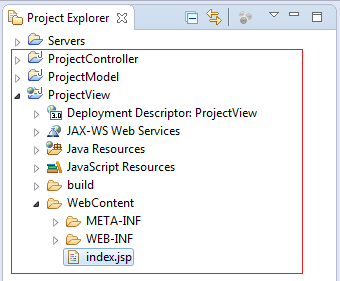
The below image illustrates 3 projects available on a computer of a member. We will share these three projects on SVN Server.
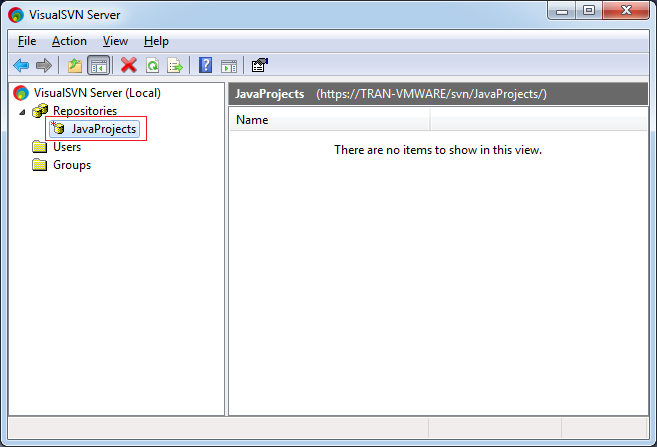
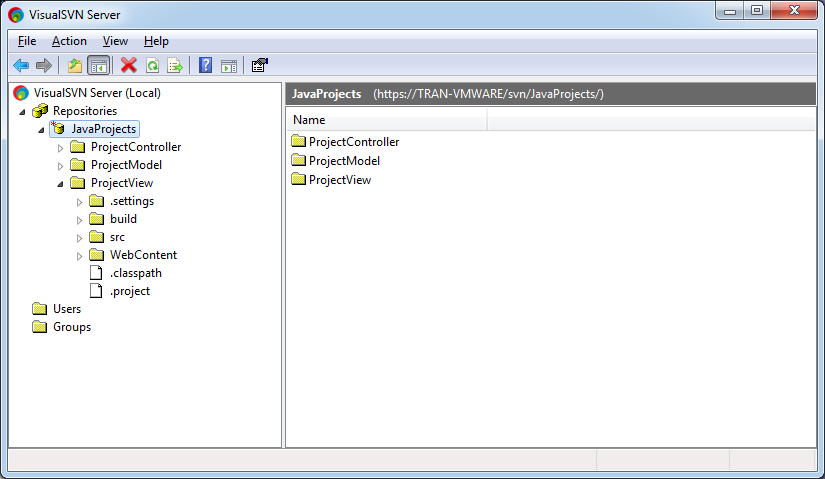
On Visual SVN, a Repository named as JavaProjects has been created.
Copy URL:
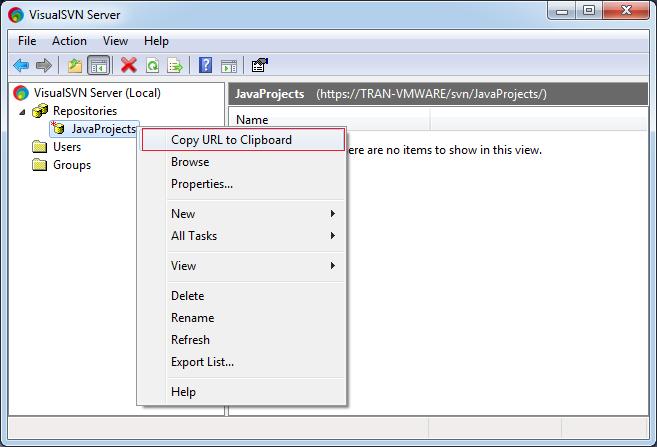
Copy URL of the SVN Repository.
- https://TRAN-VMWARE/svn/JavaProjects/
You can change the name server by IP address.
-
Back to Eclipse.
We will share 2 Project: ProjectController & ProjectModel into Repository JavaProjects:
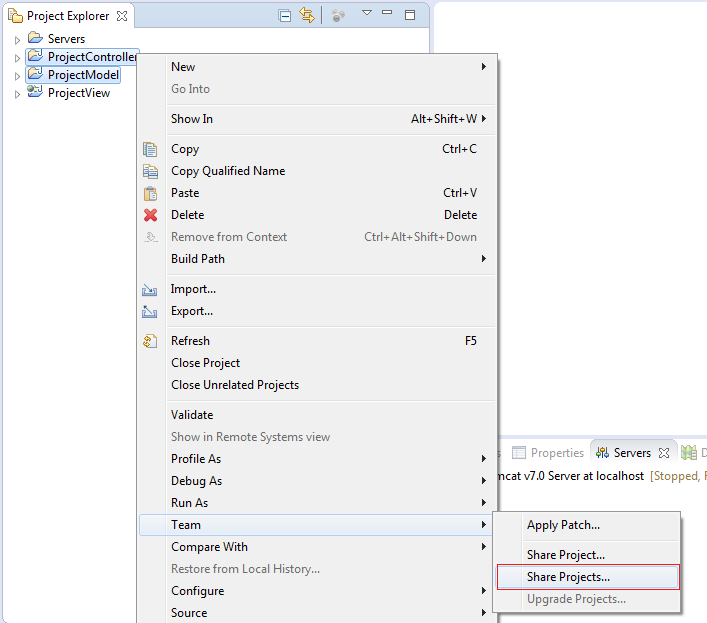
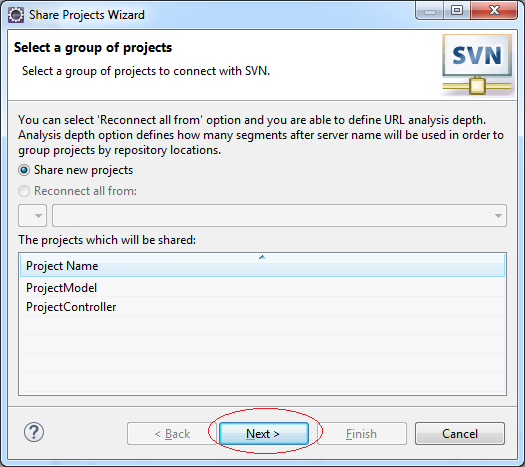
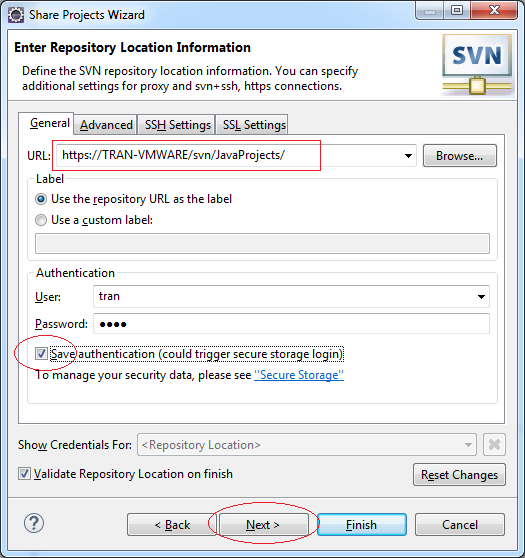
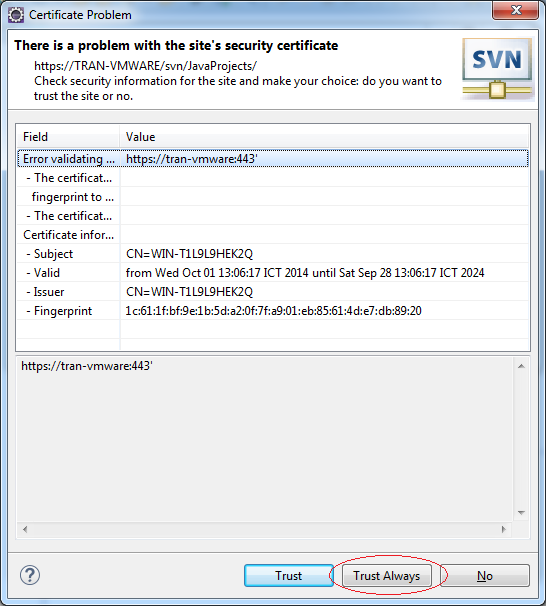
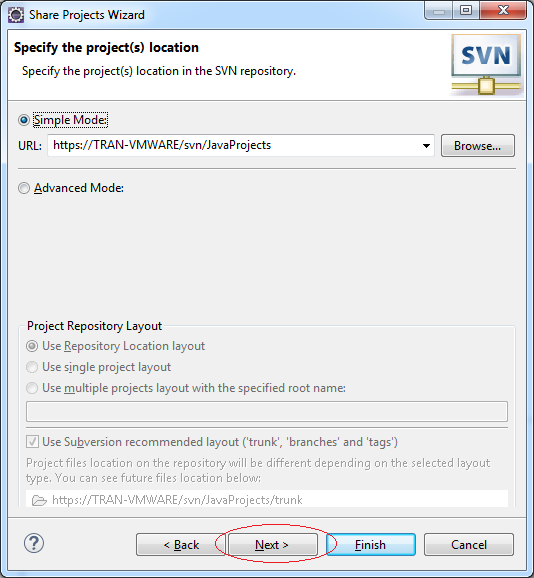
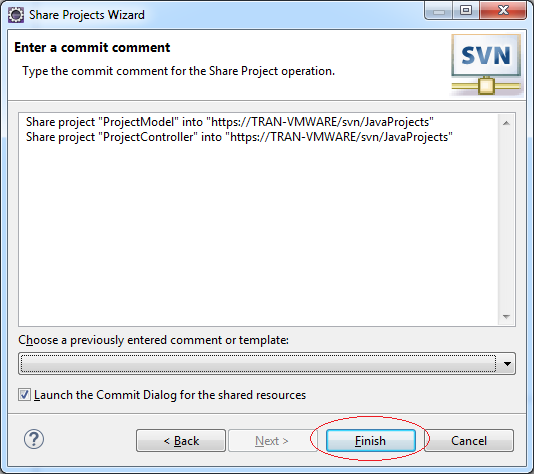
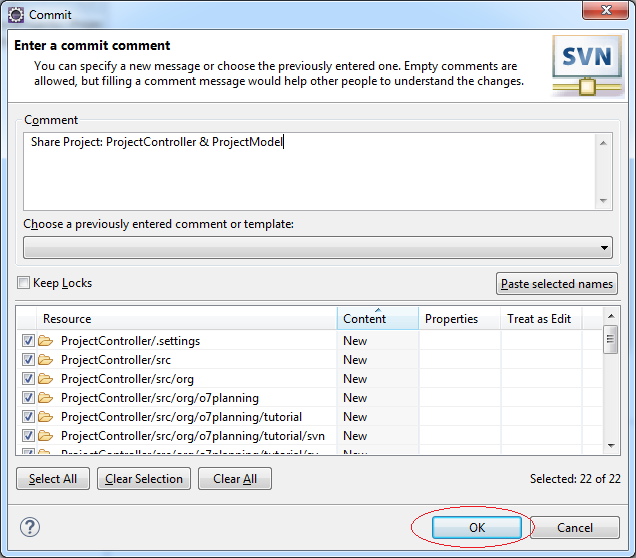
Project 2: ProjectController & ProjectModel has been shared on SVN Repository.

Whenever you want to continue to share other Projects on the same available Repository (For example, JavaProjects), we will go on sharing ProjectView Project on SVN Repository JavaProjects
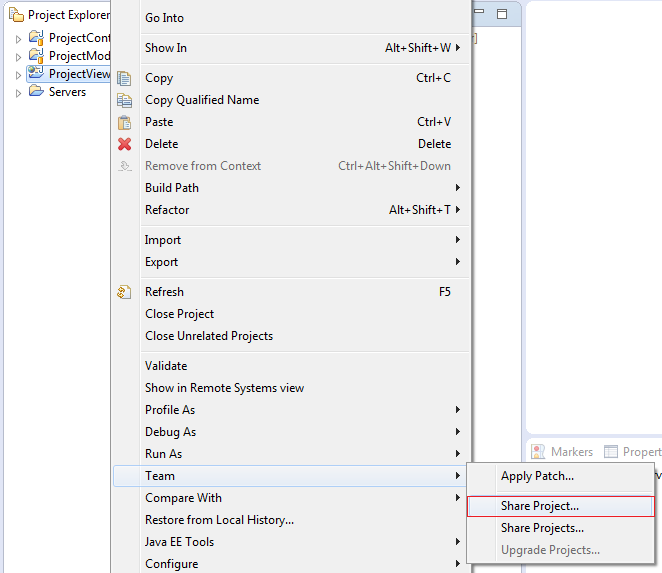
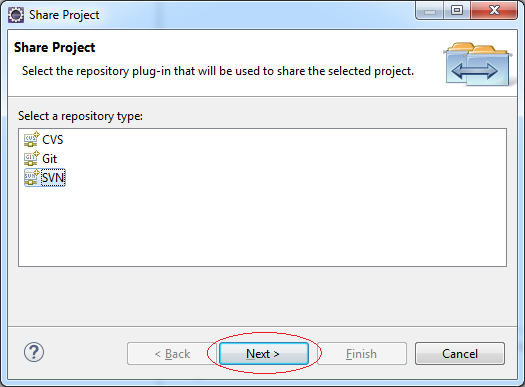
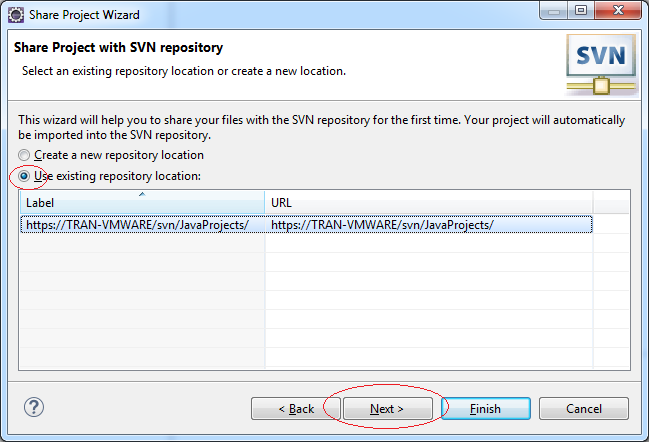
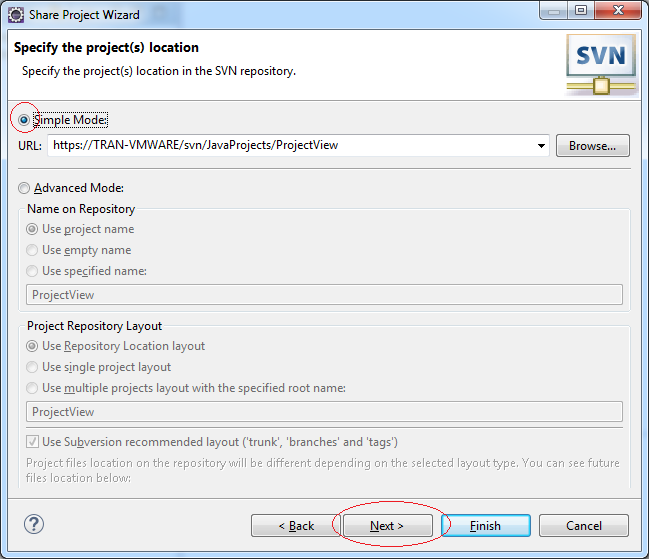
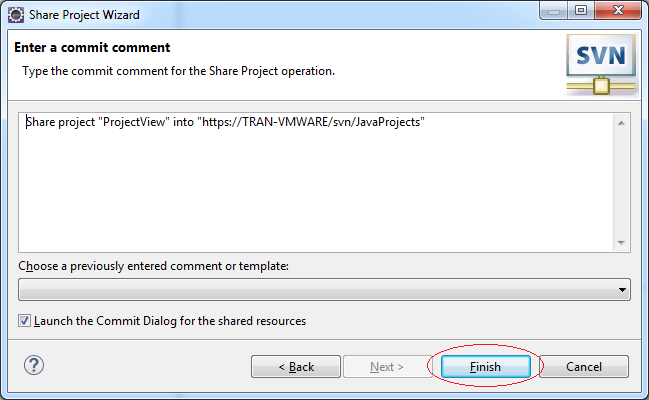
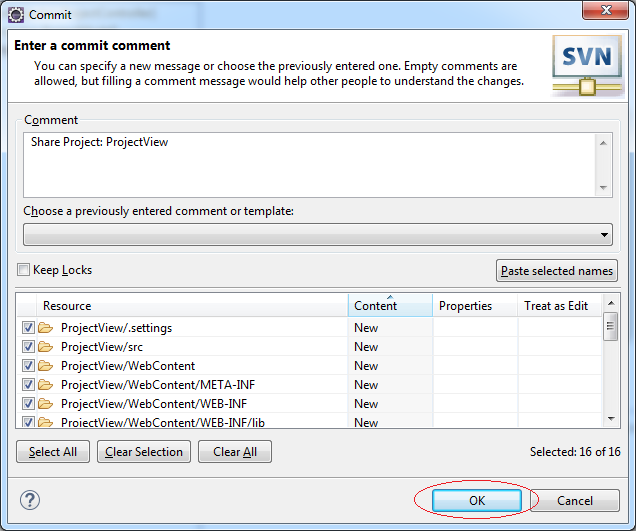
Project ProjectView shared on Repository.

See in Visual SVN Server:
4. Checkout Project from SVN Repository
Other members in the group will checkout Projects from Repository to our own computer.
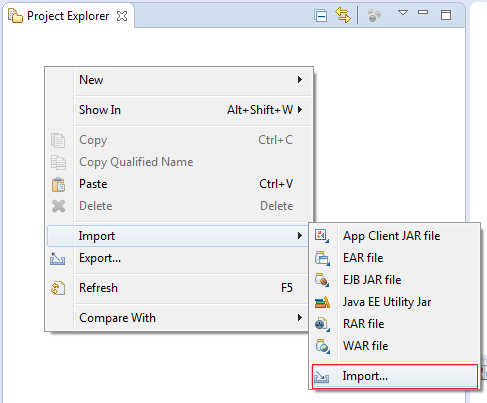
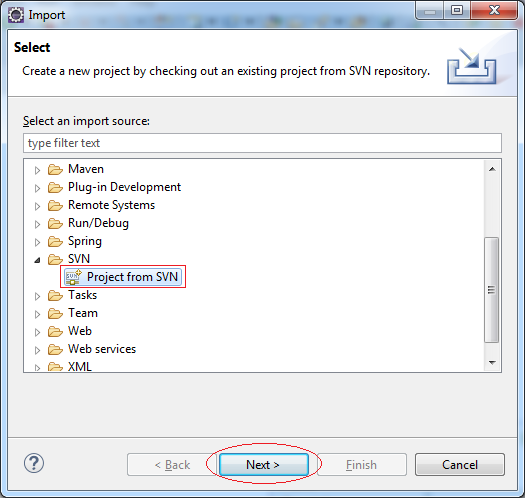
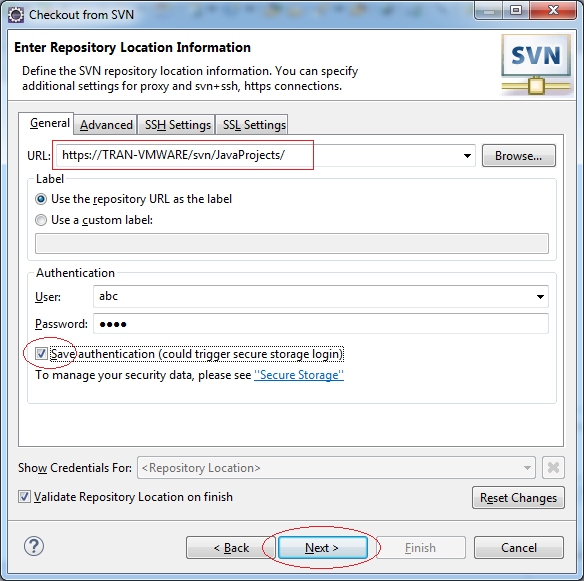
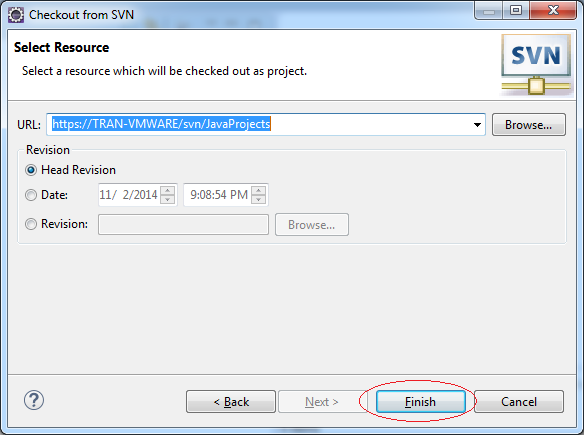
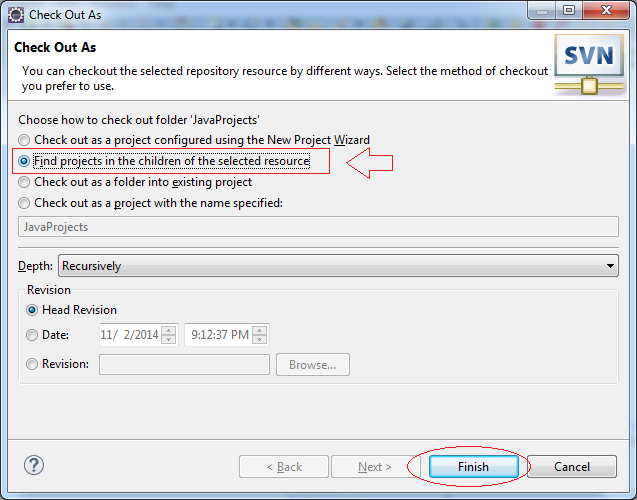
Suppose that we only checkout 2 Project, other Project will checkout laster.
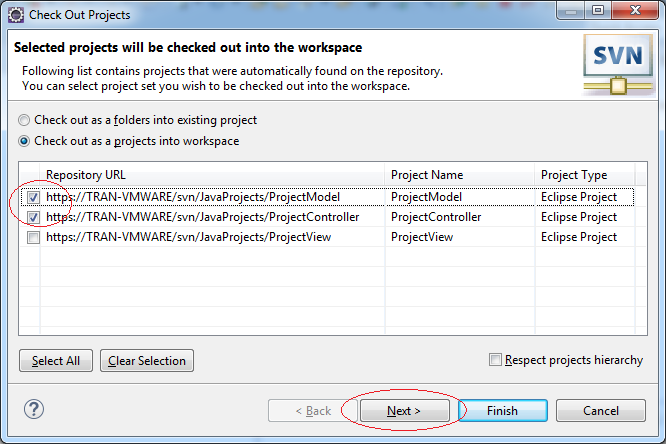
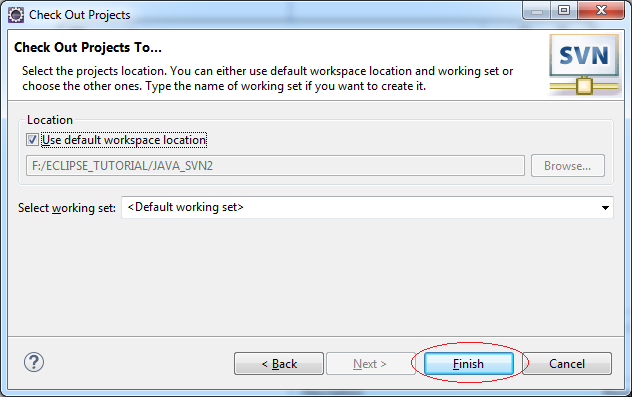
2 Project was checkout.

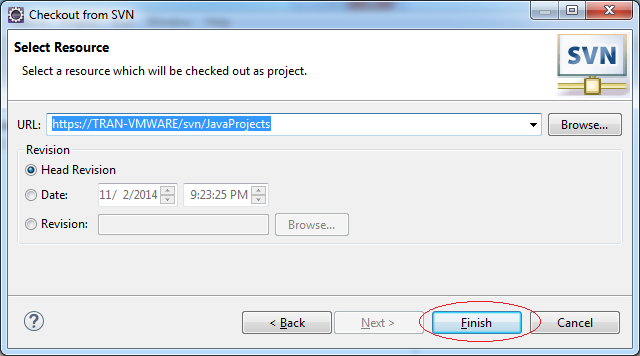
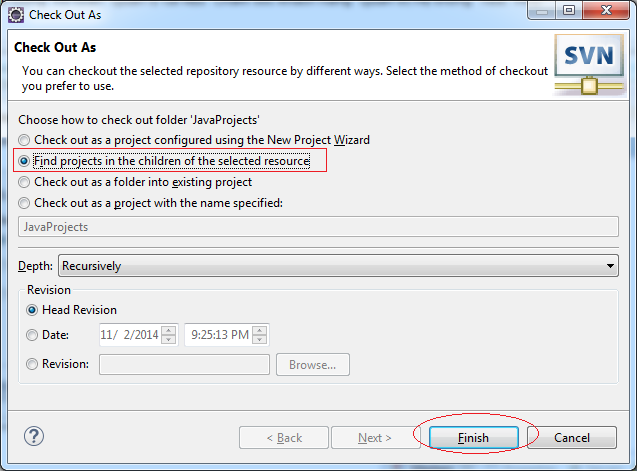
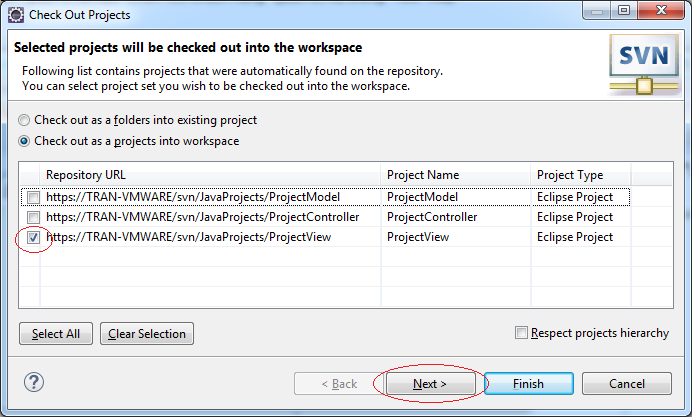
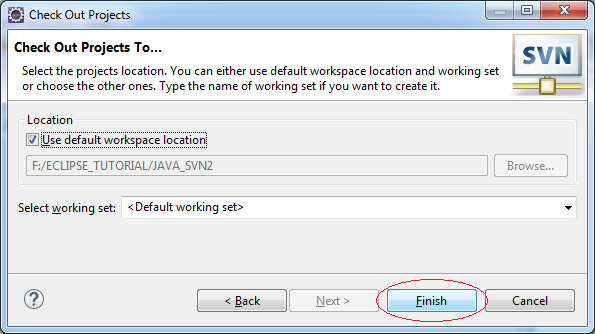
We continue to checkout other Projects (For example, it has just been shared by someone in the group).
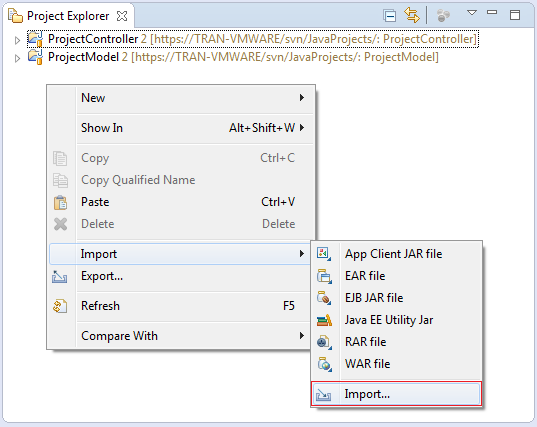
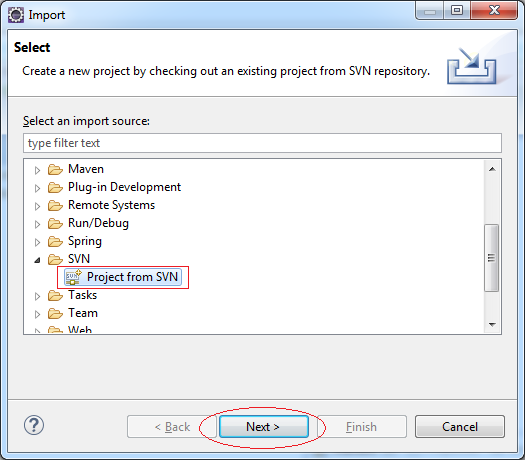
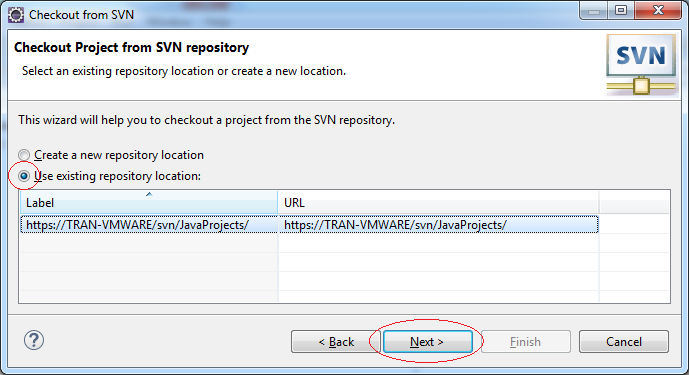

5. Commit and Update
Checkout is to extract the whole of data from one or more Projects shared in Repository to the local computer (When the local computer does not have that Project). Then the data are modified in the local computer. Use the Commit function to bring the modified data to Repository. And use the Update function to extract the modified data.
Now we modify (or add) files on Projects, and Commit them to Repository.
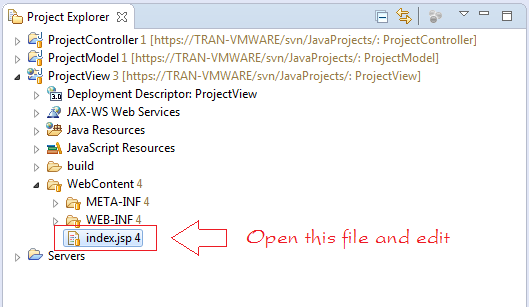
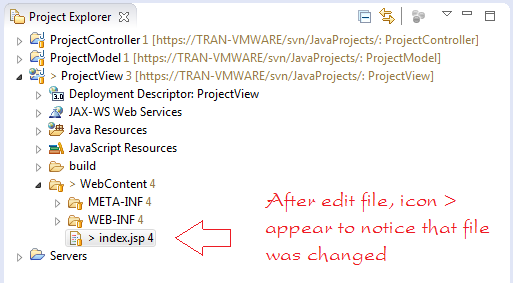
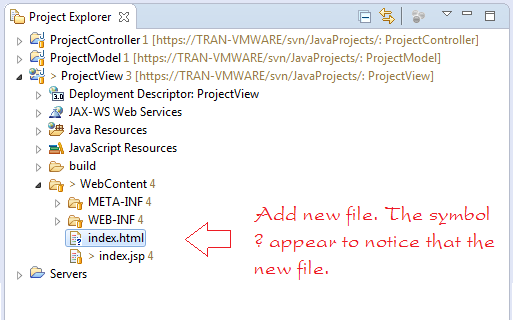
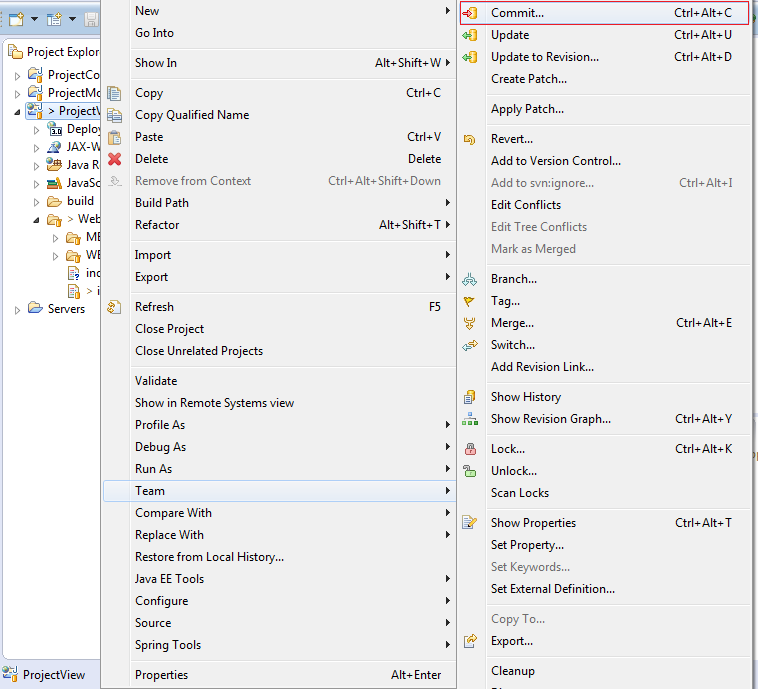
To bring modified data to SVN Repository, right-click on Project or select the modified file, click Team/Commit.
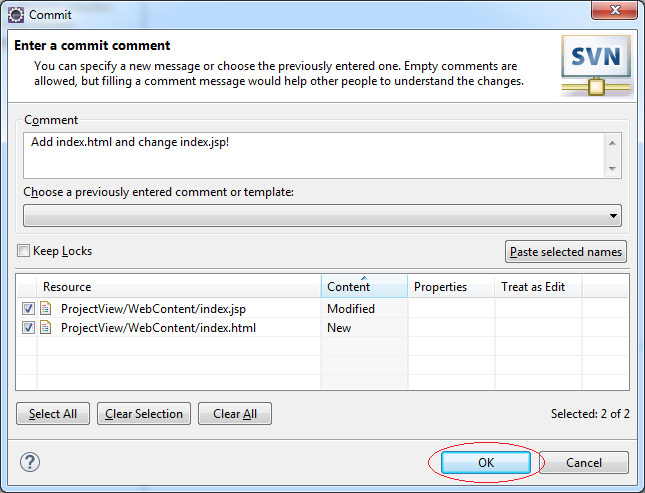
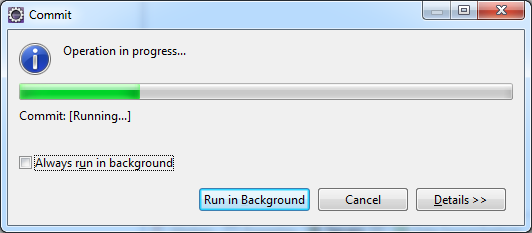
Data were Commited to SVN Repository.
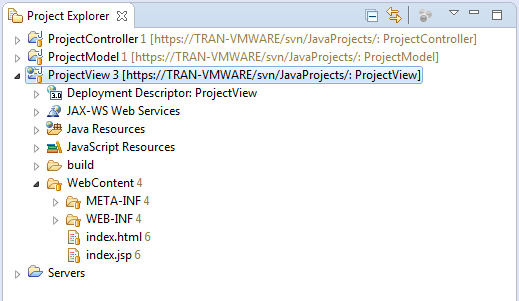
In Eclipse of the other members, can use the Update function to update the changes
Note: In some case, when Commit is notified with error, you need to Update before Commit.
6. The basic functions
SVN has many functions illustrated as the below image:
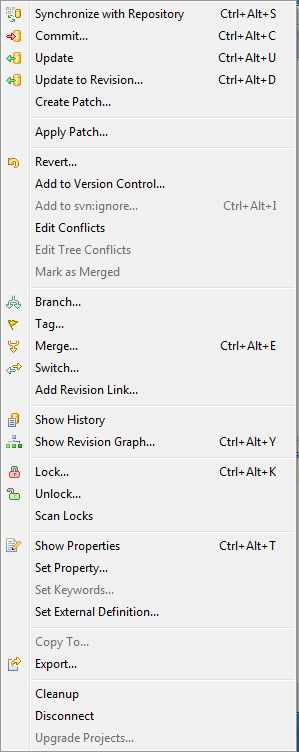
We will learn about how to use some important functions.
Add to svn:ignore
When you want SVN to ignore and not to bring a folder or a file to SVN Repository, you can use the function: Add to svn:ignore
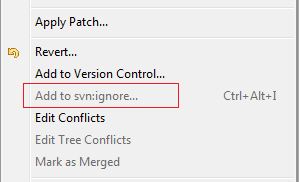
For example, you have a folder containing data files you don't want to share as the below illustrated image:
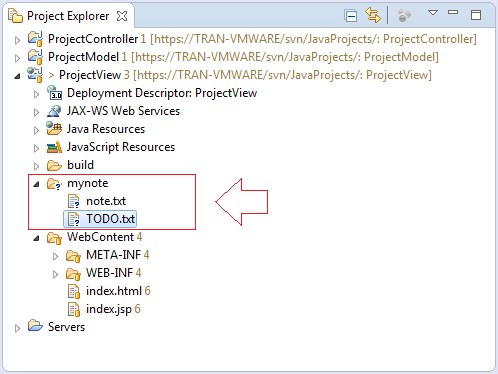
Right-click the folder mynote, select Team/Add to svn:ignore
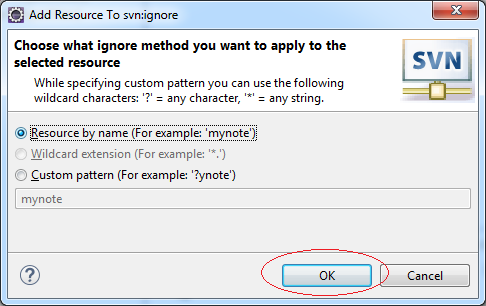
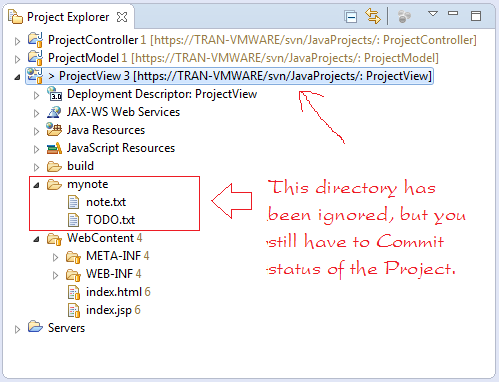
If Commit failed as shown below:
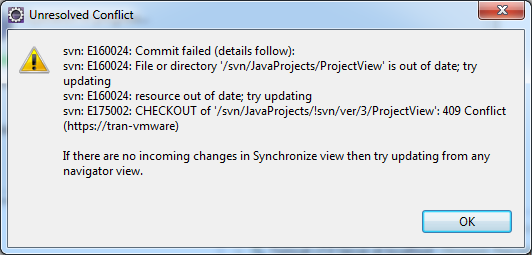
In this case you need to update the project before Commit.
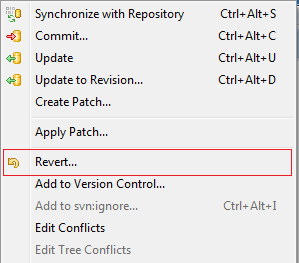
Revert
Revert is used to return the initial data. For example, when you modify data of some files, revert helps return the file to its initial state.
Lock & Unlock
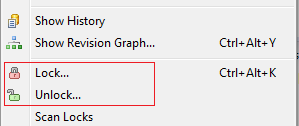
You are modifying some files in local. During the modification, if you don't want anyone in the group to Commit data of these files to Repository, you can use the Lock function to lock it. After the modification is finished, you can Commit and use the Unlock function to unlock the file.
Cleanup
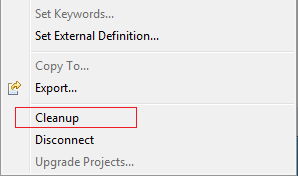
You modify some files and Commit to SVN Repository, but you will receive a notice of error if one of these files is being locked by someone. Cleanup helps free from forced lock. You cannot use the Unlock function in this case since it can be used by the person who locks file.
Disconnect
Your project is connected to the SVN Repository.
When looking at Project folder on hard disk, you will see that each folder contains a .svn hidden folder. These folders contain state information and data of files of SVN (It is alike a local repository).
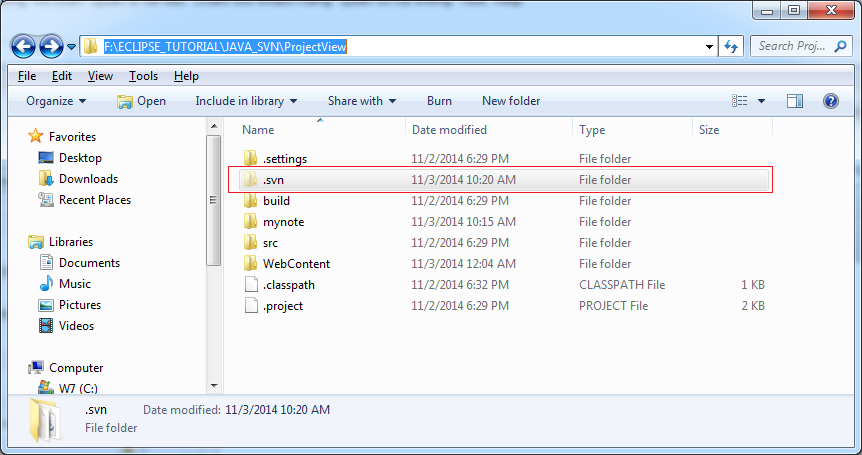
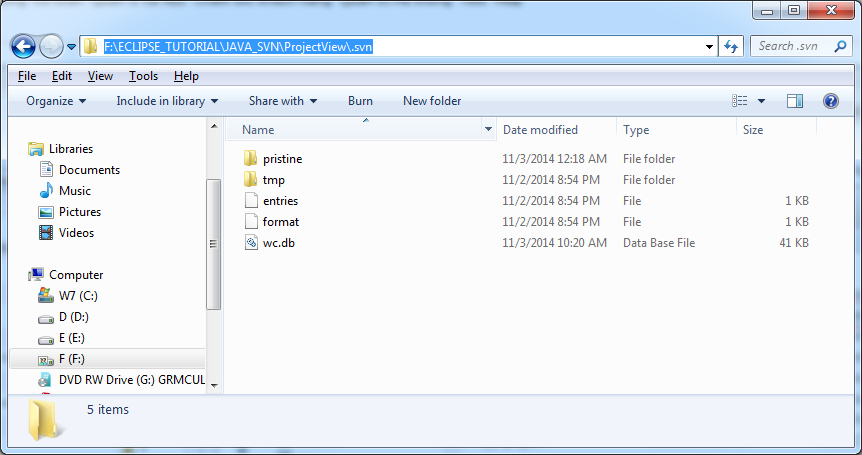
Right-click on a Project and select Team/Disconnect to disconnect with SVN Repository.
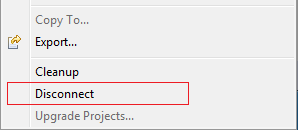
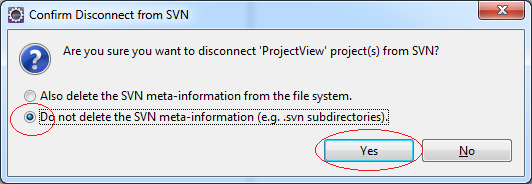
There are two choices for the Disconnection:
- Disconnect parallel to delete SVN meta-information
- This selection means to erase .svn hidden folders in all folders of Project. This situation does not allow to reconnect, except for erasing Project on hard disk and checking out again.
- Or only disconnect.
- This selection simply means to disconnect. SVN meta-information is still retained.
Here I illustrate the use of option 2:
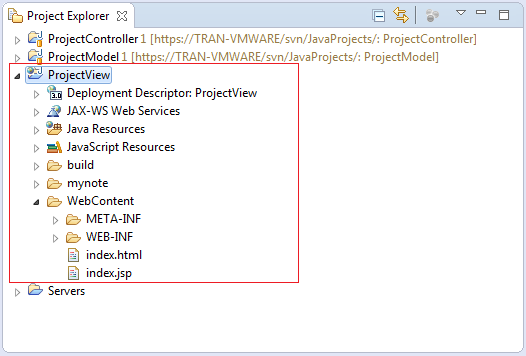
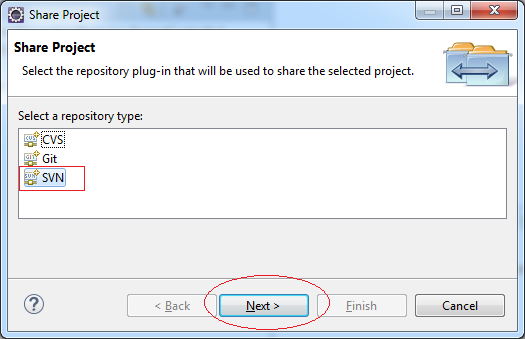
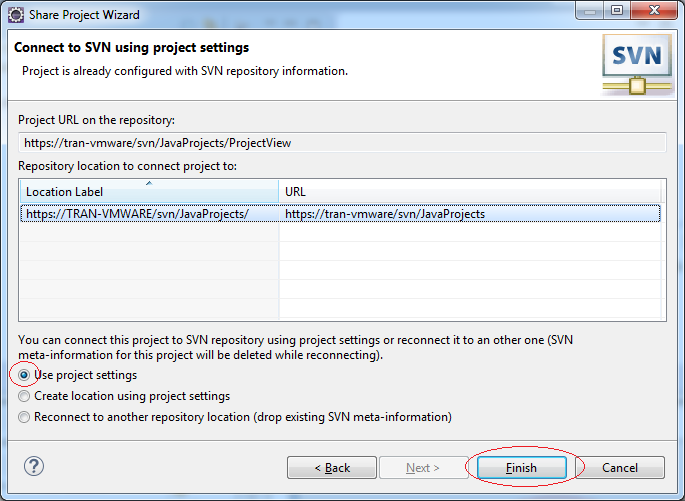
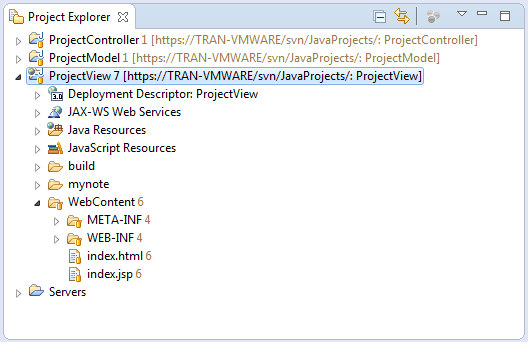
You can reconnect, right-click on the selected Project, select: Team/Share Project...

Java Basic
- Customize java compiler processing your Annotation (Annotation Processing Tool)
- Java Programming for team using Eclipse and SVN
- Java WeakReference Tutorial with Examples
- Java PhantomReference Tutorial with Examples
- Java Compression and Decompression Tutorial with Examples
- Configuring Eclipse to use the JDK instead of JRE
- Java String.format() and printf() methods
- Syntax and new features in Java 8
- Java Regular Expressions Tutorial with Examples
- Java Multithreading Programming Tutorial with Examples
- JDBC Driver Libraries for different types of database in Java
- Java JDBC Tutorial with Examples
- Get the values of the columns automatically increment when Insert a record using JDBC
- Java Stream Tutorial with Examples
- Java Functional Interface Tutorial with Examples
- Introduction to the Raspberry Pi
- Java Predicate Tutorial with Examples
- Abstract class and Interface in Java
- Access modifiers in Java
- Java Enums Tutorial with Examples
- Java Annotations Tutorial with Examples
- Comparing and Sorting in Java
- Java String, StringBuffer and StringBuilder Tutorial with Examples
- Java Exception Handling Tutorial with Examples
- Java Generics Tutorial with Examples
- Manipulating files and directories in Java
- Java BiPredicate Tutorial with Examples
- Java Consumer Tutorial with Examples
- Java BiConsumer Tutorial with Examples
- What is needed to get started with Java?
- History of Java and the difference between Oracle JDK and OpenJDK
- Install Java on Windows
- Install Java on Ubuntu
- Install OpenJDK on Ubuntu
- Install Eclipse
- Install Eclipse on Ubuntu
- Quick Learning Java for beginners
- History of bits and bytes in computer science
- Data Types in java
- Bitwise Operations
- if else statement in java
- Switch Statement in Java
- Loops in Java
- Arrays in Java
- JDK Javadoc in CHM format
- Inheritance and polymorphism in Java
- Java Function Tutorial with Examples
- Java BiFunction Tutorial with Examples
- Example of Java encoding and decoding using Apache Base64
- Java Reflection Tutorial with Examples
- Java remote method invocation - Java RMI Tutorial with Examples
- Java Socket Programming Tutorial with Examples
- Which Platform Should You Choose for Developing Java Desktop Applications?
- Java Commons IO Tutorial with Examples
- Java Commons Email Tutorial with Examples
- Java Commons Logging Tutorial with Examples
- Understanding Java System.identityHashCode, Object.hashCode and Object.equals
- Java SoftReference Tutorial with Examples
- Java Supplier Tutorial with Examples
- Java Aspect Oriented Programming with AspectJ (AOP)
Show More
- Java Servlet/Jsp Tutorials
- Java Collections Framework Tutorials
- Java API for HTML & XML
- Java IO Tutorials
- Java Date Time Tutorials
- Spring Boot Tutorials
- Maven Tutorials
- Gradle Tutorials
- Java Web Services Tutorials
- Java SWT Tutorials
- JavaFX Tutorials
- Java Oracle ADF Tutorials
- Struts2 Framework Tutorials
- Spring Cloud Tutorials