Install a free Let's Encrypt SSL certificate for Spring Boot
1. The objective of the article
Let’s Encrypt is a free SSL certificate provider developed by the Internet Security Research Group (ISRG). Let's Encrypt provides two types of certificates that are SSL for standard domain names, and Wildcard SSL for both standard domains and subdomains.
In this article, I'm going to show you how to create a SSL Let's Encrypt certificate registration for your domain name and deploy it for Spring Boot application.
The instructions will be done on Ubuntu operating system because tools like openssl,and keytool are available here. However, you can work with Windows operating system if you install the those tools.
Although the SSL certificate provided by Let's Encrypt is free, but it has a very short validity period, namely 90 days, so every 90 days you have to re-create the SSL certificate. But thank God, the steps of re-creating the certificate are simple and don't take you much time.
Maybe you are interested:
2. Registering SSL certificate
There are multiple ways to register a Let's Encrypt certificate, but I highly recommend that you register at sslforfree.com. This website allows you to create an account with your email, and register an SSL certificate for your domain name. When you need to re-create a certificate, you just need a simple Click to download a new certificate with a validity period of 90 days.
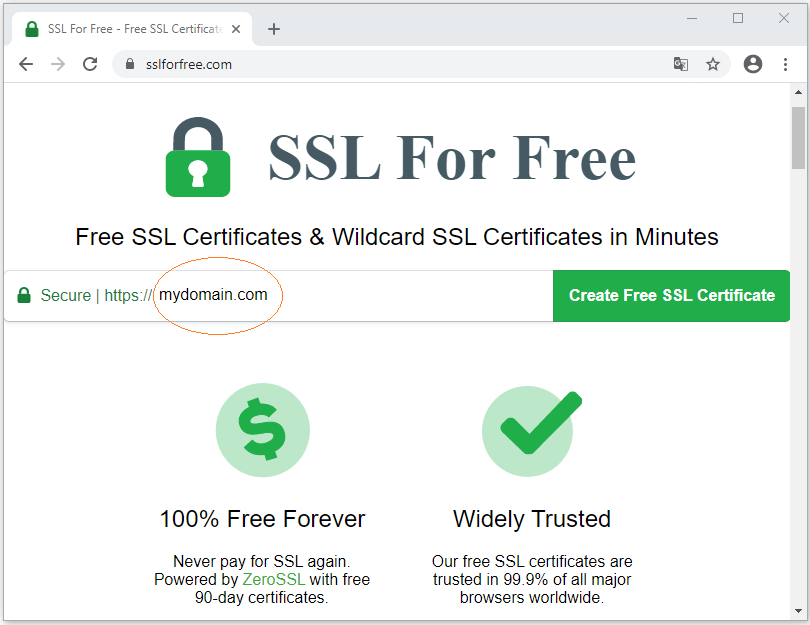
First of all, on sslforfree.com, enter your domain name and click "Create Free SSL Certificate".
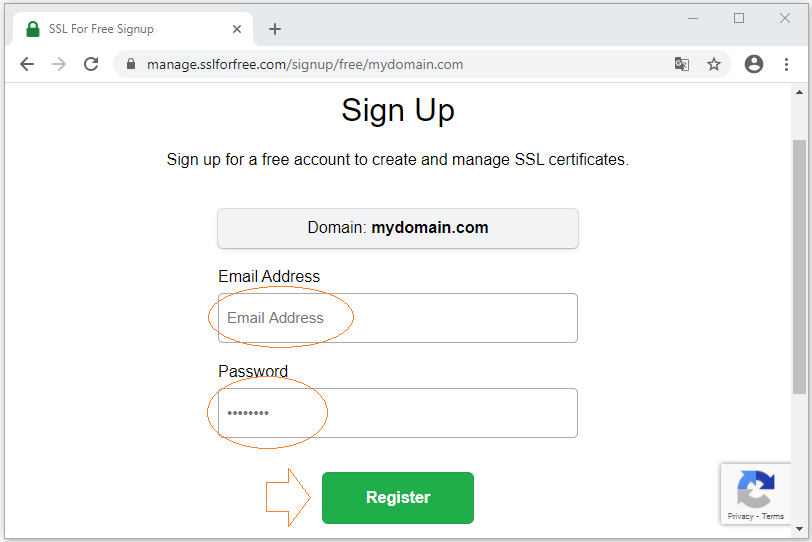
Then the sslforfree website will ask you to sign up for an account:
Next, you have to verify that you are indeed the owner of that domain name, and declare information about your domain name, such as Your Country, City, Company Name, etc.
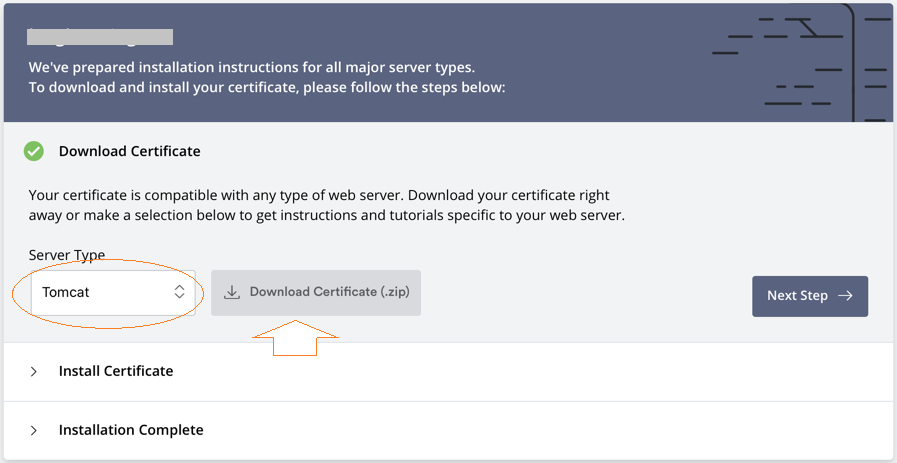
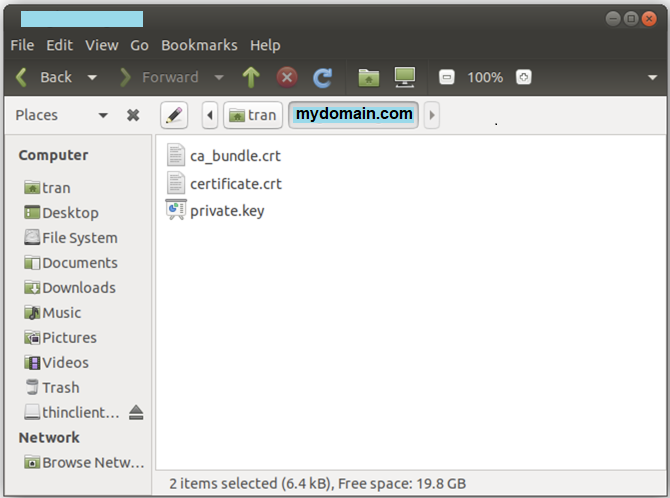
Finally, Let's Encrypt will allow you to download a ZIP file containing 3 files.
Note: For Web applications written in Java language, you need to select Tomcat for the "Server Type".
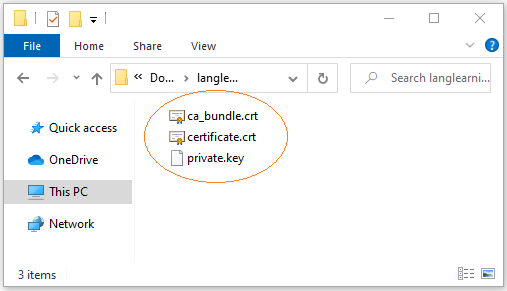
- certificate.crt: Certificate generated for your domain name.
- private.key: Private key of your certificate.
- ca_bundle.crt: Intermediate CA (Certificate Authority)
3. Converting to PKCS-12 format
Extract the ZIP file you have in the above step into a folder on Ubuntu. For example:
- /home/{username}/mydomain.com
Java applications can read certificates when they are in PKCS-12 (*.p12) format, so you have to convert the extracted files to this format.
openssl pkcs12 -export -in /home/tran/mydomain.com/certificate.crt -inkey /home/tran/mydomain.com/private.key -name mydomain -out /home/tran/mydomain.com/mydomain_com.p12
keytool -importkeystore -deststorepass YourPassword -destkeystore /home/tran/mydomain.com/mydomain_com.jks -srckeystore /home/tran/mydomain.com/mydomain_com.p12 -srcstoretype PKCS12
keytool -importkeystore -deststorepass YourPassword -destkeystore /home/tran/mydomain.com/mydomain_com.jks -srckeystore /home/tran/mydomain.com/mydomain_com.p12 -srcstoretype PKCS12
After executing the above two commands, you will have 2 new files as shown below:

4. Spring Boot Configuration
On the Spring Boot project, open the application.properties file to configure SSL.
application.properties
server.port=443

server.ssl.key-store=file:/home/tran/mydomain.com/mydomain_com.p12

server.ssl.key-store-password=YourPasswoord

server.ssl.key-alias=mydomain
Deploy your website and access it with HTTPS:
- https://mydomain.com
Note: If you package the Spring Boot application as JAR (or WAR) and run it directly through COMMAND, you may not need to add anything to the application.properties, just run the application like this:
java -jar mydomaintest-1.0.war --server.port=443 -Dserver.ssl.key-store=file:/home/tran/mydomain.com/mydomain_com.jks -Dserver.ssl.key-store-password=YourPassword -Dserver.ssl.key-alias=mydomain
Spring Boot Tutorials
- Install Spring Tool Suite for Eclipse
- Spring Tutorial for Beginners
- Spring Boot Tutorial for Beginners
- Spring Boot Common Properties
- Spring Boot and Thymeleaf Tutorial with Examples
- Spring Boot and FreeMarker Tutorial with Examples
- Spring Boot and Groovy Tutorial with Examples
- Spring Boot and Mustache Tutorial with Examples
- Spring Boot and JSP Tutorial with Examples
- Spring Boot, Apache Tiles, JSP Tutorial with Examples
- Use Logging in Spring Boot
- Application Monitoring with Spring Boot Actuator
- Create a Multi Language web application with Spring Boot
- Use multiple ViewResolvers in Spring Boot
- Use Twitter Bootstrap in Spring Boot
- Spring Boot Interceptors Tutorial with Examples
- Spring Boot, Spring JDBC and Spring Transaction Tutorial with Examples
- Spring JDBC Tutorial with Examples
- Spring Boot, JPA and Spring Transaction Tutorial with Examples
- Spring Boot and Spring Data JPA Tutorial with Examples
- Spring Boot, Hibernate and Spring Transaction Tutorial with Examples
- Integrating Spring Boot, JPA and H2 Database
- Spring Boot and MongoDB Tutorial with Examples
- Use Multiple DataSources with Spring Boot and JPA
- Use Multiple DataSources with Spring Boot and RoutingDataSource
- Create a Login Application with Spring Boot, Spring Security, Spring JDBC
- Create a Login Application with Spring Boot, Spring Security, JPA
- Create a User Registration Application with Spring Boot, Spring Form Validation
- Example of OAuth2 Social Login in Spring Boot
- Run background scheduled tasks in Spring
- CRUD Restful Web Service Example with Spring Boot
- Spring Boot Restful Client with RestTemplate Example
- CRUD Example with Spring Boot, REST and AngularJS
- Secure Spring Boot RESTful Service using Basic Authentication
- Secure Spring Boot RESTful Service using Auth0 JWT
- Spring Boot File Upload Example
- Spring Boot File Download Example
- Spring Boot File Upload with jQuery Ajax Example
- Spring Boot File Upload with AngularJS Example
- Create a Shopping Cart Web Application with Spring Boot, Hibernate
- Spring Email Tutorial with Examples
- Create a simple Chat application with Spring Boot and Websocket
- Deploy Spring Boot Application on Tomcat Server
- Deploy Spring Boot Application on Oracle WebLogic Server
- Install a free Let's Encrypt SSL certificate for Spring Boot
- Configure Spring Boot to redirect HTTP to HTTPS
- Fetch data with Spring Data JPA DTO Projections
Show More