Spring Boot and JSP Tutorial with Examples
1. Objective of Post
Spring is a famous framework because it supports a lot of technologies for View layer. The technologies supported for the View layer by the Spring are JSP, Thymeleaf, Freemarker, ...
Because of the simplicity of Thymeleaf, it is considered as the default technology used for the View layer, and is automatically configured by the Spring Boot . Therefore, if you choose the JSP for the View layer, you need to configure it.
Because of the simplicity of Thymeleaf, it is considered as the default technology used for the View layer, and is automatically configured by the Spring Boot . Therefore, if you choose the JSP for the View layer, you need to configure it.
In this post, I will show you how to create a Web application with the Spring Boot and use the JSP to display data. The contents will be mentioned in this post:
- Configure to use the JSP for the View Layer
- Explain the operating principle of Controller & JSP.

2. Create a Spring Boot project
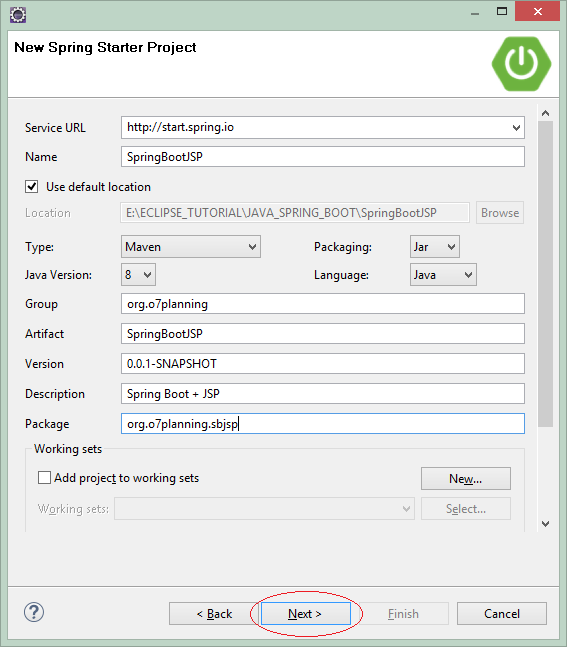
On the Eclipse, create a Spring Boot project.

Enter:
- Name: SpringBootJSP
- Group: org.o7planning.org
- Description: Spring Boot + JSP
- Package: org.o7planning.sbjsp
Select the technologies and libraries to be used:
- Web
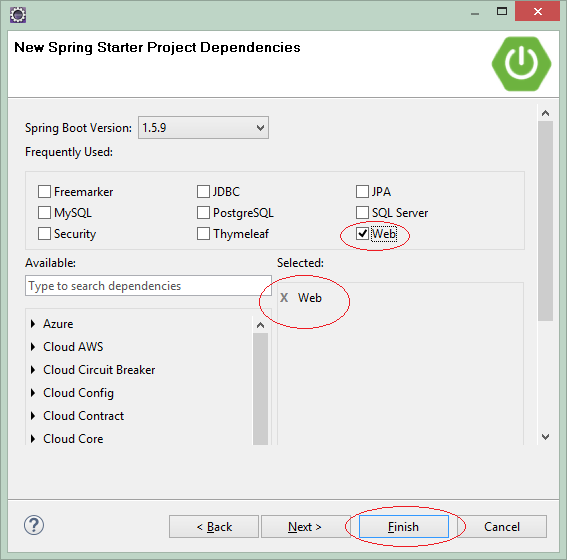
OK, the Project has been created.
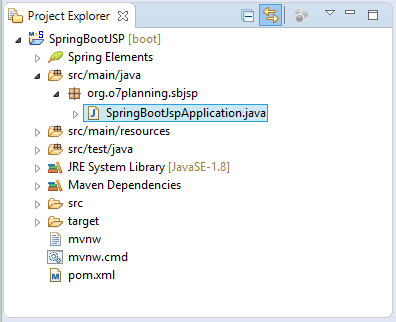
SpringBootJspApplication.java
package org.o7planning.sbjsp;

import org.springframework.boot.SpringApplication;
import org.springframework.boot.autoconfigure.SpringBootApplication;

@SpringBootApplication
public class SpringBootJspApplication {

    public static void main(String[] args) {
        SpringApplication.run(SpringBootJspApplication.class, args);
    }
}
3. Configure pom.xml
Configure the libraries necessary for JSP/Servlet in the pom.xml file:
<dependency>
    <groupId>org.apache.tomcat.embed</groupId>
    <artifactId>tomcat-embed-jasper</artifactId>
</dependency>

<dependency>
    <groupId>javax.servlet</groupId>
    <artifactId>jstl</artifactId>
</dependency>
The full contents of pom.xml file:
pom.xml
<?xml version="1.0" encoding="UTF-8"?>
<project xmlns="http://maven.apache.org/POM/4.0.0"
    xmlns:xsi="http://www.w3.org/2001/XMLSchema-instance"
    xsi:schemaLocation="http://maven.apache.org/POM/4.0.0
        http://maven.apache.org/xsd/maven-4.0.0.xsd">

    <modelVersion>4.0.0</modelVersion>

    <groupId>org.o7planning</groupId>
    <artifactId>SpringBootJSP</artifactId>
    <version>0.0.1-SNAPSHOT</version>
    <packaging>jar</packaging>

    <name>SpringBootJSP</name>
    <description>Spring Boot + JSP</description>

    <parent>
        <groupId>org.springframework.boot</groupId>
        <artifactId>spring-boot-starter-parent</artifactId>
        <version>2.0.0.RELEASE</version>
        <relativePath /> <!-- lookup parent from repository -->
    </parent>

    <properties>
        <project.build.sourceEncoding>UTF-8</project.build.sourceEncoding>
        <project.reporting.outputEncoding>UTF-8</project.reporting.outputEncoding>
        <java.version>1.8</java.version>
    </properties>

    <dependencies>
        <dependency>
            <groupId>org.springframework.boot</groupId>
            <artifactId>spring-boot-starter-web</artifactId>
        </dependency>

        <dependency>
            <groupId>org.apache.tomcat.embed</groupId>
            <artifactId>tomcat-embed-jasper</artifactId>
        </dependency>

        <dependency>
            <groupId>javax.servlet</groupId>
            <artifactId>jstl</artifactId>
        </dependency>

        <dependency>
            <groupId>org.springframework.boot</groupId>
            <artifactId>spring-boot-starter-test</artifactId>
            <scope>test</scope>
        </dependency>
    </dependencies>

    <build>
        <plugins>
            <plugin>
                <groupId>org.springframework.boot</groupId>
                <artifactId>spring-boot-maven-plugin</artifactId>
            </plugin>
        </plugins>
    </build>

</project>
4. Configure JSP View
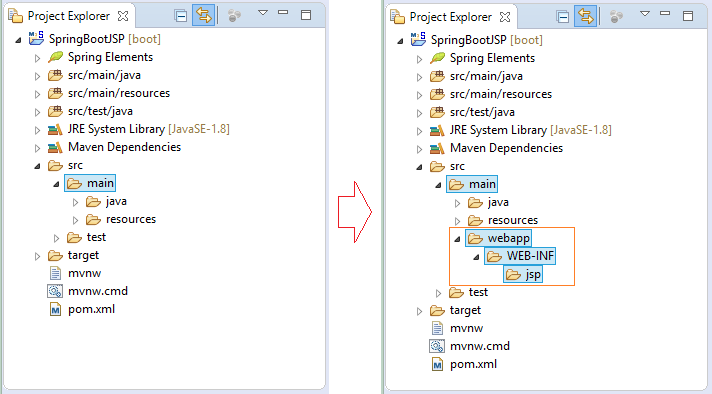
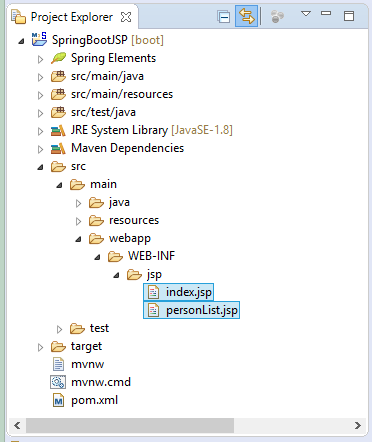
In the src/main directory, create a webapp/WEB-INF/jsp subdirectory, your JSP files will be placed into this directory.
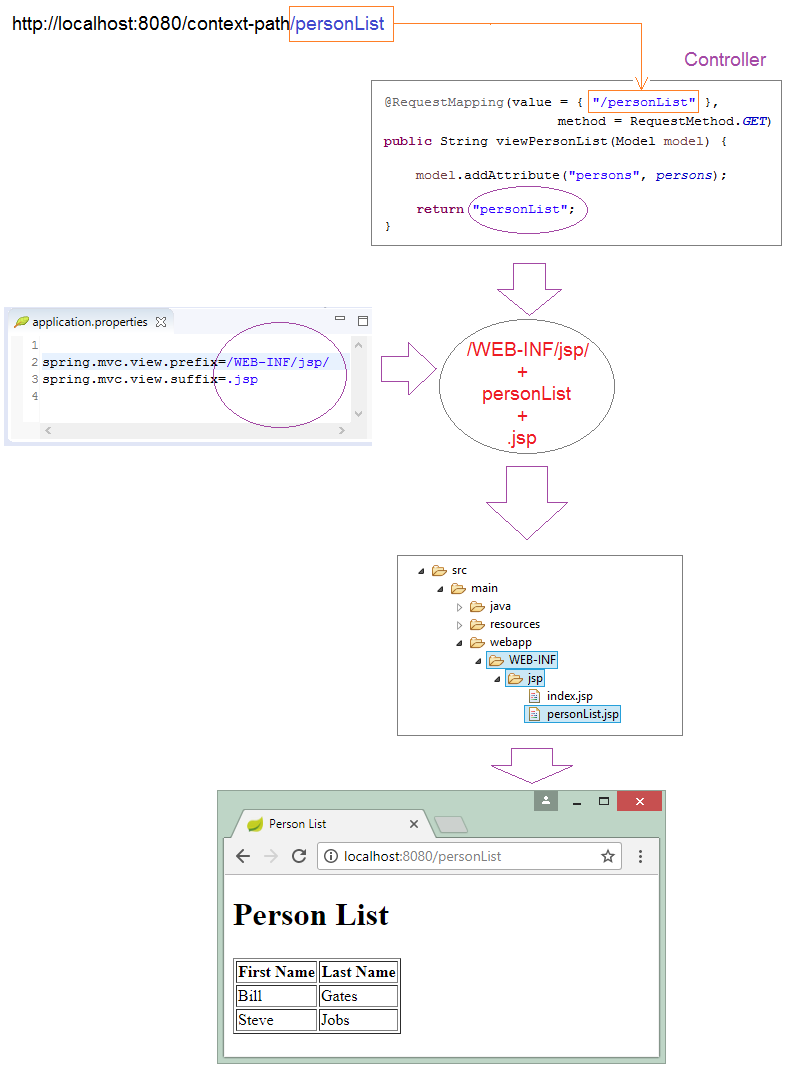
In the next step, you need to configure to tell the Spring Boot the place where you will put JSP files. OK, Open the application.propertiesfile and add the following properties:
application.properties
# =============================================
# VIEW RESOLVER
# =============================================

spring.mvc.view.prefix=/WEB-INF/jsp/
spring.mvc.view.suffix=.jsp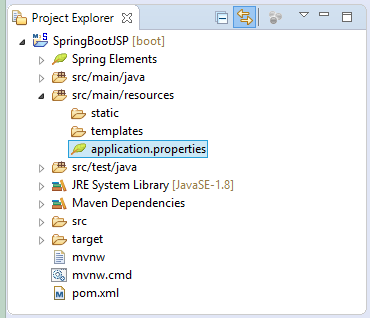
5. Controller & JSP
The relationship between the Controller and the View is explained in the figure:

Person.java
package org.o7planning.sbjsp.model;

public class Person {

    private String firstName;
    private String lastName;

    public Person() {

    }

    public Person(String firstName, String lastName) {
        this.firstName = firstName;
        this.lastName = lastName;
    }

    public String getFirstName() {
        return firstName;
    }

    public void setFirstName(String firstName) {
        this.firstName = firstName;
    }

    public String getLastName() {
        return lastName;
    }

    public void setLastName(String lastName) {
        this.lastName = lastName;
    }

}
MainController.java
package org.o7planning.sbjsp.controller;

import java.util.ArrayList;
import java.util.List;

import org.o7planning.sbjsp.model.Person;
import org.springframework.stereotype.Controller;
import org.springframework.ui.Model;
import org.springframework.web.bind.annotation.RequestMapping;
import org.springframework.web.bind.annotation.RequestMethod;

@Controller
public class MainController {

    private static List<Person> persons = new ArrayList<Person>();

    static {
        persons.add(new Person("Bill", "Gates"));
        persons.add(new Person("Steve", "Jobs"));
    }

    @RequestMapping(value = { "/", "/index" }, method = RequestMethod.GET)
    public String index(Model model) {

        String message = "Hello Spring Boot + JSP";

        model.addAttribute("message", message);

        return "index";
    }

    @RequestMapping(value = { "/personList" }, method = RequestMethod.GET)
    public String viewPersonList(Model model) {

        model.addAttribute("persons", persons);

        return "personList";
    }

}
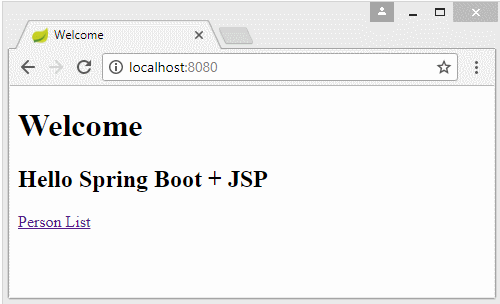
index.jsp
<!DOCTYPE HTML>
<html>
   <head>
      <meta charset="UTF-8" />
      <title>Welcome</title>
      <link rel="stylesheet" type="text/css"
                href="${pageContext.request.contextPath}/css/style.css"/>
   </head>
   <body>
      <h1>Welcome</h1>
      <h2>${message}</h2>


      <a href="${pageContext.request.contextPath}/personList">Person List</a>

   </body>

</html>
personList.jsp
<%@ taglib uri="http://java.sun.com/jsp/jstl/core" prefix="c"%>

<!DOCTYPE HTML>
<html>
  <head>
    <meta charset="UTF-8" />
    <title>Person List</title>
    <link rel="stylesheet" type="text/css" href="${pageContext.request.contextPath}/css/style.css"/>
  </head>
  <body>
    <h1>Person List</h1>

    <br/><br/>
    <div>
      <table border="1">
        <tr>
          <th>First Name</th>
          <th>Last Name</th>
        </tr>
        <c:forEach  items="${persons}" var ="person">
        <tr>
          <td>${person.firstName}</td>
          <td>${person.lastName}</td>
        </tr>
        </c:forEach>
      </table>
    </div>
  </body>

</html>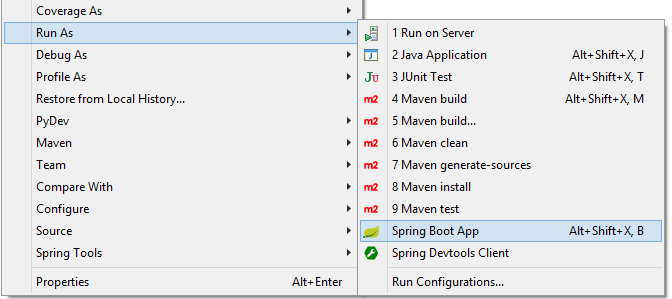
Spring Boot Tutorials
- Install Spring Tool Suite for Eclipse
- Spring Tutorial for Beginners
- Spring Boot Tutorial for Beginners
- Spring Boot Common Properties
- Spring Boot and Thymeleaf Tutorial with Examples
- Spring Boot and FreeMarker Tutorial with Examples
- Spring Boot and Groovy Tutorial with Examples
- Spring Boot and Mustache Tutorial with Examples
- Spring Boot and JSP Tutorial with Examples
- Spring Boot, Apache Tiles, JSP Tutorial with Examples
- Use Logging in Spring Boot
- Application Monitoring with Spring Boot Actuator
- Create a Multi Language web application with Spring Boot
- Use multiple ViewResolvers in Spring Boot
- Use Twitter Bootstrap in Spring Boot
- Spring Boot Interceptors Tutorial with Examples
- Spring Boot, Spring JDBC and Spring Transaction Tutorial with Examples
- Spring JDBC Tutorial with Examples
- Spring Boot, JPA and Spring Transaction Tutorial with Examples
- Spring Boot and Spring Data JPA Tutorial with Examples
- Spring Boot, Hibernate and Spring Transaction Tutorial with Examples
- Integrating Spring Boot, JPA and H2 Database
- Spring Boot and MongoDB Tutorial with Examples
- Use Multiple DataSources with Spring Boot and JPA
- Use Multiple DataSources with Spring Boot and RoutingDataSource
- Create a Login Application with Spring Boot, Spring Security, Spring JDBC
- Create a Login Application with Spring Boot, Spring Security, JPA
- Create a User Registration Application with Spring Boot, Spring Form Validation
- Example of OAuth2 Social Login in Spring Boot
- Run background scheduled tasks in Spring
- CRUD Restful Web Service Example with Spring Boot
- Spring Boot Restful Client with RestTemplate Example
- CRUD Example with Spring Boot, REST and AngularJS
- Secure Spring Boot RESTful Service using Basic Authentication
- Secure Spring Boot RESTful Service using Auth0 JWT
- Spring Boot File Upload Example
- Spring Boot File Download Example
- Spring Boot File Upload with jQuery Ajax Example
- Spring Boot File Upload with AngularJS Example
- Create a Shopping Cart Web Application with Spring Boot, Hibernate
- Spring Email Tutorial with Examples
- Create a simple Chat application with Spring Boot and Websocket
- Deploy Spring Boot Application on Tomcat Server
- Deploy Spring Boot Application on Oracle WebLogic Server
- Install a free Let's Encrypt SSL certificate for Spring Boot
- Configure Spring Boot to redirect HTTP to HTTPS
- Fetch data with Spring Data JPA DTO Projections
Show More