Spring Boot and FreeMarker Tutorial with Examples
1. What is FreeMarker?
FreeMarker is a Template Engine. it is provided by Apache as an open source Java library. The FreeMarker reads sample files and combines them with Java objects to generate an output text (html, email, ..).
The Template files of the FreeMarker in nature, are only a text file in the format introduced by the FreeMarker, which is FreeMarker Template Language (FTL).

FreeMarker can be used to replace JSP onthe View layer of Web MVC application.
Below is the image of application which we will perform in this lesson:

2. Create an application
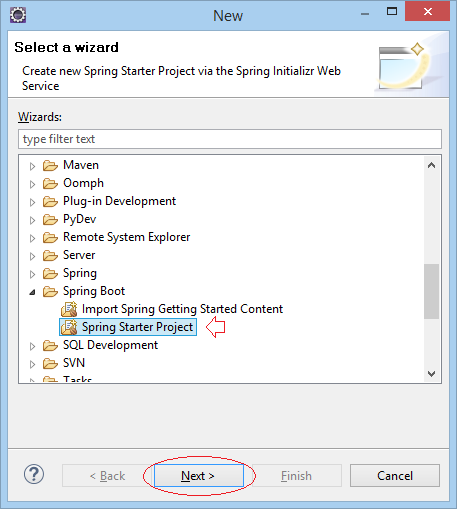
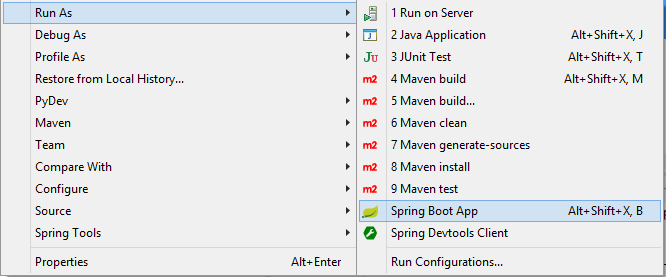
On Eclipse, choose:
- File/New/Other...
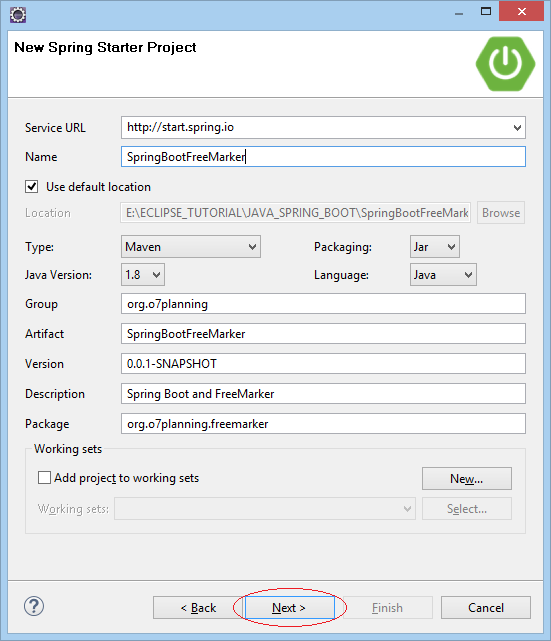
Enter:
- Name: SpringBootFreeMarker
- Group: org.o7planning
- Artifact: SpringBootFreeMarker
- Description: Spring Boot and FreeMarker
- Package: org.o7planning.freemarker
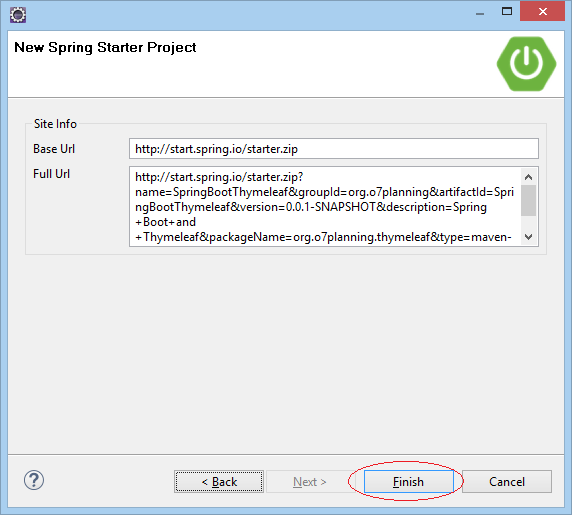
Select 2 Web and FreeMarker technologies.

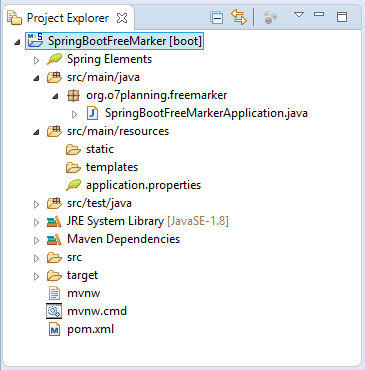
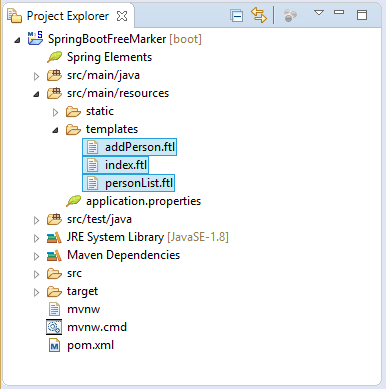
Your Project has been created:
pom.xml
<?xml version="1.0" encoding="UTF-8"?>
<project xmlns="http://maven.apache.org/POM/4.0.0" xmlns:xsi="http://www.w3.org/2001/XMLSchema-instance"
    xsi:schemaLocation="http://maven.apache.org/POM/4.0.0 http://maven.apache.org/xsd/maven-4.0.0.xsd">
    <modelVersion>4.0.0</modelVersion>

    <groupId>org.o7planning</groupId>
    <artifactId>SpringBootFreeMarker</artifactId>
    <version>0.0.1-SNAPSHOT</version>
    <packaging>jar</packaging>

    <name>SpringBootFreeMarker</name>
    <description>Spring Boot and FreeMarker</description>

    <parent>
        <groupId>org.springframework.boot</groupId>
        <artifactId>spring-boot-starter-parent</artifactId>
        <version>2.0.0.RELEASE</version>
        <relativePath/> <!-- lookup parent from repository -->
    </parent>

    <properties>
        <project.build.sourceEncoding>UTF-8</project.build.sourceEncoding>
        <project.reporting.outputEncoding>UTF-8</project.reporting.outputEncoding>
        <java.version>1.8</java.version>
    </properties>

    <dependencies>
        <dependency>
            <groupId>org.springframework.boot</groupId>
            <artifactId>spring-boot-starter-freemarker</artifactId>
        </dependency>
        <dependency>
            <groupId>org.springframework.boot</groupId>
            <artifactId>spring-boot-starter-web</artifactId>
        </dependency>

        <dependency>
            <groupId>org.springframework.boot</groupId>
            <artifactId>spring-boot-starter-test</artifactId>
            <scope>test</scope>
        </dependency>
    </dependencies>

    <build>
        <plugins>
            <plugin>
                <groupId>org.springframework.boot</groupId>
                <artifactId>spring-boot-maven-plugin</artifactId>
            </plugin>
        </plugins>
    </build>

</project>
3. FreeMarker Template
We will create three template files and place them in the src/main/resources/templates directory:
index.flt
<#import "/spring.ftl" as spring/>

<!DOCTYPE HTML>
<html>
   <head>
      <meta charset="UTF-8" />
      <title>Welcome</title>
      <link rel="stylesheet"
           type="text/css" href="<@spring.url '/css/style.css'/>"/>
   </head>

   <body>
      <h1>Welcome</h1>
      <#if message??>
      <h2>${message}</h2>
      </#if>


      <a href="<@spring.url '/personList'/>">Person List</a>

   </body>

</html>
personList.flt
<#import "/spring.ftl" as spring/>

<html>
   <head>
      <title>Person List</title>
      <link rel="stylesheet"
           type="text/css"
           href="<@spring.url '/css/style.css'/>"/>
   </head>
   <body>
     <h3>Person List</h3>
     <a href="addPerson">Add Person</a>
     <br><br>
      <div>

         <table border="1">
            <tr>
               <th>First Name</th>
               <th>Last Name</th>
            </tr>
            <#list persons as person>
            <tr>
               <td>${person.firstName}</td>
               <td>${person.lastName}</td>
            </tr>
            </#list>
         </table>
      </div>
   </body>
</html>
addPerson.flt
<#import "/spring.ftl" as spring/>

<html>
   <head>
      <title>Add Person</title>
      <link rel="stylesheet"
           type="text/css" href="<@spring.url '/css/style.css'/>"/>
   </head>
   <body>
      <#if errorMessage??>
      <div style="color:red;font-style:italic;">
         ${errorMessage}
      </div>
      </#if>

      <div>
         <fieldset>
            <legend>Add Person</legend>
            <form name="person" action="" method="POST">
               First Name: <@spring.formInput "personForm.firstName" "" "text"/>    <br/>
               Last Name: <@spring.formInput "personForm.lastName" "" "text"/>    <br/>
               <input type="submit" value="Create" />
            </form>
         </fieldset>
      </div>


   </body>

</html>
All Template files need to declare a "FreeMarker Macros".
<!-- FreeMarker Macros -->
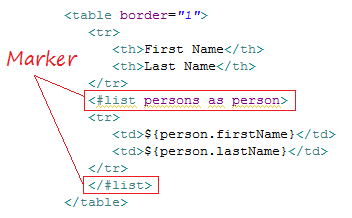
<#import "/spring.ftl" as spring/>In the Template files, there are FreeMarker Markers, which are instructions helping the FreeMarker Engine process data.
FreeMarker Engine analyzes the template file and combines with Java data to generate a new document.
FreeMarker Engine analyzes the template file and combines with Java data to generate a new document.
Below are examples to use Context-Path in the FreeMarker:<!-- Example 1: --> <a href="<@spring.url '/mypath/abc.html'/>">A Link</a> Output: ==> <a href="/my-context-path/mypath/abc.html">A Link</a> <!-- Example 2: --> <form action="<@spring.url '/mypath/abc.html'/>" method="POST"> Output: ==> <form action="/my-context-path/mypath/abc.html" method="POST">
4. Static Resource & Properties File
For the Static Resources, such as ss, javascript, image files,.. you need to place them into the src/main/resources/static folder or its subfolder.
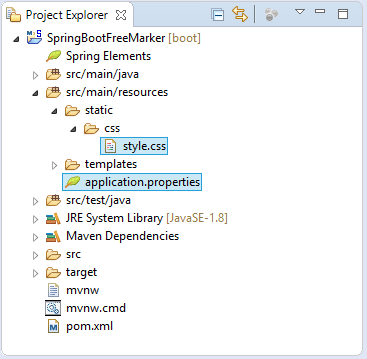
style.css
h1 {
    color:#0000FF;
}

h2 {
    color:#FF0000;
}

table {
    border-collapse: collapse;
}

table th, table td {
    padding: 5px;
}
application.properties
welcome.message=Hello FreeMarker
error.message=First Name & Last Name is required!
5. Model, Form, Controller classes
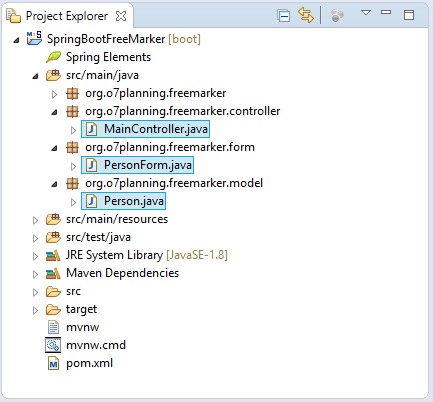
Person.java
package org.o7planning.freemarker.model;

public class Person {

    private String firstName;
    private String lastName;

    public Person() {

    }

    public Person(String firstName, String lastName) {
        this.firstName = firstName;
        this.lastName = lastName;
    }

    public String getFirstName() {
        return firstName;
    }

    public void setFirstName(String firstName) {
        this.firstName = firstName;
    }

    public String getLastName() {
        return lastName;
    }

    public void setLastName(String lastName) {
        this.lastName = lastName;
    }

}
PersonForm class represents for the data of FORM when you create a new Person on the addPerson page.
PersonForm.java
package org.o7planning.freemarker.form;

public class PersonForm {

    private String firstName;
    private String lastName;

    public String getFirstName() {
        return firstName;
    }

    public void setFirstName(String firstName) {
        this.firstName = firstName;
    }

    public String getLastName() {
        return lastName;
    }

    public void setLastName(String lastName) {
        this.lastName = lastName;
    }

}
MainController is a Controller class, which processes user's requirements and controls a flow of application.
MainController.java
package org.o7planning.freemarker.controller;

import java.util.ArrayList;
import java.util.List;

import org.o7planning.freemarker.form.PersonForm;
import org.o7planning.freemarker.model.Person;
import org.springframework.beans.factory.annotation.Value;
import org.springframework.stereotype.Controller;
import org.springframework.ui.Model;
import org.springframework.web.bind.annotation.ModelAttribute;
import org.springframework.web.bind.annotation.RequestMapping;
import org.springframework.web.bind.annotation.RequestMethod;

@Controller
public class MainController {

	private static List<Person> persons = new ArrayList<Person>();

	static {
		persons.add(new Person("Bill", "Gates"));
		persons.add(new Person("Steve", "Jobs"));
	}

	// Inject via application.properties
	@Value("${welcome.message}")
	private String message;

	@Value("${error.message}")
	private String errorMessage;


	@RequestMapping(value = { "/", "/index" }, method = RequestMethod.GET)
	public String index(Model model) {

		model.addAttribute("message", message);

		return "index";
	}

	@RequestMapping(value = { "/personList" }, method = RequestMethod.GET)
	public String personList(Model model) {

		model.addAttribute("persons", persons);

		return "personList";
	}

	@RequestMapping(value = { "/addPerson" }, method = RequestMethod.GET)
	public String addPersonForm(Model model) {

		PersonForm personForm = new PersonForm();
		model.addAttribute("personForm", personForm);

		return "addPerson";
	}

	@RequestMapping(value = { "/addPerson" }, method = RequestMethod.POST)
	public String addPersonSave(Model model, //
			@ModelAttribute("personForm") PersonForm personForm) {

		String firstName = personForm.getFirstName();
		String lastName = personForm.getLastName();

		if (firstName != null && firstName.length() > 0 //
				&& lastName != null && lastName.length() > 0) {
			Person newPerson = new Person(firstName, lastName);
			persons.add(newPerson);

			return "redirect:/personList";
		}
		String error = "First Name & Last Name is required!";
		model.addAttribute("errorMessage", error);
		return "addPerson";
	}

}

Spring Boot Tutorials
- Install Spring Tool Suite for Eclipse
- Spring Tutorial for Beginners
- Spring Boot Tutorial for Beginners
- Spring Boot Common Properties
- Spring Boot and Thymeleaf Tutorial with Examples
- Spring Boot and FreeMarker Tutorial with Examples
- Spring Boot and Groovy Tutorial with Examples
- Spring Boot and Mustache Tutorial with Examples
- Spring Boot and JSP Tutorial with Examples
- Spring Boot, Apache Tiles, JSP Tutorial with Examples
- Use Logging in Spring Boot
- Application Monitoring with Spring Boot Actuator
- Create a Multi Language web application with Spring Boot
- Use multiple ViewResolvers in Spring Boot
- Use Twitter Bootstrap in Spring Boot
- Spring Boot Interceptors Tutorial with Examples
- Spring Boot, Spring JDBC and Spring Transaction Tutorial with Examples
- Spring JDBC Tutorial with Examples
- Spring Boot, JPA and Spring Transaction Tutorial with Examples
- Spring Boot and Spring Data JPA Tutorial with Examples
- Spring Boot, Hibernate and Spring Transaction Tutorial with Examples
- Integrating Spring Boot, JPA and H2 Database
- Spring Boot and MongoDB Tutorial with Examples
- Use Multiple DataSources with Spring Boot and JPA
- Use Multiple DataSources with Spring Boot and RoutingDataSource
- Create a Login Application with Spring Boot, Spring Security, Spring JDBC
- Create a Login Application with Spring Boot, Spring Security, JPA
- Create a User Registration Application with Spring Boot, Spring Form Validation
- Example of OAuth2 Social Login in Spring Boot
- Run background scheduled tasks in Spring
- CRUD Restful Web Service Example with Spring Boot
- Spring Boot Restful Client with RestTemplate Example
- CRUD Example with Spring Boot, REST and AngularJS
- Secure Spring Boot RESTful Service using Basic Authentication
- Secure Spring Boot RESTful Service using Auth0 JWT
- Spring Boot File Upload Example
- Spring Boot File Download Example
- Spring Boot File Upload with jQuery Ajax Example
- Spring Boot File Upload with AngularJS Example
- Create a Shopping Cart Web Application with Spring Boot, Hibernate
- Spring Email Tutorial with Examples
- Create a simple Chat application with Spring Boot and Websocket
- Deploy Spring Boot Application on Tomcat Server
- Deploy Spring Boot Application on Oracle WebLogic Server
- Install a free Let's Encrypt SSL certificate for Spring Boot
- Configure Spring Boot to redirect HTTP to HTTPS
- Fetch data with Spring Data JPA DTO Projections
Show More