JavaFX Tutorial for Beginners - Hello JavaFX
1. The requires
In this post, I will guide you to perform the JavaFX programming on IDE Eclipse.
e(fx)eclipse

e(fx)clipse is a set of tools and necessary libraries which helps you to perform the JavaFX programming, let's be sure that you have installed it as a Plugin for eclipse. If the e(fx)clipse is not installed , you can see guidance at:
JavaFX Scene Builder
JavaFX Scene Builder is a visual design tool which allows you to create an application interface quickly by dragging and dropping. And the code is created as XML. This is an option in order to perform the JavaFX programming, you should install it.

If not install JavaFX Scene Builder, you can see the instructions at:
2. Create Hello World Project
In Eclipse select:
- File/New/Others..
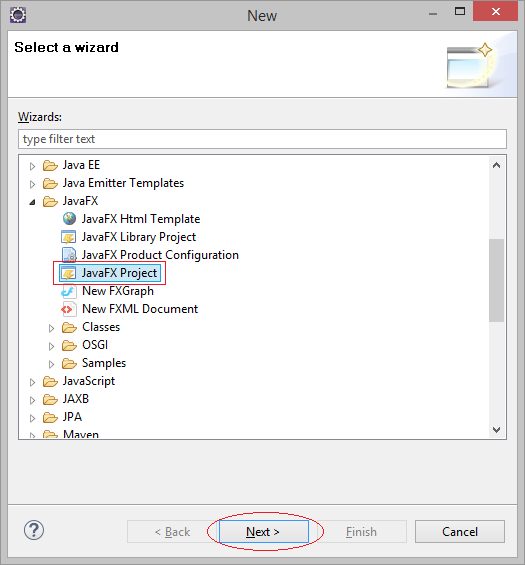
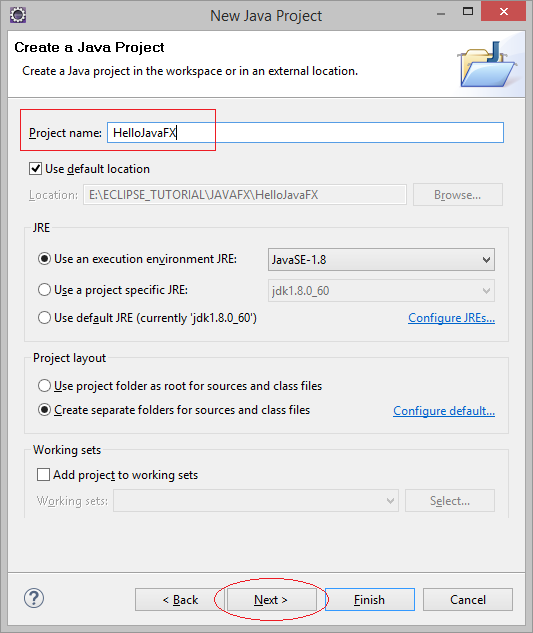
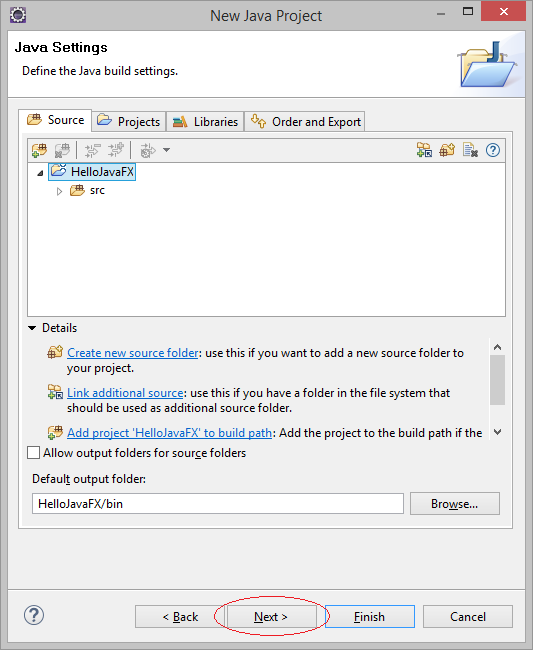
Project is created:
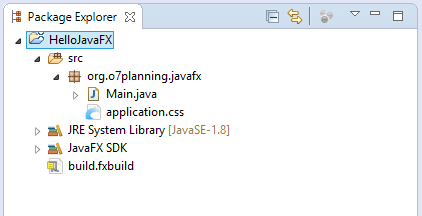
The Code of the Hello World example is also created.
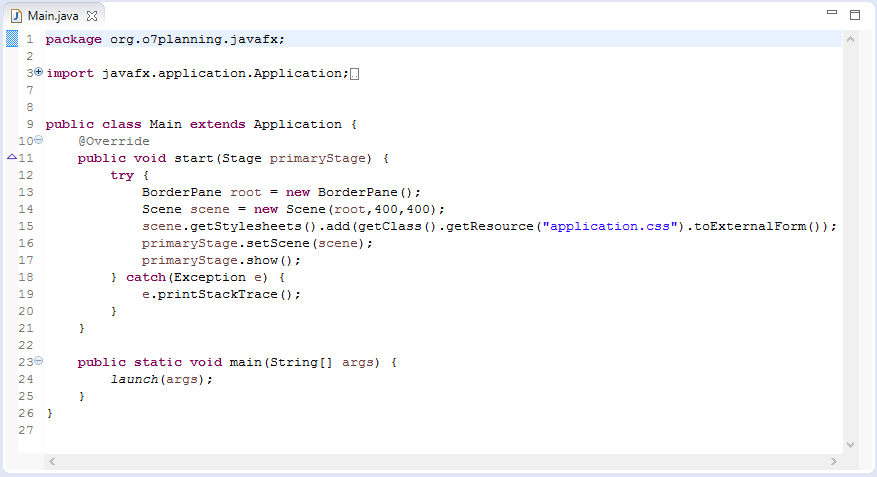
First of all, let's be sure that you run the example of Hello World successfully. Right click on Main class and select:
- Run As/Java Application

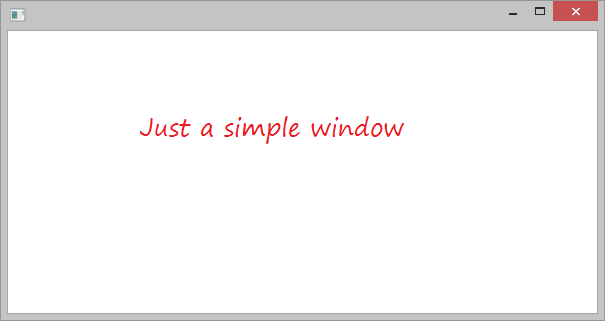
The application of Hello World JavaFX is running:
3. Explanation of Hello World Example
In the above step, you have created and run Hello World JavaFX successfully.
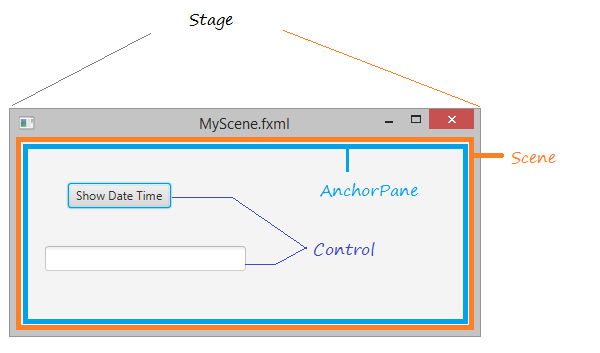
The below illustration shows the relationship between Stage, Scene, Container, Layout and Controls:
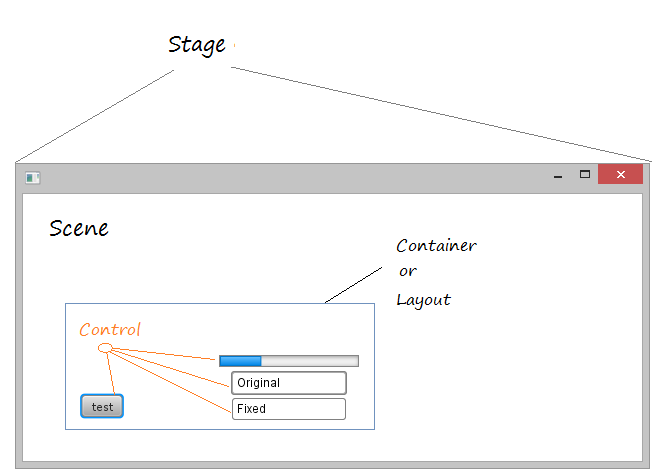
In JavaFX, Stage is the application window, which contains the space called as Scene. Scene contains the components of the interface such as Button, Text,... or containers.
4. JavaFX Scene Builder
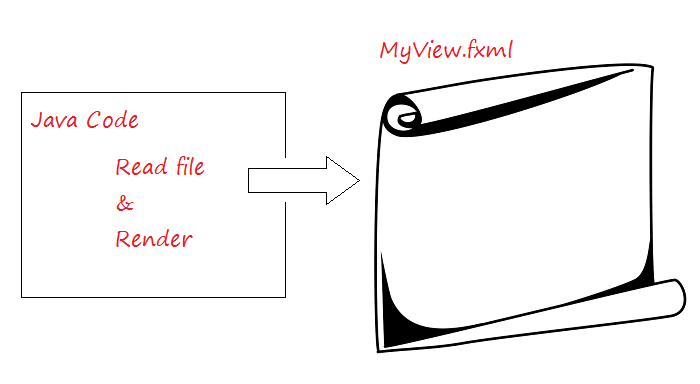
In order to create a JavaFX application interface, you can write code in Java entirely. However, it takes so much time to do this, JavaFX Scene Builder is a visual tool allowing you to design the interface of Scene. The code which is generated, is XML code saved on *.fxml file.
5. Example with JavaFX Scene Builder
This is a small example, I use Scene Builder to design application interface. The model of MVC applied to the example is illustrated as below:
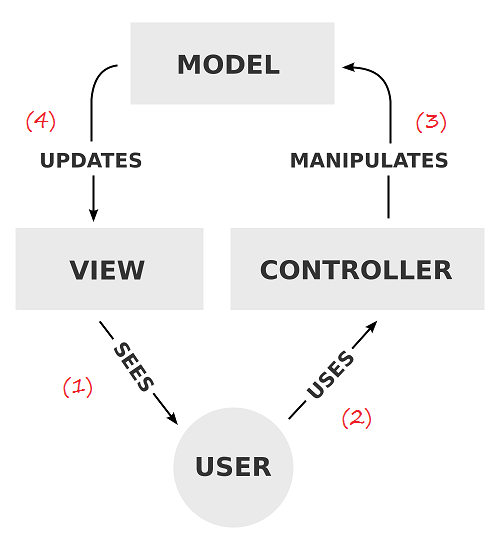
- After seeing it on VIEW
- Users use CONTROLLER
- Manipulate data (Update, modify, delete, ..), the data on MODEL has been changed.
- Displaying the data of MODEL on VIEW.
Preview the example:

- File/New/Other...
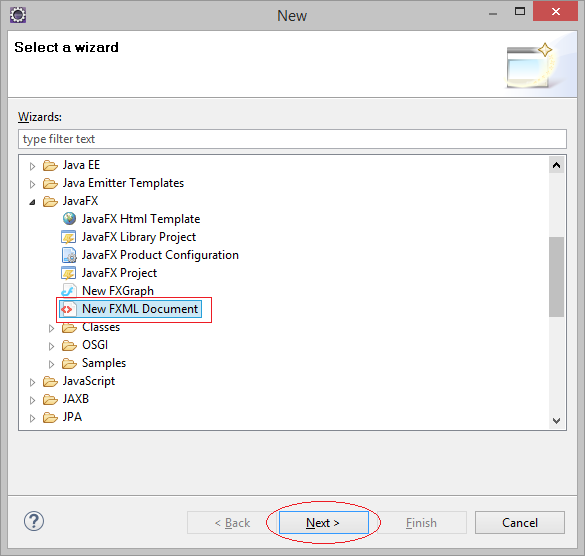

MyScene.fxml file is created.
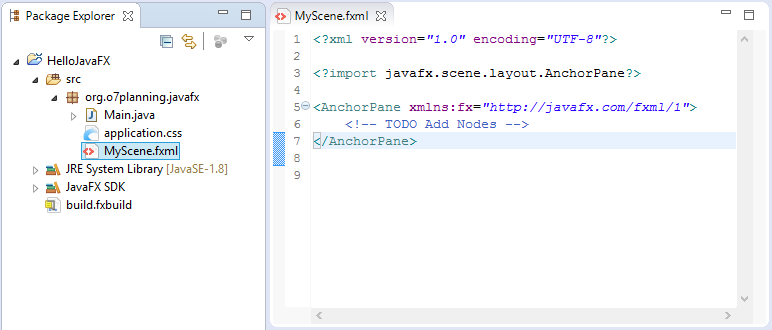
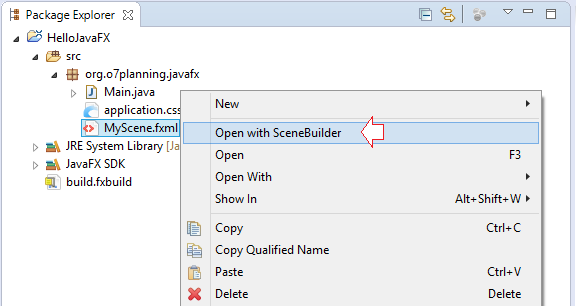
You can open the fxml file with JavaFX Scene Builder.
Note: You are sure that you have installed JavaFX Scene Builder, and integrated it into Eclipse.
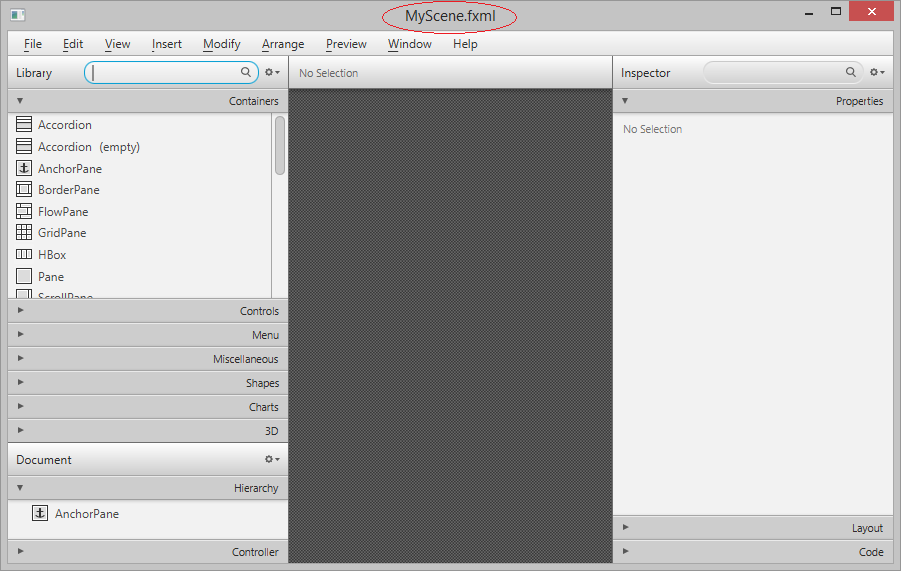
The screen of My Scene.fxml interface design:
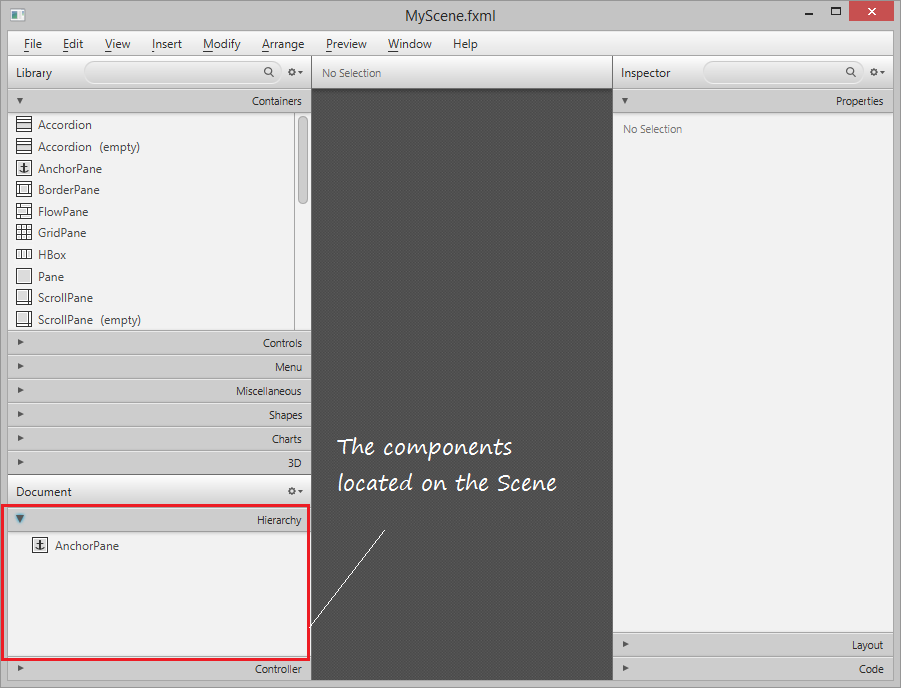
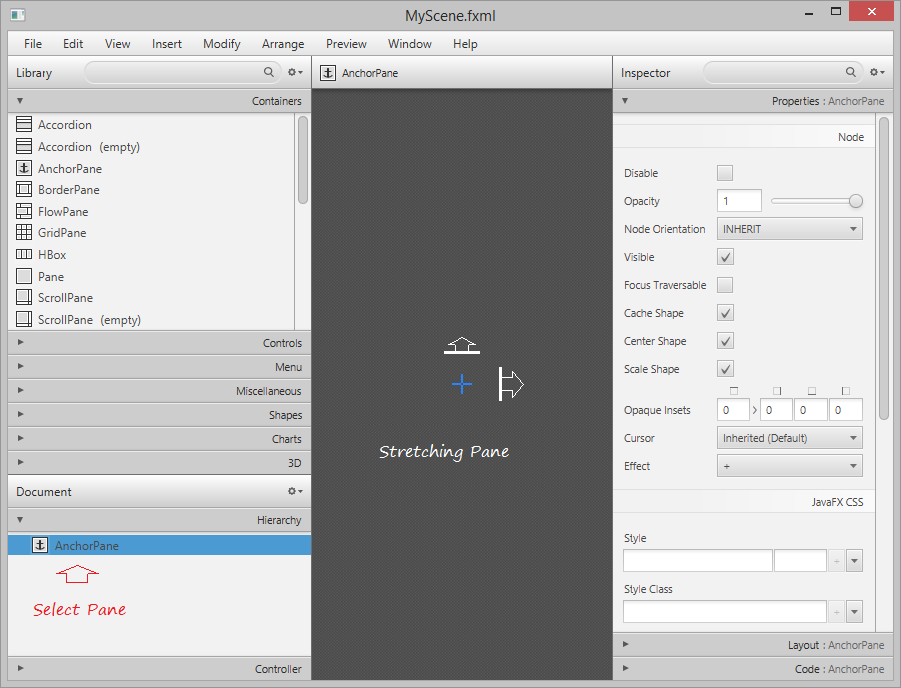
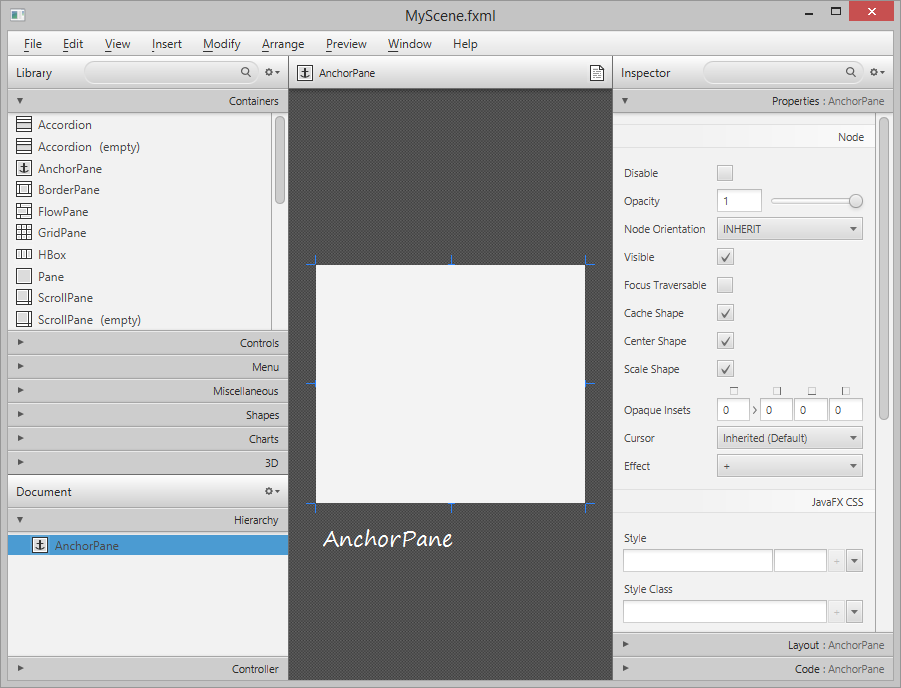
The components located on the Scene:
Finding Button and dragging it into AnchorPane:
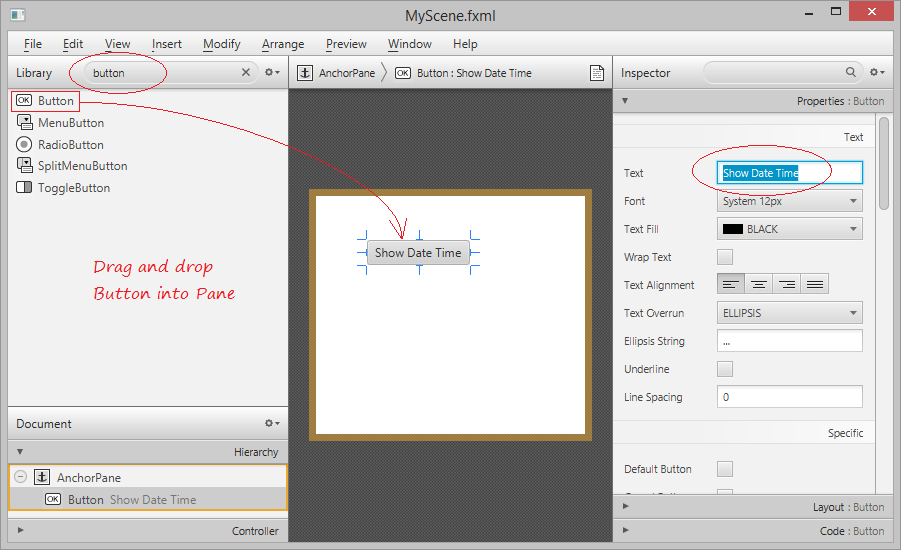
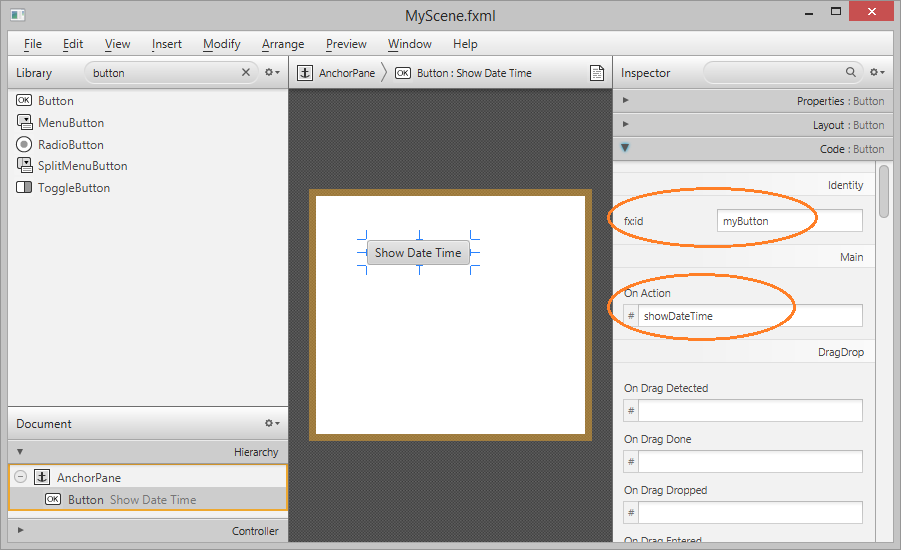
Set ID for Button as "myButton", you can have access to the Button from Java code via its ID. Set the method will be called when the button is clicked.
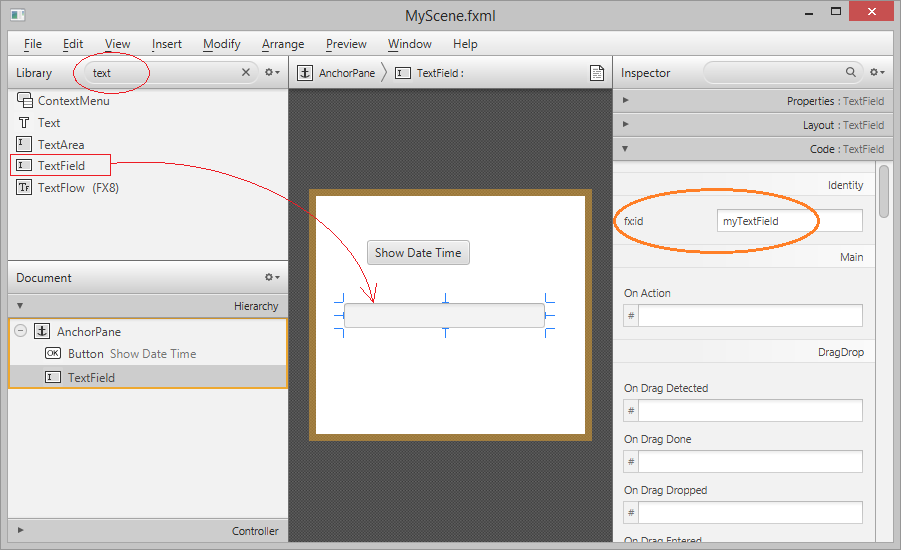
Dragging and dropping TextField into AnchorPane. Set ID for TextField which is newly dragged and dropped into AnchorPane as "myTextField", you can have access to the TextField on Java code via its ID.
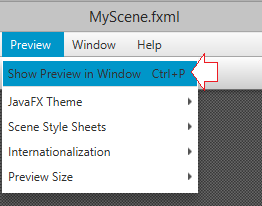
Selecting File/Save to save the changes. And selecting Preview/Show Preview in Window to preview your design.

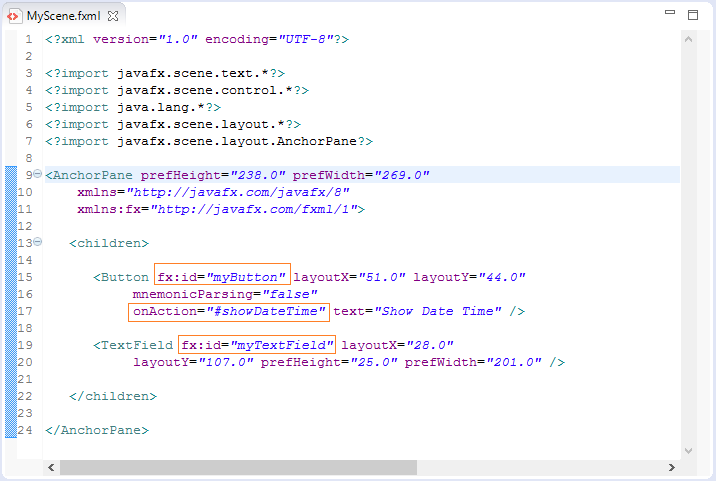
Closing Scene Builder windows and refreshing Project on Eclipse. You can see the code generated on the MyScene.fxml file:
Adding the attribute fx:controller to <AnchorPane>, the Controller will be useful to the Controls lying inside AnchorPane such as myButton and myTextField.
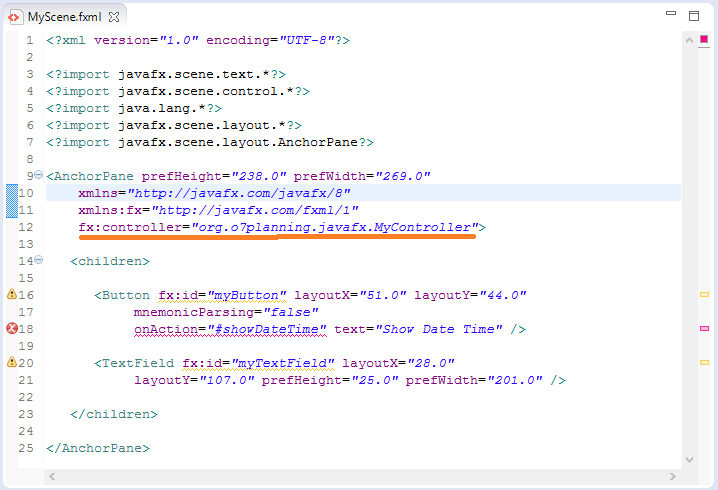
Note: org.o7planning.javafx.MyController class will be created later.
Controller
MyController.java
package org.o7planning.javafx;

import java.net.URL;
import java.text.DateFormat;
import java.text.SimpleDateFormat;
import java.util.Date;
import java.util.ResourceBundle;

import javafx.event.ActionEvent;
import javafx.fxml.FXML;
import javafx.fxml.Initializable;
import javafx.scene.control.Button;
import javafx.scene.control.TextField;

public class MyController implements Initializable {

   @FXML
   private Button myButton;

   @FXML
   private TextField myTextField;

   @Override
   public void initialize(URL location, ResourceBundle resources) {

       // TODO (don't really need to do anything here).

   }

   // When user click on myButton
   // this method will be called.
   public void showDateTime(ActionEvent event) {
       System.out.println("Button Clicked!");

       Date now= new Date();

       DateFormat df = new SimpleDateFormat("dd-MM-yyyy HH:mm:ss.SSS");


        // Model Data
        String dateTimeString = df.format(now);

        // Show in VIEW
        myTextField.setText(dateTimeString);

   }

}
MyApplication.java
package org.o7planning.javafx;

import javafx.application.Application;
import javafx.fxml.FXMLLoader;
import javafx.scene.Parent;
import javafx.scene.Scene;
import javafx.stage.Stage;

public class MyApplication  extends Application {


    @Override
    public void start(Stage primaryStage) {
        try {
            // Read file fxml and draw interface.
            Parent root = FXMLLoader.load(getClass()
                    .getResource("/org/o7planning/javafx/MyScene.fxml"));

            primaryStage.setTitle("My Application");
            primaryStage.setScene(new Scene(root));
            primaryStage.show();

        } catch(Exception e) {
            e.printStackTrace();
        }
    }

    public static void main(String[] args) {
        launch(args);
    }

}
Running MyApplication class:
JavaFX Tutorials
- Open a new Window in JavaFX
- JavaFX ChoiceDialog Tutorial with Examples
- JavaFX Alert Dialogs Tutorial with Examples
- JavaFX TextInputDialog Tutorial with Examples
- Install e(fx)clipse for Eclipse (JavaFX Tooling)
- Install JavaFX Scene Builder for Eclipse
- JavaFX Tutorial for Beginners - Hello JavaFX
- JavaFX FlowPane Layout Tutorial with Examples
- JavaFX TilePane Layout Tutorial with Examples
- JavaFX HBox, VBox Layout Tutorial with Examples
- JavaFX BorderPane Layout Tutorial with Examples
- JavaFX AnchorPane Layout Tutorial with Examples
- JavaFX TitledPane Tutorial with Examples
- JavaFX Accordion Tutorial with Examples
- JavaFX ListView Tutorial with Examples
- JavaFX Group Tutorial with Examples
- JavaFX ComboBox Tutorial with Examples
- JavaFX Transformations Tutorial with Examples
- JavaFX Effects Tutorial with Examples
- JavaFX GridPane Layout Tutorial with Examples
- JavaFX StackPane Layout Tutorial with Examples
- JavaFX ScrollPane Tutorial with Examples
- JavaFX WebView and WebEngine Tutorial with Examples
- JavaFX HTMLEditor Tutorial with Examples
- JavaFX TableView Tutorial with Examples
- JavaFX TreeView Tutorial with Examples
- JavaFX TreeTableView Tutorial with Examples
- JavaFX Menu Tutorial with Examples
- JavaFX ContextMenu Tutorial with Examples
- JavaFX Image and ImageView Tutorial with Examples
- JavaFX Label Tutorial with Examples
- JavaFX Hyperlink Tutorial with Examples
- JavaFX Button Tutorial with Examples
- JavaFX ToggleButton Tutorial with Examples
- JavaFX RadioButton Tutorial with Examples
- JavaFX MenuButton and SplitMenuButton Tutorial with Examples
- JavaFX TextField Tutorial with Examples
- JavaFX PasswordField Tutorial with Examples
- JavaFX TextArea Tutorial with Examples
- JavaFX Slider Tutorial with Examples
- JavaFX Spinner Tutorial with Examples
- JavaFX ProgressBar and ProgressIndicator Tutorial with Examples
- JavaFX ChoiceBox Tutorial with Examples
- JavaFX Tooltip Tutorial with Examples
- JavaFX DatePicker Tutorial with Examples
- JavaFX ColorPicker Tutorial with Examples
- JavaFX FileChooser and DirectoryChooser Tutorial with Examples
- JavaFX PieChart Tutorial with Examples
- JavaFX AreaChart and StackedAreaChart Tutorial with Examples
- JavaFX BarChart and StackedBarChart Tutorial with Examples
- JavaFX Line Tutorial with Examples
- JavaFX Rectangle and Ellipse Tutorial with Examples
Show More