Install e(fx)clipse for Eclipse (JavaFX Tooling)
1. Get link to install
Go to address:
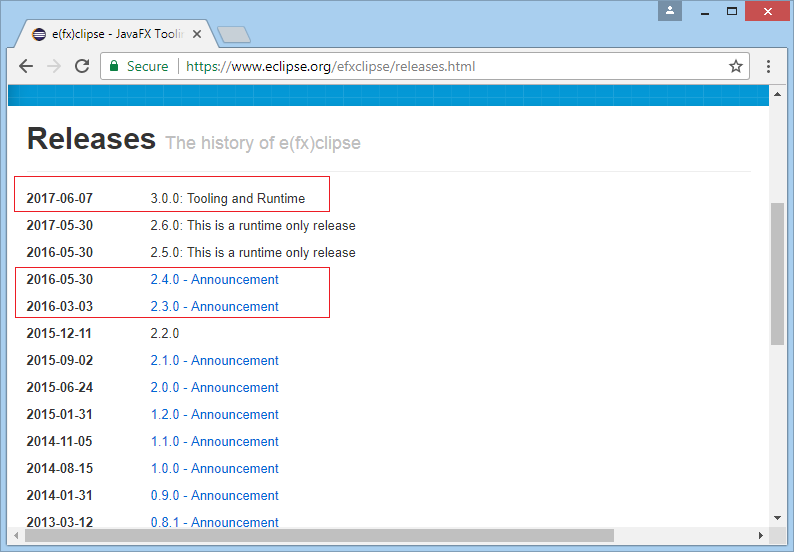
The latest version of e(fx)clipse is 3.0.0. Copy one of the URLs below:
- http://download.eclipse.org/efxclipse/updates-released/3.0.0/site
- http://download.eclipse.org/efxclipse/updates-released/2.4.0/site
- http://download.eclipse.org/efxclipse/updates-released/2.3.0/site
2. Installing
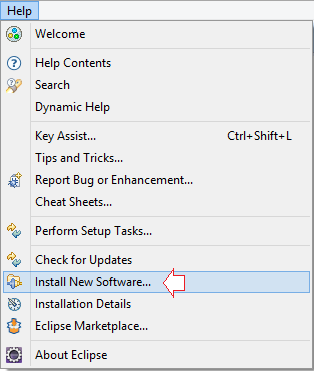
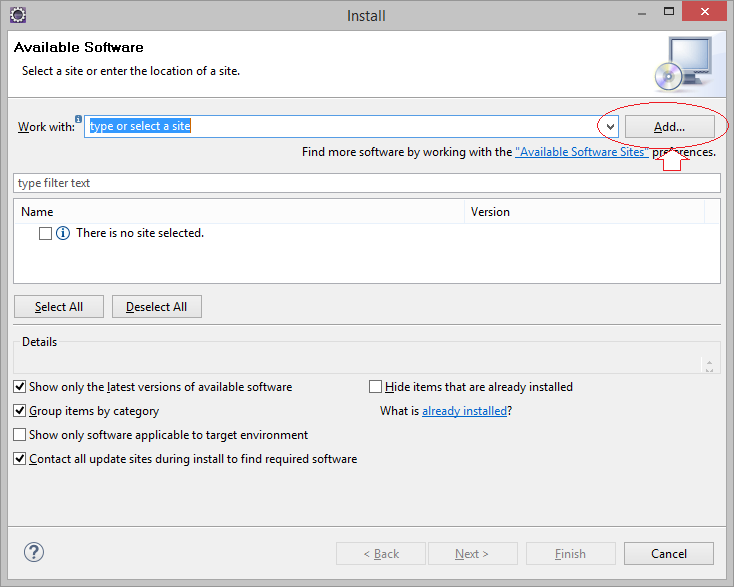
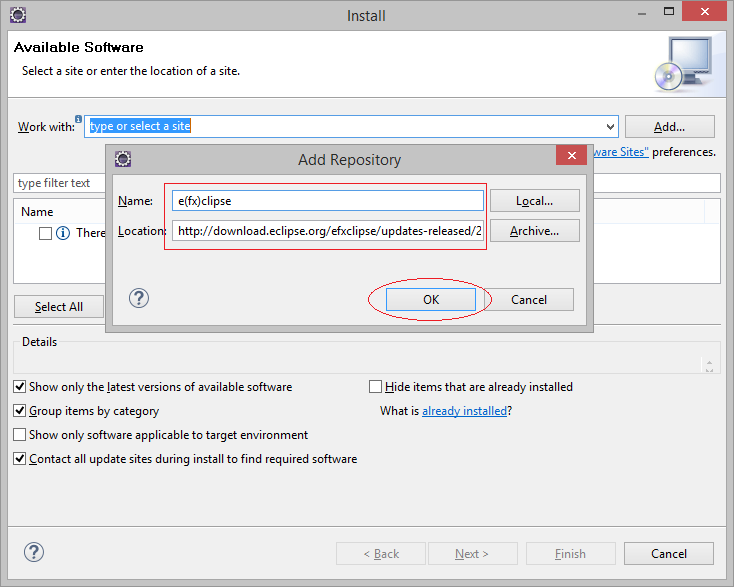
Enter:
- Name: e(fx)clipse
- Location: http://download.eclipse.org/efxclipse/updates-released/3.0.0/site
Note that the link above you get in the previous step.
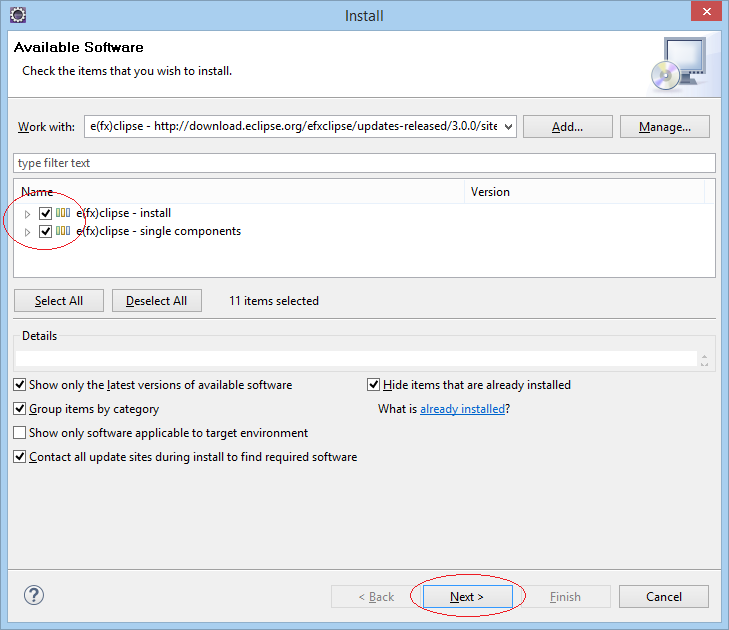

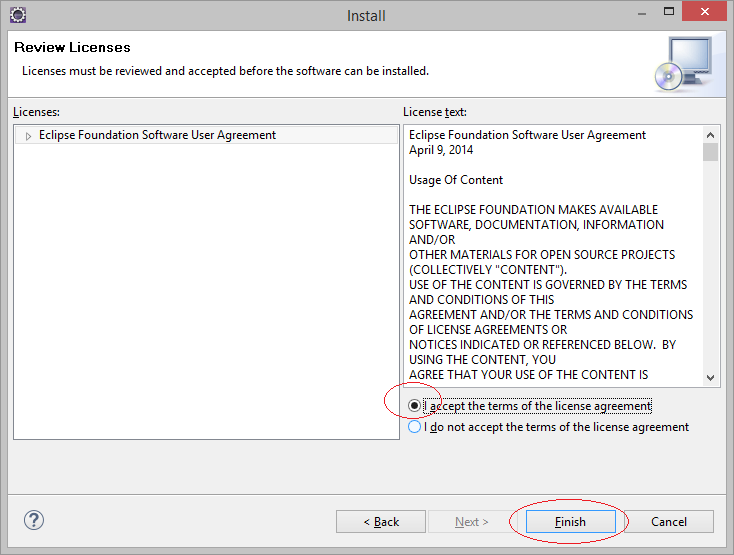
After the installation is completed, let's restart Eclipse.

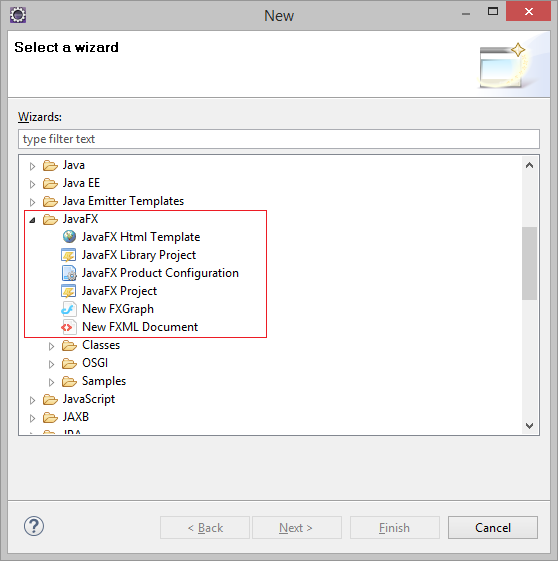
3. Check after installation
After successful installation and restarting Eclipse, you can check the result of the installation.
In Eclipse select:
- File/New/Others...
There are Wizards which allow you to carry out JavaFX programming
4. Install JavaFX Scene Builder
JavaFX Scene Builder is a visual layout tool that lets users quickly design JavaFX application user interfaces, without coding. Users can drag and drop UI components to a work area, modify their properties, apply style sheets, and the FXML code for the layout that they are creating is automatically generated in the background. The result is an FXML file that can then be combined with a Java project by binding the UI to the application’s logic.

Next, you can see the installation guide of JavaFX Scene Builder here:
JavaFX Tutorials
- Open a new Window in JavaFX
- JavaFX ChoiceDialog Tutorial with Examples
- JavaFX Alert Dialogs Tutorial with Examples
- JavaFX TextInputDialog Tutorial with Examples
- Install e(fx)clipse for Eclipse (JavaFX Tooling)
- Install JavaFX Scene Builder for Eclipse
- JavaFX Tutorial for Beginners - Hello JavaFX
- JavaFX FlowPane Layout Tutorial with Examples
- JavaFX TilePane Layout Tutorial with Examples
- JavaFX HBox, VBox Layout Tutorial with Examples
- JavaFX BorderPane Layout Tutorial with Examples
- JavaFX AnchorPane Layout Tutorial with Examples
- JavaFX TitledPane Tutorial with Examples
- JavaFX Accordion Tutorial with Examples
- JavaFX ListView Tutorial with Examples
- JavaFX Group Tutorial with Examples
- JavaFX ComboBox Tutorial with Examples
- JavaFX Transformations Tutorial with Examples
- JavaFX Effects Tutorial with Examples
- JavaFX GridPane Layout Tutorial with Examples
- JavaFX StackPane Layout Tutorial with Examples
- JavaFX ScrollPane Tutorial with Examples
- JavaFX WebView and WebEngine Tutorial with Examples
- JavaFX HTMLEditor Tutorial with Examples
- JavaFX TableView Tutorial with Examples
- JavaFX TreeView Tutorial with Examples
- JavaFX TreeTableView Tutorial with Examples
- JavaFX Menu Tutorial with Examples
- JavaFX ContextMenu Tutorial with Examples
- JavaFX Image and ImageView Tutorial with Examples
- JavaFX Label Tutorial with Examples
- JavaFX Hyperlink Tutorial with Examples
- JavaFX Button Tutorial with Examples
- JavaFX ToggleButton Tutorial with Examples
- JavaFX RadioButton Tutorial with Examples
- JavaFX MenuButton and SplitMenuButton Tutorial with Examples
- JavaFX TextField Tutorial with Examples
- JavaFX PasswordField Tutorial with Examples
- JavaFX TextArea Tutorial with Examples
- JavaFX Slider Tutorial with Examples
- JavaFX Spinner Tutorial with Examples
- JavaFX ProgressBar and ProgressIndicator Tutorial with Examples
- JavaFX ChoiceBox Tutorial with Examples
- JavaFX Tooltip Tutorial with Examples
- JavaFX DatePicker Tutorial with Examples
- JavaFX ColorPicker Tutorial with Examples
- JavaFX FileChooser and DirectoryChooser Tutorial with Examples
- JavaFX PieChart Tutorial with Examples
- JavaFX AreaChart and StackedAreaChart Tutorial with Examples
- JavaFX BarChart and StackedBarChart Tutorial with Examples
- JavaFX Line Tutorial with Examples
- JavaFX Rectangle and Ellipse Tutorial with Examples
Show More