How do I take a MacOS Retina screenshot and get the image at its actual size?
1. Print Screen in Mac OS
In Mac OS, CMD+SHIFT+3, CMD+SHIFT+4 or CMD+SHIFT+5 key combinations are frequently used to take a screenshot, probably full screen or part of the screen. For later Macbook computers with Retina display, you will get a screenshot with its size twice as much as that of the area you captured. A few questions arise, "How do I take a MacOS Retina screenshot and get the image at its actual size?", or "How can I disable Retina?."


Basically, there is no way to disable Retina, but here are a few workable solutions for you:
Solution 1: After capturing a screenshot, you will receive an image file. Then you use a photo editing tool to resize it.
Solution 2: Use a third-party screen capture application with the auto built-in image scaling function, LighShot, for example.
Solution 3: In MacOS, open Automator app to create an automatic task. Later on, every time you take a screenshot, it will automatically create a new image file with 50% of the original image size you have just taken. This will help you get better quality images than the first two solutions.

Alright, in this article, I'm going to guide you to use Automator to automatically downsize the image when you take a screenshot with MacOS Retina.
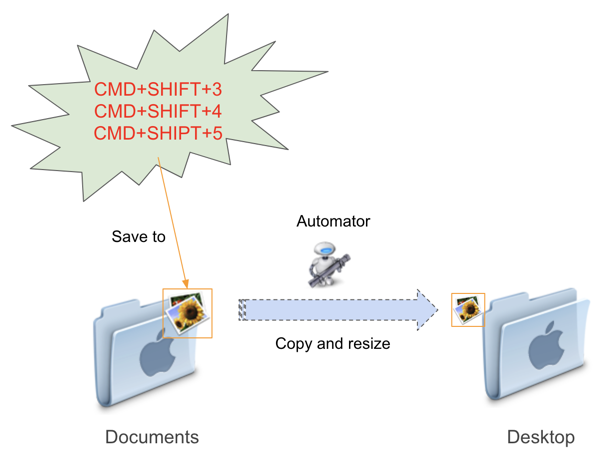
By default, when you take a screenshot, the image file will be saved to the Desktop. Thus, you need to change the default location into the Documents folder to save it.
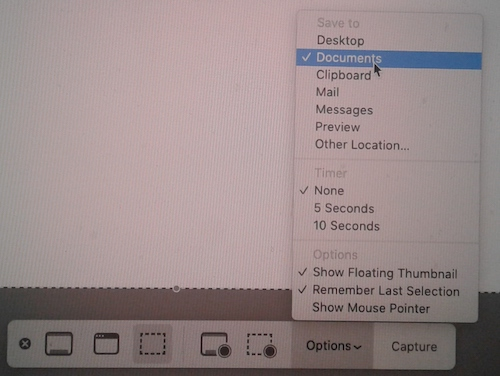
First, press CMD+SHIFT+5 and select:
- Options > (Save to) Documents
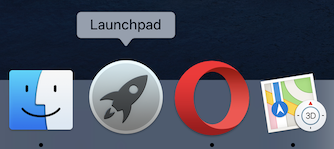
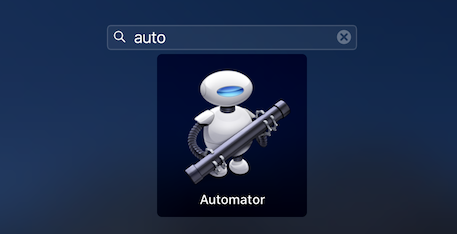
Now open the Automator application in Launchpad.
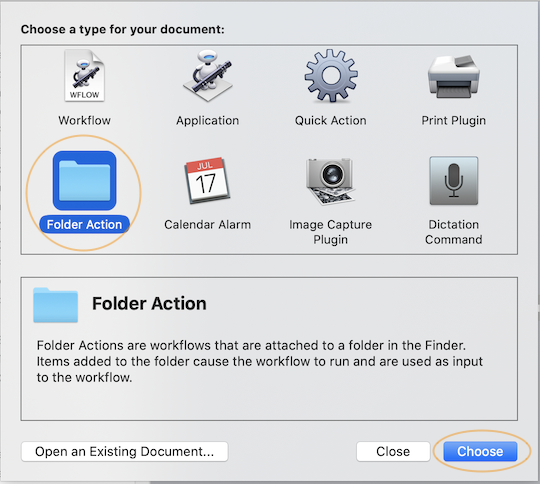
Create a "Folder Action":
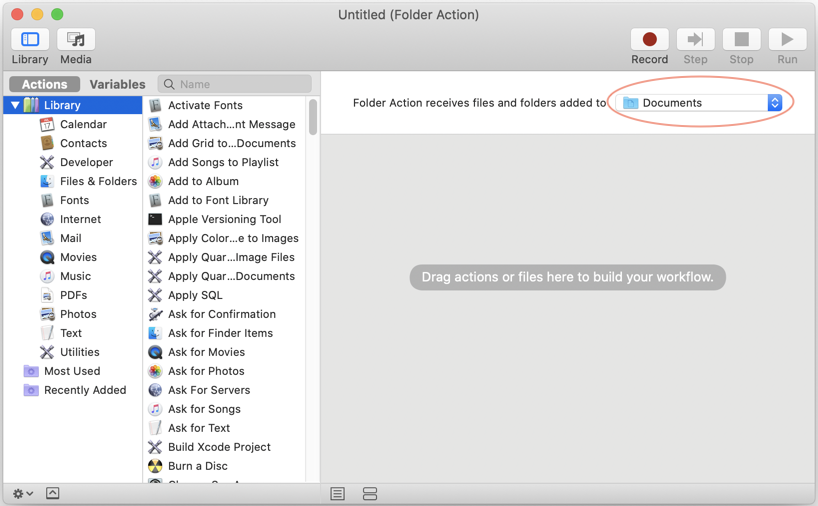
Then choose the Documents folder. That means your Automator will listen for commands in this folder.
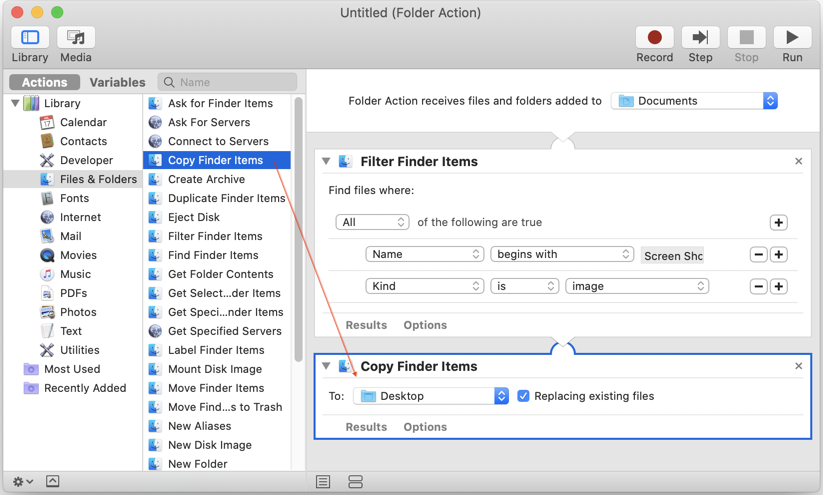
Next, select "Files & Folders". After that,drag and drop "Filter Finder Items" to the right window.
- Name > begins with > Screen Shot
- Kind > is > image

Later, drag and drop "Copy Finder Items" to the right window.
- To > Desktop (v) Replacing Exiting File
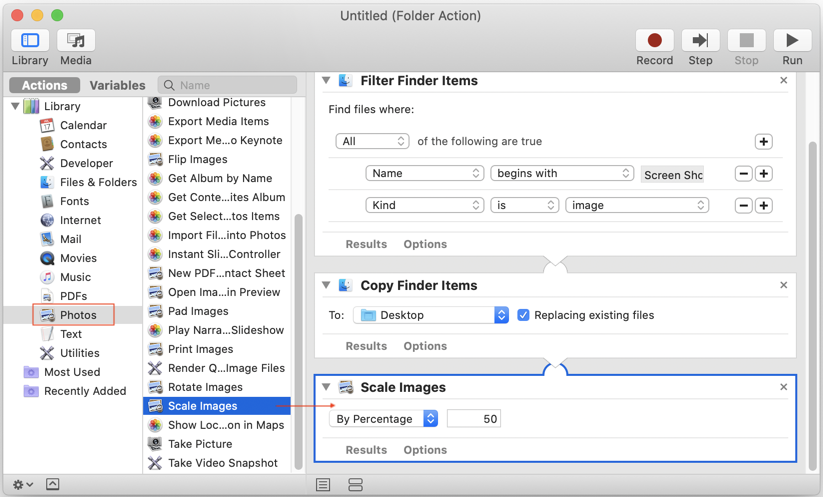
After that, select "Photos". Thendrag and drop "Scale Images" to the right window.
- By Percentage > 50
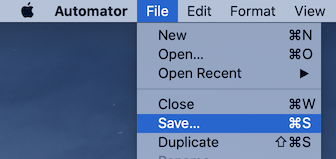
Finally, save your "Folder Action" with a certain name, for instance, "Smaller Screenshot Copy".

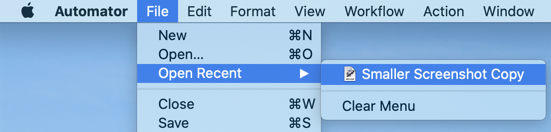
Remember that you can reopen the recently saved file by selecting:
- File > Open Recent
Mac OS Tutorials
- Install Mac OS X 10.11 El Capitan in VMWare
- Install Mac OS Virtual Machine in VirtualBox
- Upgrade Mac Operating System
- Install Java on Mac OS
- Install VirtualBox on Mac OS
- How to use Windows-like shortcuts in Mac OS Virtual Machine
- Lightshot - Screenshot tool for Mac and Windows
- How do I take a MacOS Retina screenshot and get the image at its actual size?
- Microsoft Remote Desktop for Mac OS
- Transfer files between computers using Cyberduck on Mac OS
- Connect to the Server with Terminal on Mac OS
- How to use the "hosts" file?
- Are There Ways to Improve Gaming Experience on a Macbook?
- Mac Keyboard Shortcut List to Improve Efficiency
- Install FFmpeg on Mac OS
- How to open Terminal on Mac OS
- Setup environment variables on Mac Os
- Create executable files for Terminal scripts on Mac OS
Show More