Quickstart with ReactJS in NodeJS Environment
1. Objective of lesson
NodeJS is a technology at the Server side helping generate HTML to return to user's browser. It is like to other technologies such as PHP, Java Servlet/JSP,... The different thing here is that the NodeJS uses Javascript to write codes, therefore, you only need to know that your Javascript can program applications at the two sides: Client & Server.

You can see more introduction on my NodeJS in the following post:
In this lesson, I am going to show you how to create a React application at the Server side, specifically, NodeJS Server. Ensure that you have basic knowledge of NodeJS before starting with this lesson.
The most important thing is that you need to install NodeJS on your computer.
2. Create a React project
Make sure your computer is connected to the Internet. We will create a React project to run on the NodeJS environment.
OK, Open the CMD window and CD window to your directory. This directory will contain your project.
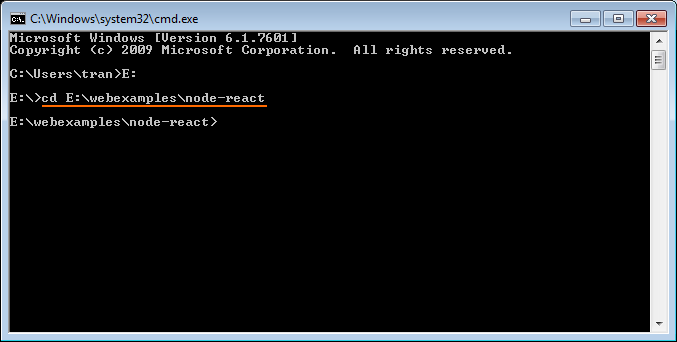
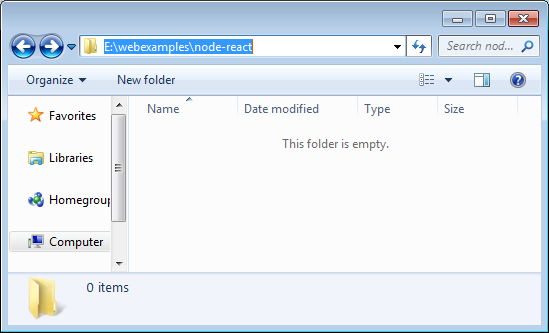
At this time, on my directory there is no project.
Finding that configurations, environment settings for the new project using React are too complex, the Facebook team and open source community have jointly created the "Create React App" seed project with built-in basic and necessary libraries for you, including:
- Webpack
- ESLint
- Babel
Therefore, to create a React project, you need to install the create-react-app tool, then, we shall use this tool to create a React project which is the copy of the foresaid seed project.
# Install 'create-react-app' package. (Windows)

npm install -g create-react-app

# Linux (Ubuntu,..)

sudo npm install -g create-react-app
OK, now, use the create-react-app tool to create a React project:
# Syntax:

create-react-app your-app-name

# Example:

create-react-app  hello-react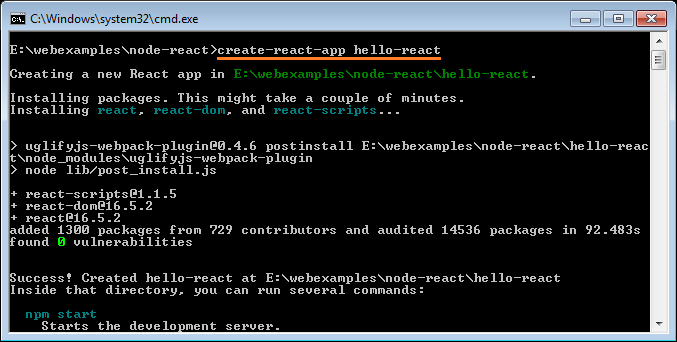
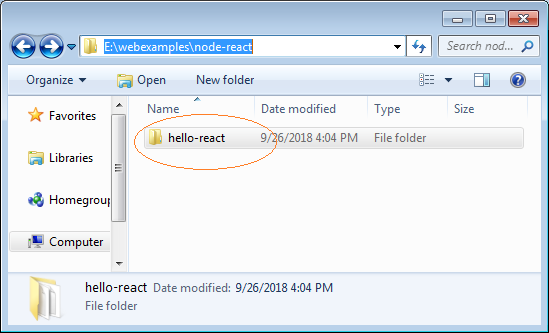
Now a project is created:
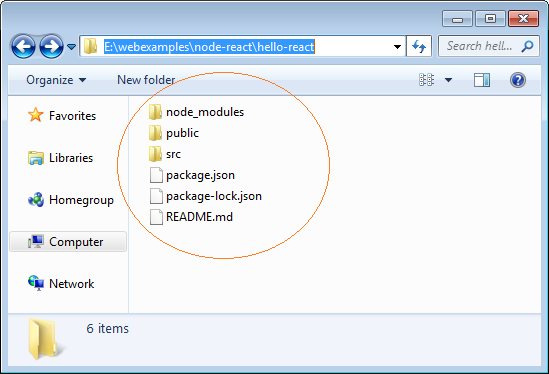
Next, CD comes to the directory of the project just created and starts your application (it will run on a HTTP Server).
# CD to your app:

cd your-app-name

# Start your App:

npm start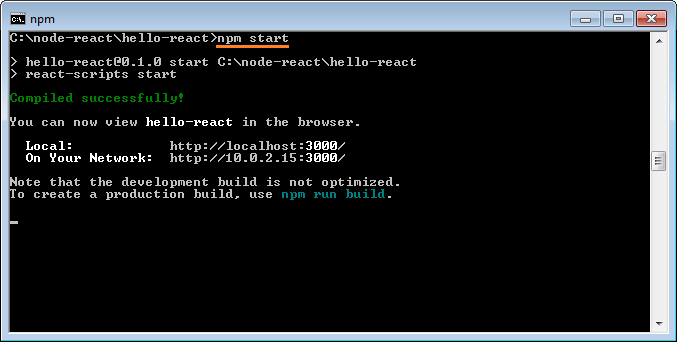
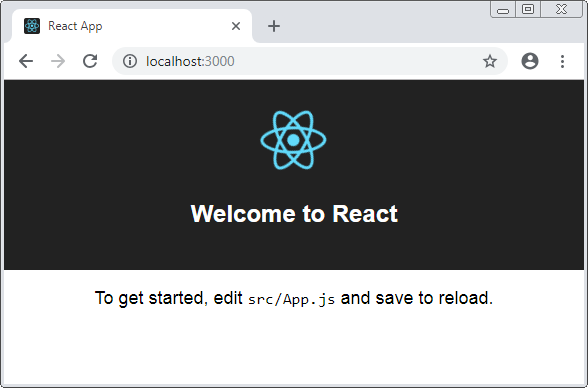
OK, now, your application has run on port 3000, and you can visit it at the following address:
3. Explain the project structure
In the above step, you have created a React project. You need to open it with a editor that you are familiar with. I recommend you use the Atom editor.
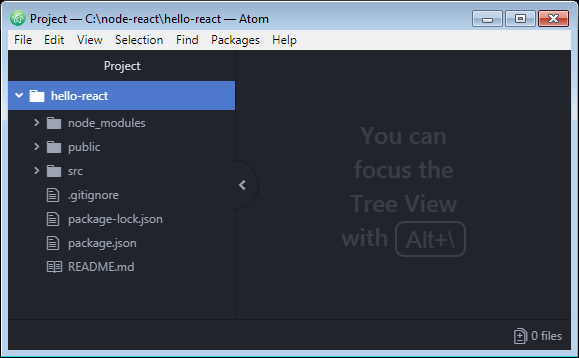
Now, you haven't changed anything on the project. But, there are many things on your project.
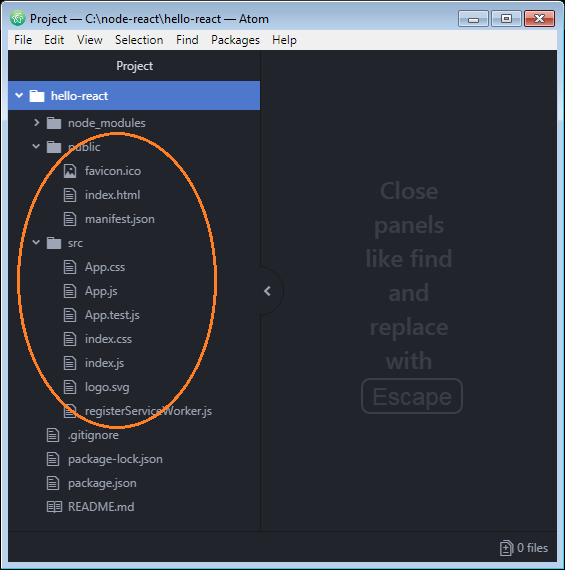
node_modules
This is the directory storing the dependencies of the project, or in other words, it is the place containing the libraries necessary for your project. They have been downloaded from the Internet and placed in this directory.
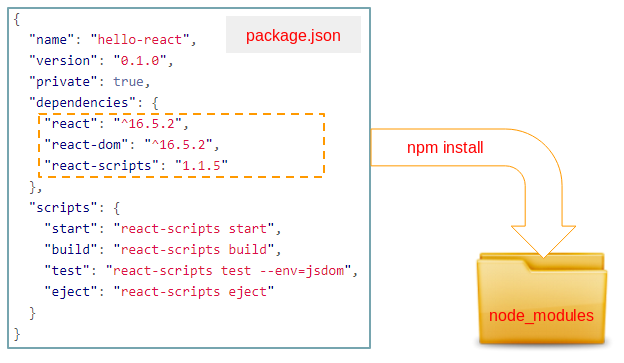
package.json
The package.json file tells you what libraries you are using and their versions. It also contains other information such as application name, your application version and commands to run applications, build applications, ...
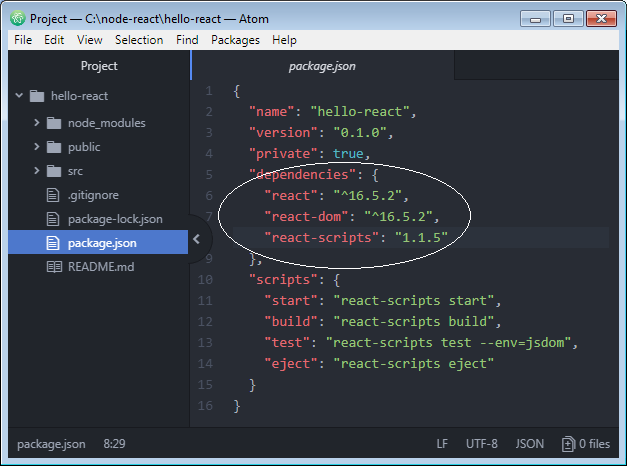
The package.json file is very important. If a new library needs adding to your project, please declare its name and version in this file. After that, execute the "npm install" command, this library shall be downloaded to the node_modules directory for you. You also can delete all in the node_modules directory and execute the "npm install" command to download all libraries again.
src
The src directory contains the files that you (a developer) can amend or add
4. Write your code
Open the 2 files: App.js & App.css on your browser and delete all their contents.
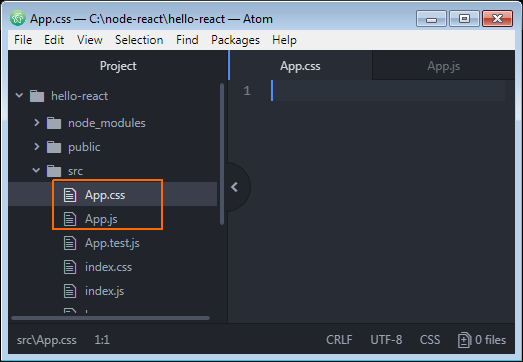
We shall write code for 2 above files:
App.css
.people  {
   border: 1px solid #ddd;
   padding: 5px;
   margin: 5px;
}

.person-info  {
  display: inline-block;
  border: 1px solid blue;
  margin: 5px;
  padding: 5px;
  width: 250px;
}
App.js
import React, { Component } from 'react';
import logo from './logo.svg';
import './App.css';

// Define a Component: Person
// Like you create a new Tag:
// <Person personNo='1' firstName='Bill' lastName='Gates' />
class Person extends React.Component {

  // Use the render function to return JSX component
  render() {
    return (
      <div className="person-info">
         <h3>Person {this.props.personNo}:</h3>
         <ul>
            <li>First Name: {this.props.firstName}</li>
            <li>Last Name: {this.props.lastName}</li>
         </ul>
       </div>
      );
    }
}

// Define a Component: App
// Like you create a new Tag: <App />
class App extends React.Component {

  // Use the render function to return JSX component
  render() {
    return (
      <div className="people">
          <Person personNo='1' firstName='Bill' lastName='Gates' />
          <Person personNo='2' firstName='Donald' lastName='Trump' />
      </div>
      );
    }
}

// Export App component.
export default App;
You don't need to change anything on the index.js & index.html files:
index.js
import React from 'react';
import ReactDOM from 'react-dom';
import './index.css';
import App from './App';
import registerServiceWorker from './registerServiceWorker';

// Render App component.
ReactDOM.render(<App />, document.getElementById('root'));
registerServiceWorker();
index.html
<!DOCTYPE html>
<html lang="en">
<head>
<meta charset="utf-8">
<meta name="viewport" content="width=device-width, initial-scale=1, shrink-to-fit=no">
<meta name="theme-color" content="#000000">
<!--
manifest.json provides metadata used when your web app is added to the
homescreen on Android. See https://developers.google.com/web/fundamentals/engage-and-retain/web-app-manifest/
-->
<link rel="manifest" href="%PUBLIC_URL%/manifest.json">
<link rel="shortcut icon" href="%PUBLIC_URL%/favicon.ico">
<!--
Notice the use of %PUBLIC_URL% in the tags above.
It will be replaced with the URL of the `public` folder during the build.
Only files inside the `public` folder can be referenced from the HTML.
Unlike "/favicon.ico" or "favicon.ico", "%PUBLIC_URL%/favicon.ico" will
work correctly both with client-side routing and a non-root public URL.
Learn how to configure a non-root public URL by running `npm run build`.
-->
<title>React App</title>
</head>
<body>
<noscript>
You need to enable JavaScript to run this app.
</noscript>
<div id="root"></div>
<!--
This HTML file is a template.
If you open it directly in the browser, you will see an empty page.
You can add webfonts, meta tags, or analytics to this file.
The build step will place the bundled scripts into the <body> tag.
To begin the development, run `npm start` or `yarn start`.
To create a production bundle, use `npm run build` or `yarn build`.
-->
</body>
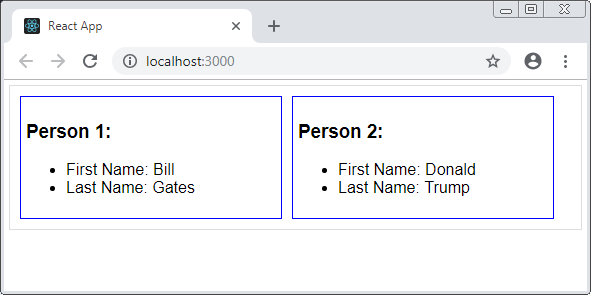
</html>OK, see your application running on the browser.
5. Explain code
It is noted that now, you are working on the Server environment. If you want to use a "something" in the module, you shall import it to your file.
For example, this is code to import the Component class in the 'react' module to your file (App.js):
// Syntax:
// import defaultExport, { export [ , [...] ] } from "module-name";
import React, { Component } from 'react';
In the App.js file, we create the extended Person class from the Component.
class Person extends React.Component {
   // Other code ...
}
// Same as:
class Person extends Component {
    // Other code ...
}
The idea is that you want to have a new <Person> tag and it has 3 attributes such as personNo, firstName, lastName. To do that, you create an extended Person from the React.Component class.
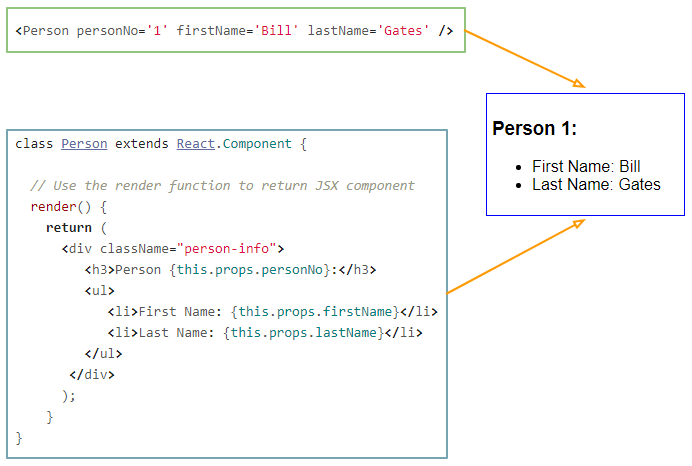
Please note that the syntax used is JSX (Javascript Syntax eXtension), which is a mixture of Javascript and XML. The JSX code shall be compiled into the Javascript code with the help of the Babel library, so it can be executed in the NodeJS environment. Basically, you can write your components completely in Javascript, but your code shall be longer and harder to see.
index.js
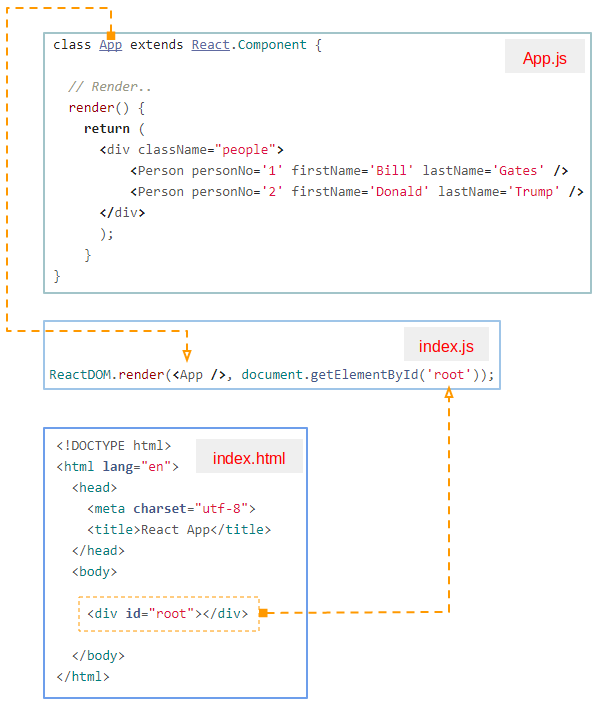
In the src directory, the index.js file is an entry point of the application therefore, you should not delete or change its name.
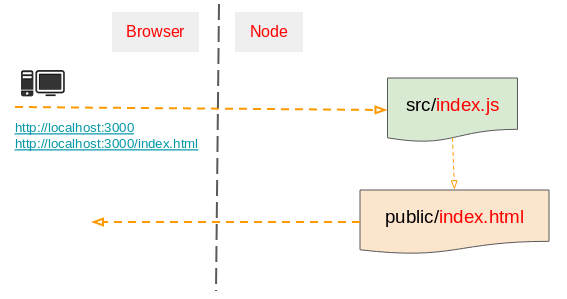
The index.js file imports necessary libraries for the application and render Component on the interface through the ReactDOM.render() method.
ReactJS Tutorials
- ReactJS props and state Tutorial with Examples
- ReactJS Events Tutorial with Examples
- ReactJS Component API Tutorial with Examples
- ReactJs component Lifecycle methods
- ReactJS Refs Tutorial with Examples
- ReactJS Lists and Keys Tutorial with Examples
- ReactJS Forms Tutorial with Examples
- Undertanding ReactJS Router with example on the client side
- Introduction to Redux
- Simple example with React and Redux on the client side
- React-Transition-Group API Tutorial with Examples
- Quickstart with ReactJS in NodeJS Environment
- Undertanding ReactJS Router with a basic example (NodeJS)
- React-Transition-Group Transition Example (NodeJS)
- React-Transition-Group CSSTransition Example (NodeJS)
- Introduction to ReactJS
- Install React Plugin for Atom Editor
- Create a Simple HTTP Server with NodeJS
- Quickstart with ReactJS - Hello ReactJS
Show More