Eclipse RCP 4 Tutorial for Beginners - e4 Workbench Application
1. The installation requires
Install WindowBuilder plugin, there is a plugin that allows you to design SWT GUI applications using drag and drop convenience.
See installation instructions at:
See installation instructions at:
Installing e4 Tools Developer Sources:
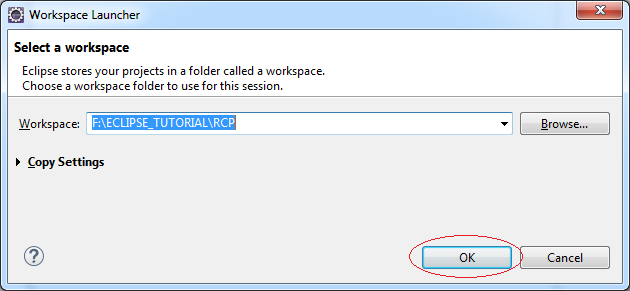
2. Create new Java Workspace
To programme RCP application you should create a new Java Workspace:
- File/Switch Workspace/Other..

Enter:
- F:\ECLIPSE_TUTORIAL\RCP
3. Create RCP Project
In this document, I will guide you to build an RCP application from the beginning (Do not follow the available template), so I'll create a blank Eclipse RCP application.
In Eclipse select:
- File/New/Other...
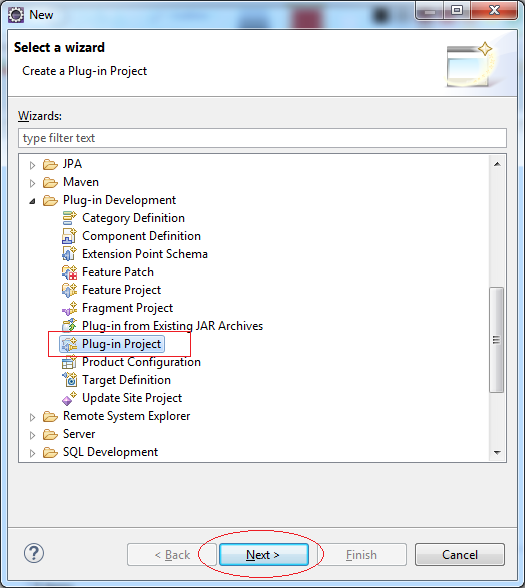
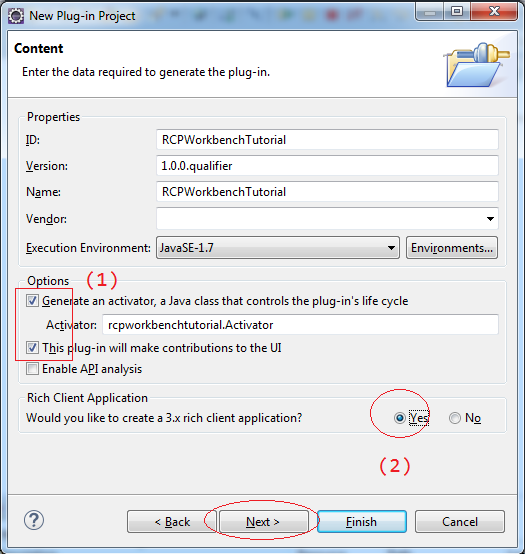
- Check selected on (1)
- On the (2) select "Yes" to create Eclipse RCP Project (Running on Desktop), otherwise it will create RAP Project (Running on the Web).
Select "Eclipse 4 RCP Application"
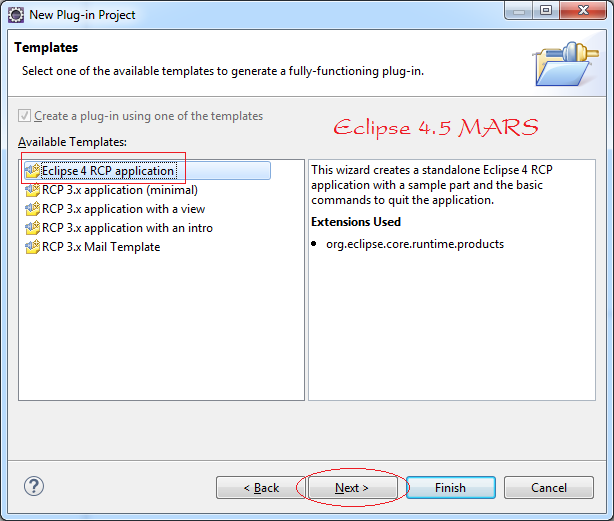
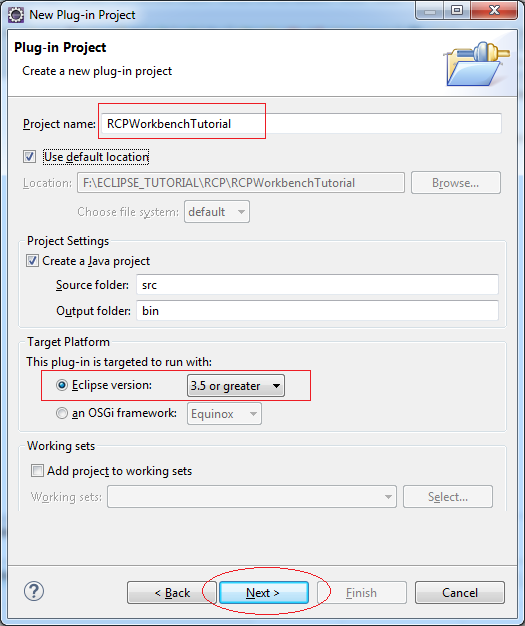
Enter:
- Java package name: org.o7planning.tutorial.rcp
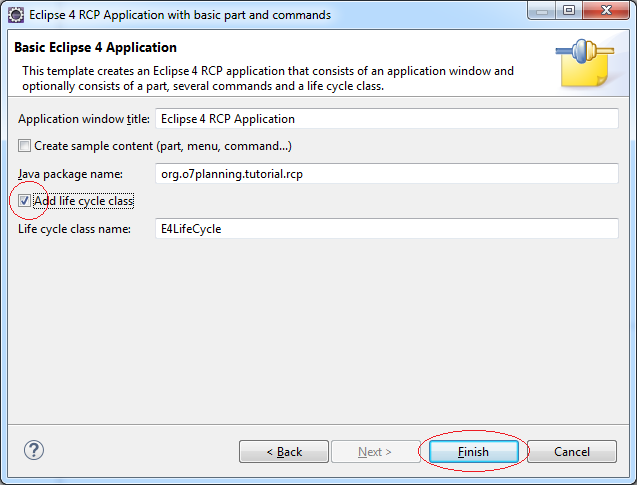
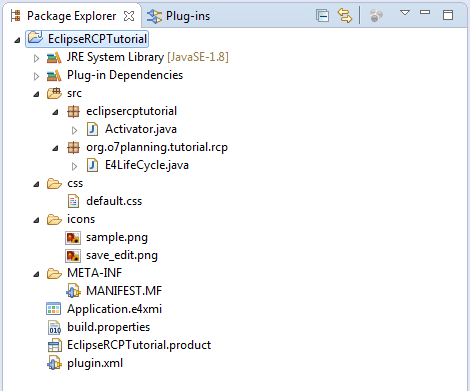
Project was created:
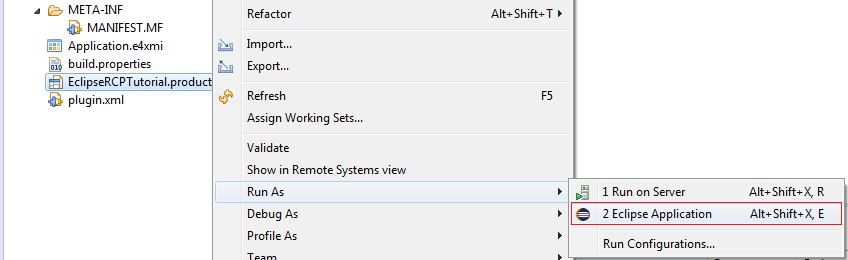
Run application:
Right click EclipseRCPTutorial.product and select Run As/Eclipse Application
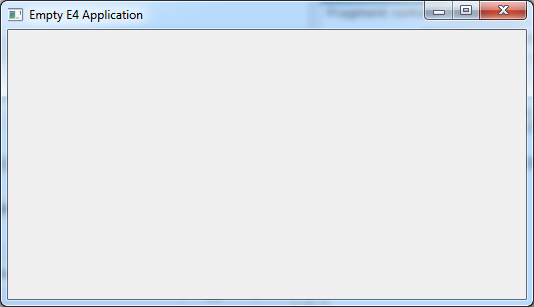
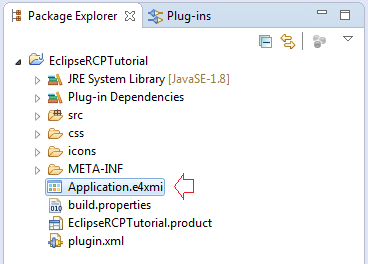
4. Structure of Empty Eclipse 4 RCP application
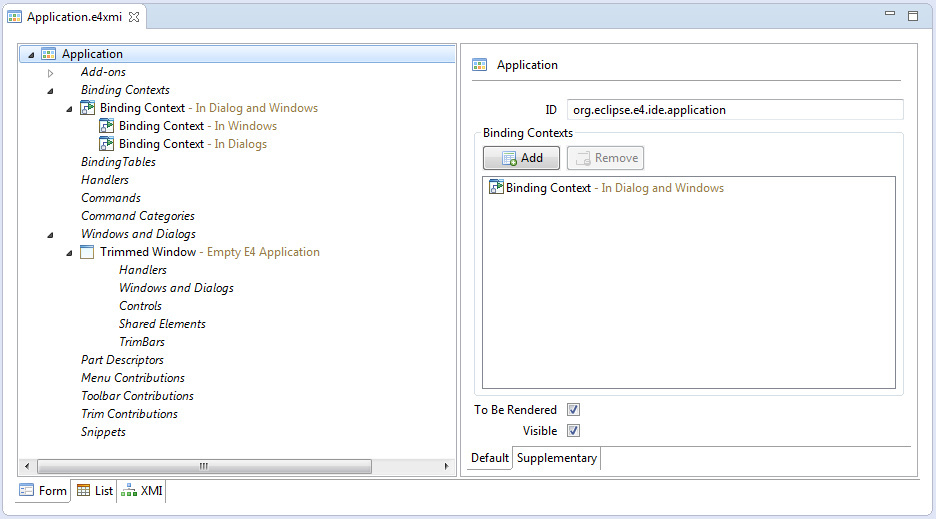
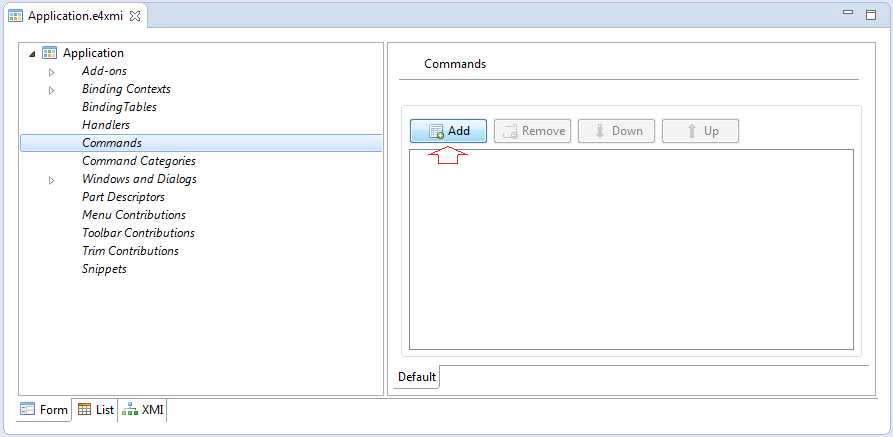
Empty Eclipse 4 RCP applications was created by Eclipse, see its structure. Open Application.e4xmi file:
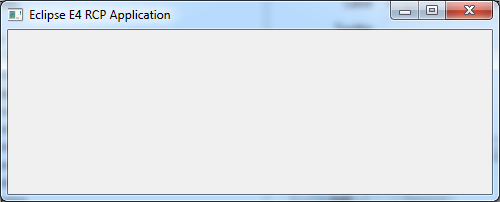
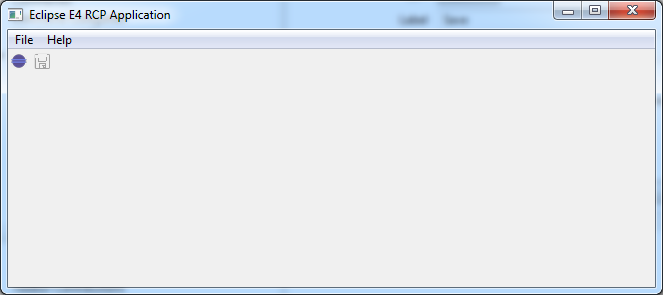
Change the title of the application into "Eclipse E4 RCP Application" as shown below.
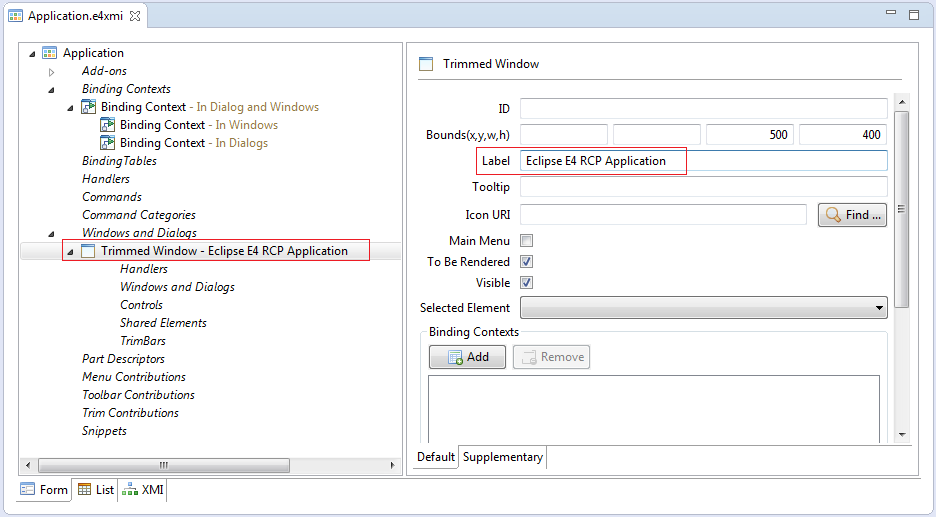
And rerun application:
5. Handler and Command
RCP Framework built a lot of Command, for example 4 commands with the following ID:
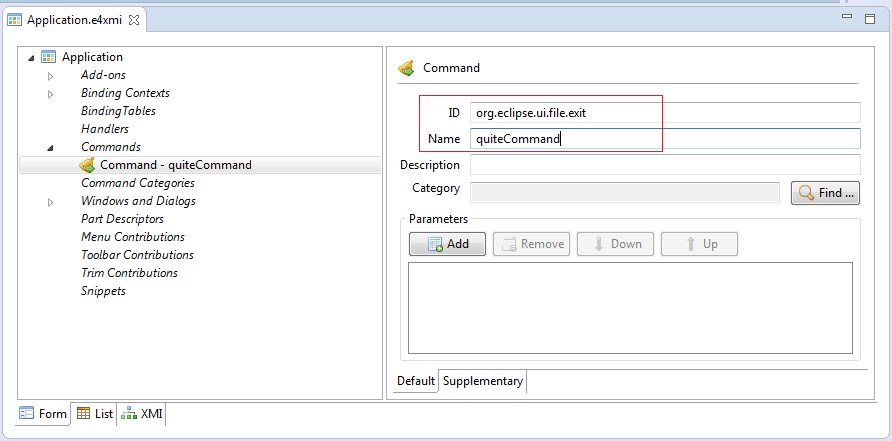
- org.eclipse.ui.file.exit
- Close the workbench
- org.eclipse.ui.file.open
- Open file
- org.eclipse.ui.file.save
- Save the active editor.
- org.eclipse.ui.help.aboutAction
- Displays the About dialog.
You can see a list of built-in command of the RCP framework at:
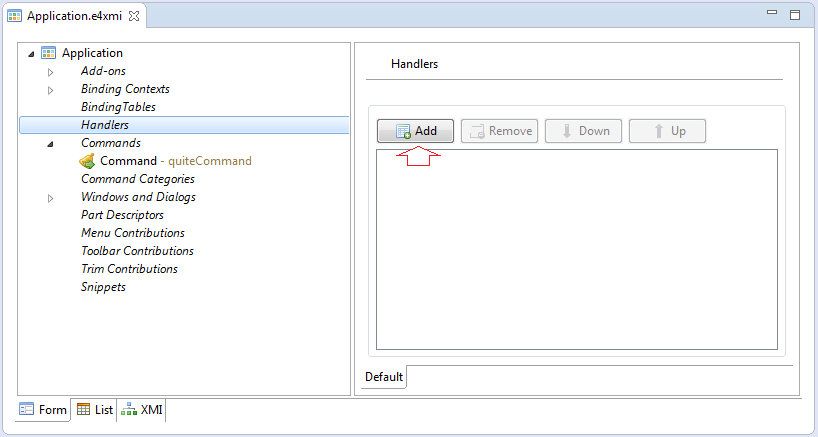
Create a Command named quiteCommand , called to exit the application command which was built by RCP Framework.
Similarly we create 3 other Commands:
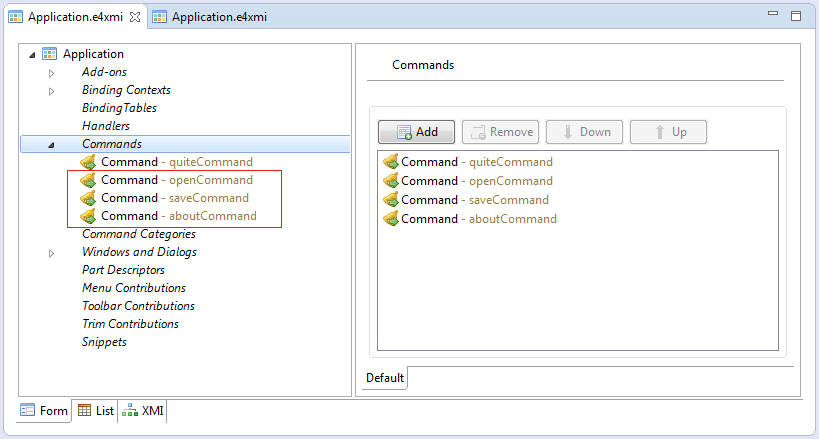
Open selected file.
- ID: org.eclipse.ui.file.open
- Name: openCommand
Save the active editor (or part).
- ID: org.eclipse.ui.file.save
- Name: saveCommand
AboutCommand:
- ID: org.eclipse.ui.help.aboutAction
- Name: aboutCommand
Handler is the classes handling for the commands of Menu or Toolbar. When you click on MenuItem or ToolItem, it means that the call to execute a command,Handler will be executed before the Command is executed, you can cancel (cancel) the command is executed in Handler.
Handler is the classes that when executed, it will execute the task is written in method annotated by @Execute.
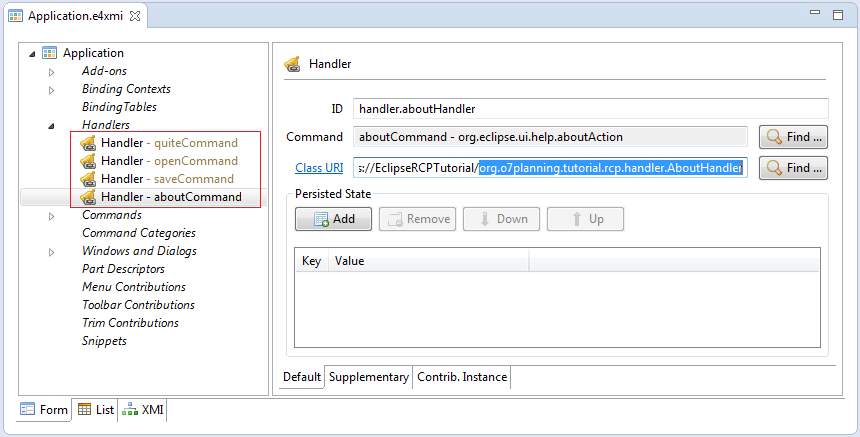
I will create 4 Handler classes:
Handler is the classes that when executed, it will execute the task is written in method annotated by @Execute.
I will create 4 Handler classes:
AboutHandler.java
package org.o7planning.tutorial.rcp.handler;

import org.eclipse.e4.core.di.annotations.Execute;
import org.eclipse.jface.dialogs.MessageDialog;
import org.eclipse.swt.widgets.Shell;

public class AboutHandler {

   @Execute
   public void execute(Shell shell) {
       MessageDialog.openInformation(shell, "About", "Eclipse 4 RCP Application");
   }
}
OpenHandler.java
package org.o7planning.tutorial.rcp.handler;

import org.eclipse.e4.core.di.annotations.Execute;
import org.eclipse.swt.widgets.FileDialog;
import org.eclipse.swt.widgets.Shell;

public class OpenHandler {

   @Execute
   public void execute(Shell shell){
       FileDialog dialog = new FileDialog(shell);
       dialog.open();
   }
}
QuitHandler.java
package org.o7planning.tutorial.rcp.handler;
import org.eclipse.e4.core.di.annotations.Execute;
import org.eclipse.e4.ui.workbench.IWorkbench;
import org.eclipse.jface.dialogs.MessageDialog;
import org.eclipse.swt.widgets.Shell;
public class QuitHandler {
@Execute
public void execute(IWorkbench workbench, Shell shell){
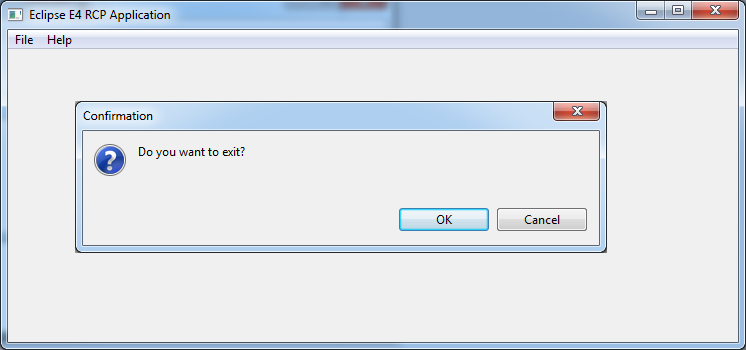
if (MessageDialog.openConfirm(shell, "Confirmation",
"Do you want to exit?")) {
workbench.close();
}
}
}SaveHandler.java
package org.o7planning.tutorial.rcp.handler;

import org.eclipse.e4.core.di.annotations.CanExecute;
import org.eclipse.e4.core.di.annotations.Execute;
import org.eclipse.e4.ui.workbench.modeling.EPartService;

public class SaveHandler {

   @CanExecute
   public boolean canExecute(EPartService partService) {
       if (partService != null) {
           return !partService.getDirtyParts().isEmpty();
       }
       return false;
   }

   @Execute
   public void execute(EPartService partService) {
       partService.saveAll(false);
   }
}
Declaring Handler classes with applications.
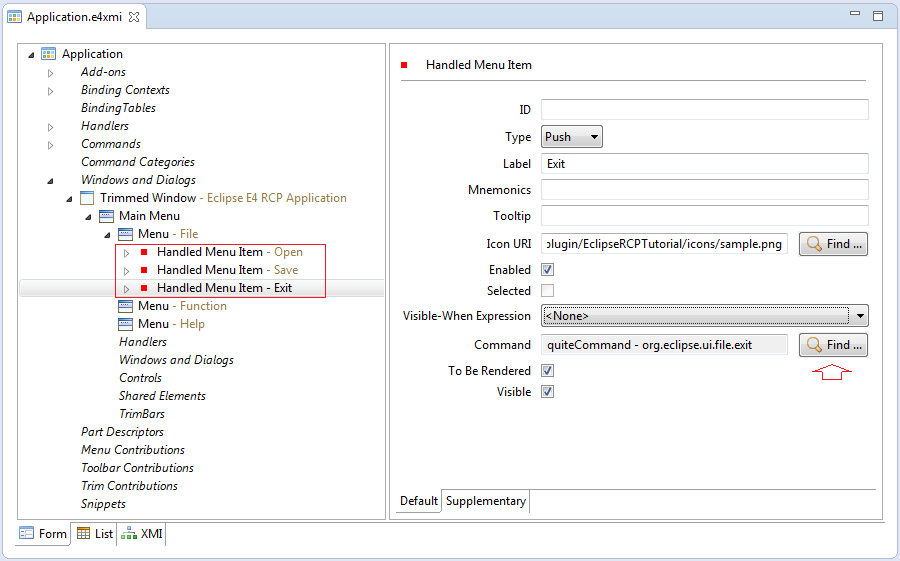
Declaring a Handler with Application, you must declare the ID, Handler class and Command.
For example, the user closes the application by clicking the menuItem Exit, the MenuItem associated with quiteCommand, QuiteHandler is class handling for this command (as declared above), class QuiteHandler will ask users really want to close the application or not, if yes, quiteCommand Command will be executed.
For example, the user closes the application by clicking the menuItem Exit, the MenuItem associated with quiteCommand, QuiteHandler is class handling for this command (as declared above), class QuiteHandler will ask users really want to close the application or not, if yes, quiteCommand Command will be executed.
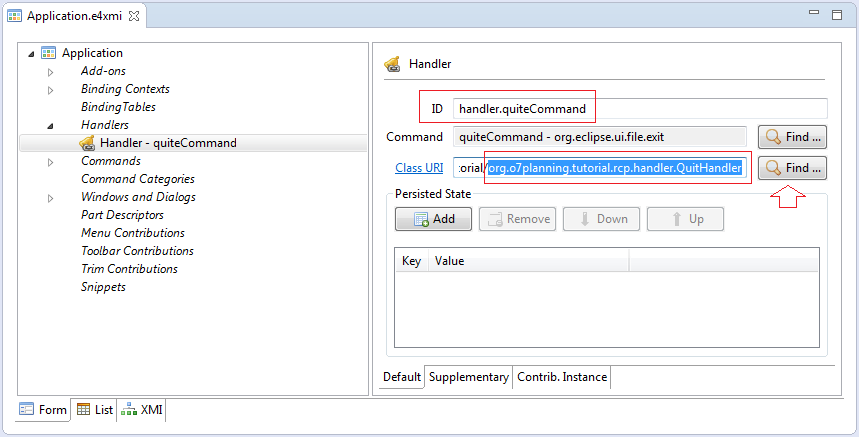
Similarly declare other Handler.
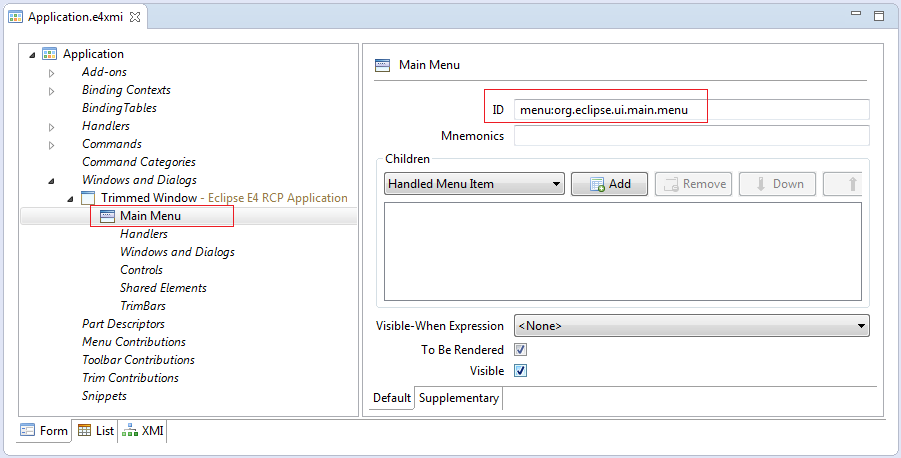
6. Create Menus
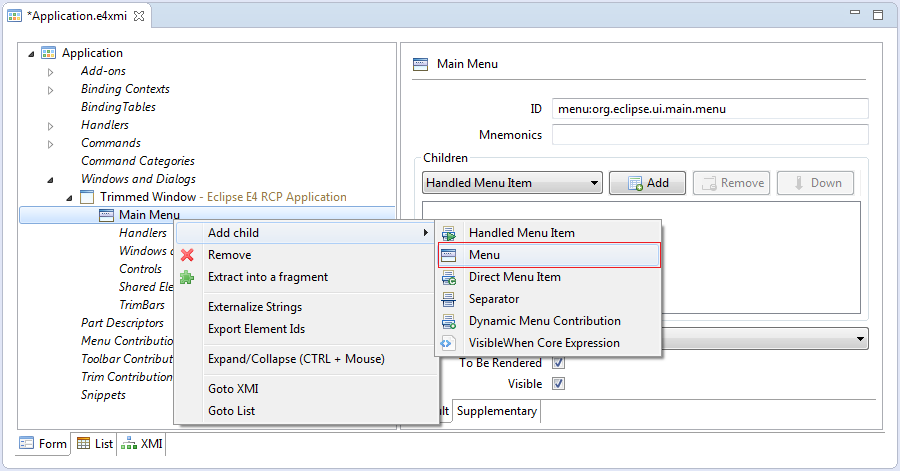
Create Main Menu:
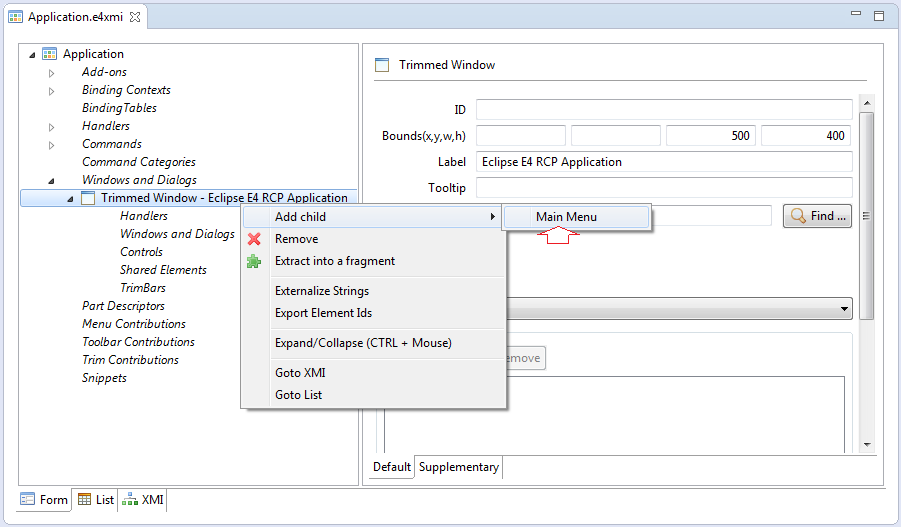
Enter the ID of Main Menu, It must be named: menu:org.eclipse.ui.main.menu
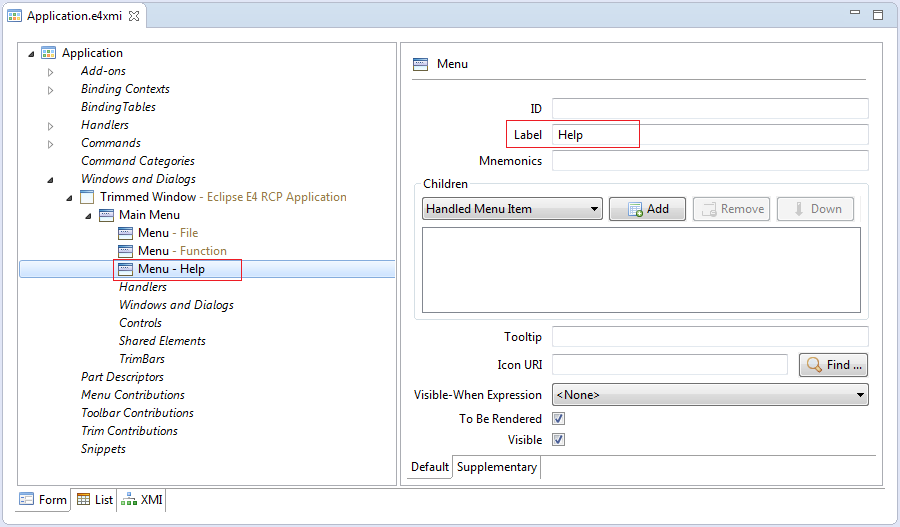
Create 3 submenus:
- File, Function, Help
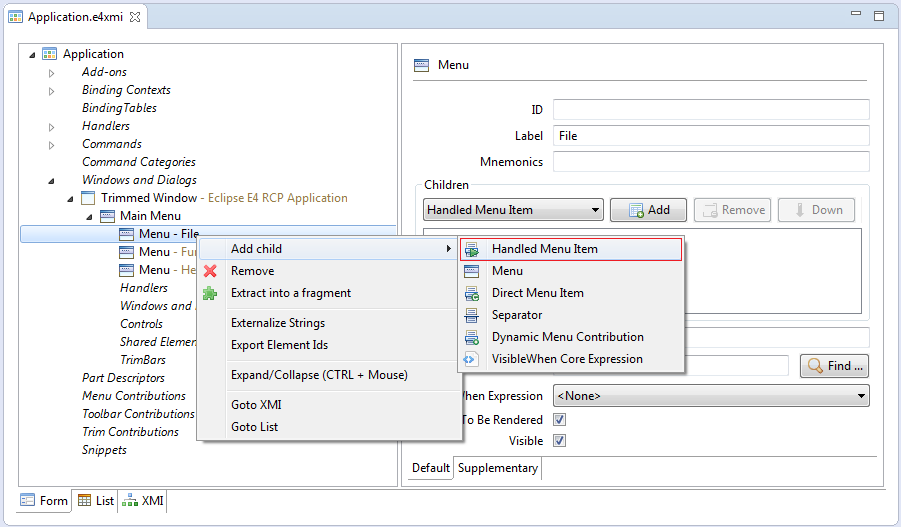
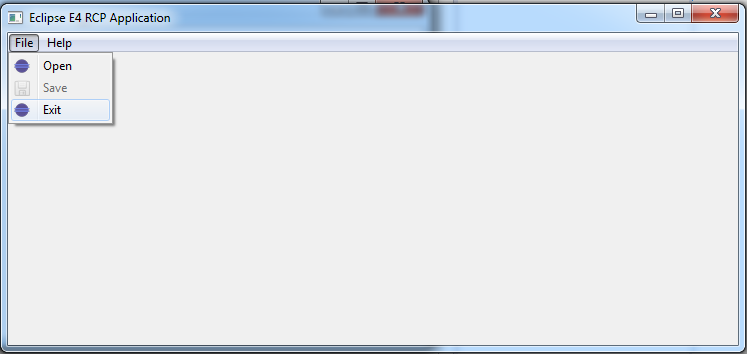
Create submenus of File menu.
- Open
- Save
- Exit
Rerun your application:
7. Create Toolbar
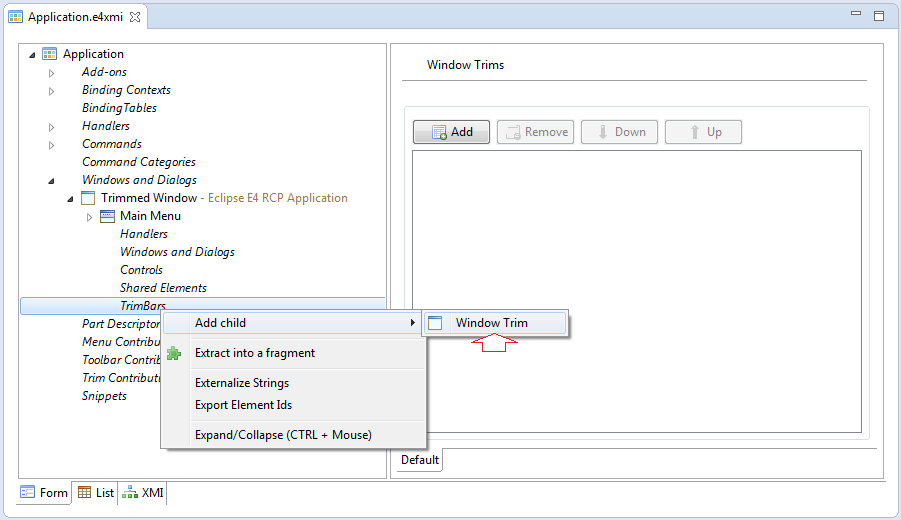
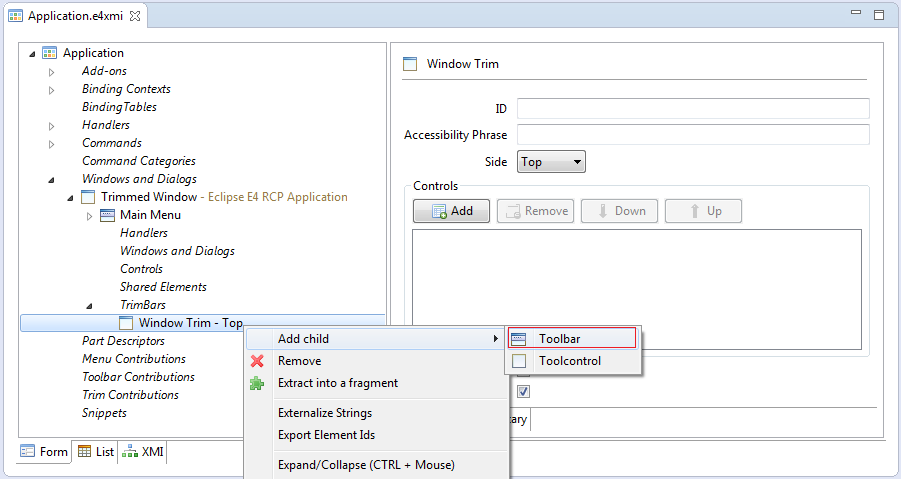
Create Main Toolbar, with ID:
- ID: toolbar:org.eclipse.ui.main.toolbar
Add 2 Toolitem: open & save

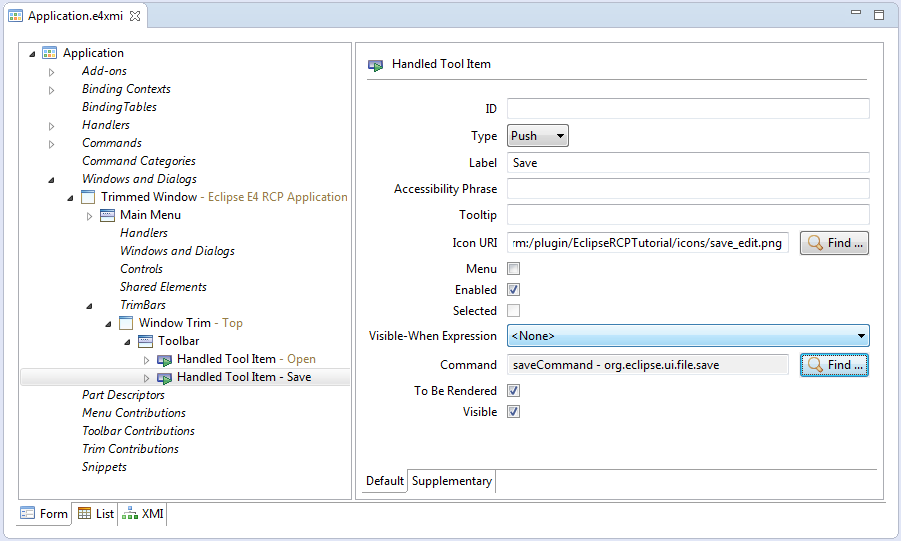
Rerun your application:
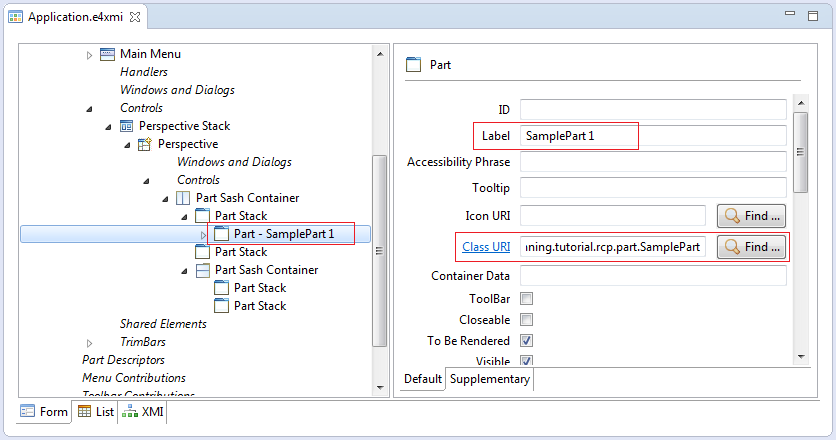
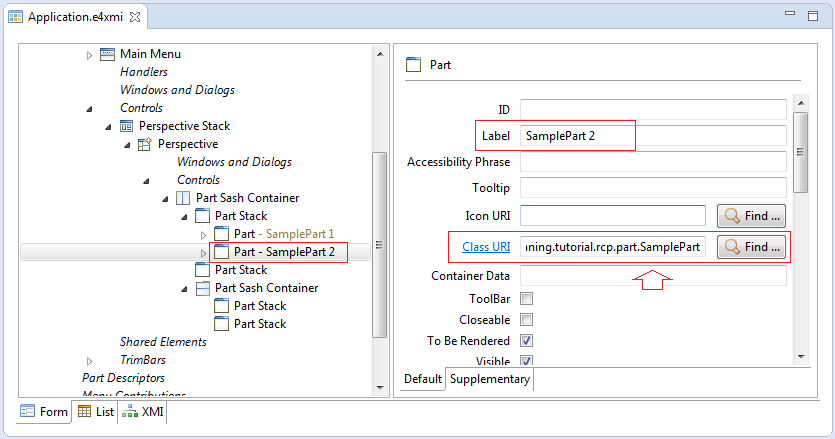
8. Part
SamplePart.java
/*******************************************************************************
* Copyright (c) 2010 - 2013 IBM Corporation and others.
* All rights reserved. This program and the accompanying materials
* are made available under the terms of the Eclipse Public License v1.0
* which accompanies this distribution, and is available at
* http://www.eclipse.org/legal/epl-v10.html
*
* Contributors:
* IBM Corporation - initial API and implementation
* Lars Vogel <lars.Vogel@gmail.com> - Bug 419770
*******************************************************************************/
package org.o7planning.tutorial.rcp.part;
import javax.annotation.PostConstruct;
import javax.inject.Inject;
import org.eclipse.e4.ui.di.Focus;
import org.eclipse.e4.ui.di.Persist;
import org.eclipse.e4.ui.model.application.ui.MDirtyable;
import org.eclipse.jface.viewers.TableViewer;
import org.eclipse.swt.SWT;
import org.eclipse.swt.events.ModifyEvent;
import org.eclipse.swt.events.ModifyListener;
import org.eclipse.swt.layout.GridData;
import org.eclipse.swt.layout.GridLayout;
import org.eclipse.swt.widgets.Composite;
import org.eclipse.swt.widgets.Text;
public class SamplePart {
private Text txtInput;
private TableViewer tableViewer;
@Inject
private MDirtyable dirty;
@PostConstruct
public void createComposite(Composite parent) {
parent.setLayout(new GridLayout(1, false));
txtInput = new Text(parent, SWT.BORDER);
txtInput.setMessage("Enter text to mark part as dirty");
txtInput.addModifyListener(new ModifyListener() {
@Override
public void modifyText(ModifyEvent e) {
dirty.setDirty(true);
}
});
txtInput.setLayoutData(new GridData(GridData.FILL_HORIZONTAL));
tableViewer = new TableViewer(parent);
tableViewer.add("Sample item 1");
tableViewer.add("Sample item 2");
tableViewer.add("Sample item 3");
tableViewer.add("Sample item 4");
tableViewer.add("Sample item 5");
tableViewer.getTable().setLayoutData(new GridData(GridData.FILL_BOTH));
}
@Focus
public void setFocus() {
tableViewer.getTable().setFocus();
}
@Persist
public void save() {
dirty.setDirty(false);
}
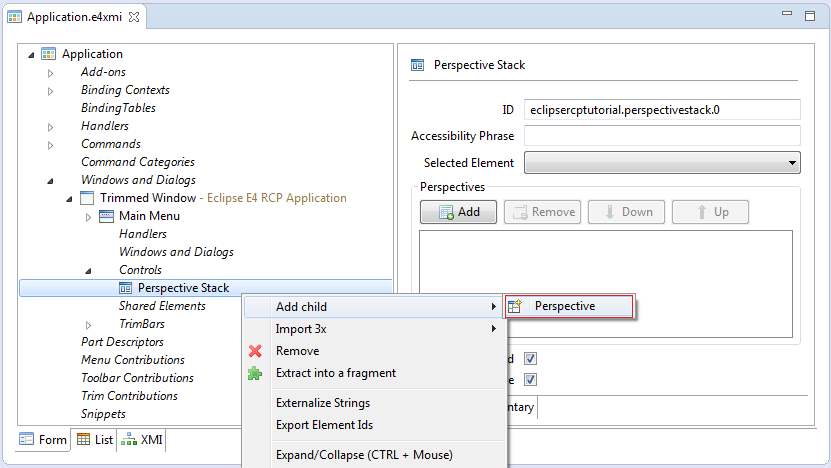
}Add new PerspectiveStack. This is a stack, it can contain the perspective.
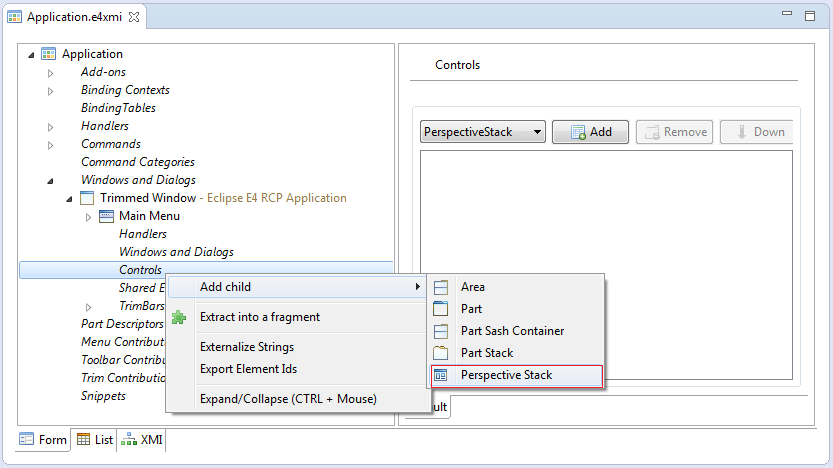
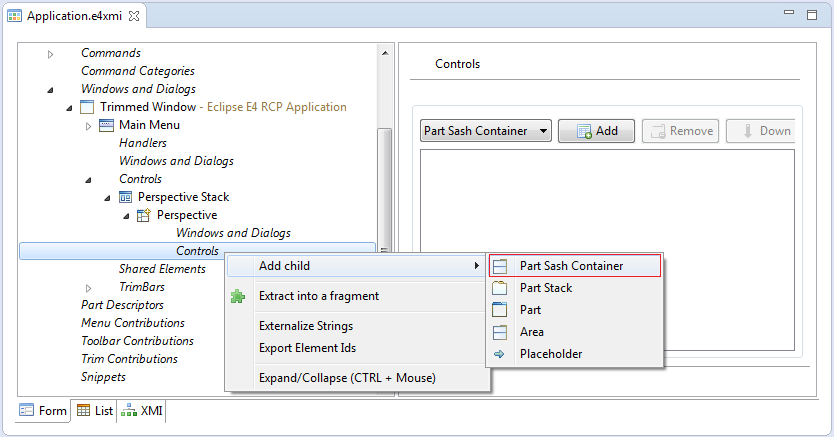
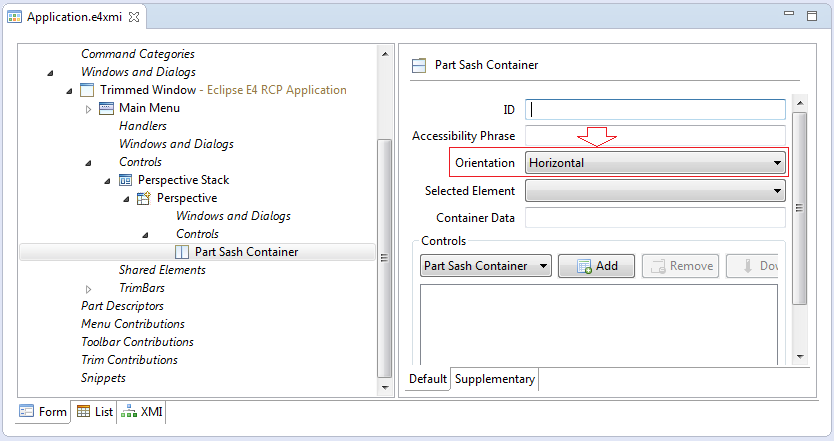
Add new Perspective:
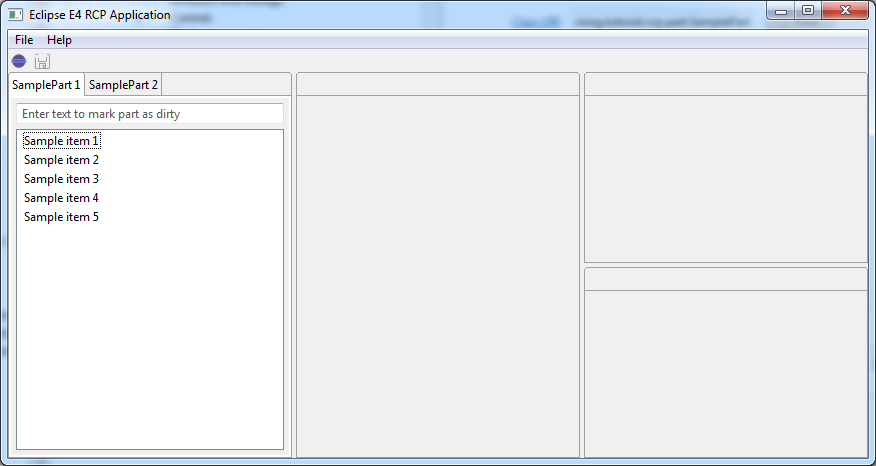
Rerun Application:
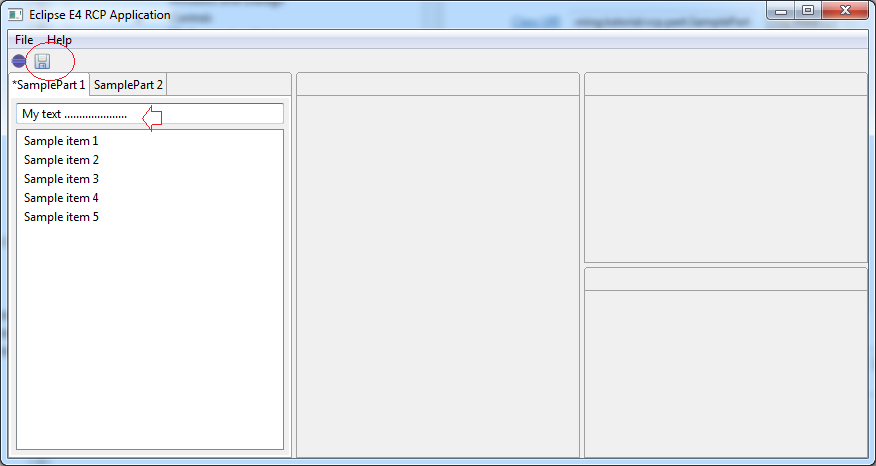
The change in the Part, may do SAVE button lights up.
Eclipse RCP
- Which Platform Should You Choose for Developing Java Desktop Applications?
- Programming Java Desktop Application Using SWT
- Eclipse RCP 4 Tutorial for Beginners - e4 Workbench Application
- Package and Deploy Desktop Application SWT/RCP
- Eclipse RCP 3 Tutorial for Beginners - Workbench Application
- Install e4 Tools Developer Resources for Eclipse
- Simple Eclipse RCP 3 Application - View and Editor integration
Show More
Eclipse Technology
- How to get the open source Java libraries as OSGi(s)
- Install Tycho for Eclipse
- Java OSGi Tutorial for Beginners
- Create Java OSGi project with Maven and Tycho
- Install WindowBuilder for Eclipse
- Which Platform Should You Choose for Developing Java Desktop Applications?
- Programming Java Desktop Application Using SWT
- Eclipse JFace Tutorial with Examples
- Install e4 Tools Developer Resources for Eclipse
- Package and Deploy Desktop Application SWT/RCP
- Install Eclipse RAP Target Platform
- Install EMF for Eclipse
- Install RAP e4 Tooling for Eclipse
- Create Eclipse RAP Widget from ClientScripting-based widget
- Install GEF for Eclipse
- Eclipse RAP Tutorial for Beginners - Workbench Application (OLD)
- Eclipse RCP 3 Tutorial for Beginners - Workbench Application
- Simple Eclipse RCP 3 Application - View and Editor integration
- Eclipse RCP 4 Tutorial for Beginners - e4 Workbench Application
- Install RAP Tools for Eclipse
- Eclipse RAP Tutorial for Beginners - Basic Application
- Eclipse RAP Tutorial for Beginners - e4 Workbench Application
- Package and deploy Eclipse RAP application
Show More