Eclipse RAP Tutorial for Beginners - Basic Application
2. The installation requires
First ensure that you have installed "RAP Tools". If not installed you can see at:
3. Create Rap Target Platform Project (Declare RAP Library)
First, you need to create RAPTarget Project, to declare RAP library
You can see the instructions at:
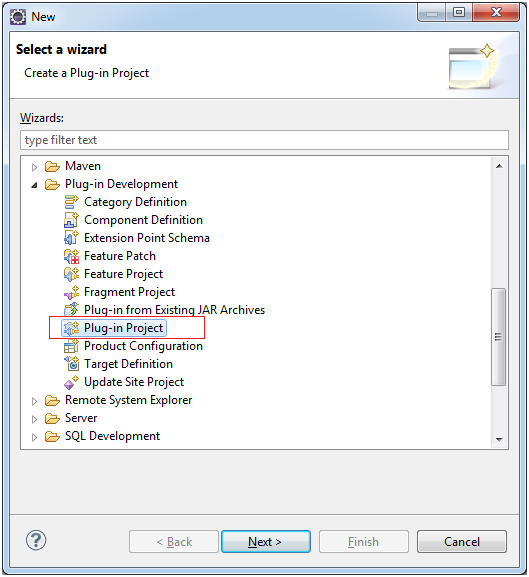
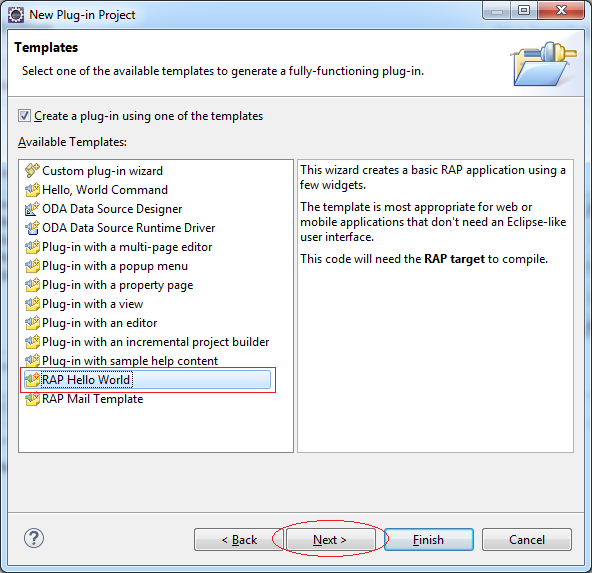
4. Create Basic rap Project
In Eclipse, Select:
- File/New/Other..
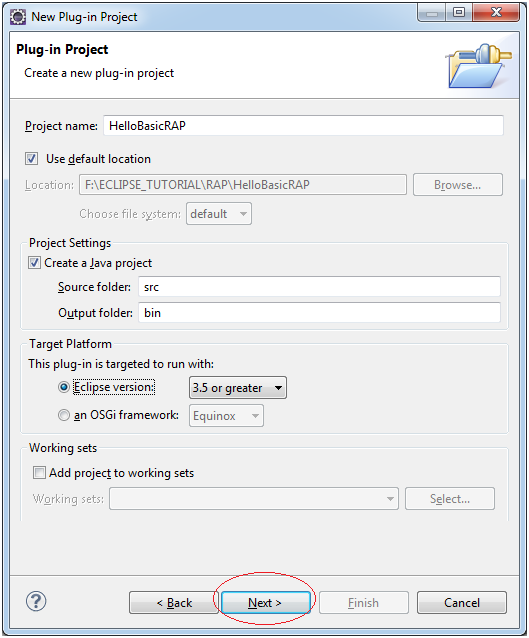
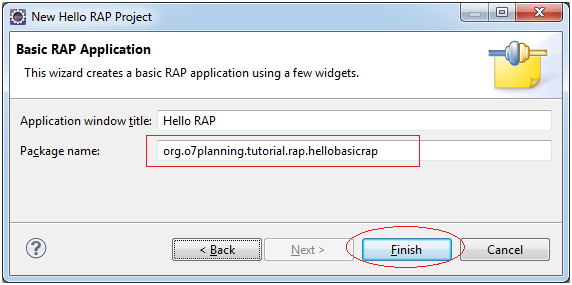
Type Project Name:
- HelloBasicRAP
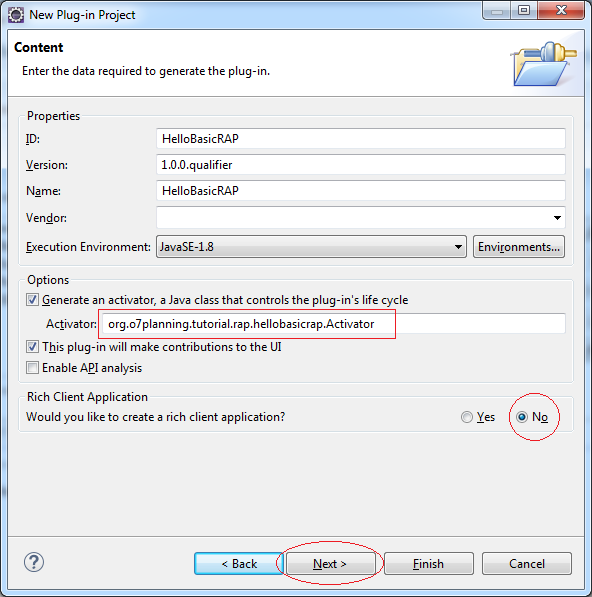
- org.o7planning.tutorial.rap.hellobasicrap.Activator
In raise up Template Dialog, select "Rap Hello World", aim to create a RAP Project is available in template of Eclipse.
Note : If you do not install RAP Tools such step above, will not have this Template you choose.
Type package name use in project.
- org.o7planning.tutorial.rap.hellobasicrap
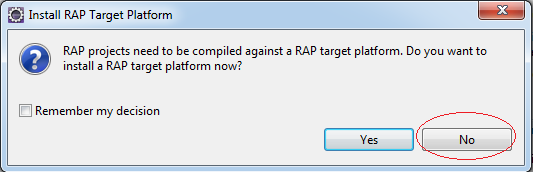
Project was created. Eclipse asks if you want to install "RAP Target platform" or not, press NO.
If the project generated get an error message as shown below, it means that "RAP Target Platform" do not have effect for project that you just created.
Open file: RAPTarget.target and click "Set as Target Platform".
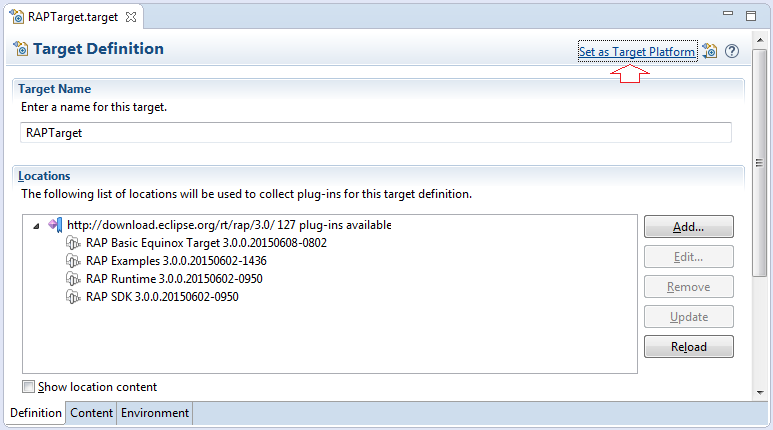
Now, Your project has no error.
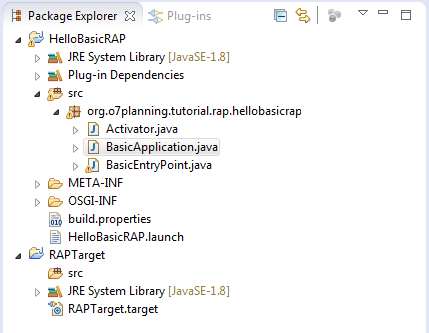
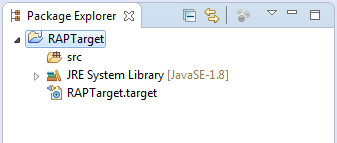
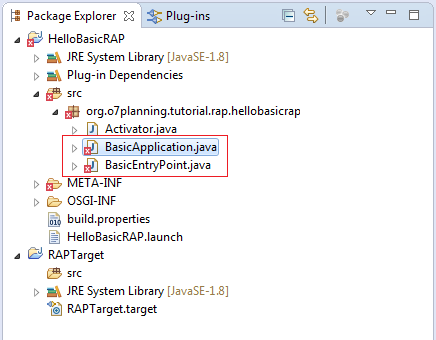
5. View the structure of the project
Now we see the structure of the project is created:
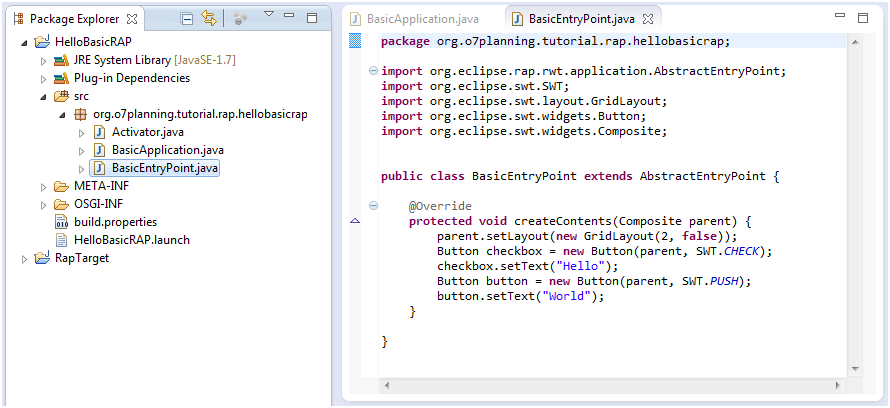
Class BasicEntryPoint is a web page.
BasicEntryPoint.java
package org.o7planning.tutorial.rap.hellobasicrap;

import org.eclipse.rap.rwt.application.AbstractEntryPoint;
import org.eclipse.swt.SWT;
import org.eclipse.swt.layout.GridLayout;
import org.eclipse.swt.widgets.Button;
import org.eclipse.swt.widgets.Composite;


public class BasicEntryPoint extends AbstractEntryPoint {

   @Override
   protected void createContents(Composite parent) {
       parent.setLayout(new GridLayout(2, false));
       Button checkbox = new Button(parent, SWT.CHECK);
       checkbox.setText("Hello");
       Button button = new Button(parent, SWT.PUSH);
       button.setText("World");
   }

}
Meanwhile BasicApplication declare the path to access to the EntryPoint.
You can see the page BasicEntryPoint will be accessed by:
You can see the page BasicEntryPoint will be accessed by:
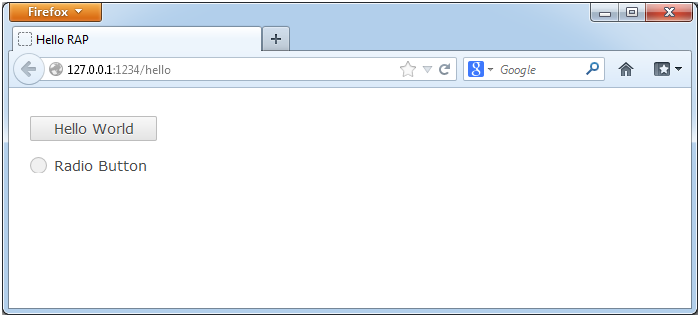
- http://<host>:<port>/hello
Thus, this class show you how to declare the EntryPoint. In fact, there are many ways to declare so. You can declare EntryPoint in plugin.xml
BasicApplication.java
import org.eclipse.rap.rwt.application.Application;
import org.eclipse.rap.rwt.application.ApplicationConfiguration;
import org.eclipse.rap.rwt.client.WebClient;
public class BasicApplication implements ApplicationConfiguration {
public void configure(Application application) {
Map<String, String> properties = new HashMap<String, String>();
properties.put(WebClient.PAGE_TITLE, "Hello RAP");
application.addEntryPoint("/hello", BasicEntryPoint.class, properties);
}
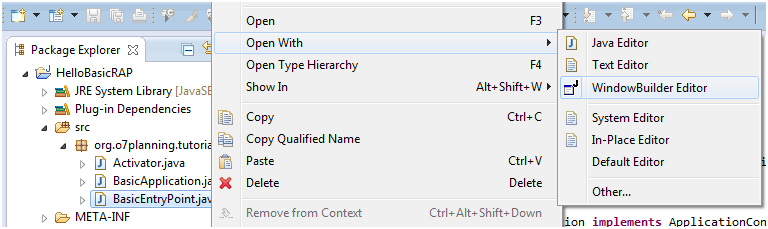
}Open class BasicEntryPoint with WindowBuilder.
Note: You can view the installation guide WindowBuilder into Eclipse here:
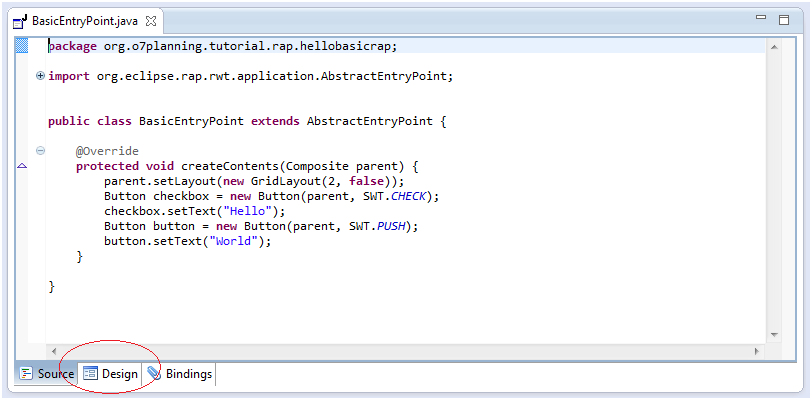
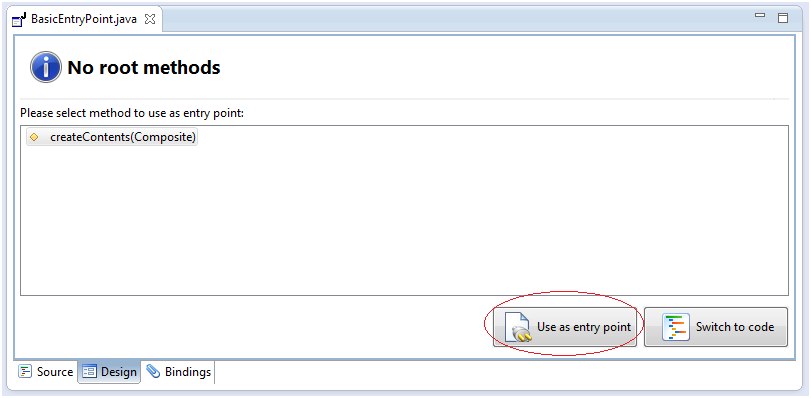
If inside the Design window, notice WindowBuilder not understand where it is beginning to draw the interface. Please click the "Use as entry point" and back to Source Tab.
Back to the Source tab and edit the code:
BasicEntryPoint.java
package org.o7planning.tutorial.rap.hellobasicrap;

import java.util.HashMap;
import java.util.Map;

package org.o7planning.tutorial.rap.hellobasicrap;

import org.eclipse.rap.rwt.application.AbstractEntryPoint;
import org.eclipse.swt.SWT;
import org.eclipse.swt.layout.FillLayout;
import org.eclipse.swt.widgets.Composite;


public class BasicEntryPoint extends AbstractEntryPoint {

 /**
  * @wbp.parser.entryPoint
  */
@Override
protected void createContents(Composite parent) {
   // if you want open with WindowBuilder.
   // Change code like:
    parent.setLayout(new FillLayout());
    Composite root= new Composite(parent,SWT.NONE) ;
}

}
Now, you can designed this page in the WindowBuilder:
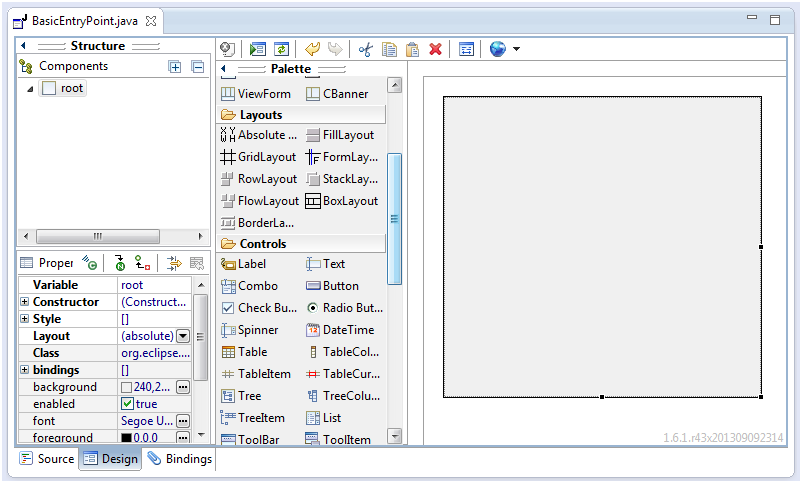
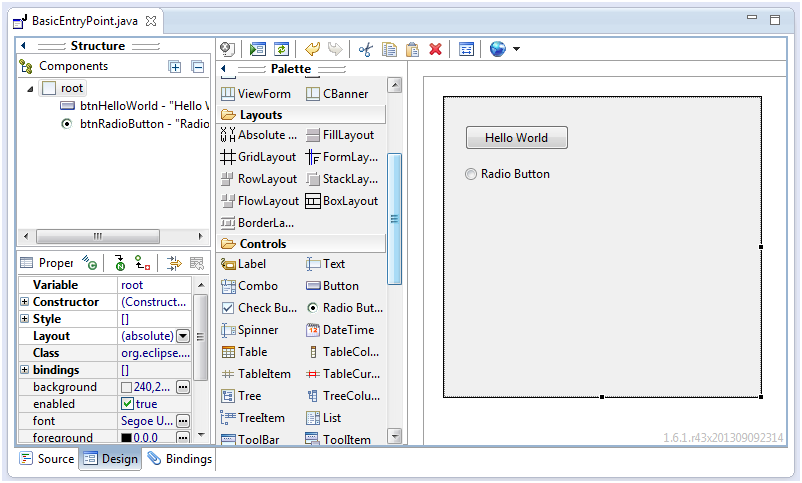
Drag and drop a few components in the interface. WindowBuilder code will be generated. If you are not familiar with the WindowBuilder you can learn how to use it. In this document I only guide RAP. And now we config to run this RAP Application.
6. Run RAP Application
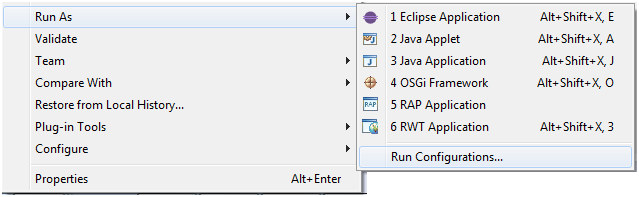
Right-click on HelloBasicRAP and select "Run As/RAP Application"

In the case fail to run.
Right-click on the HelloBasicRAP project , select "Run As/Run Configurations .."
Right-click on the HelloBasicRAP project , select "Run As/Run Configurations .."
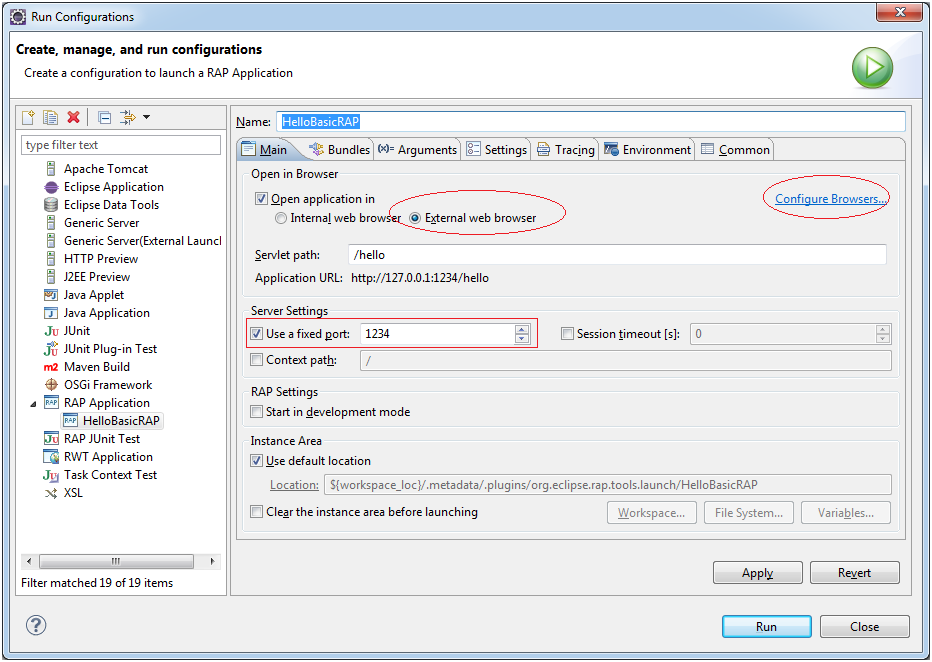
You can configure to your web page runs on some port, here I choose 1234, and Firefox browser.
Switch to Bundles TAB, make sure that the Bundle below is selected.
Next, click on "Add Required Bundles" to RAP automatically calculates the dependent Bundle, it will automatically check on these dependent Bundles.
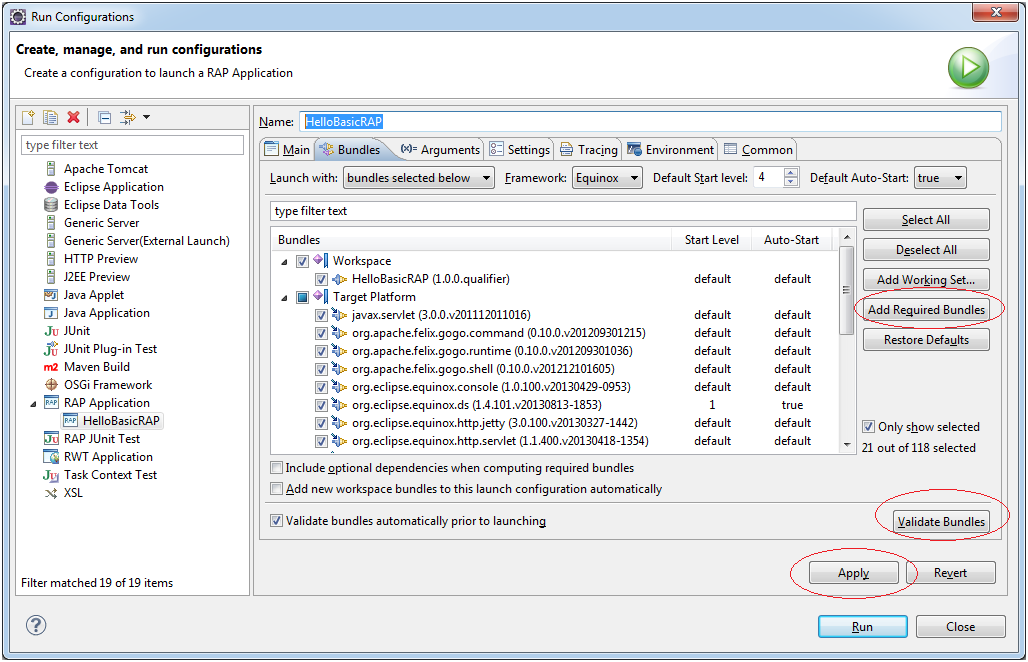
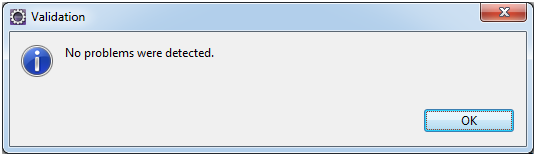
If the validation is successful, you will receive notification "no problem was detected". Click Apply and Close the configuration window.
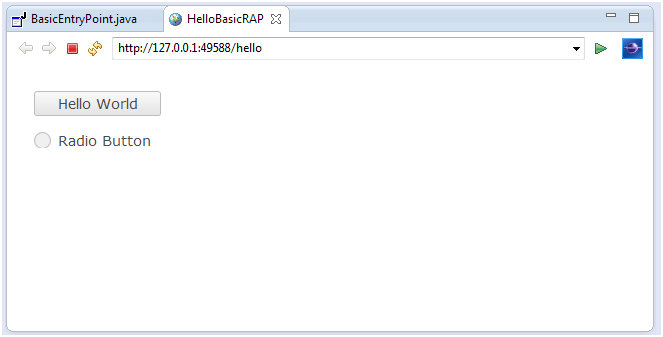
Now run your project

Eclipse RAP
- Package and deploy Eclipse RAP application
- Eclipse RAP Tutorial for Beginners - Basic Application
- Install RAP Tools for Eclipse
- Which Platform Should You Choose for Developing Java Desktop Applications?
- Eclipse RAP Tutorial for Beginners - e4 Workbench Application
- Install Eclipse RAP Target Platform
- Eclipse RAP Tutorial for Beginners - Workbench Application (OLD)
- Create Eclipse RAP Widget from ClientScripting-based widget
- Install RAP e4 Tooling for Eclipse
Show More
Eclipse Technology
- How to get the open source Java libraries as OSGi(s)
- Install Tycho for Eclipse
- Java OSGi Tutorial for Beginners
- Create Java OSGi project with Maven and Tycho
- Install WindowBuilder for Eclipse
- Which Platform Should You Choose for Developing Java Desktop Applications?
- Programming Java Desktop Application Using SWT
- Eclipse JFace Tutorial with Examples
- Install e4 Tools Developer Resources for Eclipse
- Package and Deploy Desktop Application SWT/RCP
- Install Eclipse RAP Target Platform
- Install EMF for Eclipse
- Install RAP e4 Tooling for Eclipse
- Create Eclipse RAP Widget from ClientScripting-based widget
- Install GEF for Eclipse
- Eclipse RAP Tutorial for Beginners - Workbench Application (OLD)
- Eclipse RCP 3 Tutorial for Beginners - Workbench Application
- Simple Eclipse RCP 3 Application - View and Editor integration
- Eclipse RCP 4 Tutorial for Beginners - e4 Workbench Application
- Install RAP Tools for Eclipse
- Eclipse RAP Tutorial for Beginners - Basic Application
- Eclipse RAP Tutorial for Beginners - e4 Workbench Application
- Package and deploy Eclipse RAP application
Show More