- Introduction
- Install Tomcat Web Server
- Create Project to start with JSP
- Configuring Tomcat Web Server and run WebApp
- The relationship between the JSP and Servlet
- The examples with JSP
- JSP Directive
- JSP Standard Actions
- JSP Expression Language
- Form Processing
- Cookie handling
- Install Web Tools Platform into Eclipse
- Taglibs
- Create a Simple Web application using Servlet, JSP and JDBC
Java JSP Tutorial for Beginners
1. Introduction
Tài liệu này được viết dựa trên:
Eclipse 4.6 (NEON)
Tomcat Web Server 8.x
To begin with this document, you need to have the knowledge of Servlet. You can reference it at:
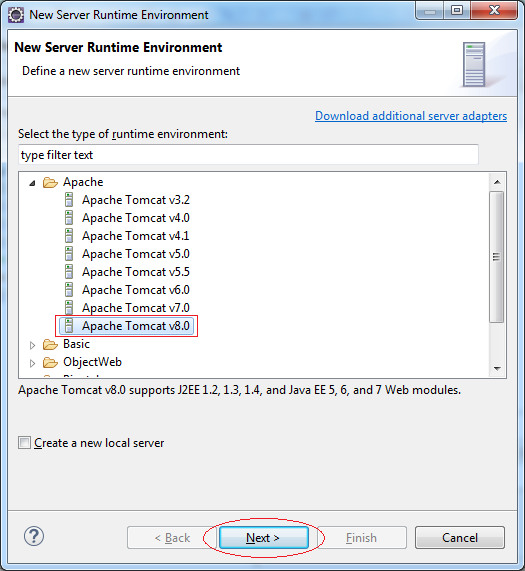
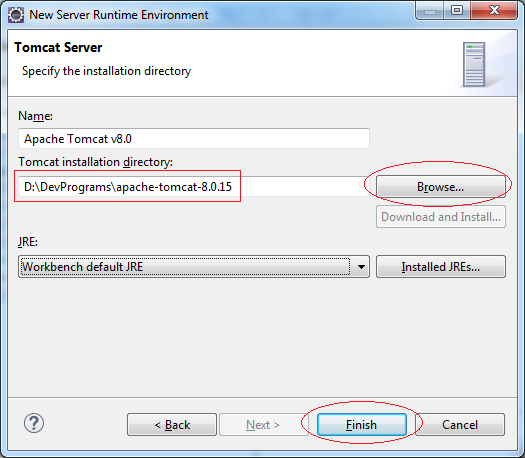
2. Install Tomcat Web Server
To begin with JSP, you need to download Tomcat Web Server and declare it with Eclipse. You can see the instructions here:
3. Create Project to start with JSP
In Eclipse select:
- File/New/Project...
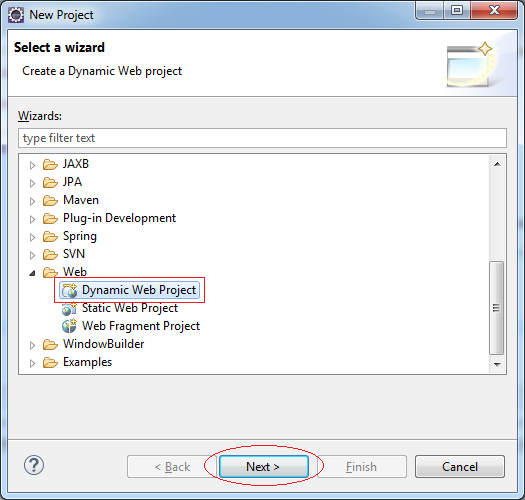
Enter:
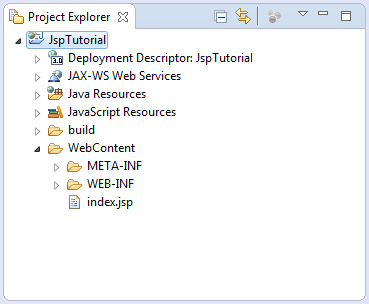
- Project name: JspTutorial
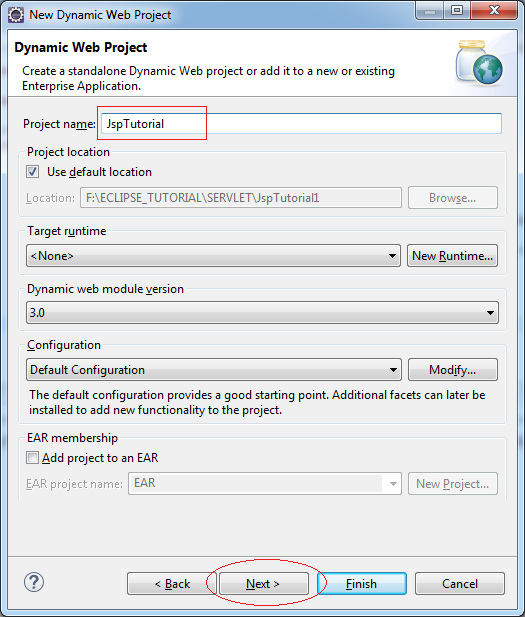

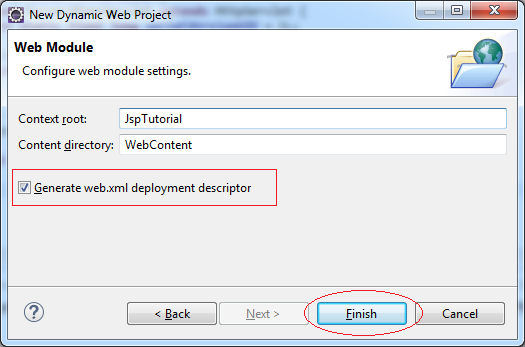
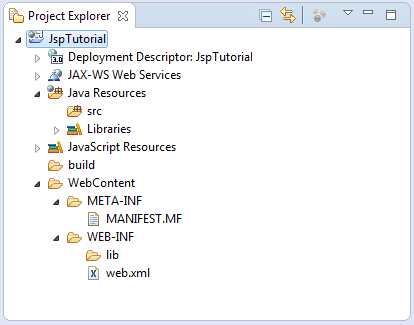
Your Project was created
Create jsp file:
- File/New/Other...
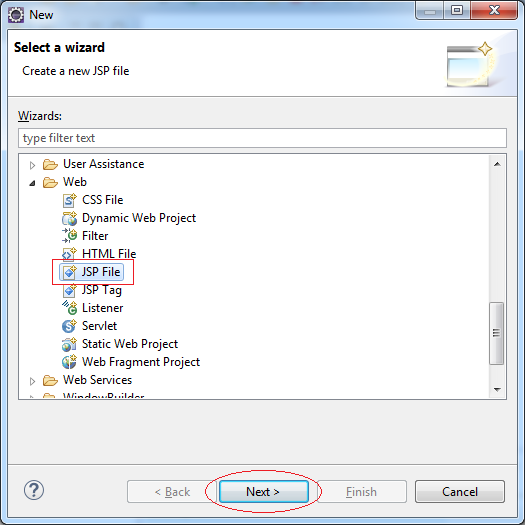
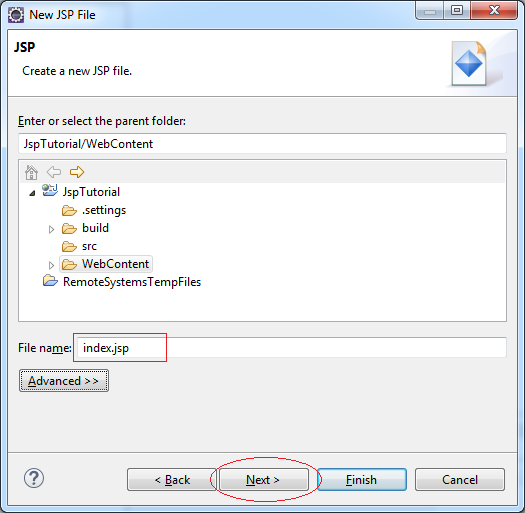
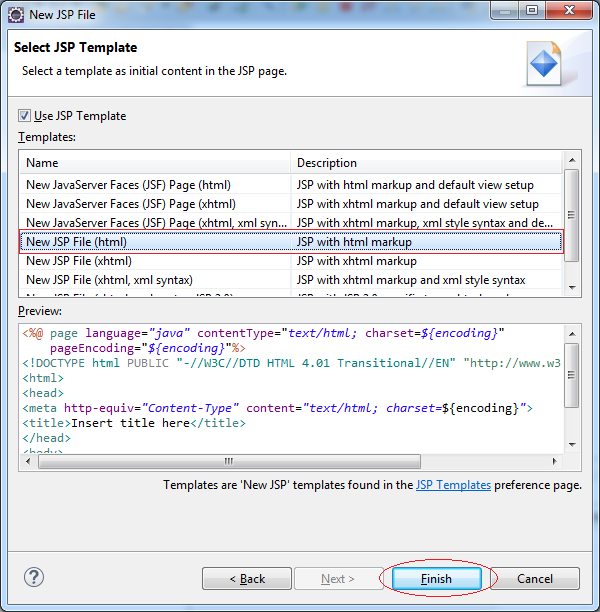
index.jsp file is created, but there is a notification of error. Don't worry about that. It is the result of not declaring Servlet library. We will use the Servlet library of Tomcat,along with its configuration of Web Server to run this Project.
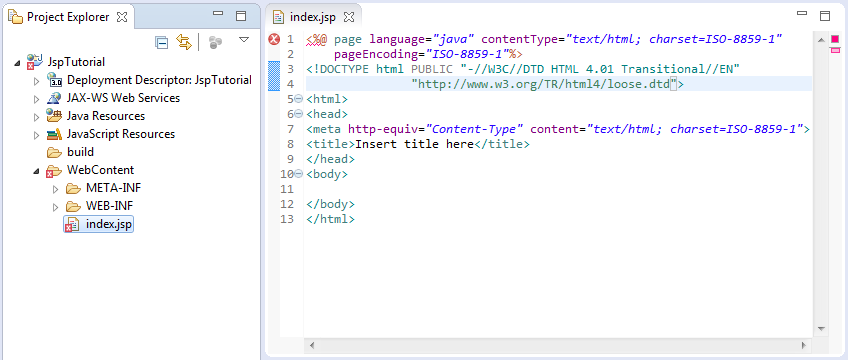
Edit content index.jsp file:
index.jsp
<%@ page language="java" contentType="text/html; charset=ISO-8859-1"
pageEncoding="ISO-8859-1"%>
<!DOCTYPE html PUBLIC "-//W3C//DTD HTML 4.01 Transitional//EN"
"http://www.w3.org/TR/html4/loose.dtd">
<html>
<head>
<meta http-equiv="Content-Type" content="text/html; charset=ISO-8859-1">
<title>Insert title here</title>
</head>
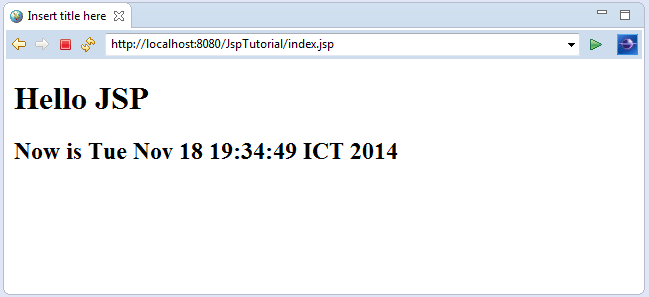
<body>
<h1>Hello JSP</h1>
<%
java.util.Date date = new java.util.Date();
%>
<h2>
Now is
<%=date.toString()%>
</h2>
</body>
</html>4. Configuring Tomcat Web Server and run WebApp
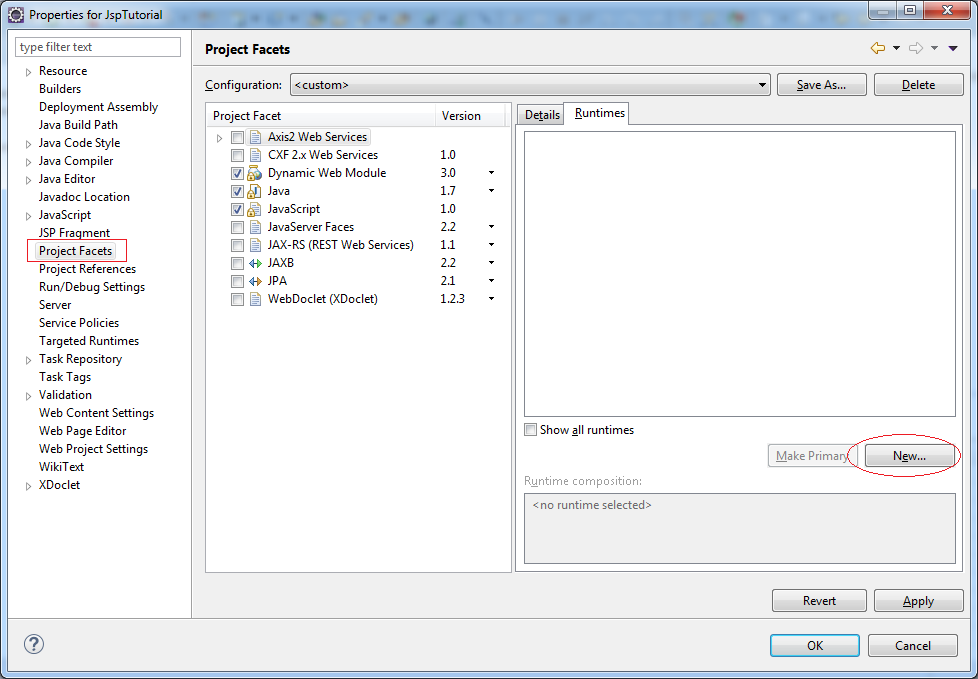
Right-click the JspTutorial project and select Properties
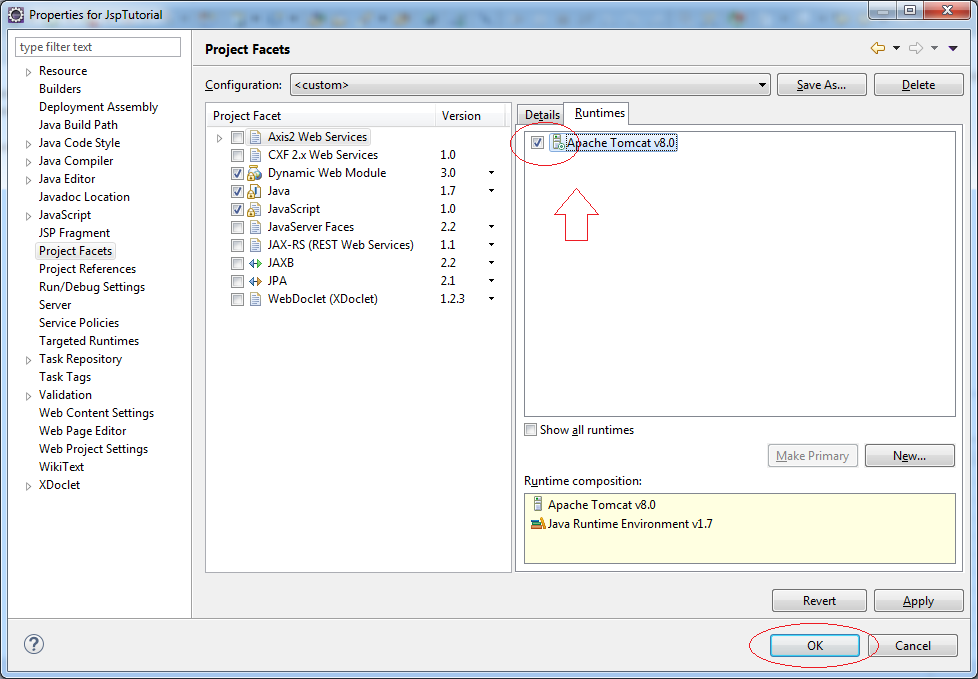
Now, Project has no error notified.
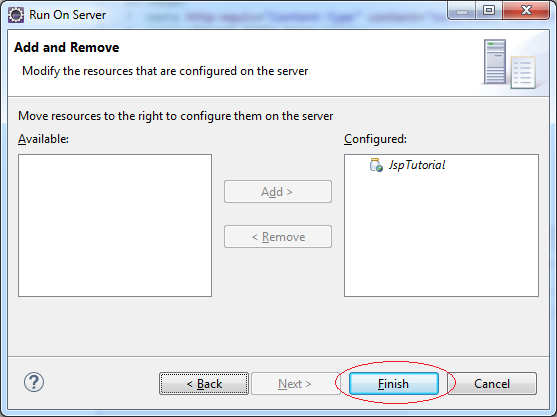
Right-click the Project and select Run As/Run on Server.


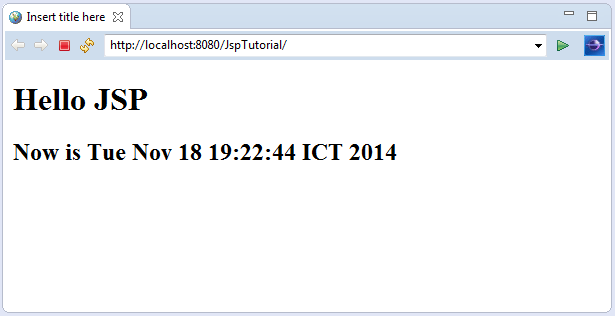
The results run the application:
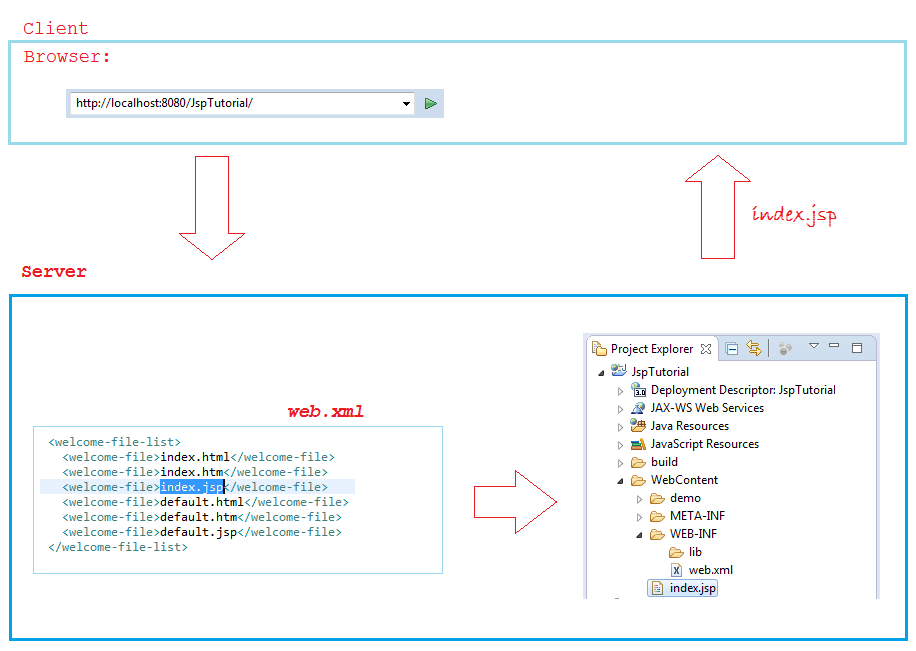
This is the flow of the program:
5. The relationship between the JSP and Servlet
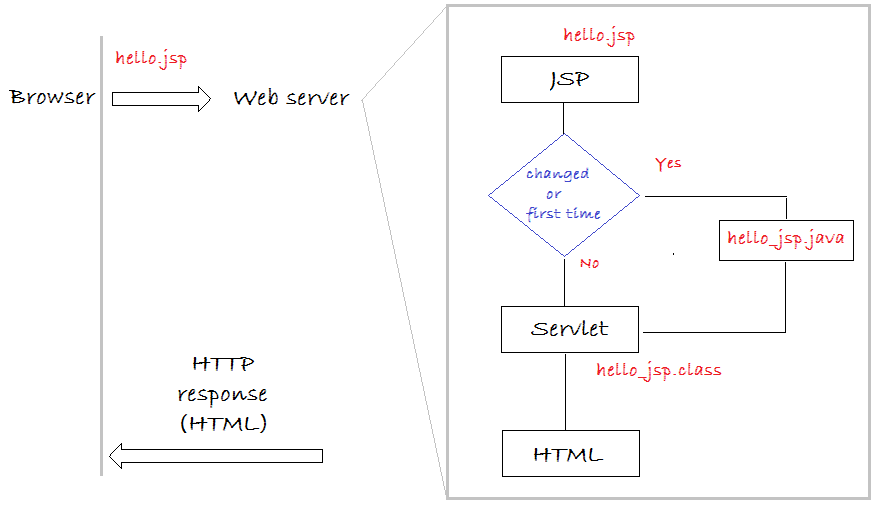
When user send a request to a JSP page, for example, hello.jsp:
At the first time, Web Server will change hello.jsp page to hello_jsp.java file, and compile it to hello_java.class. This is a Servlet, and it will create HTML in response to user's request.
From second request onwards, it will check hello.jsp file for any change. If there is no change, it will call servlet (hello_jsp.class) and reply with HTML data to user. If there is some change, it will recreate hello_jsp.java and recompile it to hello_jsp.class file.
So when you change jsp files you do not need to rerun the Web Server.
6. The examples with JSP
Predefined Variables in JSP
Import declaration:
<!-- Import declaration -->
<%@ page import="java.util.*, java.text.*"  %>

<%@ page import="java.util.List, java.text.*" %>
Predefined Variables in JSP, you are ready to use:
request: javax.servlet.http.HttpServletRequest
response: javax.servlet.http.HttpServletResponse
out: javax.servlet.jsp.JspWriter
response: javax.servlet.http.HttpServletResponse
out: javax.servlet.jsp.JspWriter
<%
// Using out variable:
out.println("<h1>Now is "+ new Date()+"</h1>");
// Using request variable:
String serverName= request.getServerName();
// Using response variable:
response.sendRedirect("http://eclipse.org");
%>
Java code within HTML (JSP)
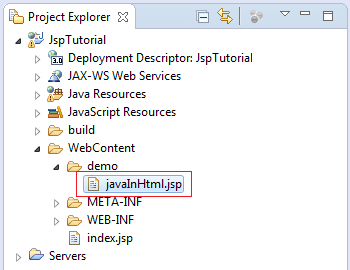
Create jsp file:
- demo/javaInHtml.jsp
javaInHtml.jsp
<%@ page import="java.util.Random,java.text.*"%>
<html>
<head>
<meta http-equiv="Content-Type" content="text/html; charset=ISO-8859-1">
<title>Java In HTML</title>
</head>
<body>
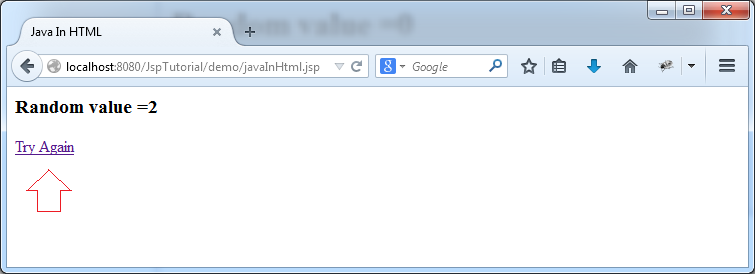
<%
Random random = new Random();
// Returns a random number (0, 1 or 2)
int randomInt = random.nextInt(3);
if (randomInt == 0) {
%>
<h1>Random value =<%=randomInt%></h1>
<%
} else if (randomInt == 1) {
%>
<h2>Random value =<%=randomInt%></h2>
<%
} else {
%>
<h3>Random value =<%=randomInt%></h3>
<%
}
%>
<a href="<%= request.getRequestURI() %>">Try Again</a>
</body>
</html>Run URL:
You can see HTML code of a page on its browser. The following illustrative image is a print screen of Firefox's browser.

Defining methods in JSP, using the <%! %>
In essence, JSP is finally compiled to Servlet (a class). Thus, JSP also allows you to create methods inside it. Methods are declared inside <%! %>
<%!
public int sum(int a, int b)  {
return a + b;
}
public void exampleMethod()  {
  // Code here
}
%>
methodInJsp.jsp
<%!
  public int sum(int a, int b) {
      return a + b;
  }
%>
<html>
<head>
<meta http-equiv="Content-Type" content="text/html; charset=UTF-8">
<title>Method in JSP</title>
</head>
<body>
  <h1>
      1 + 2 =    <%=sum(1, 2)%>
  </h1>
</body>
</html>
7. JSP Directive
JSP directives provide directions and instructions to the container, telling it how to handle certain aspects of JSP processing.
Directive | Description |
<%@ page ... %> | Defines page-dependent attributes, such as scripting language, error page, and buffering requirements. |
<%@ include ... %> | Includes a file during the translation phase. |
<%@ taglib ... %> | Declares a tag library, containing custom actions, used in the page. |
JSP Directive <%@ page .. %>
Directive page is used to provide instructions relating to current JSP pages for container. You can have directive page code wherever in your JSP page. By convention, directive page is placed on the top of JSP page.
Attribute | Purpose / Example |
buffer | Specifies a buffering model for the output stream. |
autoFlush | Controls the behavior of the servlet output buffer. |
contentType | Defines the character encoding scheme. |
contentType | contentType="text/html;charset=UTF8" |
errorPage | Defines the URL of another JSP that reports on Java unchecked runtime exceptions. |
errorPage | errorPage = "error.jsp" |
isErrorPage | Indicates if this JSP page is a URL specified by another JSP page's errorPage attribute. |
extends | Specifies a superclass that the generated servlet must extend |
extends | extends = "mypackage.MyServlet" |
import | Specifies a list of packages or classes for use in the JSP as the Java import statement does for Java classes. |
import | import="java.io.*, java.utils.List" |
info | Defines a string that can be accessed with the servlet's getServletInfo() method. |
info | info = "Login Page" |
isThreadSafe | Defines the threading model for the generated servlet. |
language | Defines the programming language used in the JSP page. |
language | language = "java" |
session | Specifies whether or not the JSP page participates in HTTP sessions |
isELIgnored | Specifies whether or not EL expression within the JSP page will be ignored. |
isScriptingEnabled | Determines if scripting elements are allowed for use. |
For example, use the errorPage attribute in Directive <%@ page ... %>
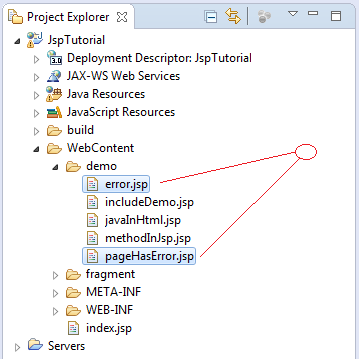
pageHasError.jsp
<%@ page language="java" contentType="text/html; charset=UTF-8"
  pageEncoding="UTF-8" errorPage ="error.jsp"%>
<%@ page errorPage ="error.jsp"%>
<html>
<head>
<meta http-equiv="Content-Type" content="text/html; charset=UTF-8">
<title>Page has Error</title>
</head>
<body>
  <h2>Page has Error</h2>
  <%
      // Error divided by 0
      int i = 1000 / 0;
  %>
</body>
</html>
error.jsp
<%@ page isErrorPage="true" import="java.io.*" %>
<html>
<head>
<meta http-equiv="Content-Type" content="text/html; charset=UTF-8">
<title>Error</title>
</head>
<body>
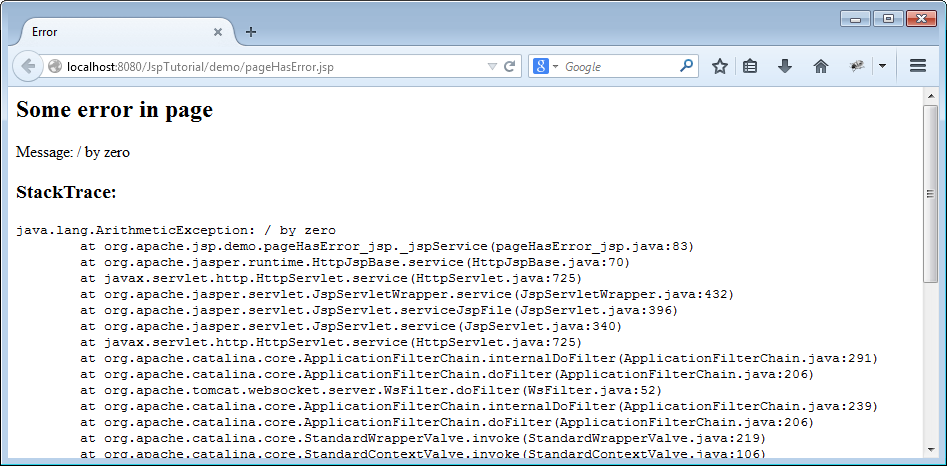
<h2>Some error in page</h2>
Message:
<%=exception.getMessage()%>
<h3>StackTrace:</h3>
<%
StringWriter stringWriter = new StringWriter();
PrintWriter printWriter = new PrintWriter(stringWriter);
exception.printStackTrace(printWriter);
out.println("<pre>");
out.println(stringWriter);
out.println("</pre>");
printWriter.close();
stringWriter.close();
%>
</body>
</html>The results run pageHasError.jsp
JSP Directive <%@ include ... %>
JSP allows you to embed content of files into JSP at the time when JSP page is turned into Servlet.
Example:
<!-- Syntax -->
<%@ include file="url" %>
<!-- Example -->
<%@ include file = "header.html" %>
<%@ include file = "footer.html" %>
<!-- You can also embed a different JSP page -->
<%@ include file = "fragment.jsp" %>
we see examples below:
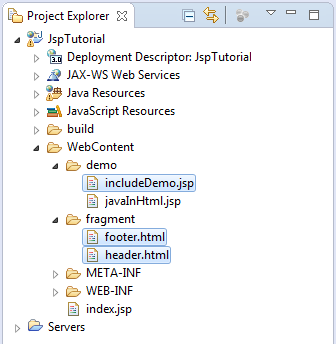
header.html
<div style="background: #E0E0E0; height: 80px; padding: 5px;">
  <div style="float: left">
      <h1>My Site</h1>
  </div>
  <div style="float: right; padding: 10px;">
      Search <input name="search">
  </div>
</div>
footer.html
<div
style="background: #E0E0E0; text-align: center; padding: 5px; margin-top: 10px;">
@Copyright mysite.com
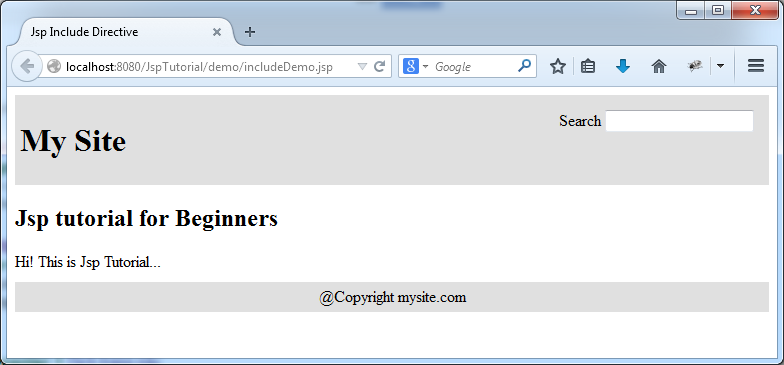
</div>includeDemo.jsp
<%@ page import="java.util.Random,java.text.*"%>
<html>
<head>
<meta http-equiv="Content-Type" content="text/html; charset=UTF-8">
<title>Jsp Include Directive</title>
</head>
<body>
  <%@ include file="../fragment/header.html"%>
  <h2>Jsp tutorial for Beginners</h2>
  Hi! This is Jsp Tutorial...
  <%@ include file="../fragment/footer.html"%>
</body>
</html>
Run URL:
JSP Directive <%@ taglib .. %>
Used to declare customized tags in this JSP page. This part will be discussed in more detail in "Advanced JSP" document.
8. JSP Standard Actions
Standard Actions are actions that are defined in JSP itself, it need not be declared with a "taglib" directive. All the Standard Actions in JSP has a default prefix "jsp".
Thus, in essence, JSP Standard Actions is available extensive tags of JSP. By convention, they are integrated in JSP page and you needn't declare TAGLIB by declaring Directive <%@ taglib ... %>
The following is the list of Standard Actions in JSP.
Thus, in essence, JSP Standard Actions is available extensive tags of JSP. By convention, they are integrated in JSP page and you needn't declare TAGLIB by declaring Directive <%@ taglib ... %>
The following is the list of Standard Actions in JSP.
Syntax | Purpose |
jsp:include | Includes a file at the time the page is requested |
jsp:useBean | Finds or instantiates a JavaBean |
jsp:setProperty | Sets the property of a JavaBean |
jsp:getProperty | Inserts the property of a JavaBean into the output |
jsp:forward | Forwards the requester to a new page |
jsp:plugin | Generates browser-specific code that makes an OBJECT or EMBED tag for the Java plugin |
jsp:element | Defines XML elements dynamically. |
jsp:attribute | The jsp:attribute element allows you to define the value of a tag attribute in the body of an XML element instead of in the value of an XML attribute. |
jsp:body | Defines dynamically defined XML element's body. |
jsp:text | Use to write template text in JSP pages and documents. |
JSP Action jsp:include ..
<jsp:include ..> allows you to embed a page in JSP at the time of request. On the contrary, Directive <%@ include %> embeds a file in JSP at the time when it interprets JSP to Servlet.
See example:
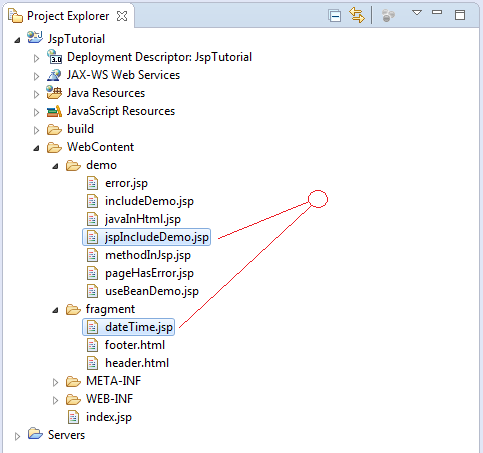
dateTime.jsp
<%@ page import="java.util.Date,java.text.*"%>
<%
  Date now = new Date();
  DateFormat df = new SimpleDateFormat("dd-MM-yyyy HH:mm:ss SSS");
%>
<h4>Current Time:</h4>
<%=df.format(now)%>
jspIncludeDemo.jsp
<html>
<head>
<meta http-equiv="Content-Type" content="text/html; charset=UTF-8">
<title>JSP Action jsp:include</title>
</head>
<body>
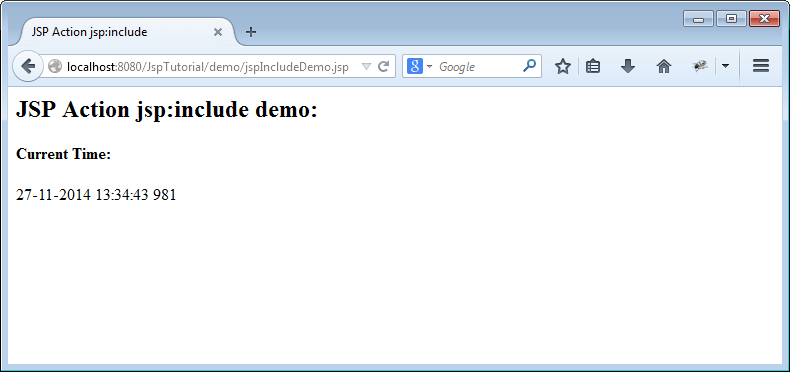
<h2>JSP Action jsp:include demo:</h2>
<jsp:include page="../fragment/dateTime.jsp"></jsp:include>
</body>
</html>The results run jspIncludeDemo.jsp:
JSP Action jsp:useBean ..
View example:

HelloBean.java
package org.o7planning.tutorial.jsp.beans;

public class HelloBean {
   private String name;
  // Class is required default constructor.
   public HelloBean() {
   }
   public String getName() {
       return name;
   }
   public void setName(String name) {
       this.name = name;
   }
   public String getHello() {
       if (name == null) {
           return "Hello every body";
       }
       return "Hello " + name;
   }
}
useBeanDemo.jsp
<html>
<head>
<meta http-equiv="Content-Type" content="text/html; charset=UTF-8">
<title>Use Bean</title>
</head>
<body>
<jsp:useBean id="helloBean"
class="org.o7planning.tutorial.jsp.beans.HelloBean"></jsp:useBean>
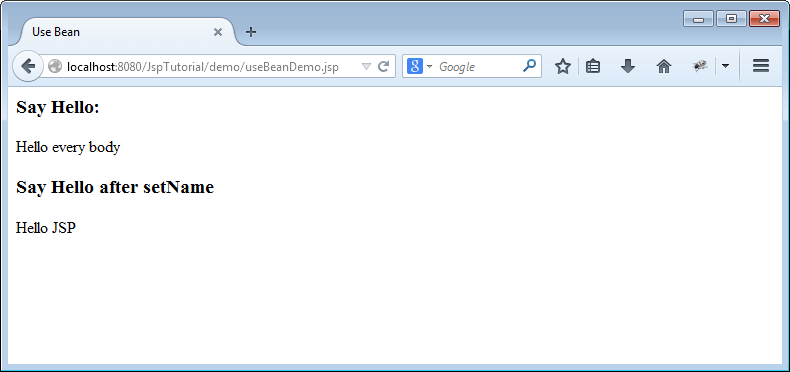
<h3>Say Hello:</h3>
<jsp:getProperty name="helloBean" property="hello" />
<!-- Set property name for helloBean -->
<jsp:setProperty name="helloBean" property="name" value="JSP"/>
<h3>Say Hello after setName</h3>
<jsp:getProperty name="helloBean" property="hello" />
</body>
</html>Result of running example:
JSP Action jsp:element-jsp:attribute-jsp:body
In some situations, you want to reply to user with xml data in exchange for HTML data. Using the combination of <jsp:element>, <jsp:attribute>, and <jsp:body> makes code easy to see. Let's see the following example of these combination.
JSP inherently is a file with HTML tags. Thus, it is best to use HTML tags or JSP custom tags instead of inserting Java code in JSP. This makes code obvious.
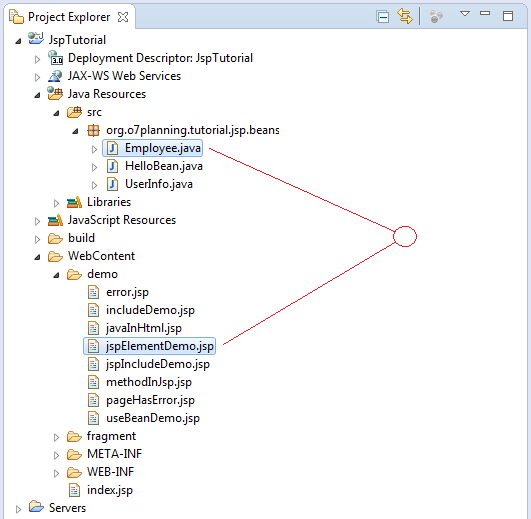
Employee.java
package org.o7planning.tutorial.jsp.beans;

public class Employee {

  private String empNo;
  private String empName;

  public Employee() {

  }

  public String getEmpNo() {
      return empNo;
  }

  public void setEmpNo(String empNo) {
      this.empNo = empNo;
  }

  public String getEmpName() {
      return empName;
  }

  public void setEmpName(String empName) {
      this.empName = empName;
  }

}
jspElementDemo.jsp
<?xml version="1.0" ?>
<%@ page pageEncoding="UTF-8"%>
<jsp:element name="data">
<h3>Please view source of this page</h3>
<%-- Create Employee object and setting value for its fields --%>
<jsp:useBean id="emp"
class="org.o7planning.tutorial.jsp.beans.Employee">
<jsp:setProperty name="emp" property="empNo" value="E01" />
<jsp:setProperty name="emp" property="empName" value="Smith" />
</jsp:useBean>
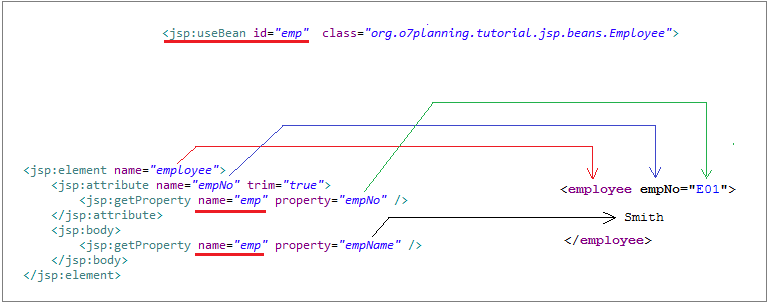
<jsp:element name="employee">
<jsp:attribute name="empNo" trim="true">
<jsp:getProperty name="emp" property="empNo" />
</jsp:attribute>
<jsp:body>
<jsp:getProperty name="emp" property="empName" />
</jsp:body>
</jsp:element>
</jsp:element>Run URL:
And view the source code in the browser:
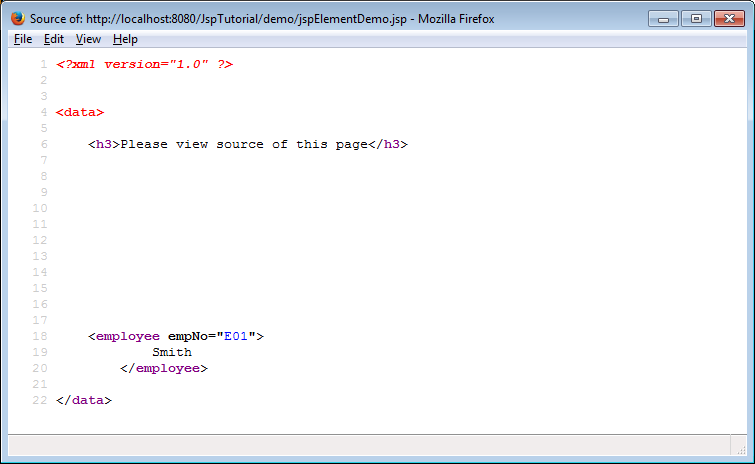
You can see the explanation in the following illustrative image.
Let's see JSP code in the situation when there is an absence of jsp:element/attribute/body tags.
<?xml version="1.0" ?>
<%@ page pageEncoding="UTF-8"%>
<data>
  <h3>Please view source of this page</h3>
  <%--  Create Employee and set value for its fields --%>
  <jsp:useBean id="emp"
      class="org.o7planning.tutorial.jsp.beans.Employee">
      <jsp:setProperty name="emp" property="empNo" value="E01" />
      <jsp:setProperty name="emp" property="empName" value="Smith" />
  </jsp:useBean>
  <employee empNo="<%=emp.getEmpNo()%>">
      <%=emp.getEmpName()%>
  </employee>
</data>
9. JSP Expression Language
JSP Expression Language (EL) makes it possible to easily access application data stored in JavaBeans components. JSP EL allows you to create expressions both (a) arithmetic and (b) logical. Within a JSP EL expression, you can use integers, floating point numbers, strings, the built-in constants true and false for boolean values, and null.
JSP EL is added to JSP from version 2.0. It is a way of replacing the usage of expression tag <%=expression%>. You should use JSP EL in lieu of using JSP Expression Tag wherever you can at JSP page.
Syntax:
Syntax:
${expression}In this document (JPS for beginners), I introduce briefly JSP EL. You can see a detailed document of JSP EL at:
Let's see some examples:
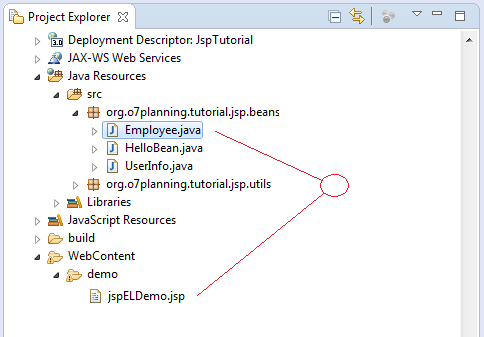
jspELDemo.jsp
<html>
<head>
<meta http-equiv="Content-Type" content="text/html; charset=UTF-8">
<title>JSP Expression Language Demo</title>
</head>
<body>
<jsp:useBean id="emp"
class="org.o7planning.tutorial.jsp.beans.Employee">
<jsp:setProperty name="emp" property="empNo" value="E01" />
<jsp:setProperty name="emp" property="empName" value="Smith" />
</jsp:useBean>
<br>
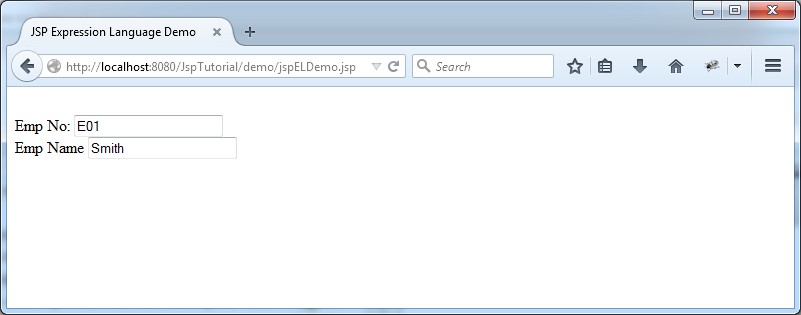
Emp No: <input type="text" value = "${emp.empNo}">
<br>
Emp Name <input type="text" value = "${emp.empName}">
</body>
</html>The results:
10. Form Processing
Processing Form is one of the most important things when you work with web applications. Here are two files participating in this example:
- formHtml.html
- formProcessing.jsp
Note: This is an example for illustration, in fact you should process Form by a Servlet rather than JSP. JSP should be considered as simply display the content.
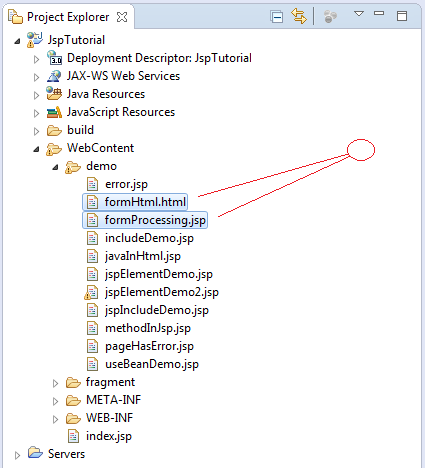
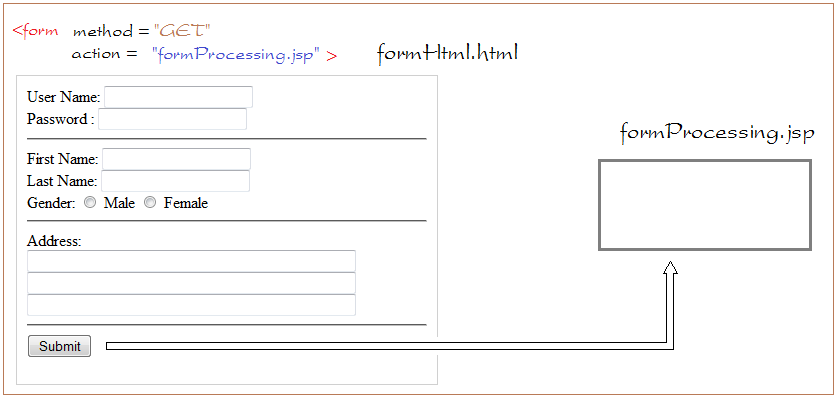
User will enter information on a form at formHtml.html and send that information to formProcessing.jsp.
formHtml.html
<html>
<head>
<meta http-equiv="Content-Type" content="text/html; charset=UTF-8">
<title>Html Form</title>
</head>
<body>
<h3>User Register</h3>
<div style="border:1px solid #D0D0D0;width:400px;padding:10px;">
    <form method = "GET" action="formProcessing.jsp">
        User Name: <input type="text" name="userName" value="">
        <br>
        Password : <input type="password" name="password" value="">
        <hr>
        First Name: <input type="text" name="firstName">
        <br>
        Last Name: <input type="text" name="lastName">
        <br>
        Gender: <input type="radio" name="gender" value ="M"> Male
                <input type="radio" name="gender" value="F"> Female
        <hr>
        Address:
        <br>
        <input type="text" name="address" size="50">
        <input type="text" name="address" size="50">
        <input type="text" name="address" size="50">
        <hr>
        <input type="submit" value="Submit">
    </form>
</div>
</body>
</html>
formProcessing.jsp
<html>
<head>
<meta http-equiv="Content-Type" content="text/html; charset=ISO-8859-1">
<title>Form Processing</title>
</head>
<body>
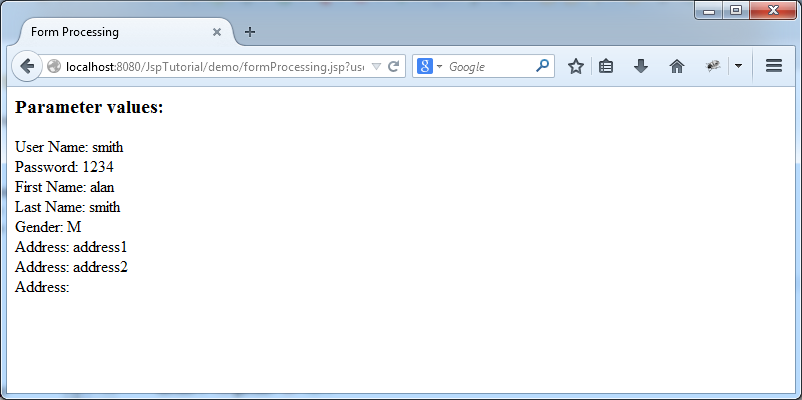
<h3>Parameter values:</h3>
<%
String userName = request.getParameter("userName");
String password = request.getParameter("password");
String firstName = request.getParameter("firstName");
String lastName = request.getParameter("lastName");
String gender = request.getParameter("gender");
String[] addresses = request.getParameterValues("address");
%>
User Name: <%=userName %> <br>
Password: <%=password %> <br>
First Name: <%=firstName %> <br>
Last Name: <%=lastName %> <br>
Gender: <%=gender %> <br>
<% if (addresses!= null) {
for(String address: addresses) {
%>
Address: <%=address %> <br>
<% } } %>
</body>
</html>Get method
Code of formHtml.html file shows that the current method attribute of form is GET.
<!-- Form using GET method -->
<form method="GET" action="formProcessing.jsp">

 .....
<!-- When you click Submit, the data will be send to the formProcessing.jsp -->

 <input type="submit" value="Submit">

</form>
Run URL:
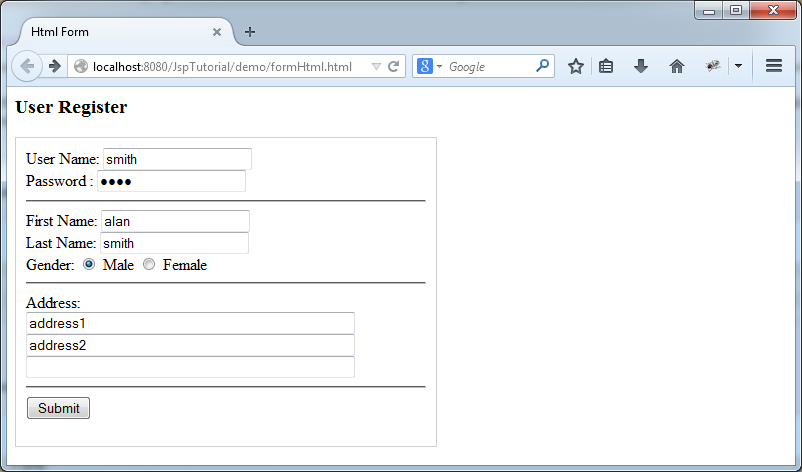
After entering data on the form, click on Submit. Browser will change to formProcessing.jsp page with an URL address enclosed with parameters. This results from the usage of GET method of form.
Post method
In case you change attribute method = "POST" on the <form>:
<!-- Form using POST method -->
<form method="POST" action="formProcessing.jsp">
.....
<!-- When you click Submit, the data will be send to the formProcessing.jsp -->
<input type="submit" value="Submit">
</form>
Run URL:
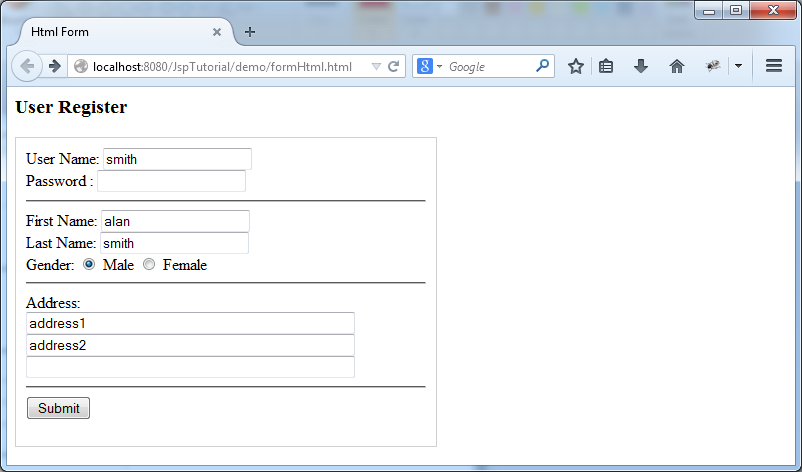
Enter data and click on Submit. Browser will change to formProcessing.jsp page, excluding parameters attached to URL, while data are subtly sent to formProcessing.jsp.
Form processing
formProcessing.jsp will get the data sent to it via getParameter(..), data can be attached on a URL (GET method), or included in the body of the request (POST method).
// Get the value of the parameter 'userName'
String userName = request.getParameter("userName");

// Get the list values of parameter 'address'
String[] addresses = request.getParameterValues("address");
After user enter data and click on Submit:
11. Cookie handling
Cookies are text files stored on the client computer and they are kept for various information tracking purpose. JSP transparently supports HTTP cookies using underlying servlet technology.
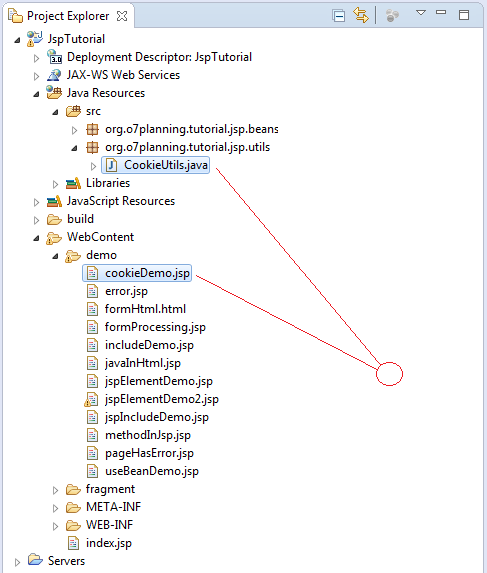
CookieUtils.java
package org.o7planning.tutorial.jsp.utils;
import java.io.IOException;
import java.text.DateFormat;
import java.text.SimpleDateFormat;
import java.util.Date;
import javax.servlet.http.Cookie;
import javax.servlet.http.HttpServletRequest;
import javax.servlet.http.HttpServletResponse;
import javax.servlet.jsp.JspWriter;
public class CookieUtils {
public static void demoUserCookie(HttpServletRequest request,
HttpServletResponse response, JspWriter out) throws IOException {
boolean found = false;
// Get an array of Cookies associated with this domain
Cookie[] cookies = request.getCookies();
if (cookies != null && cookies.length > 0) {
String userName = null;
String lastLoginDatetime = null;
out.println("<h3>Cookies:</h3>");
for (int i = 0; i < cookies.length; i++) {
out.println(cookies[i].getName() + " : "
+ cookies[i].getValue() + "<br>");
if (cookies[i].getName().equals("userName")) {
userName = cookies[i].getValue();
} else if (cookies[i].getName().equals("lastLoginDatetime")) {
lastLoginDatetime = cookies[i].getValue();
}
}
if (userName != null) {
found = true;
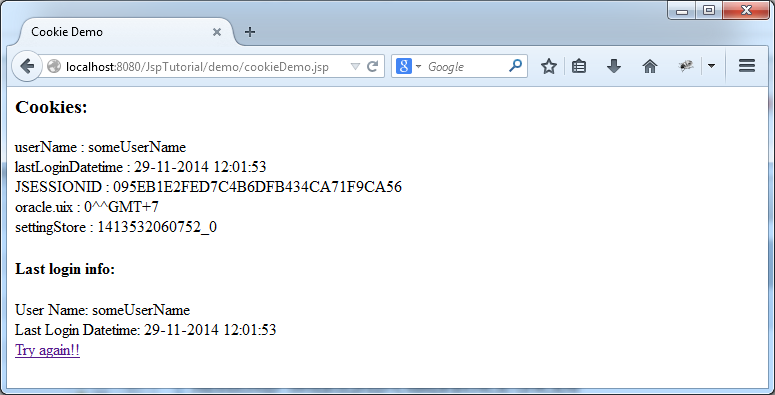
out.println("<h4>Last login info:</h4>");
out.println("User Name: " + userName + "<br>");
out.println("Last Login Datetime: " + lastLoginDatetime
+ "<br>");
}
}
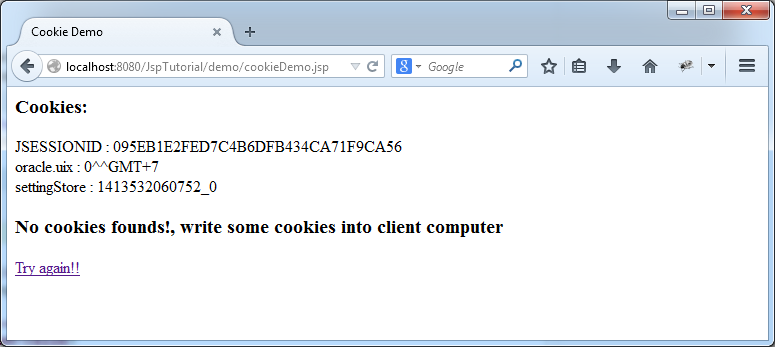
if (!found) {
out.println("<h3>No cookies founds!, write some cookies into client computer</h3>");
// Storing user information in cookies
// for example userName.
// Simulation Cookie stored on a user's computer, as soon as the user login is successful
String userName = "someUserName";
Cookie cookieUserName = new Cookie("userName", userName);
DateFormat df = new SimpleDateFormat("dd-MM-yyyy HH:mm:ss");
Date now = new Date();
String lastLoginDatetime = df.format(now);
Cookie cookieLoginDatetime = new Cookie("lastLoginDatetime",
lastLoginDatetime);
// Sets the maximum age in seconds for this Cookie. (24h)
cookieUserName.setMaxAge(24 * 60 * 60);
// Sets the maximum age in seconds for this Cookie. (24h)
cookieLoginDatetime.setMaxAge(24 * 60 * 60);
// Store in the user's computer.
response.addCookie(cookieUserName);
// Store in the user's computer.
response.addCookie(cookieLoginDatetime);
}
}
}cookieDemo.jsp
<%@ page import="org.o7planning.tutorial.jsp.utils.CookieUtils" %>
<html>
<head>
<meta http-equiv="Content-Type" content="text/html; charset=UTF-8">
<title>Cookie Demo</title>
</head>
<body>
<%
   CookieUtils.demoUserCookie(request,response, out);
%>
<a href ="">Try again!!</a>
</body>
</html>
In the first run:
The second running time (After Cookies stored in user's computer in the first running time)
12. Install Web Tools Platform into Eclipse
Web Tools Platform (WTP) is a visual tool designing HTML/JSP page for Eclipse. It helps you drag and drop the interface of web page quite easily.

You can install WTP into Eclipse as the instructions below:
14. Create a Simple Web application using Servlet, JSP and JDBC
JSP is invented to invented to eliminate difficulties in coding the interface of a Web page. Obviously, designing the interface of a web page on HTML is always more simple than printing each code HTML line through the statement of Servlet.
JSP is not invented to replace for Servlet, but it simply supports servlet.
JSP is not invented to replace for Servlet, but it simply supports servlet.
Thus, in a Web application, JSP will play the role on VIEW layer while Servlet will do it on CONTROLLER layer.
An proficient programmer needs to know how to combine JSP,Servlet and Filter together in an application. Although JSP allows you to code Java alternately in HTML, you should avoid this and use extension tags in accordance with HTML manner instead.
You can watch the following application that has the combination of Servlet, JSP, Filter, JSP EL & JDBC .
Java Servlet/Jsp Tutorials
- Install Tomcat Server for Eclipse
- Install Glassfish Web Server on Windows
- Run Maven Java Web Application in Tomcat Maven Plugin
- Run Maven Java Web Application in Jetty Maven Plugin
- Run background task in Java Servlet Application
- Java Servlet Tutorial for Beginners
- Java Servlet Filter Tutorial with Examples
- Java JSP Tutorial for Beginners
- Java JSP Standard Tag Library (JSTL) Tutorial with Examples
- Install Web Tools Platform for Eclipse
- Create a simple Login application and secure pages with Java Servlet Filter
- Create a Simple Java Web Application Using Servlet, JSP and JDBC
- Uploading and downloading files stored to hard drive with Java Servlet
- Upload and download files from Database using Java Servlet
- Displaying Image from Database with Java Servlet
- Redirect 301 Permanent redirect in Java Servlet
- How to automatically redirect http to https in a Java Web application?
- Use Google reCAPTCHA in Java Web Application
Show More