NodeJS Tutorial for Beginners
1. Các chuẩn bị trước khi bắt đầu
This is the first lesson of the series of instructing Node.js. There are some preparations before you start. Some pieces of software need to be installed on your computer. After the installation is finished, we will practise the first lesson "Hello Node.js".
You should read my post of introduction to the NodeJS below before continuing this lesson, which will help you have an overview of the NodeJS.
To study the NodeJS, first of all, you need to download and install it on your computer.
Atom is a text (and source) editor. It supports plugins to allow you to program NodeJS applications. It was developed by GitHub. Its first version 1.0 was released in 2015. This is a piece of software that is appreciated compared to similar software. To program the NodeJS applications, I recommend you to use this software.
2. Create a NodeJS project
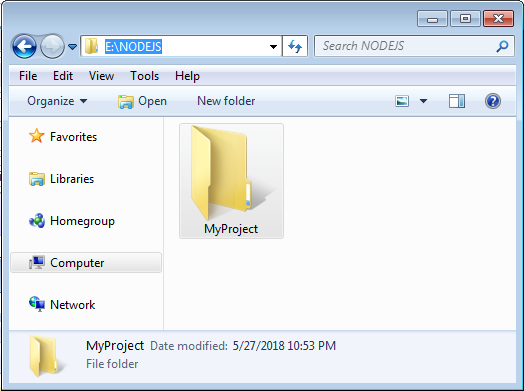
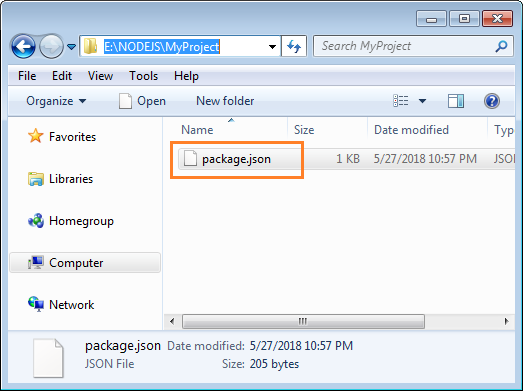
First of all, you need to create a directory named MyProject, or a name that you want.
Open CMD and CD windows to the directory just created by you. After that run the following command so that NPM creates project for you.
npm init
Accept default options and press "Enter" until completion.
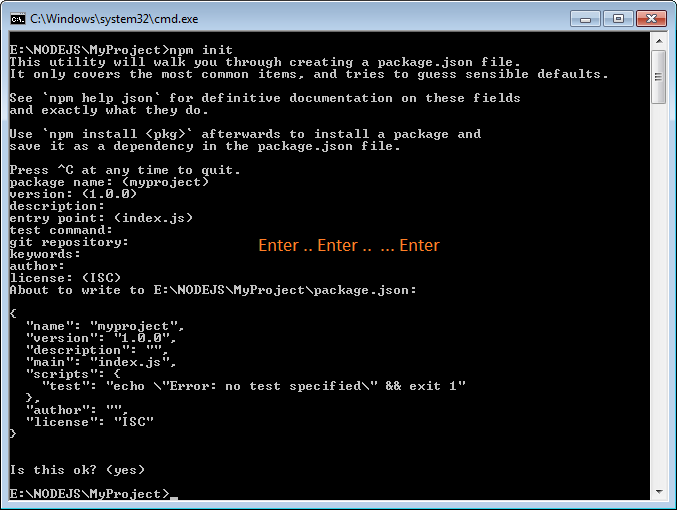
A file with the name of package.json has been created on your project.
There are some library packages necessary for your project, and you need to install it with the support of NPM:
Express
Express.js (or simply Express) means a Web Application Framework for the NodeJS. It provides a set of strong features to web and mobile applications.
Ejs
EJS stands for "Embedded JavaScript templating", which is a library, used to parse ejs files and create HTML to return to client (browser).
npm install express ejs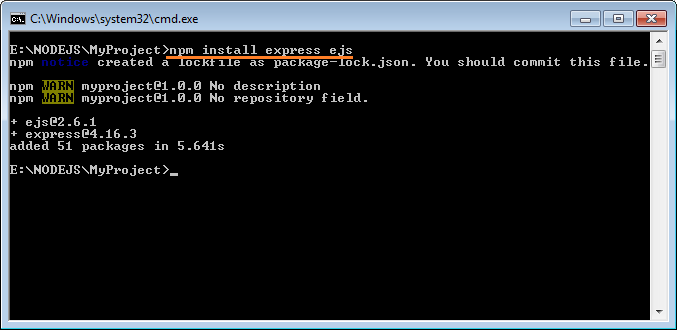
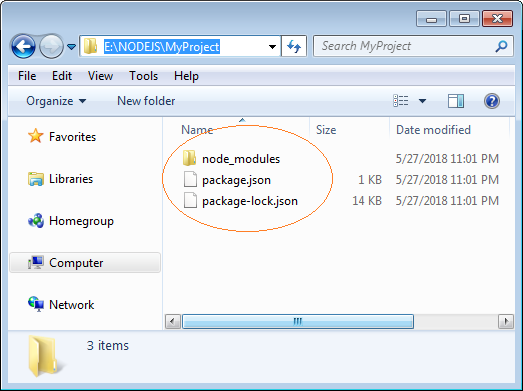
After the installation finishes, you can see changes on your project:
3. Create structure for project
In the above step, we have created a project by command. Now we will open this project by a more visual tool. Here, I use Atom editor (The software which I advise you to install in the above step).
- File/Add Project Folder
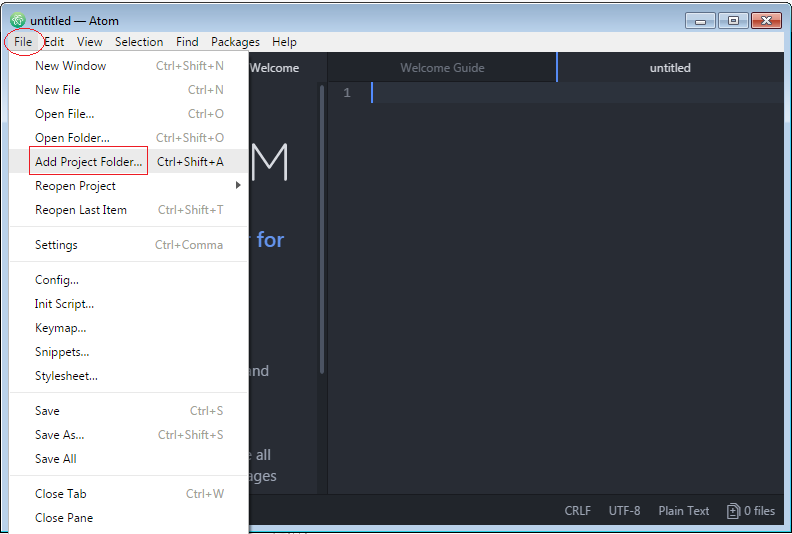
OK, Project is opened on the Atom:

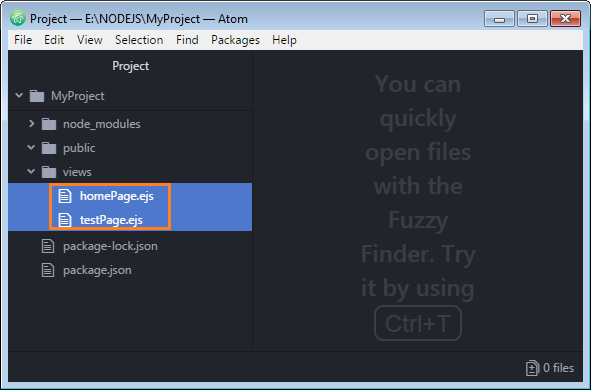
On the project, create 2 sub-directories: public & views:
- public: a directory containing all files which users can access, for example image, video,..
- views: Your website will have a lot of pages, for example, home page, login page, ...This directory is the place containg all your pages.

In views directory, we create 2 files:
- homePage.ejs
- testPage.ejs
homePage.ejs
<!DOCTYPE html>
<html lang="en" dir="ltr">
  <head>
    <meta charset="utf-8">
    <title>Home</title>
  </head>
  <body>

     <h1>This is Home Page</h1>

  </body>
</html>
testPage.ejs
<!DOCTYPE html>
<html lang="en" dir="ltr">
  <head>
    <meta charset="utf-8">
    <title>Test</title>
  </head>
  <body>

     <h1>This is Test Page</h1>

  </body>
</html>
Next, create a file named index.js, and enter contents for this file. This is configuration file for your project:
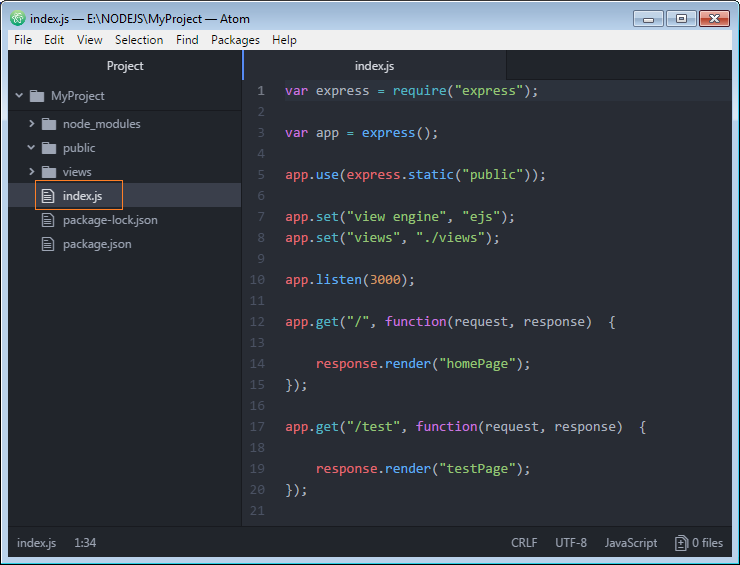
index.js
var express = require("express");
var app = express();
app.use(express.static("public"));
app.set("view engine", "ejs");
app.set("views", "./views");
app.listen(3000);
app.get("/", function(request, response) {
response.render("homePage");
});
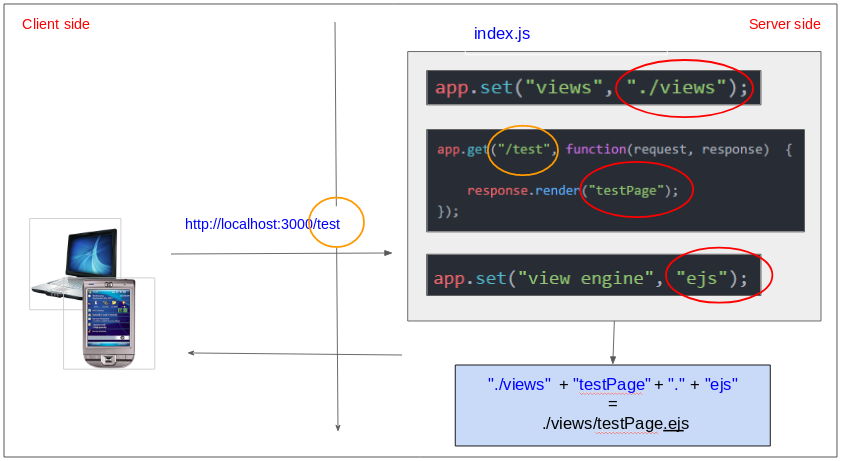
app.get("/test", function(request, response) {
response.render("testPage");
});OK, Now, it is time to explain the contents of the index.js above file.
Code | Description |
var express = require("express"); | ExpressJS means a Web Application Framework.This code line says that you want to use it. |
var app = express(); | Create an Express object. |
app.use(express.static("public")); | This code line tells Application Server that you want to use public directory to contain static data, users can access the files in this directory. |
app.set("view engine", "ejs"); | This code line tells the Application Server that you want to use EJS library. It is a machinery to handle your page. The EJS will create HTML to return to user's browser. |
app.set("views", "./views"); | This code line shows the Application Server the path to the directory containing your pages |
app.listen(3000); | Your application will listen on port 3000 when it is deployed |
app.get("/test", function(req, res) { ...
}); | Define the path to access to a page. |
4. Run Application Server
Open the CMD, and CD window to go to the directory of your project and perform the following command to deploy your application.
node index.js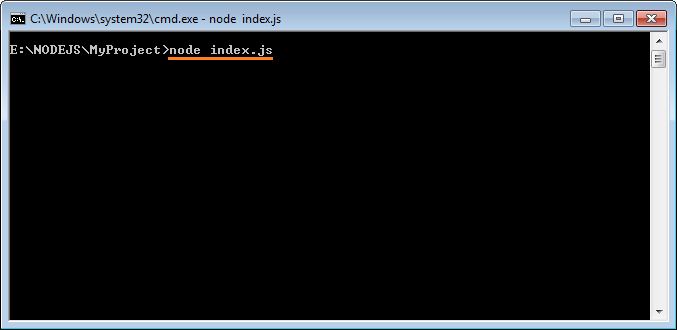
The above command will start the Web Application Server, and deploy your application on this Web Server. At this moment, it is ready to serve the request sent from the client.
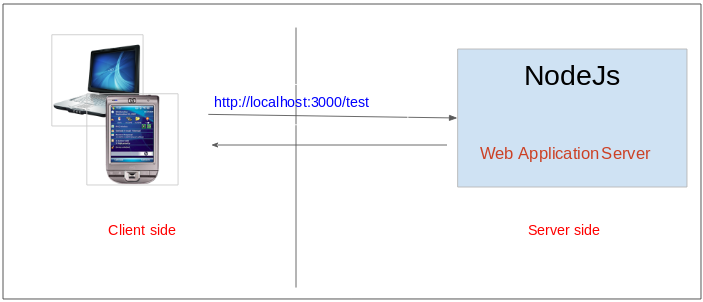
Note: Not close the CMD window, because your Application Serser is running. Open the browser and visit the link:

What will take place at the Server when the user accesses the above address?
NodeJS Tutorials
- Introduction to NodeJs
- What is NPM?
- NodeJS Tutorial for Beginners
- Install Atom Editor
- Install NodeJS on Windows
- NodeJS Modules Tutorial with Examples
- The concept of Callback in NodeJS
- Create a Simple HTTP Server with NodeJS
- Understanding Event Loop in NodeJS
- NodeJS EventEmitter Tutorial with Examples
- Connect to MySQL database in NodeJS
Show More