Oracle APEX Tabular Form Tutorial with Examples
1. Introduction
You are viewing guidelines for programming Oracle APEX 5.0. This is the 2nd document which next of:
Included in this document, I will continue to guide you on Oracle APEX Database Desktop Application, using Tabular Form.
2. Create a Tabular Form using Wizard
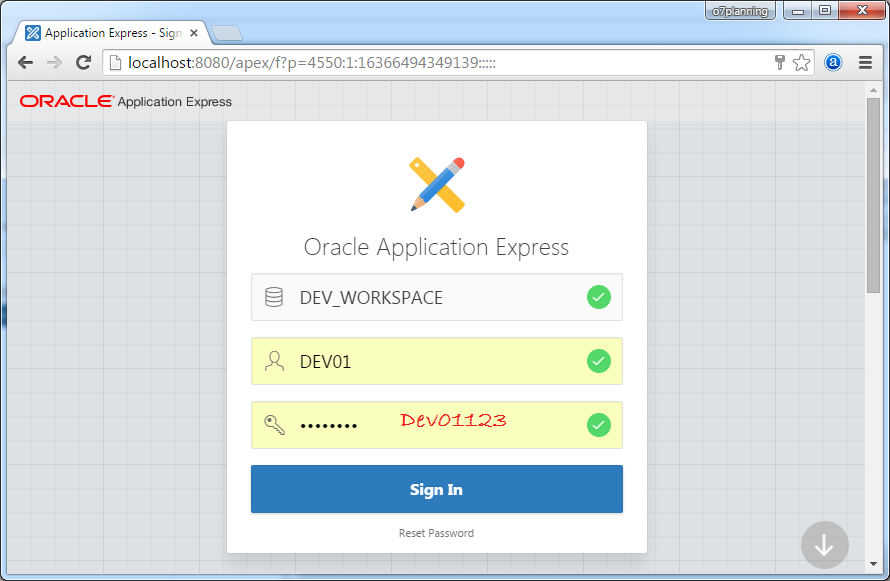
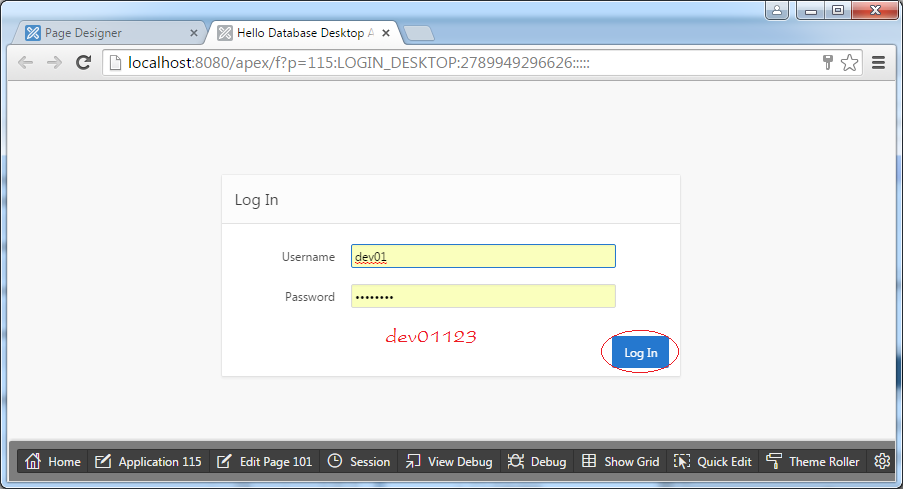
Log in to Oracle APEX with programmer's account.
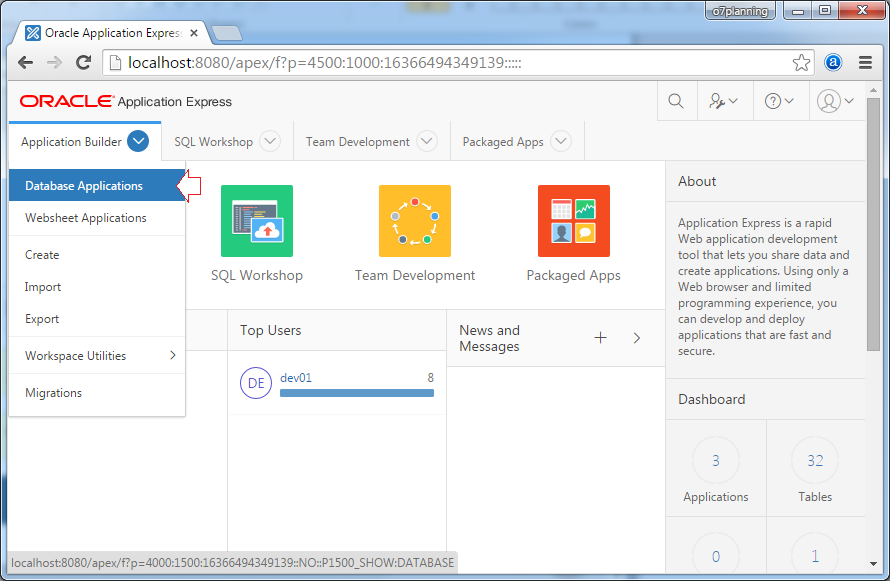
Go to "Database Application".
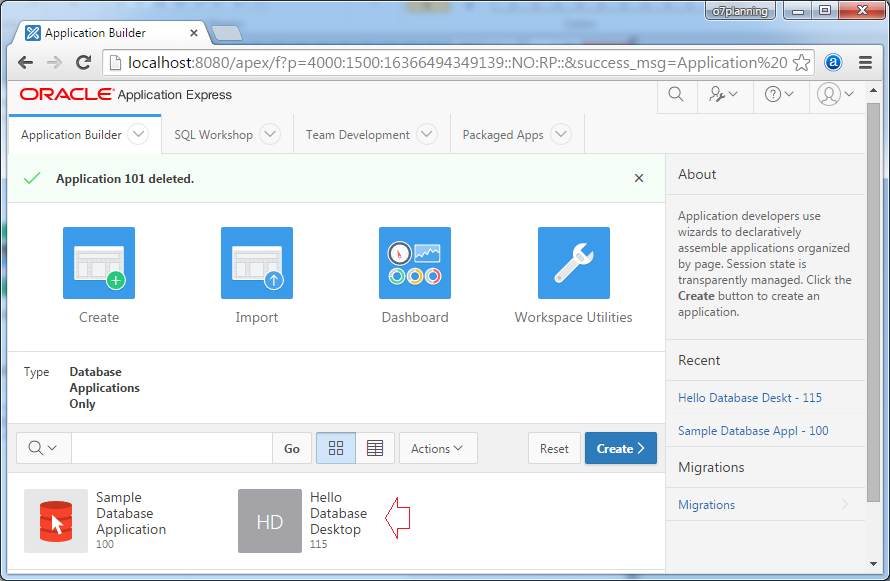
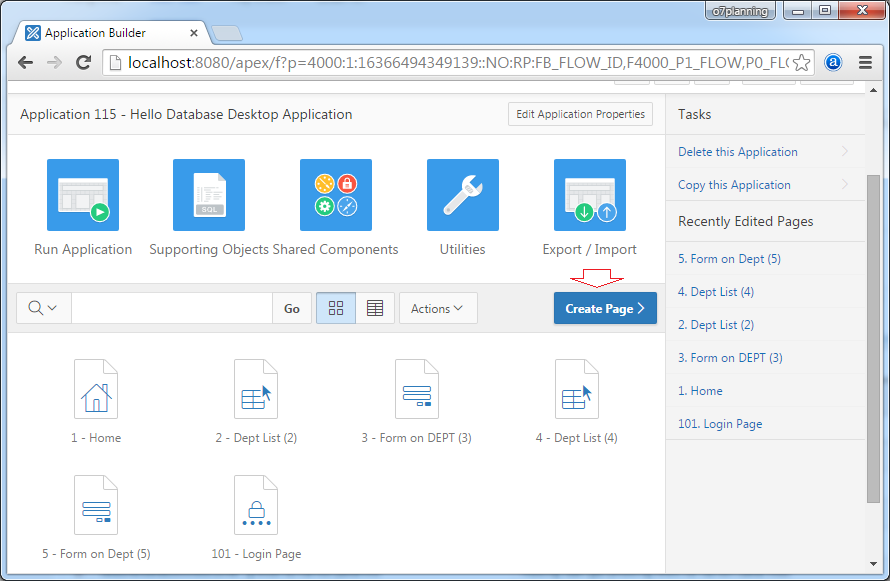
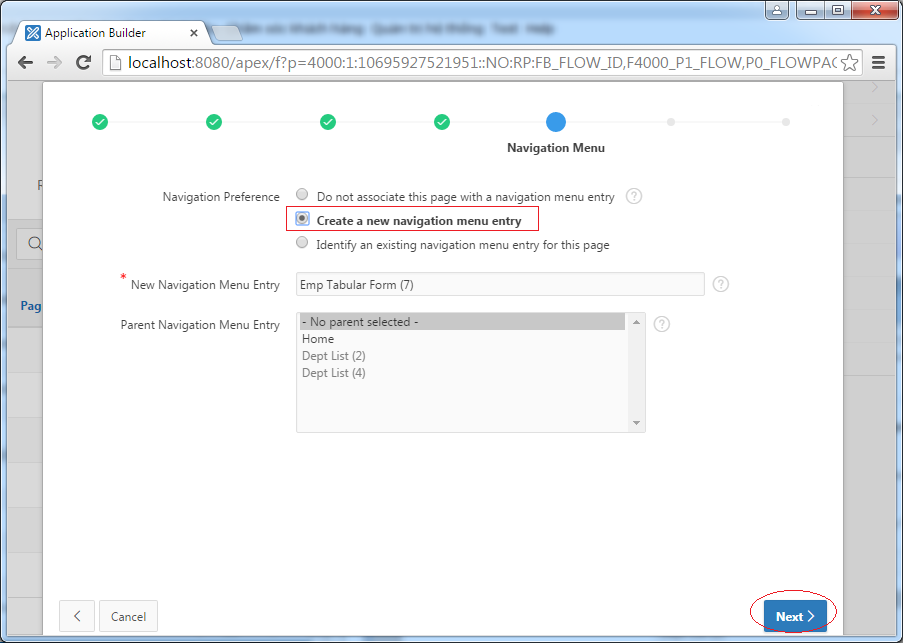
Next, going to "Hello Database Desktop Application" that you created in the previous guidance
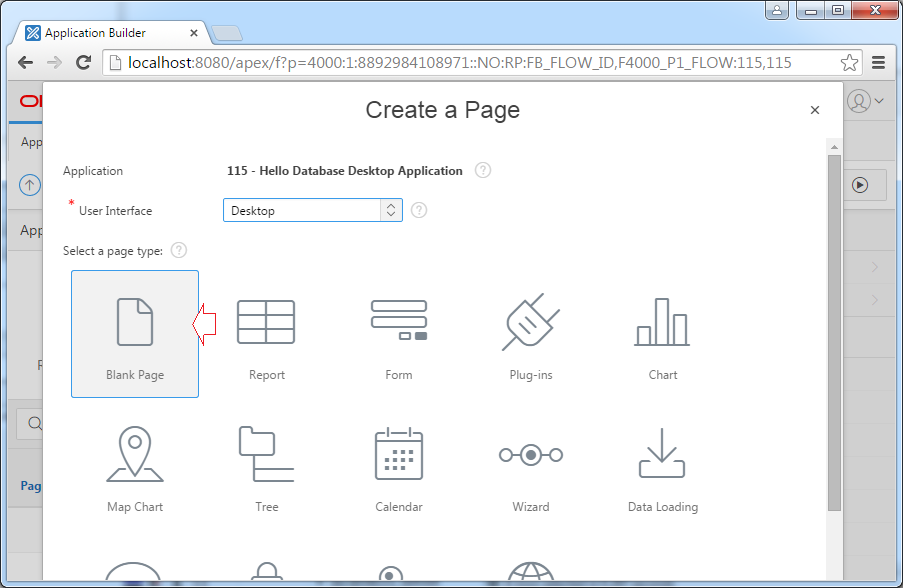
In this application, there are a few pages created in the previous tutorial. Click "Create Page" to create another page.
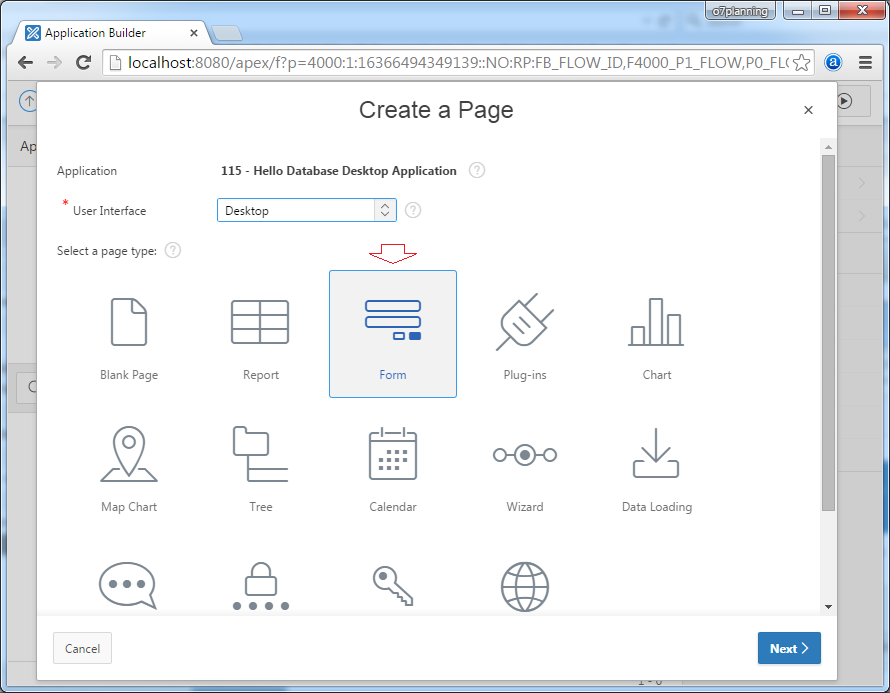
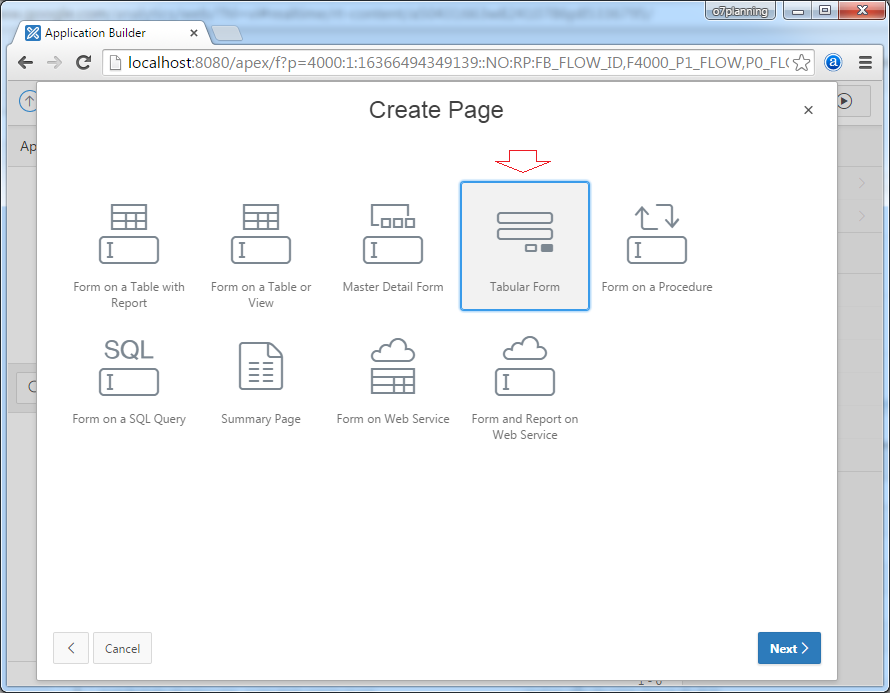
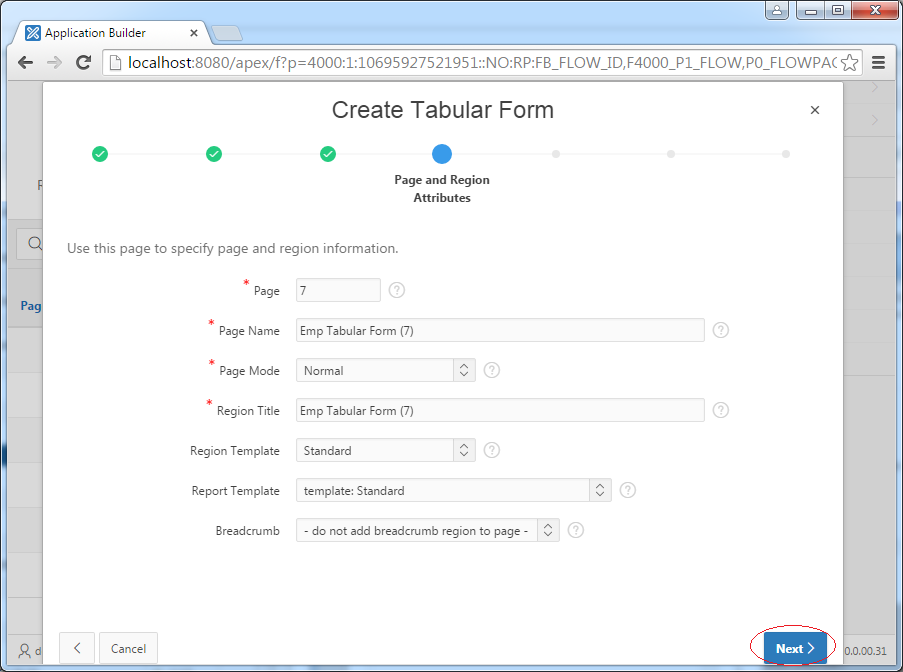
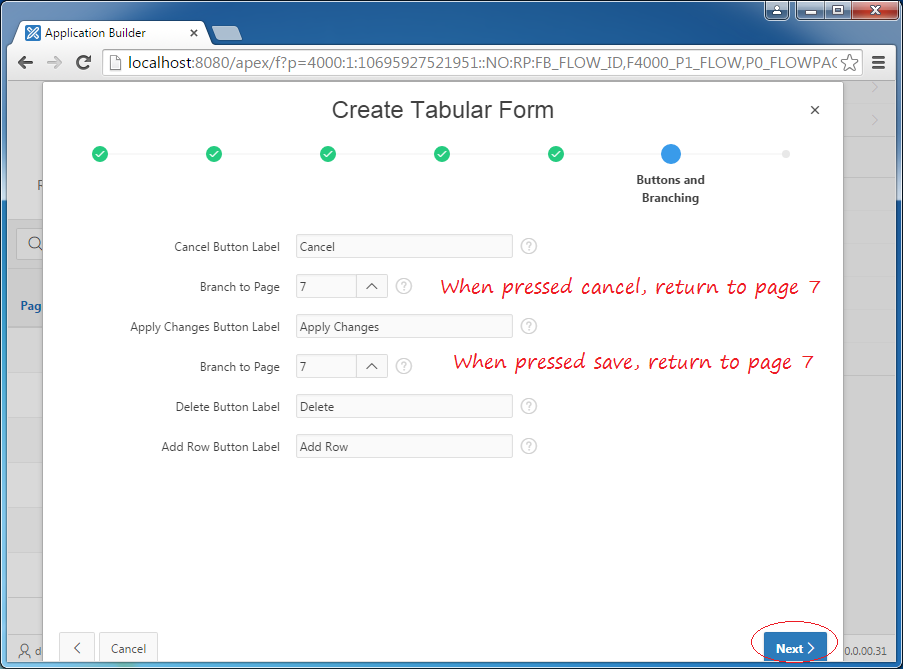
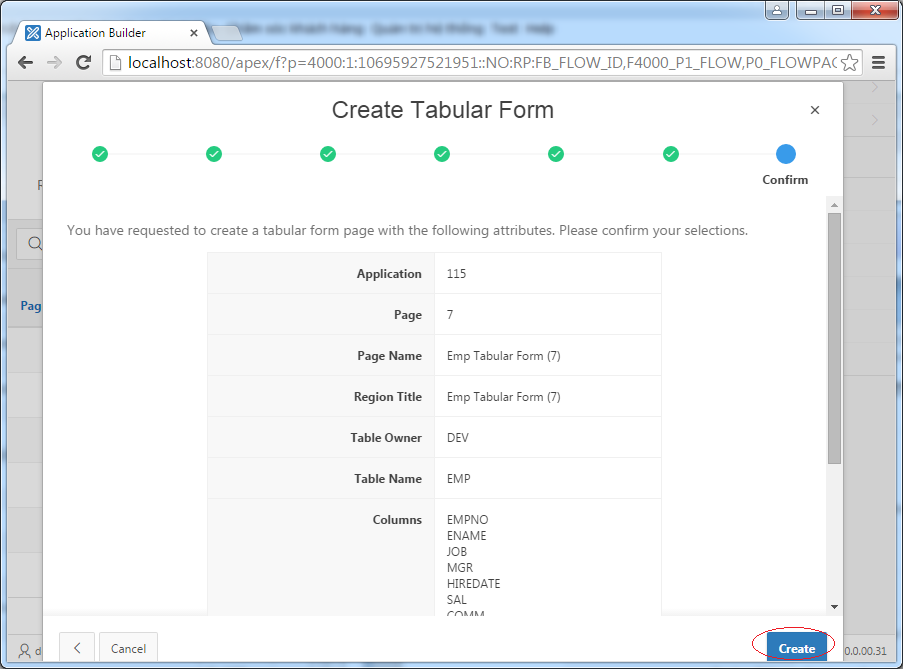
Create a Tabular Form:
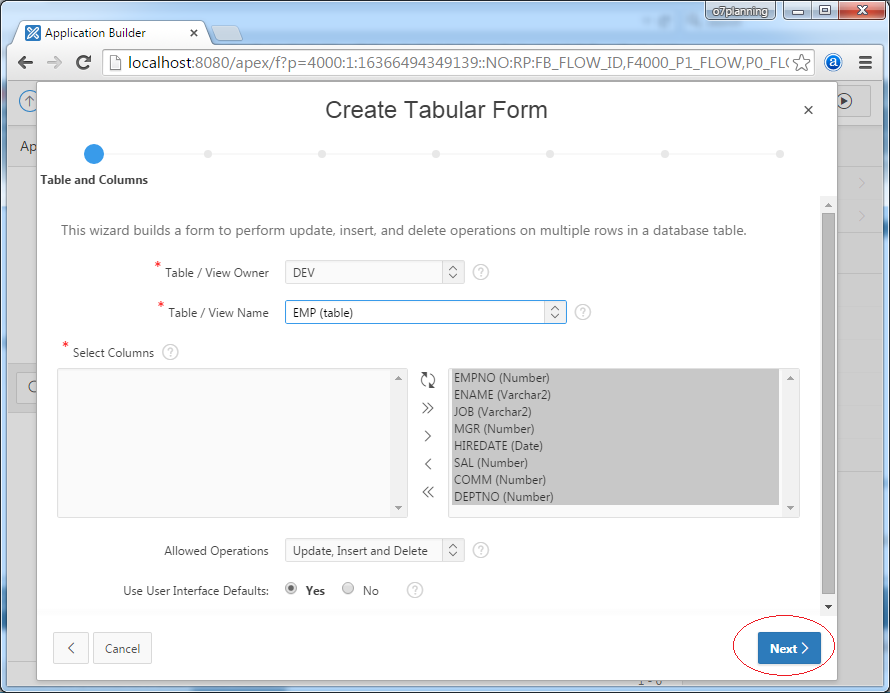
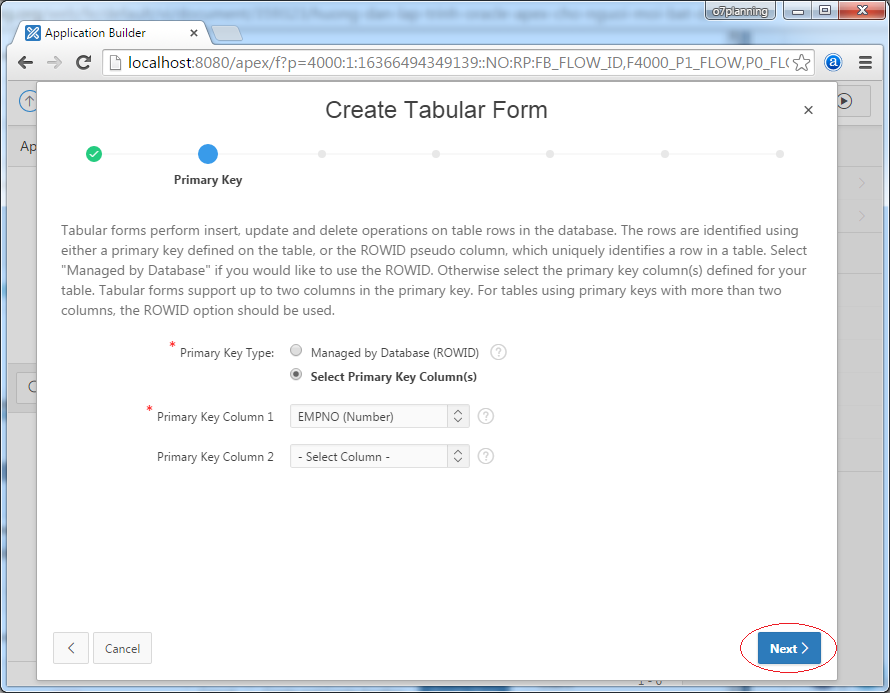
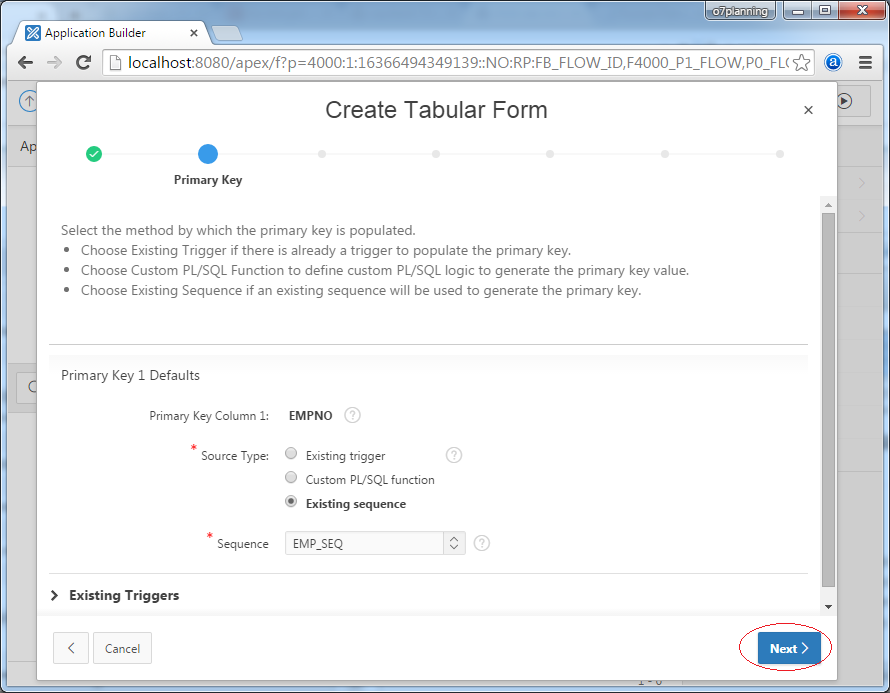
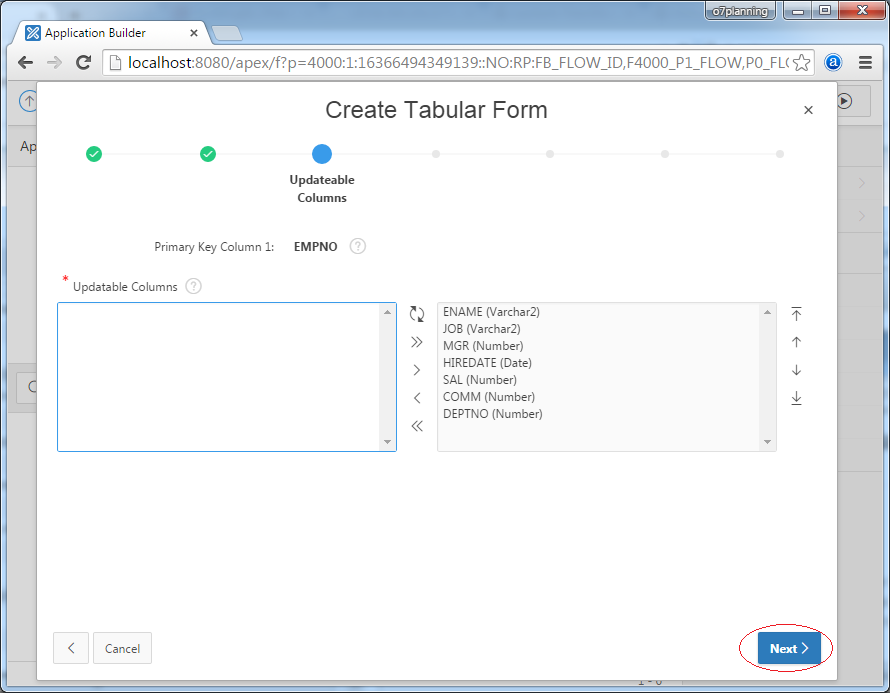
Enter:
- Page: 7
- Page Name: Emp Tabular Form (7)
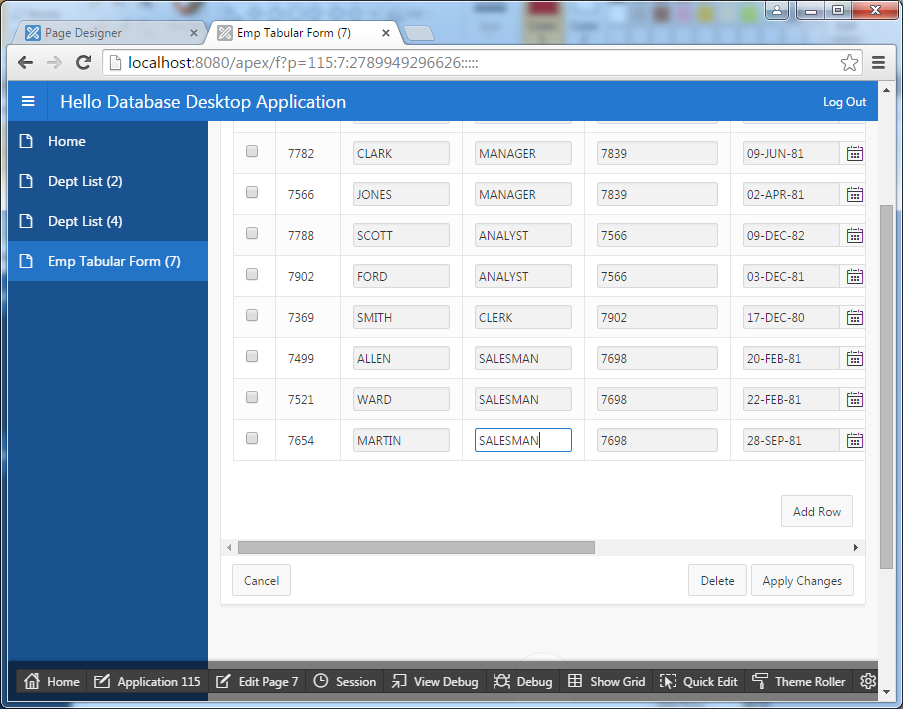
Your web page has been created, click RUN to test the newly created page.
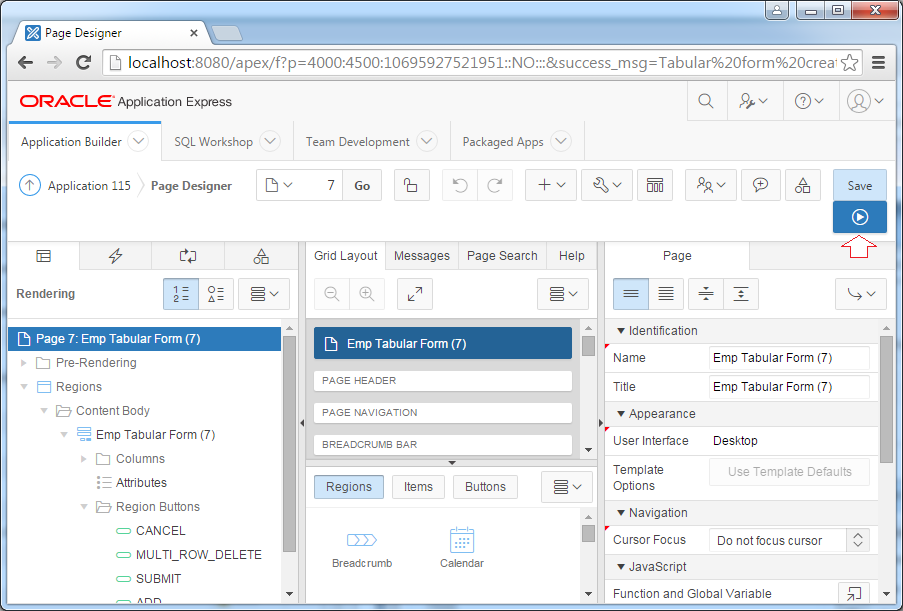
Page 7 is running:
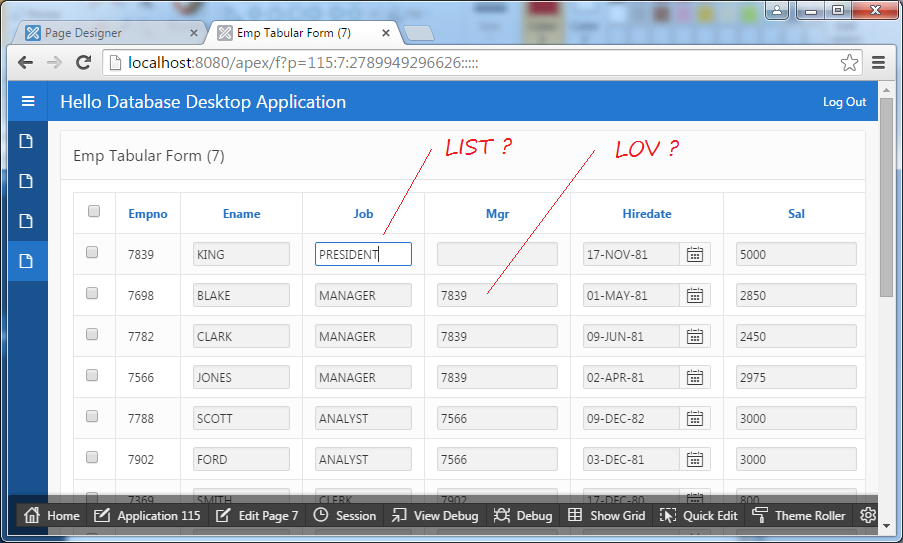
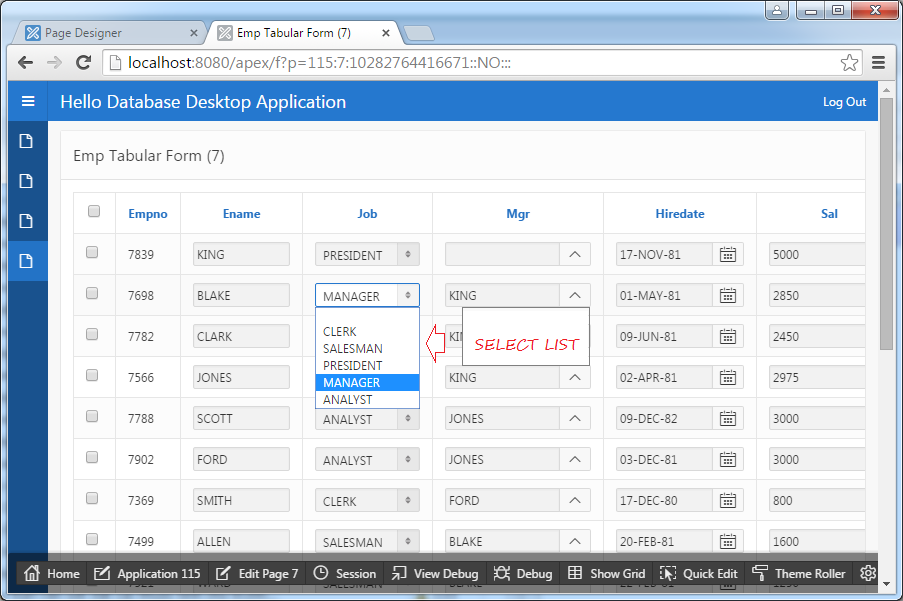
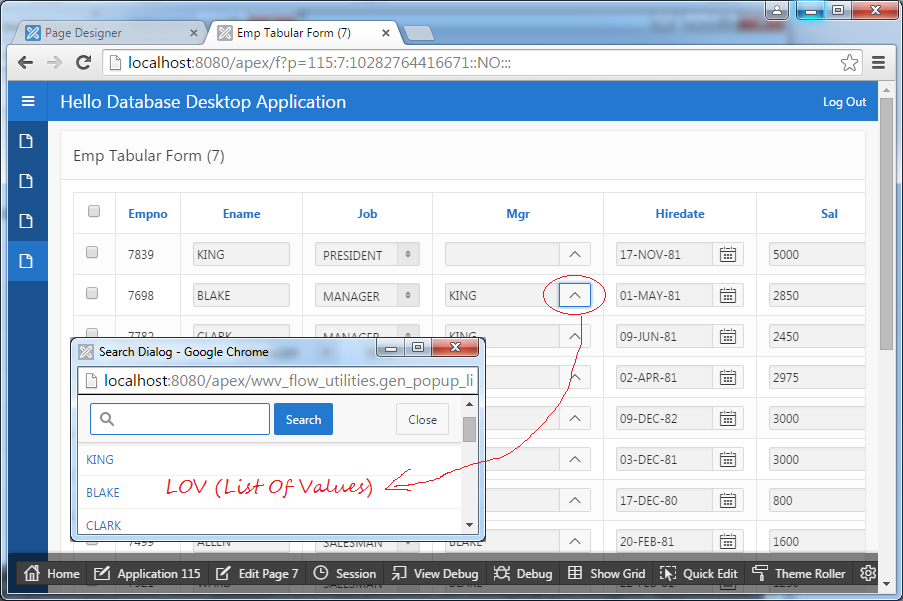
Here, the question arises as to how to change some input fields into SELECT LIST or POPUP LOV (List of values). For example, you want to choose a Manager (MGR) through POPUP LOV, and select a Job through SELECT LIST.
Return to the design screen of page 7. Set the properties for the JOB column so that it displays as a SELECT LIST.
Identification:
- Type: Select List
- Type: Static Value
- Static Value:
STATIC:
CLERK;CLERK,
SALESMAN;SALESMAN,
PRESIDENT;PRESIDENT,
MANAGER;MANAGER,
ANALYST;ANALYST
The syntax used to declare the static values
STATIC:Display1;Return1,Display2;Return2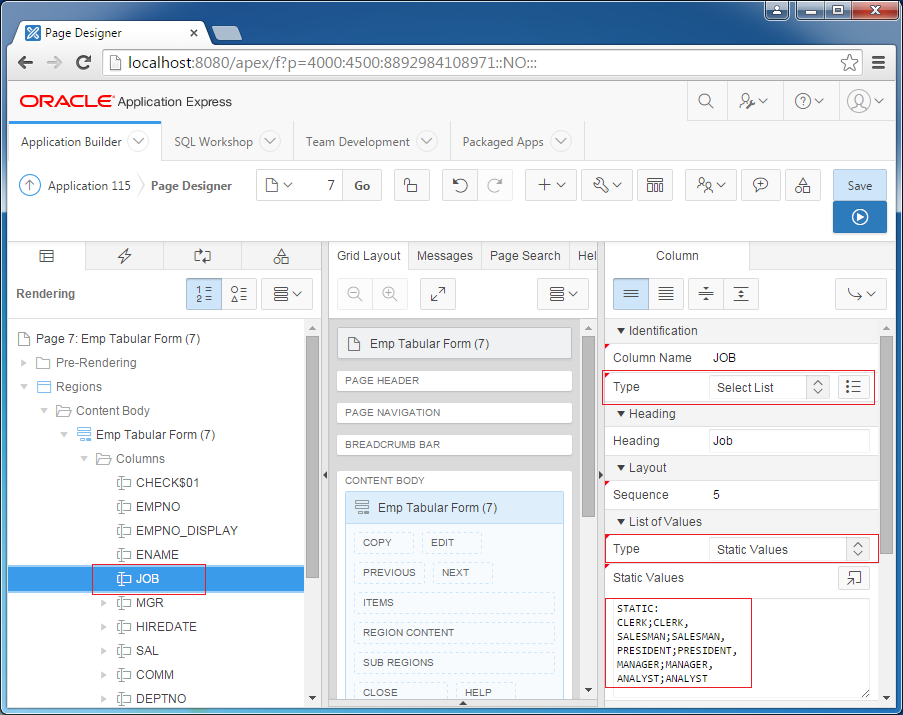
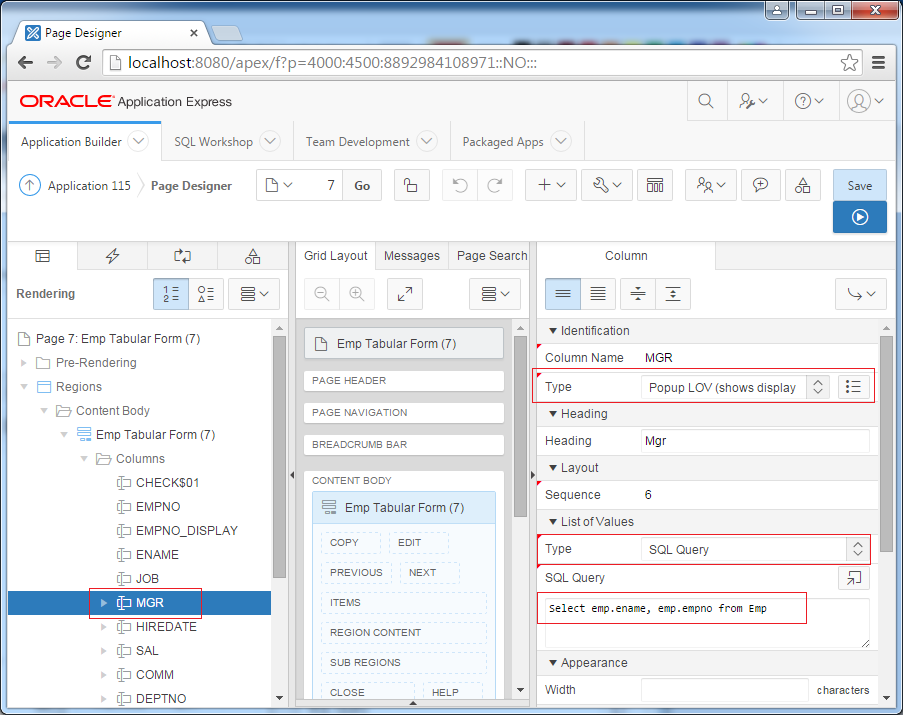
Next, you need to set the properties for the MGR so that it shows up as POPUP LOV (list of values)
Identification:
- Type: Popup LOV (shows display values)
- Type: SQL Query
- SQL Query: Select emp.ename, emp.empno from Emp
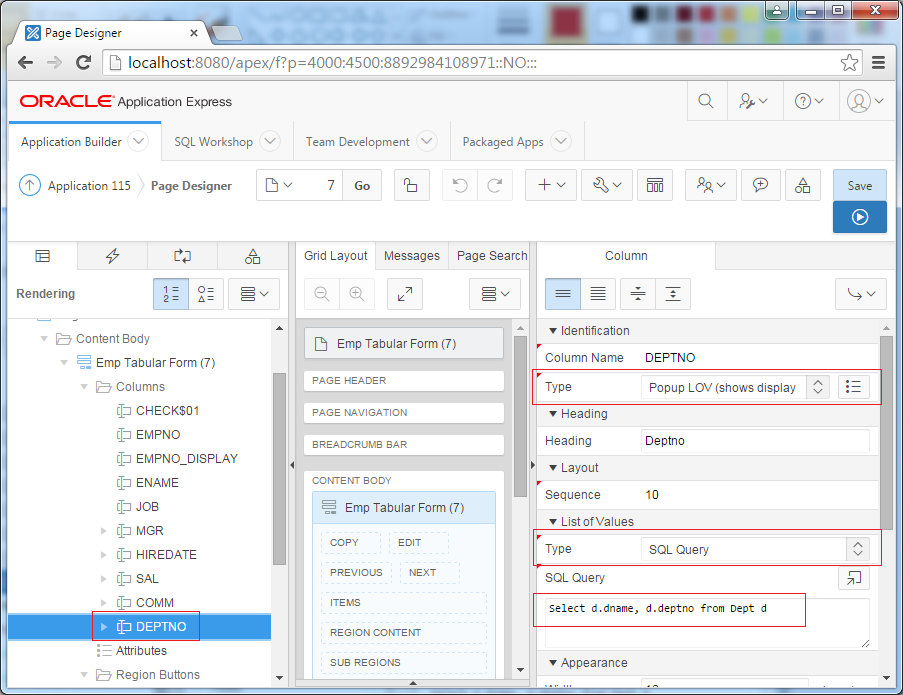
Similarly set the properties for DEPTNO, so that it displays as a POPUP LOV.
Identification:
- Type: Popup LOV (shows display values)
- Type: SQL Query
- SQL Query: Select d.dname, d.deptno from Dept d
Save and run the Page 7:
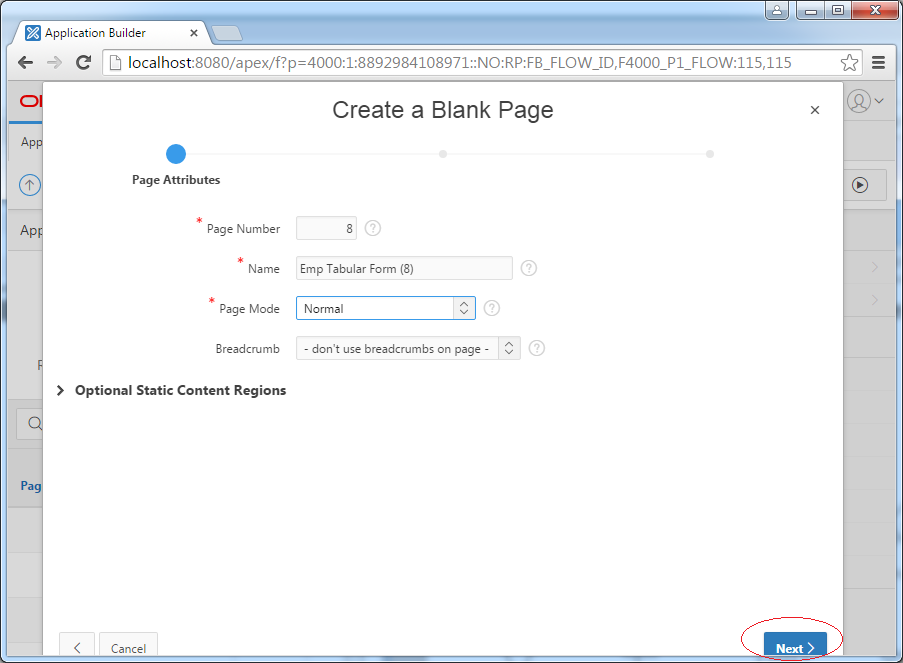
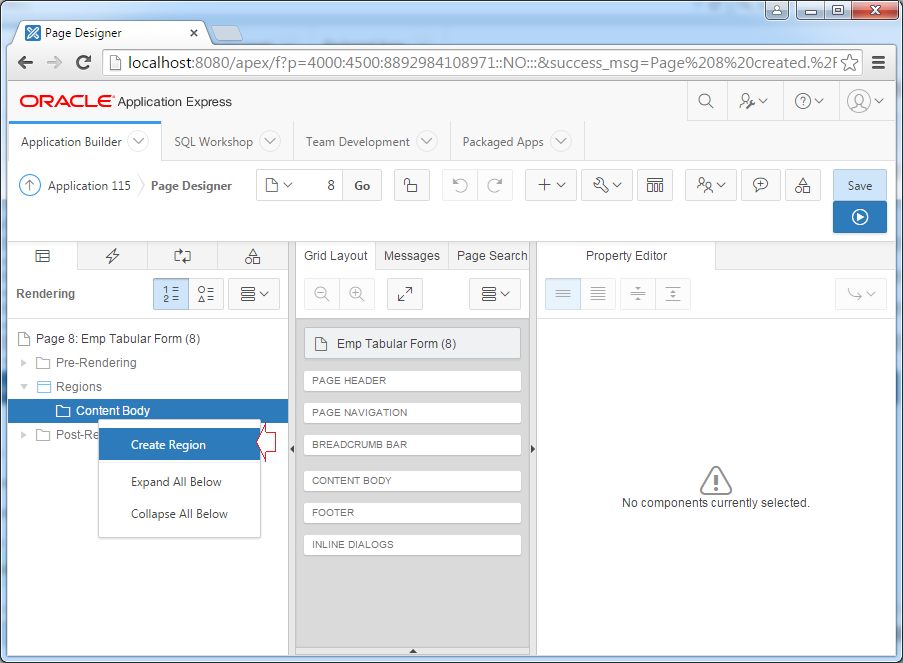
3. Create Tabular Form manually
Above, I showed you how to create a Tabular Form by using the wizard of Oracle Apex. Next we will create completely from scratch a Tabular Form, not using the wizard, which will help you understand more about Tabular Form & Oracle APEX.
Enter:
- Page Number: 8
- Name: Emp Tabular Form (8)
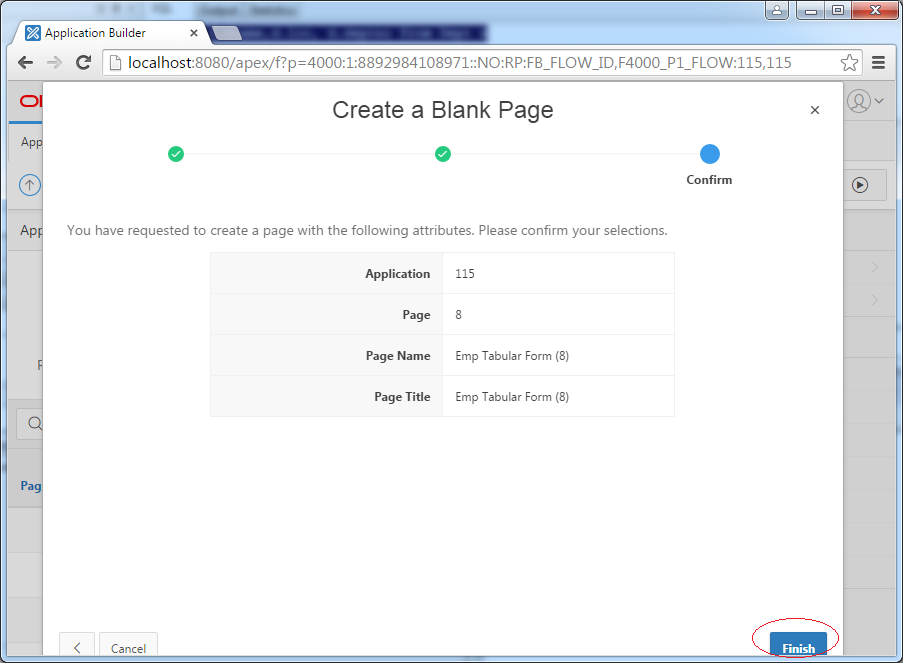
A blank page has been created.
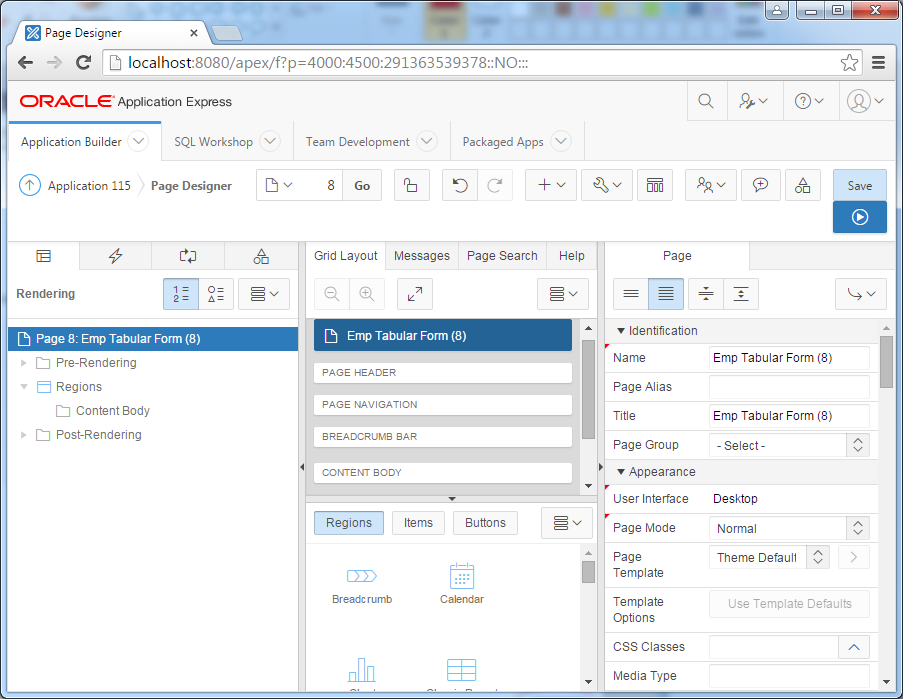
Create a Tabular Form in the "Content Body" region:
- Title: Emp Tabular Form (8)
- Type: Tabular Form
- SQL Query:
select EMPNO,
       EMPNO EMPNO_DISPLAY,
       ENAME,
       JOB,
       MGR,
       HIREDATE,
       SAL,
       COMM,
       DEPTNO
  from EMP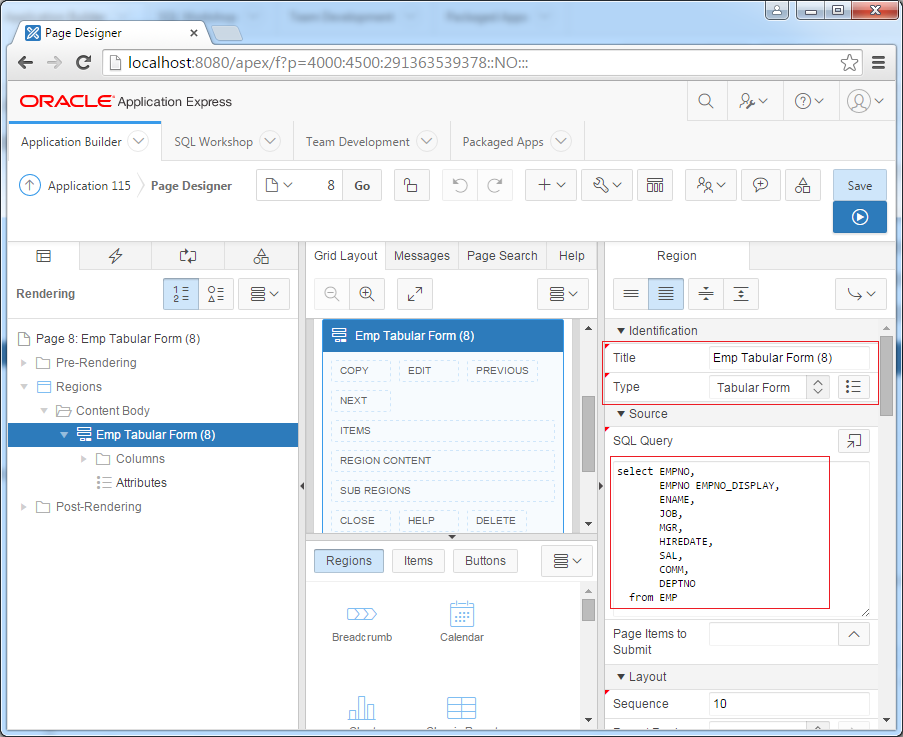
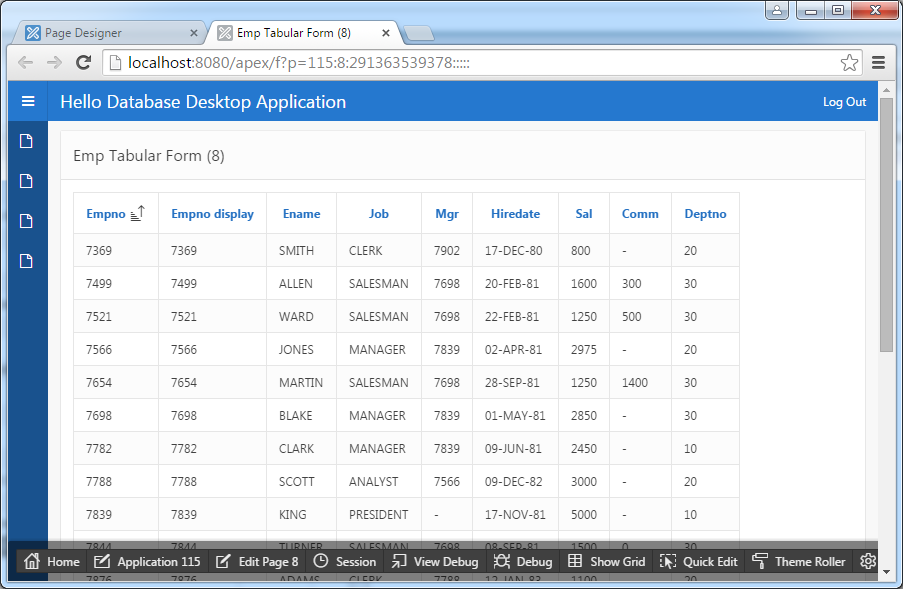
You can test page 8, result is as follows:
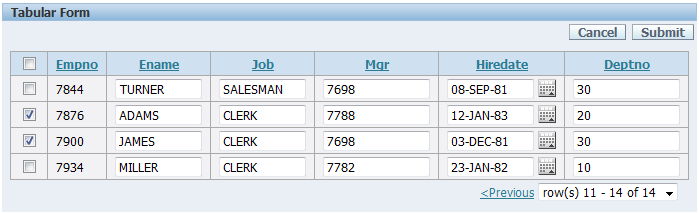
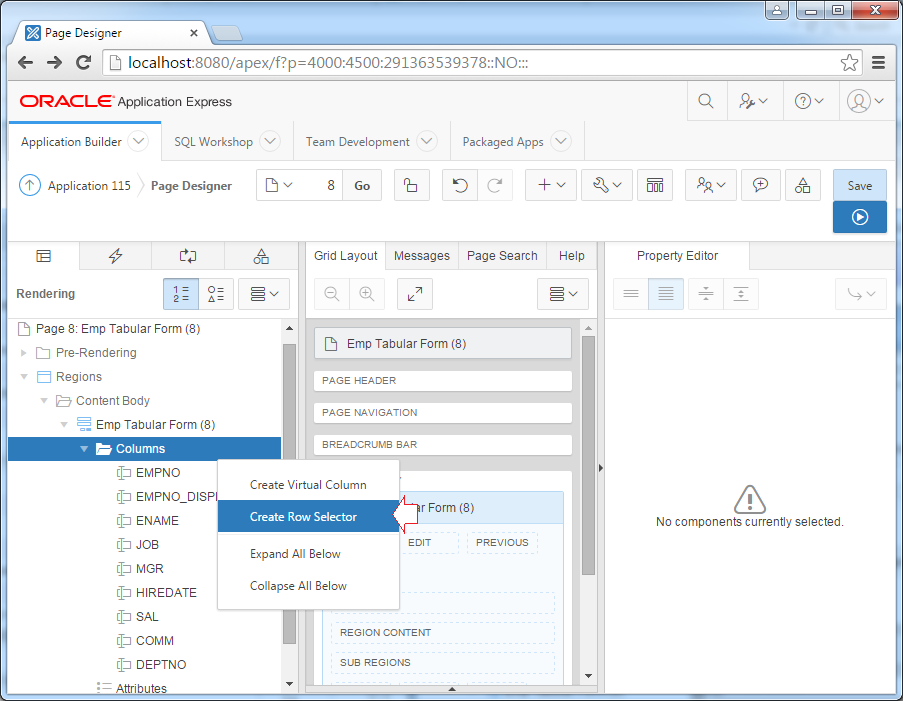
Add a column contains Checkbox, which used to select rows.
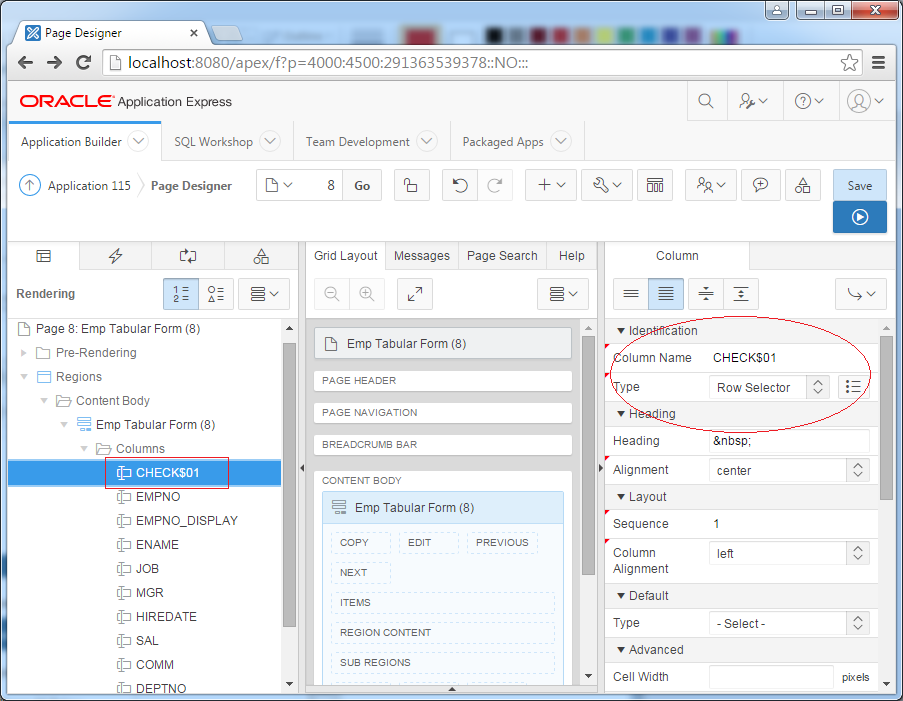
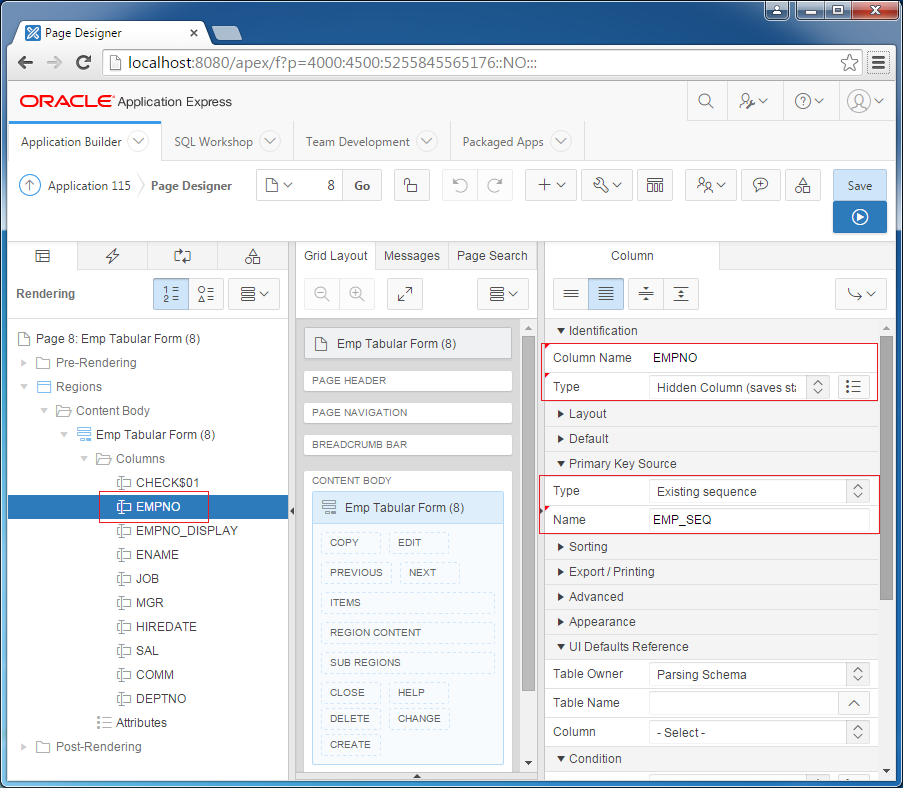
Set attributes for EMPNO, hide this column, and set the primary key attribute for it.
Identification
Primary Key Source
- Column Name: EMPNO
- Type: Hidden Column (saves state)
Primary Key Source
- Type: Existing sequence
- Name: EMP_SEQ
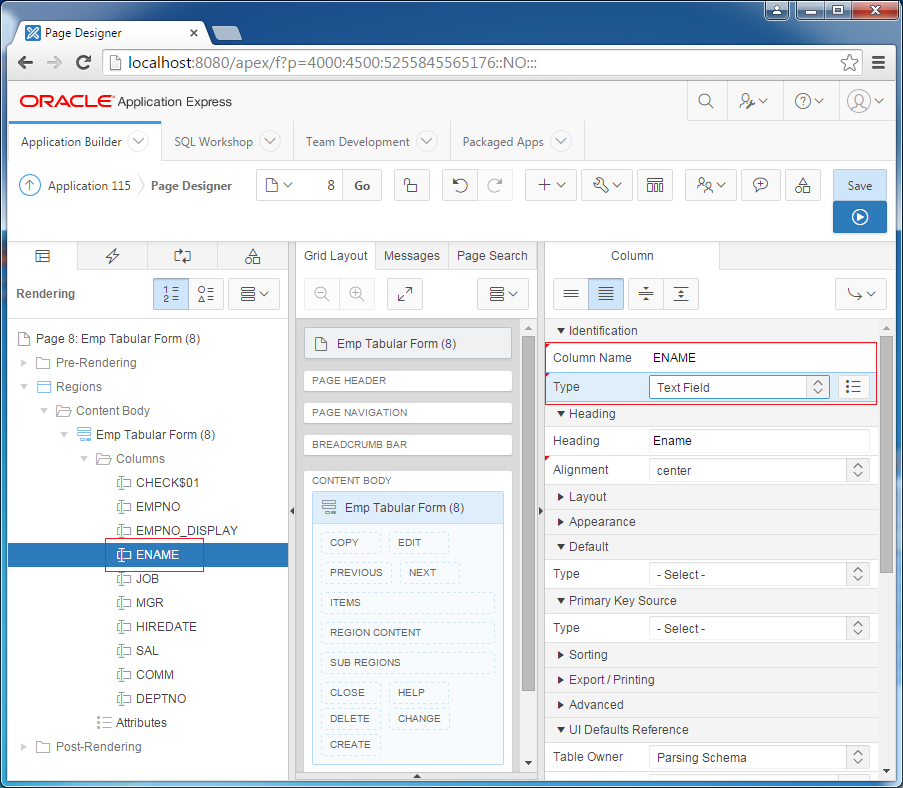
Column ENAME:
Identification
- Column Name: ENAME
- Type: Text Field
Column JOB:
Identification
List of Values
- Column Name: JOB
- Type: Select List
List of Values
- Type: Static Values
- Static Values:
STATIC:
CLERK;CLERK,
SALESMAN;SALESMAN,
PRESIDENT;PRESIDENT,
MANAGER;MANAGER,
ANALYST;ANALYST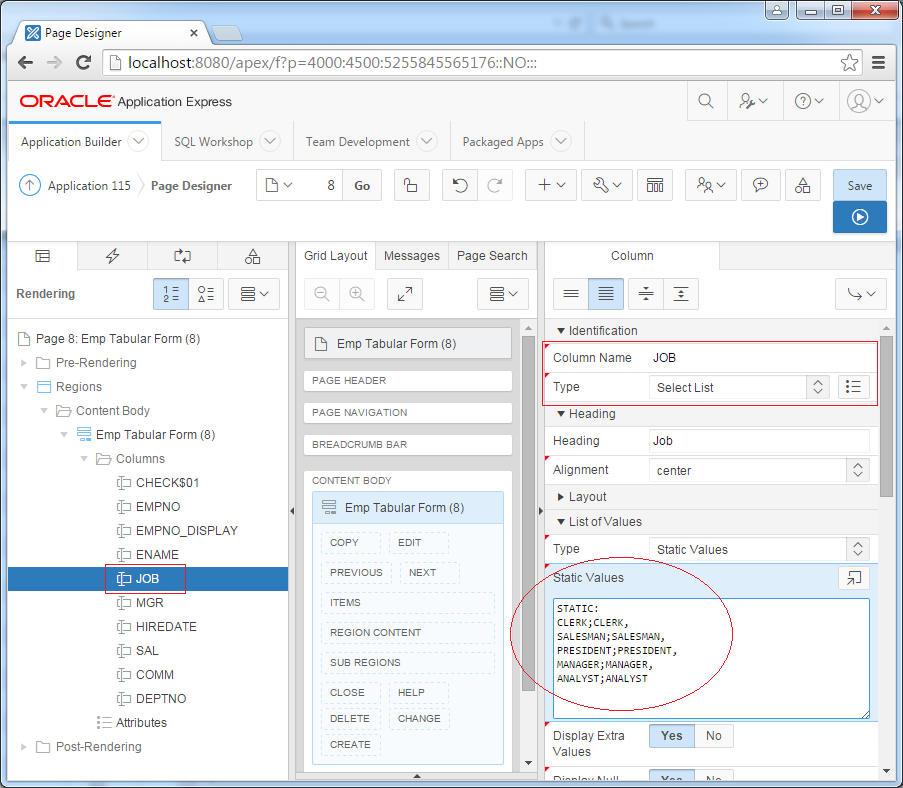
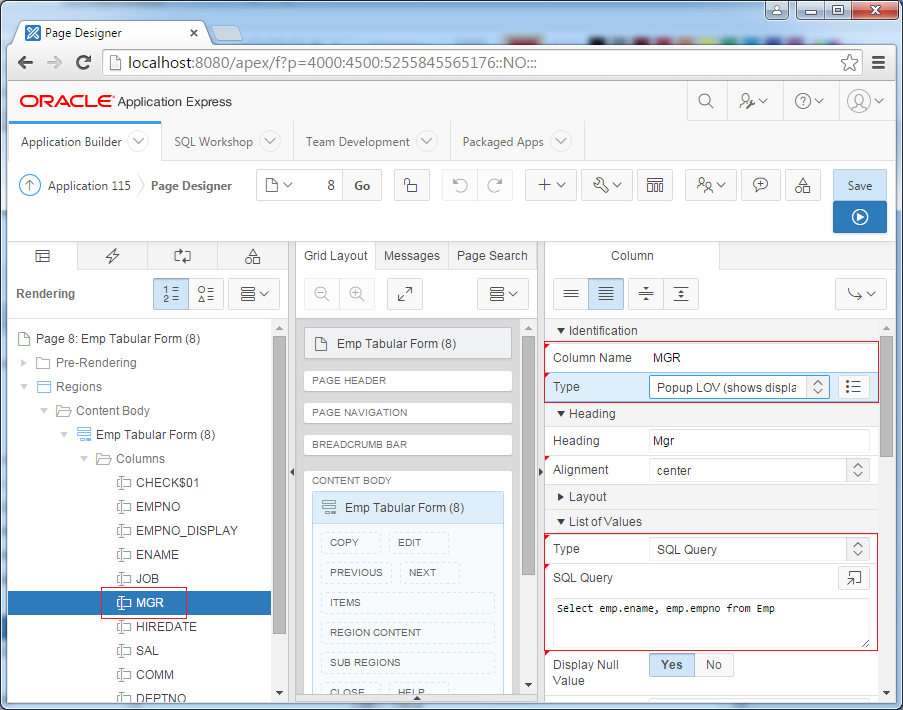
Column MGR:
Identification
List of Values
- Column Name: MGR
- Type: Popup LOV (shows display values)
List of Values
- Type: SQL Query
- Static Values: Select emp.ename, emp.empno from Emp
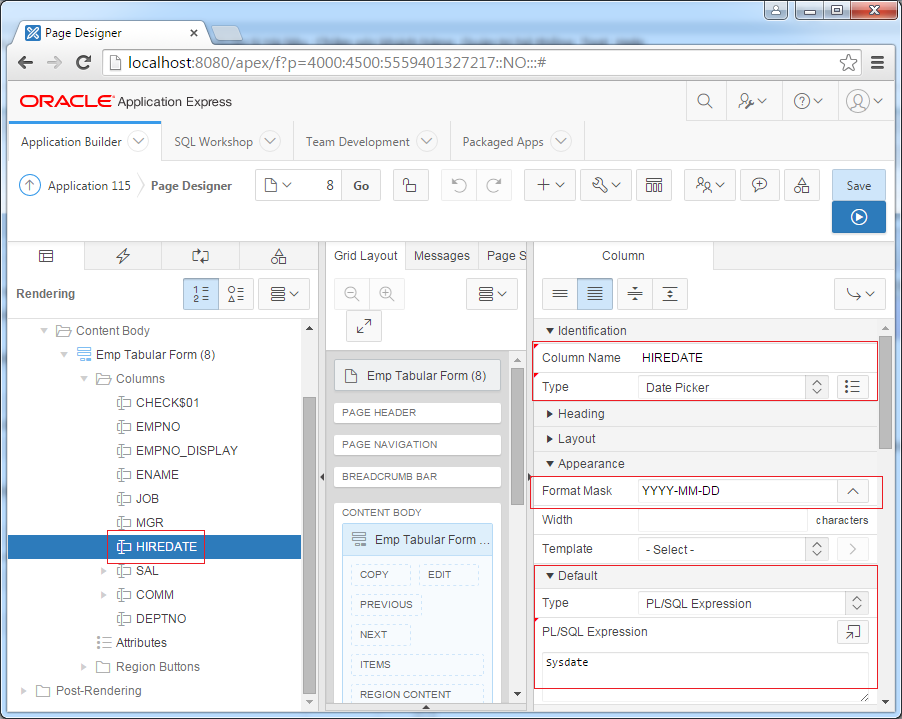
Column HIREDATE:
Identification
- Column Name: HIDEDATE
- Type: Date Picker
- Format Mask: YYYY-MM-DD
- Type: PL/SQL Expression
- PL/SQL Expression: sysdate
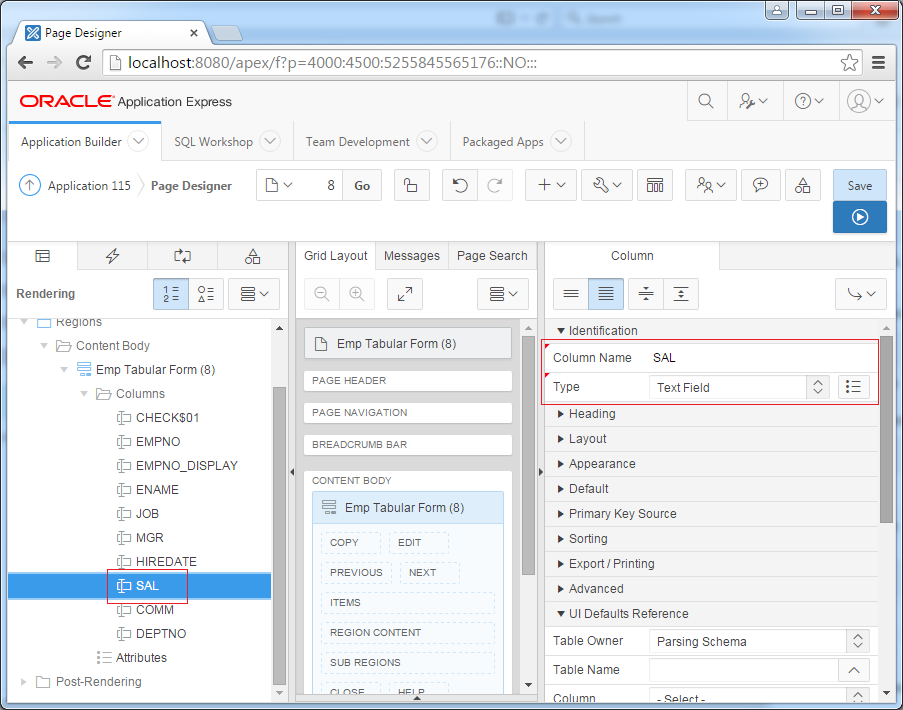
Column SAL:
Identification
- Column Name: SAL
- Type: Text Field
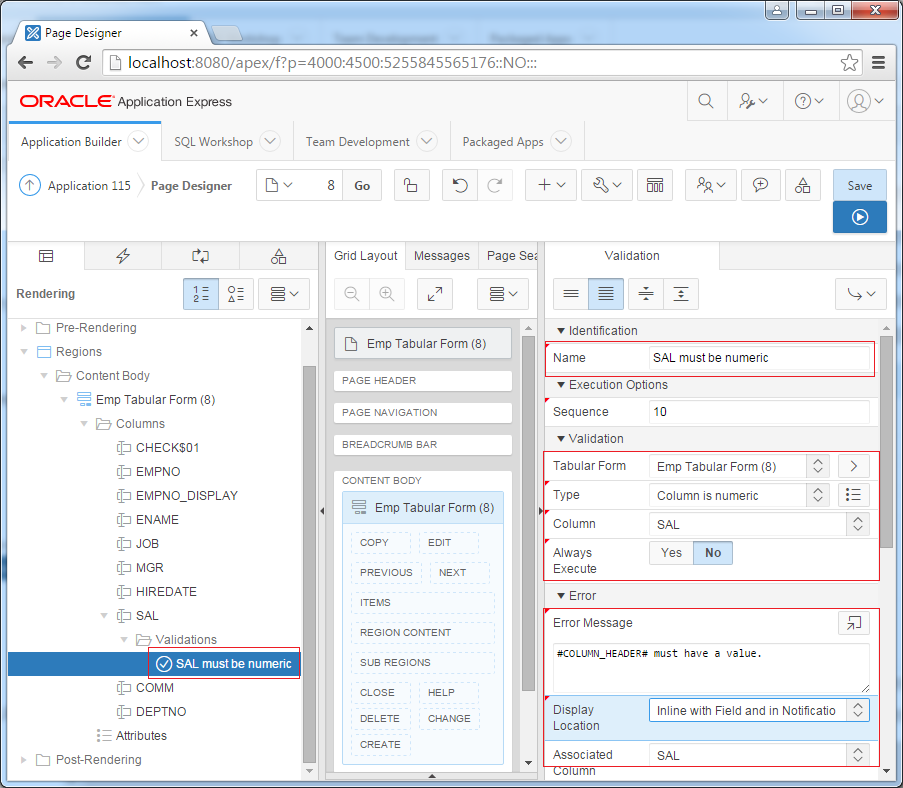
SAL (Salary) Column is a type of numeric, so you need to add validation:
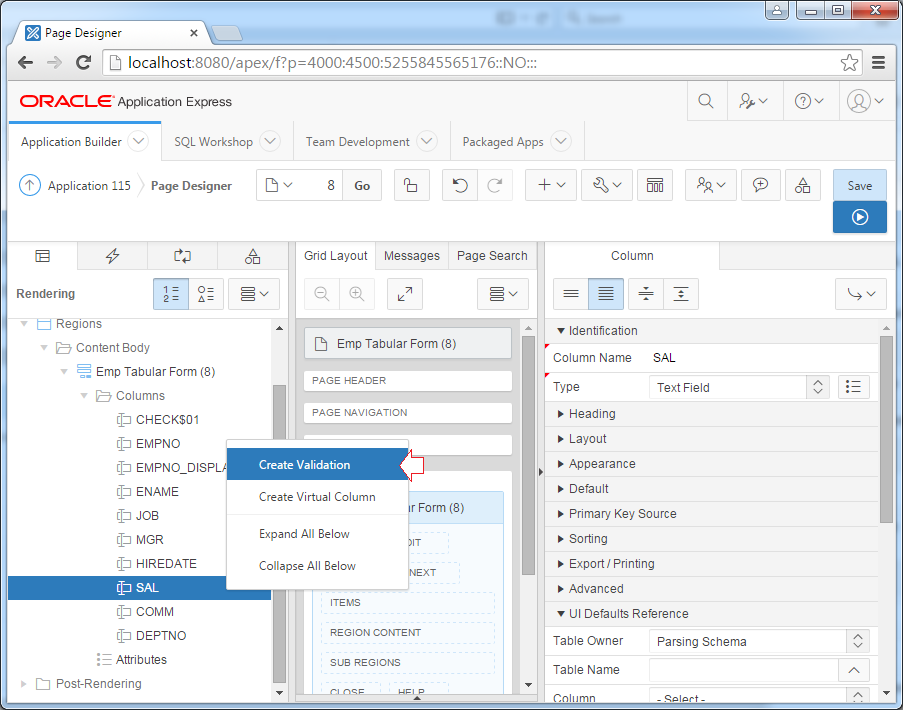
Identification
- Name: SAL must be numeric
- Type: Column is numeric
- Column: SAL
- Error Message: #COLUMN_HEADER# must have a value.
- Display Location: Inline with Field and in Notification
Note :
- #COLUMN_HEADER# is one that acts as a Place Holder, it will be replaced by the title of the corresponding column at runtime.
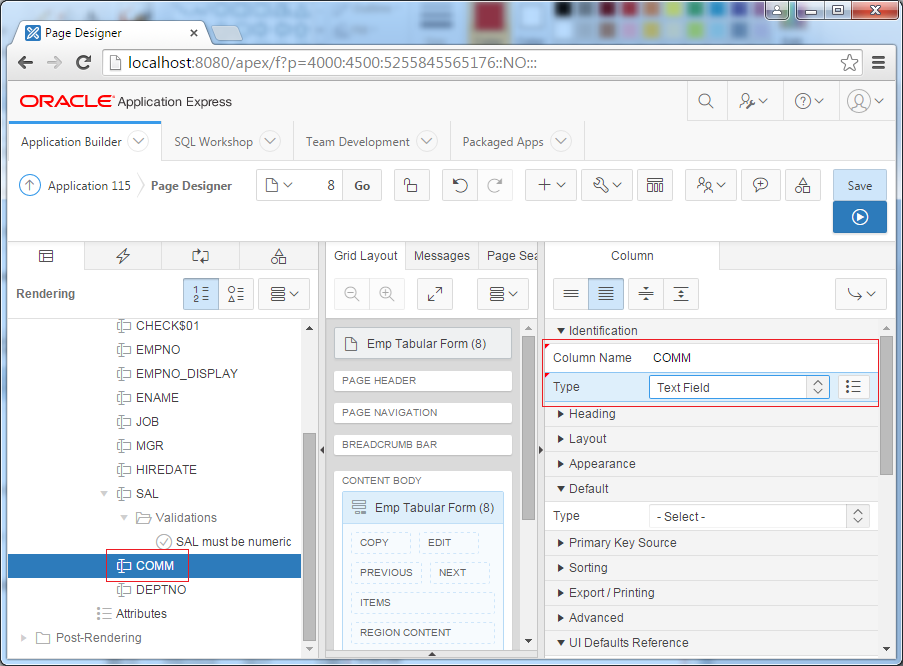
Column COMM:
Identification
- Column Name: COMM
- Type: Text Field
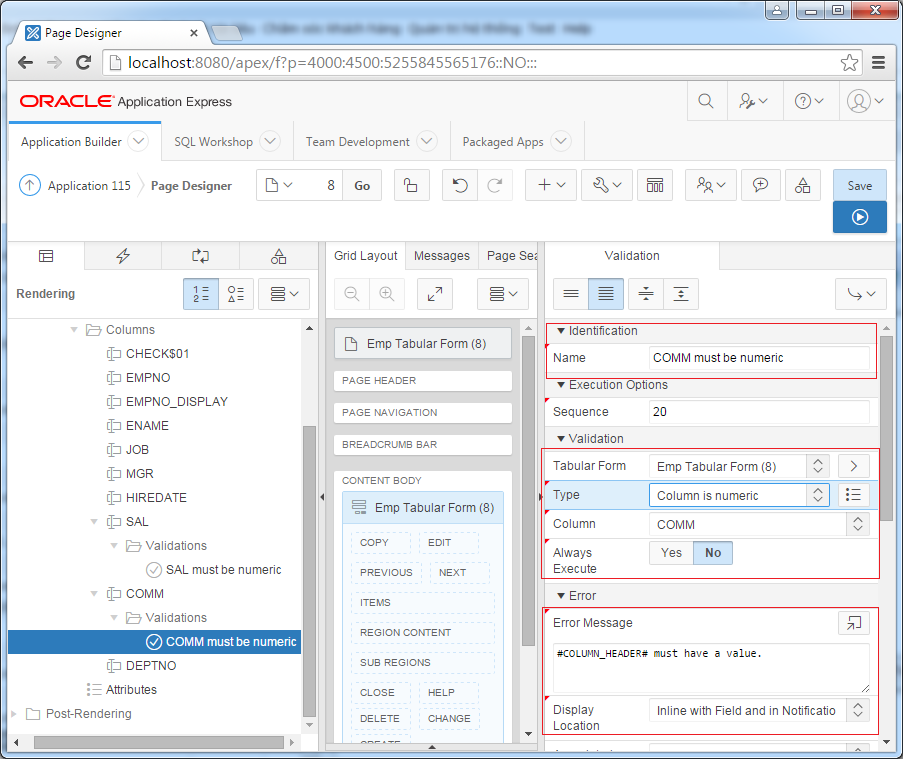
Create Validation for COMM, COMM must be numeric.
Identification
- Name: COMM must be numeric
- Type: Column is numeric
- Column: COMM
- Error Message: #COLUMN_HEADER# must have a value.
- Display Location: Inline with Field and in Notification
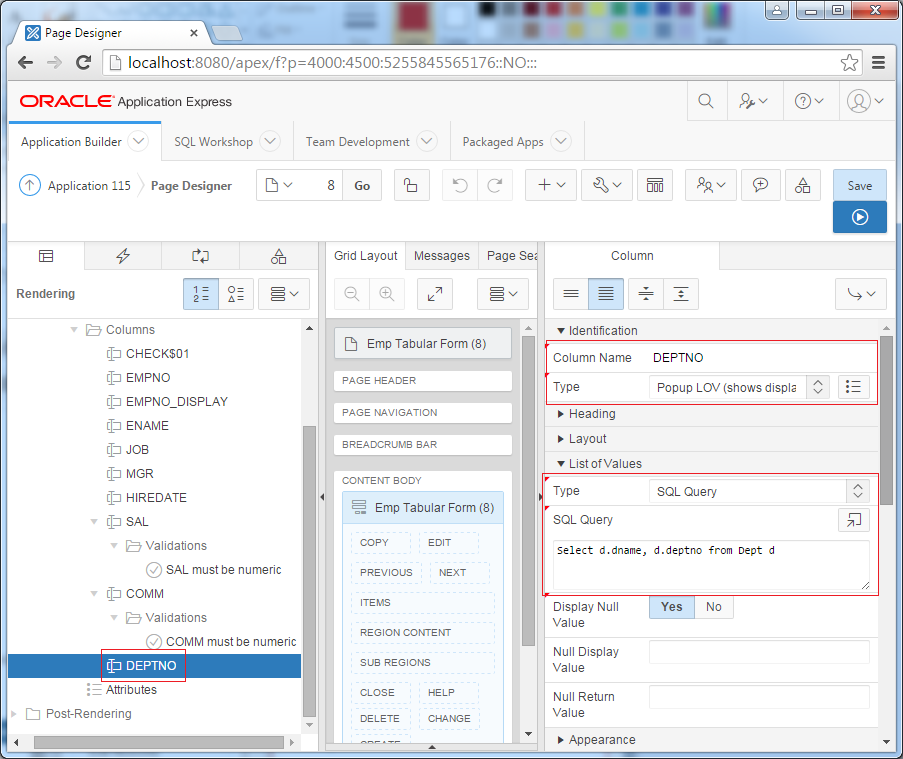
Column DEPTNO:
Identification:
- Type: Popup LOV (shows display values)
- Type: SQL Query
- SQL Query: Select d.dname, d.deptno from Dept d
4. Handling Tabular form
Next we need to add more processing includes create row, edit rows, delete rows
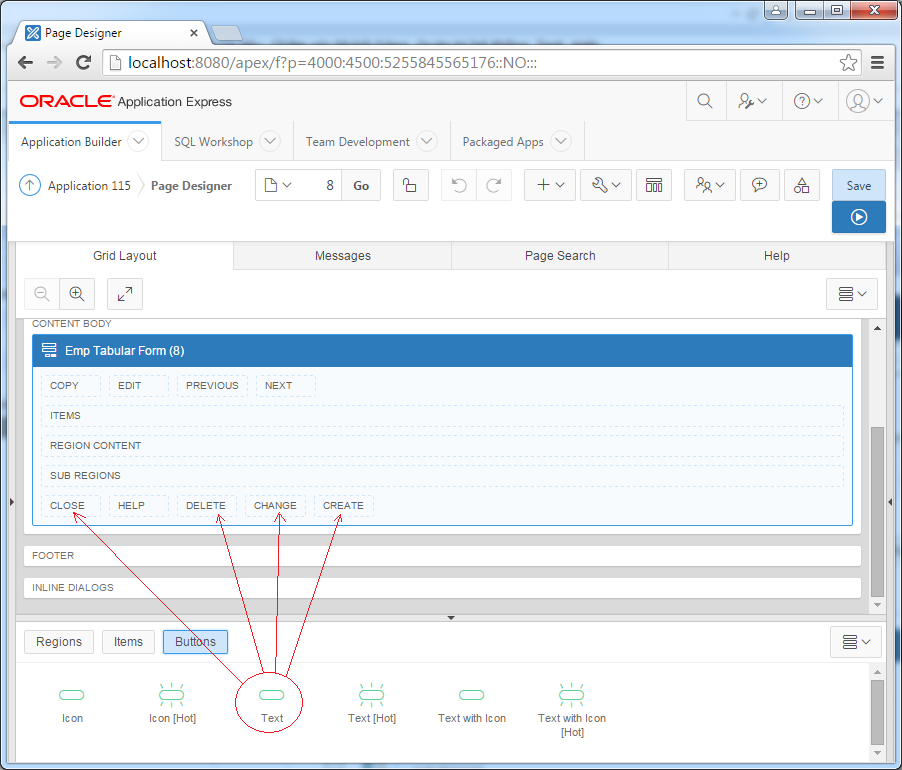
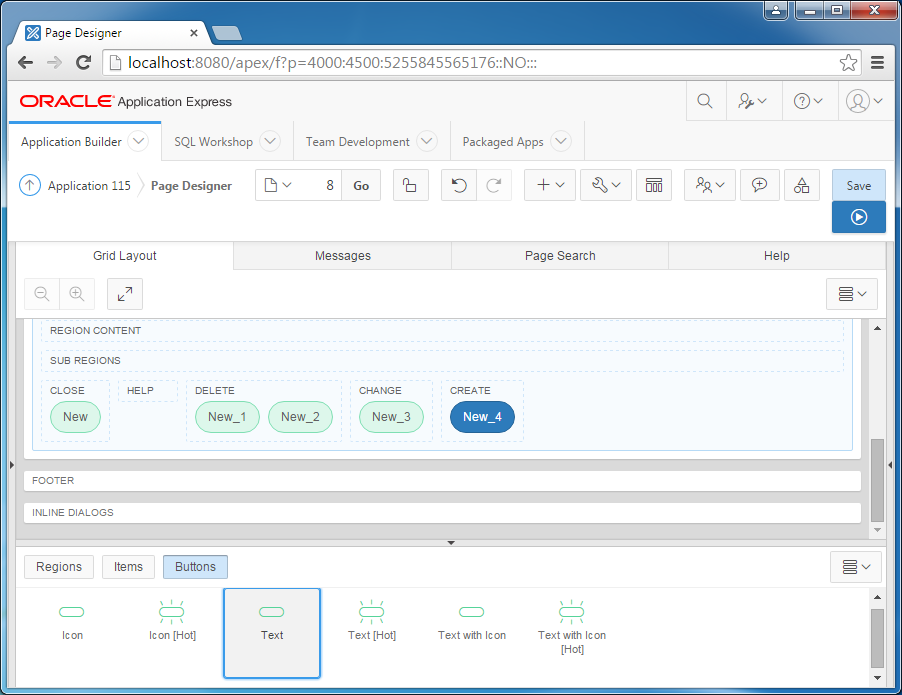
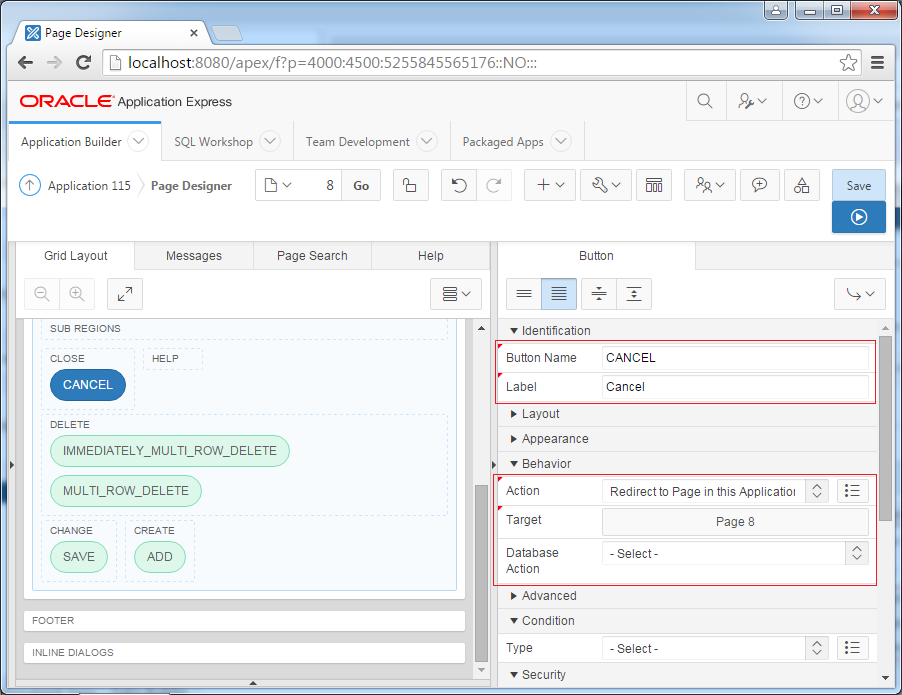
Change name of the buttons, as shown below:
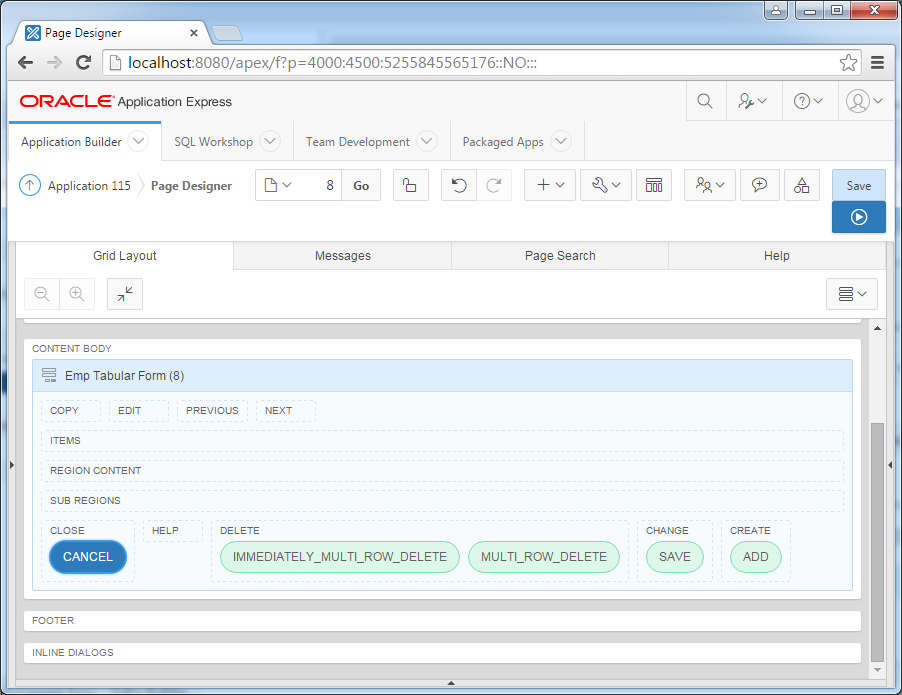
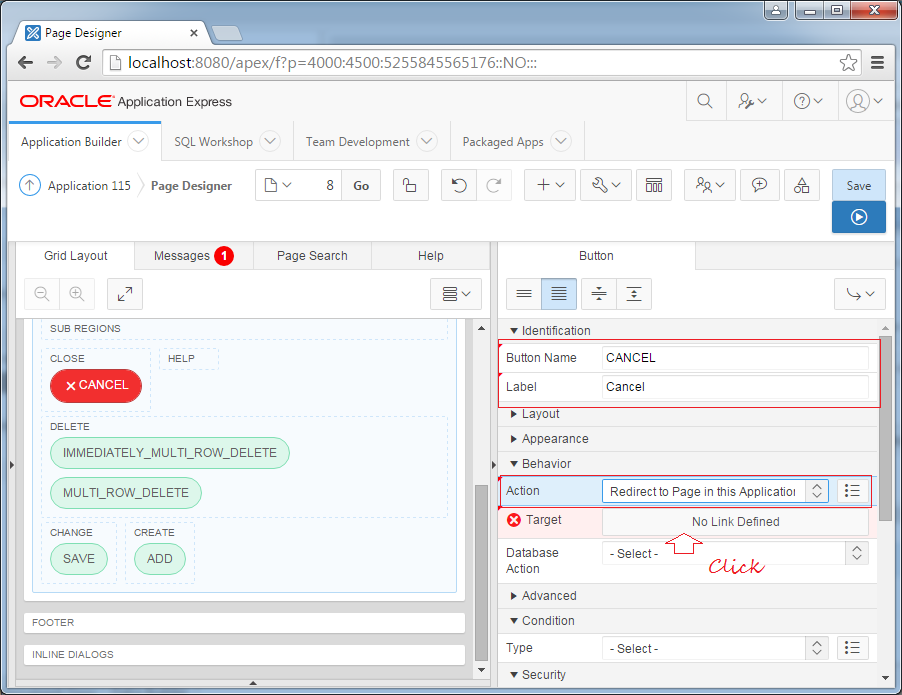
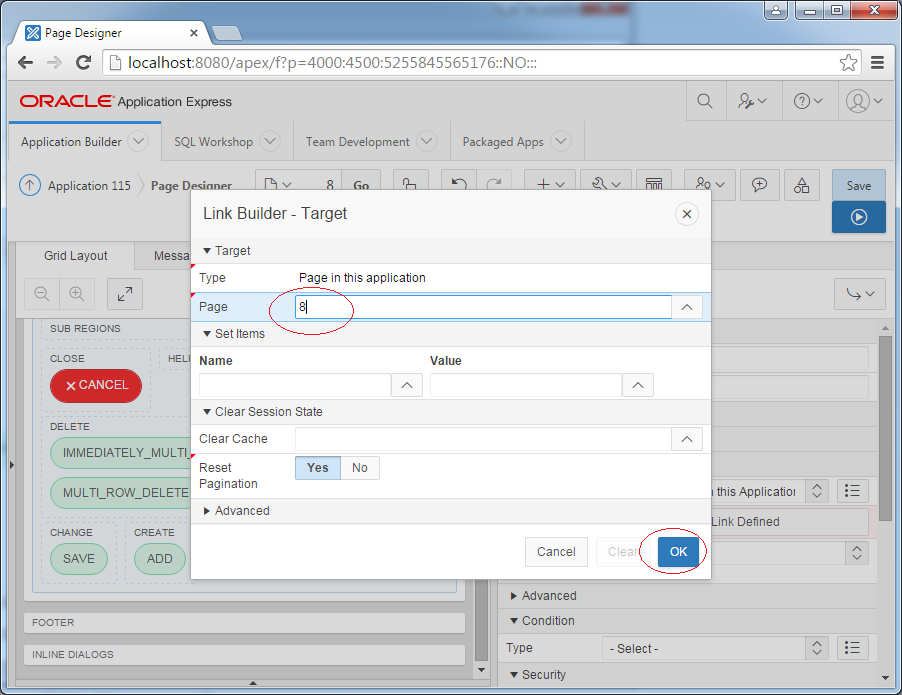
For Cancel button:
When the user clicks the Cancel button, website will refresh the current page (Here is page 8).
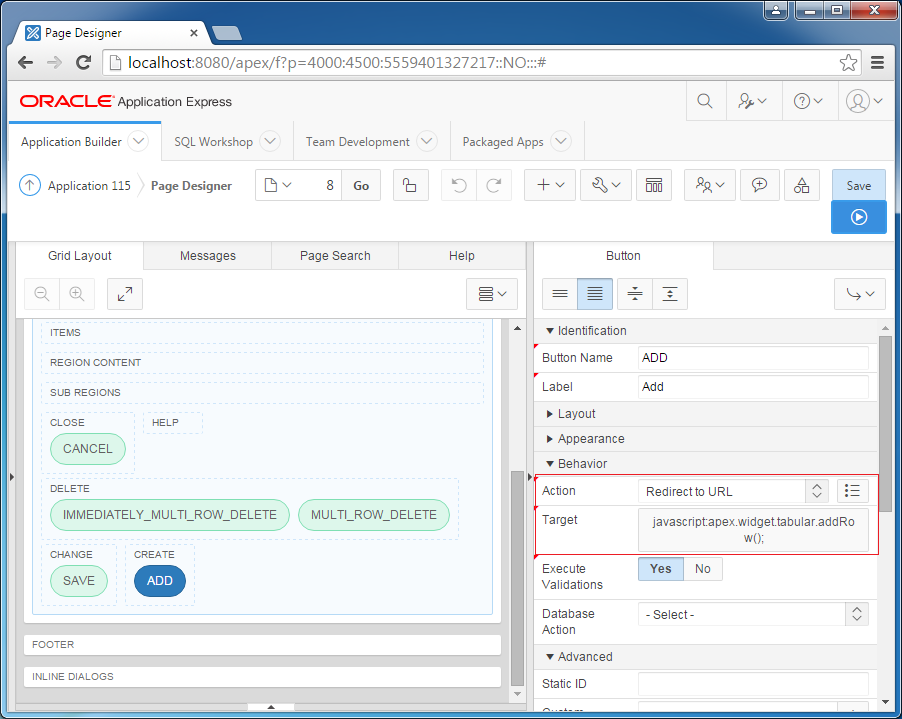
Add rows
When users click on the ADD button, table on page will automatically add a new row, which allows user to enter data. You need to call javascript function to accomplish this.
Idetification
Behavior
- Button Name: ADD
- Label: Add
Behavior
- Action: Redirect to URL
- Target: javascript:apex.widget.tabular.addRow();
Multiple row update
Idetification
Behavior
- Button Name: SAVE
- Label: Save
Behavior
- Action: Submit Page

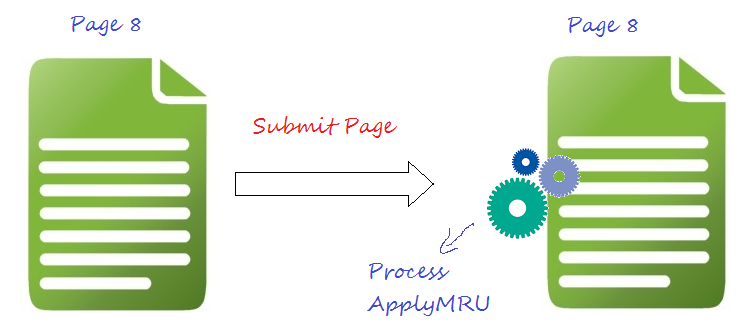
SAVE button need to save the information of several records at once, including new records, modified records. You need to declare a process to handle this. This process will be run once immediately after the page is called, it will update the records that have changes and insert new records.
Create Process:
Idetification
Settings
Execution Options
Success Messages
Condition
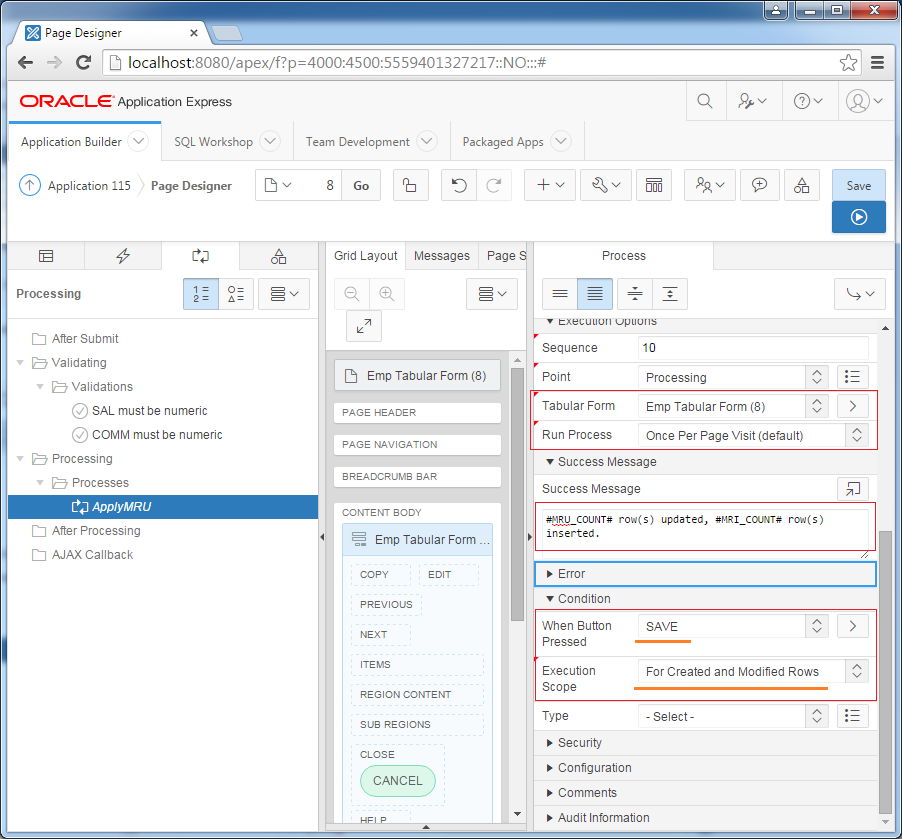
- Name: ApplyMRU
- Type: Tabular Form - Multi Row Update
Settings
- Table Name: EMP
- Primary Key Column: EMPNO
Execution Options
- Tabular Form: Emp Tabular Form (8)
- Run Process: Once Per Page Visit (default)
Success Messages
- Success Message: #MRU_COUNT# row(s) updated, #MRI_COUNT# row(s) inserted.
Condition
- When Button Pressed: SAVE (Name of button)
- Execution Scope: For Created and Modified Rows

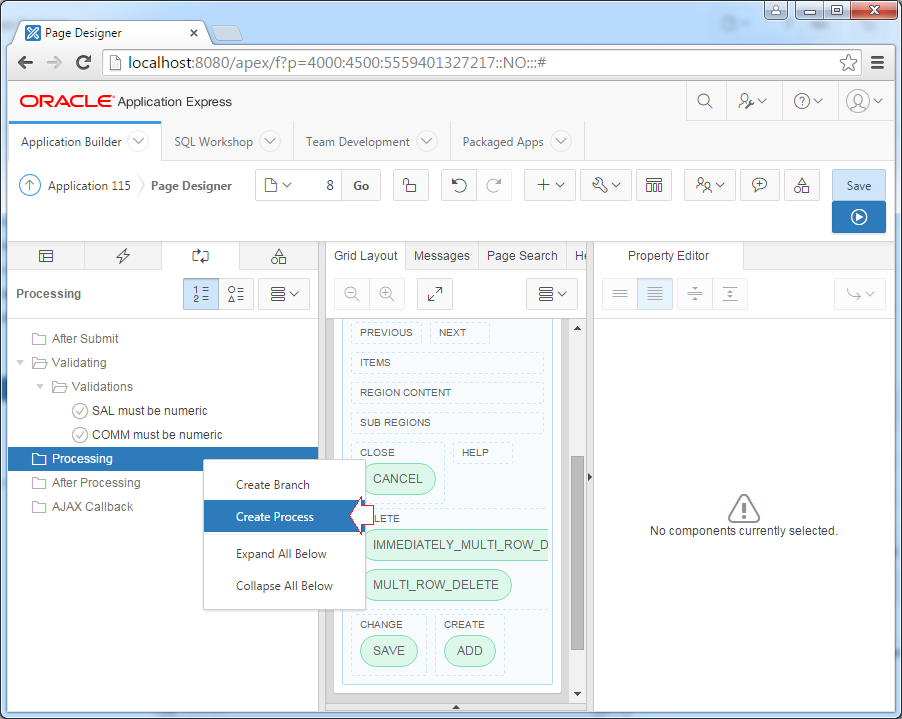
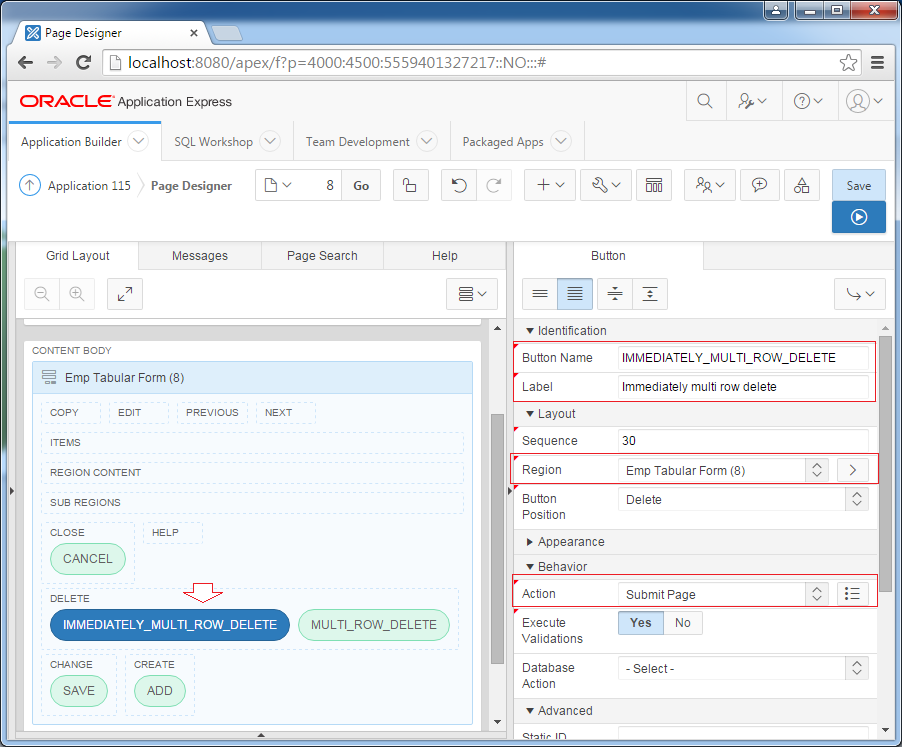
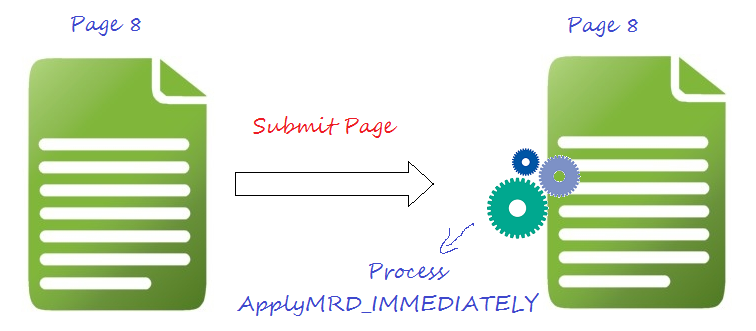
Deleting multiple rows immediately
Handling button to immediately delete the selected records, no need to confirm:
To delete many rows you need to create a Process to handle this. This process will be executed once as soon as the page is called.
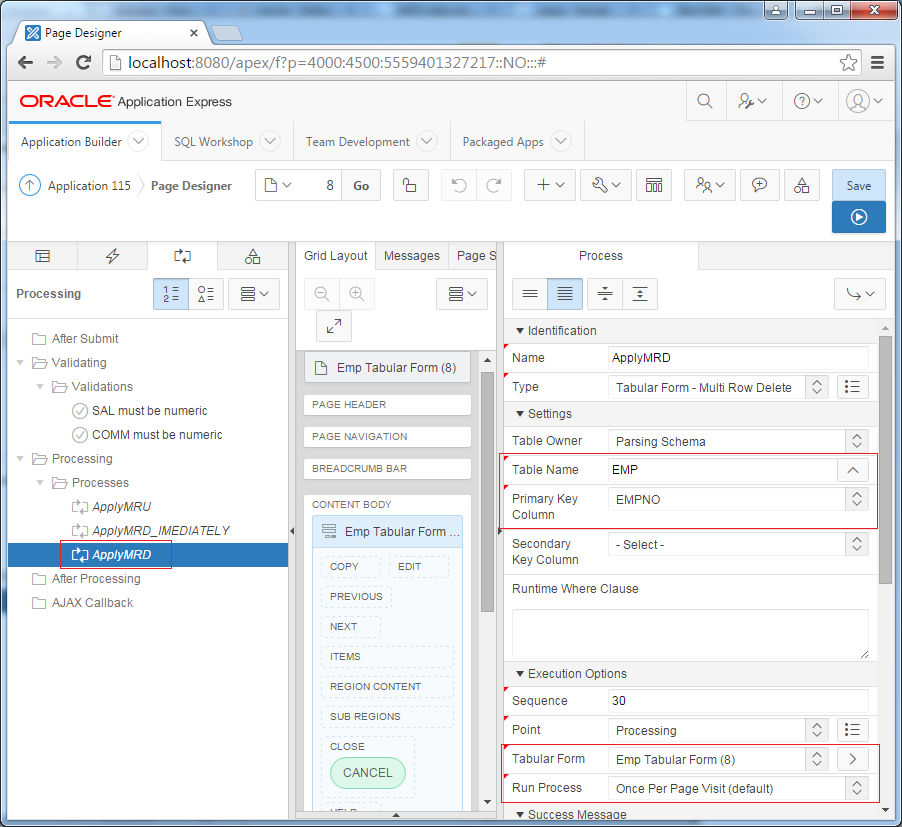
Create Process:
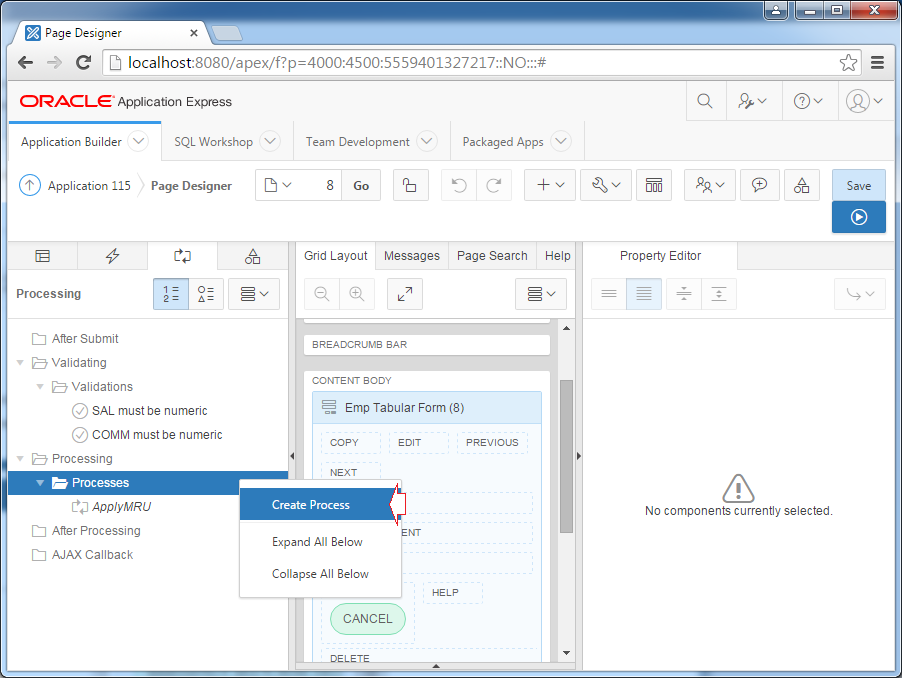
Idetification
Settings
Execution Options
Success Messages
Condition
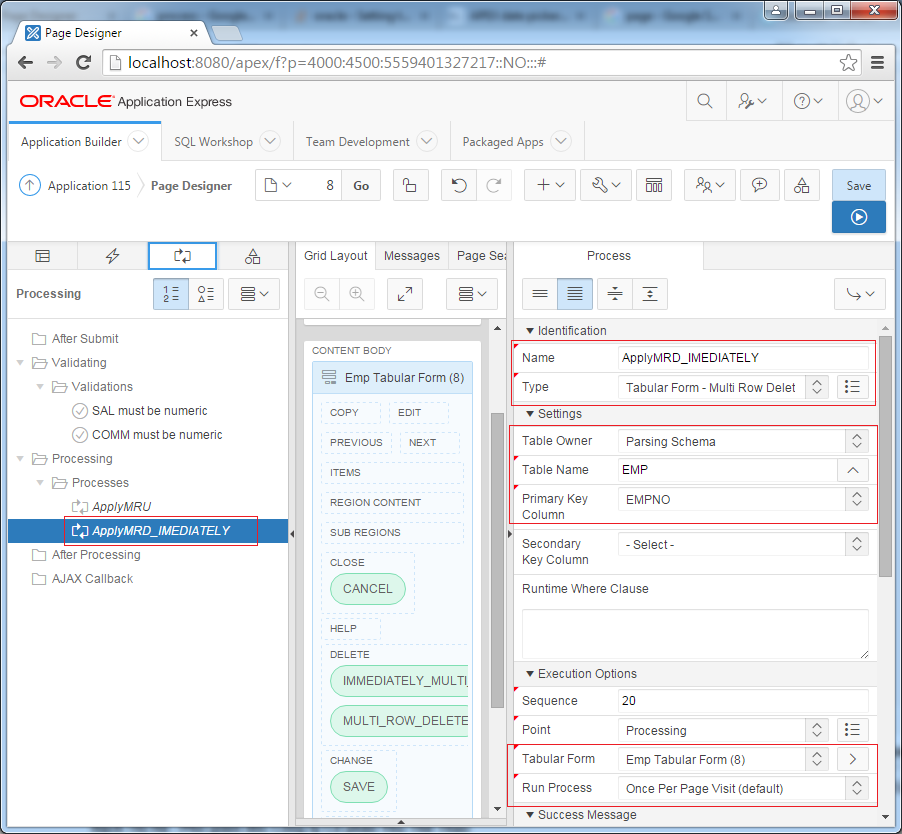
- Name: ApplyMRD_IMMEDIATELY
- Type: Tabular Form - Multi Row Delete
Settings
- Table Name: EMP
- Primary Key Column: EMPNO
Execution Options
- Tabular Form: Emp Tabular Form (8)
- Run Process: Once Per Page Visit (default)
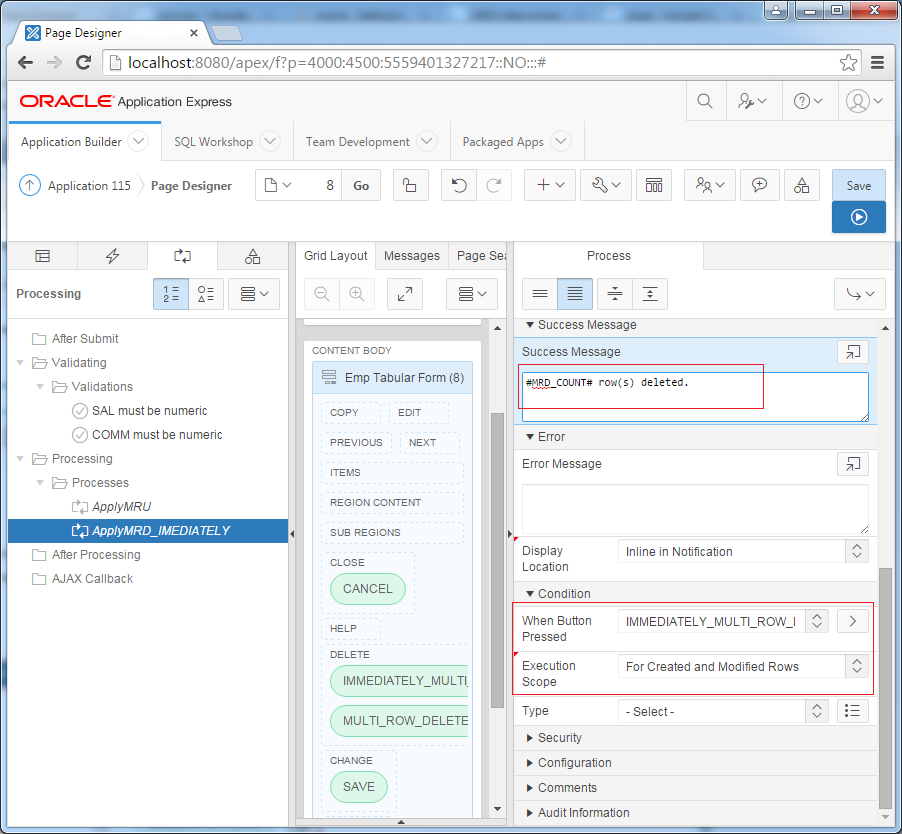
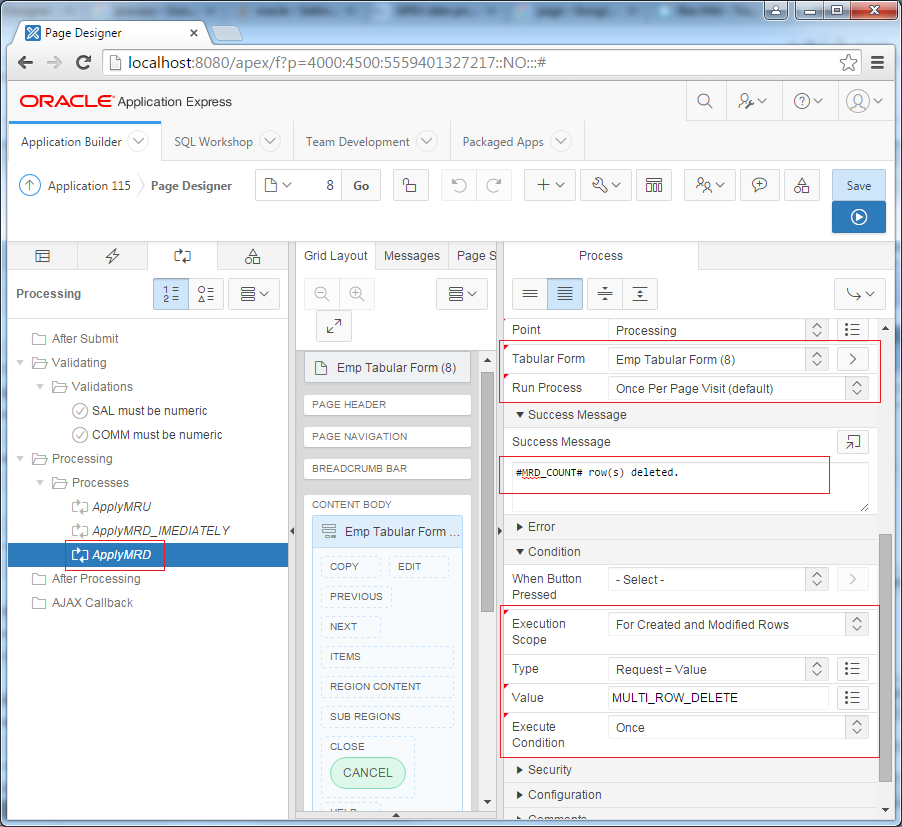
Success Messages
- Success Message: #MRD_COUNT# row(s) deleted.
Condition
- When Button Pressed: IMMEDIATELY_MULTY_ROW_DELETE (Name of button)
- Execution Scope: For Created and Modified Rows
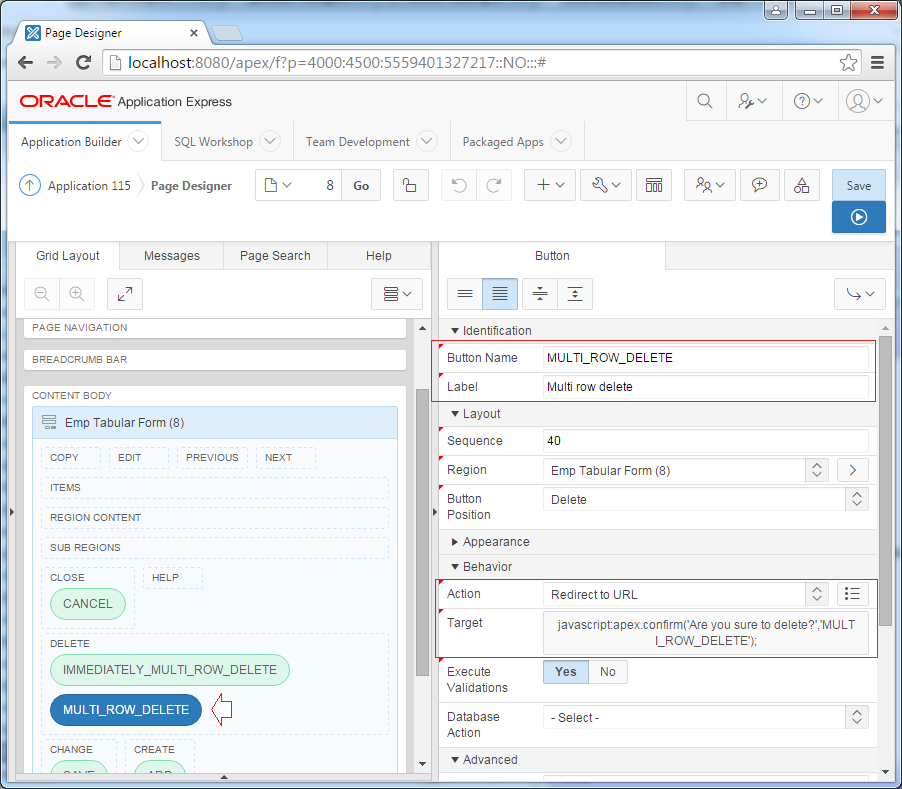
Deleting multiple rows - Prompt before deleting
Before deleting records, the program asks whether the user agrees to delete or not?
Idetification
Behavior
- Button Name: MULTI_ROW_DELETE
- Label: Multi Row Delete
Behavior
- Action: Redirect URL
- Target: javascript:apex.confirm('Are you sure to delete?','MULTI_ROW_DELETE');
apex.confirm (...) is a JavaScript function used to ask the user before executing the command of button.
// The function includes 2 parameters, message and Button Name.

apex.confirm('Message ...', 'Button Name');

// Example:

apex.confirm('Are you sure to delete?','MULTI_ROW_DELETE');

// Using variable.
// htmldb_delete_message is a javascript variable
// with value: 'Would you like to perform this delete action?'
// (You need to declare this variable).
apex.confirm(htmldb_delete_message,'MULTI_ROW_DELETE');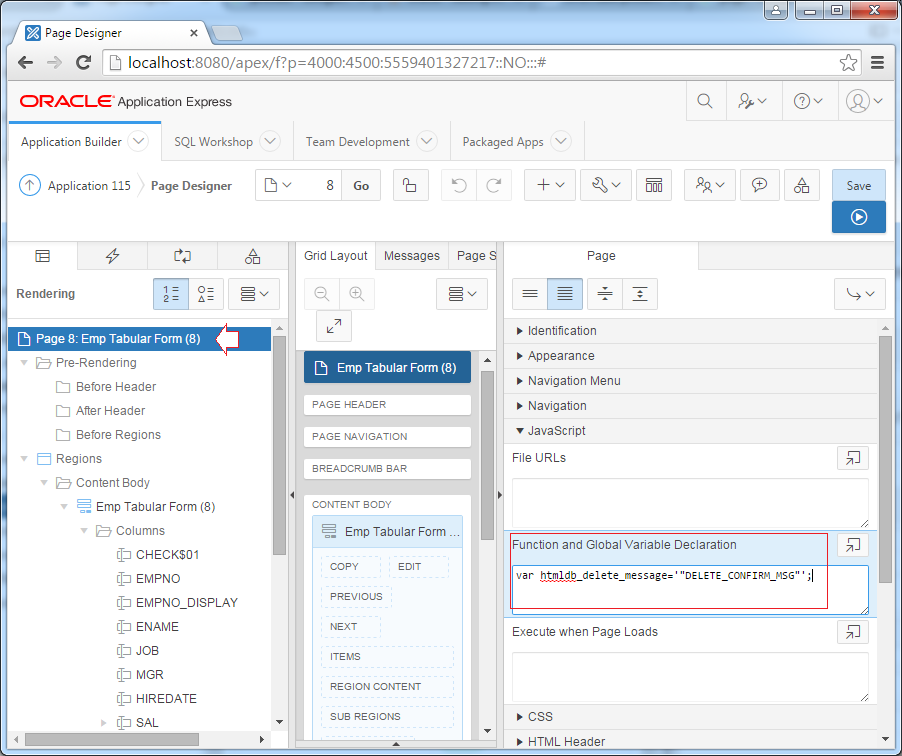
// Declare a variable named htmldb_delete_message
var htmldb_delete_message='Would you like to perform this delete action?';

// Or:
// "DELETE_CONFIRM_MSG" is a constant available in APEX.
// It has value: Would you like to delete this thực action?


var htmldb_delete_message='"DELETE_CONFIRM_MSG"';


// Then can use this variable in the whole page.

apex.confirm(htmldb_delete_message,'MULTI_ROW_DELETE');
To delete many rows you need to create a Process to handle this. This process will be executed once as soon as the page is called.
Idetification
Settings
Execution Options
Success Messages
Condition
- Name: ApplyMRD
- Type: Tabular Form - Multi Row Delete
Settings
- Table Name: EMP
- Primary Key Column: EMPNO
Execution Options
- Tabular Form: Emp Tabular Form (8)
- Run Process: Once Per Page Visit (default)
Success Messages
- Success Message: #MRD_COUNT# row(s) deleted.
Condition
- Execution Scope: For Created and Modified Rows
- Type: Request = Value
- Value: MULTI_ROW_DELETE
- Execute Condition: Once
Oracle APEX Tutorials
- What is Oracle Application Express?
- Install Oracle Apex 5.0
- Install Oracle REST Data Services (ORDS) for Oracle APEX
- Oracle APEX Tutorial for Beginners (APEX 5.0)
- Oracle APEX Tabular Form Tutorial with Examples
- Oracle APEX Master Details Tutorial with Examples
- Custom Authentication in Oracle APEX
- Oracle APEX Dynamic Action Tutorial with Examples
- Create Dynamic Content Region in Oracle APEX (PL/SQL Dynamic Content)
- What is Business Intelligence?
- Install Oracle BI 11g
Show More