Install Oracle Database 11g on Windows
2. Download Oracle 11g
Oracle allows you to freely download. You can access the home page of Oracle to download this software.
Please check whether your operating system is 32bit bit or 64bit to download exactly.
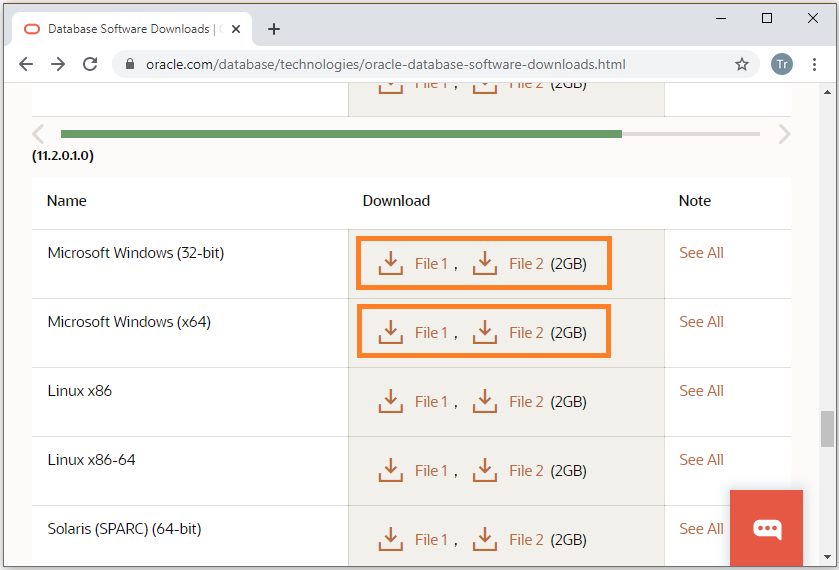
After finishing downloading, you have 2 zip files. Decompress them in the same folder.
3. Installing Oracle 11g on Windows
First, we need to understand the structure of Oracle a bit:
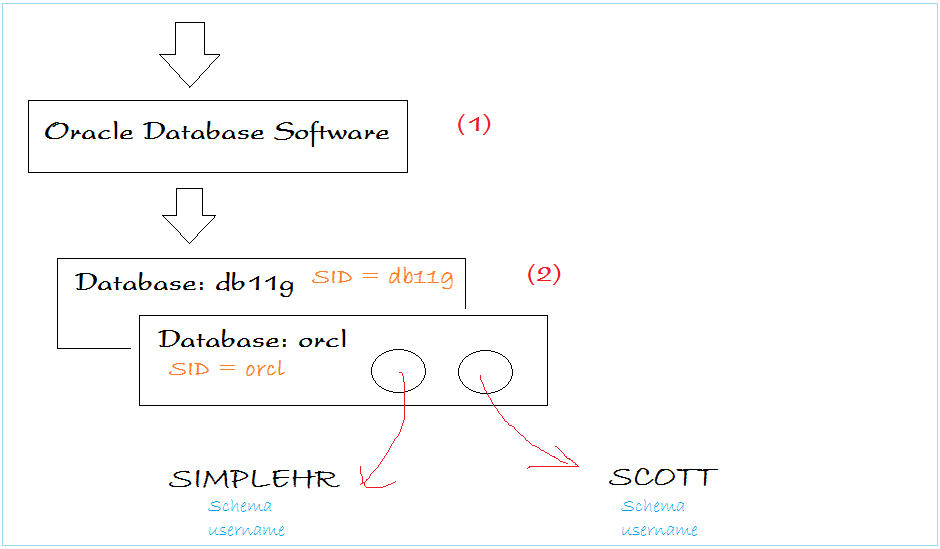
The structure of Oracle includes:
The structure of Oracle includes:
- Oracle software
- And Database
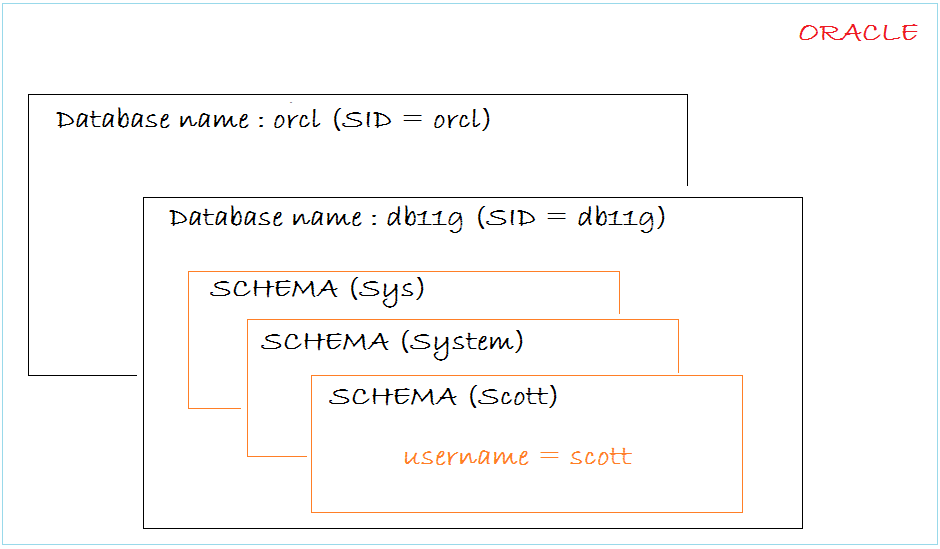
Each Database contains many SCHEMA, and the name of Schema is simultaneously the User name to log in that Schema. A Schema contains a system of tables, views, functions, procedures, packages, etc.
That means that after installing the Oracle software is complete, we can create one or more Database. Usually you only need 1.
That means that after installing the Oracle software is complete, we can create one or more Database. Usually you only need 1.
As illustrated below, we install Oracle software, and create two database named Db11g and ORCL respectively. The name of the database is also known as SID.
Setup Oracle:
If you decompress two installing zip files of Oracles in two folders, and begin installing the setup file in the folder 1. During the installment, it will require you to indicate the position of folder 2 for continuing to install.
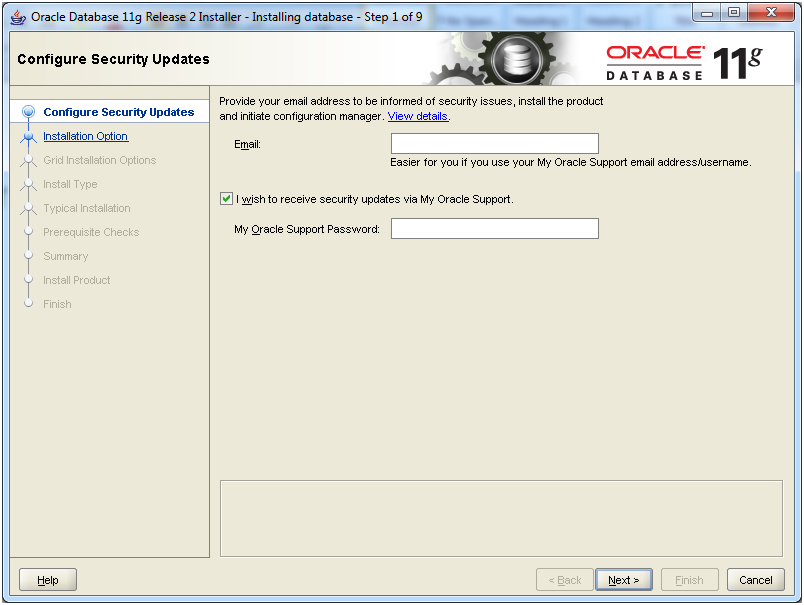
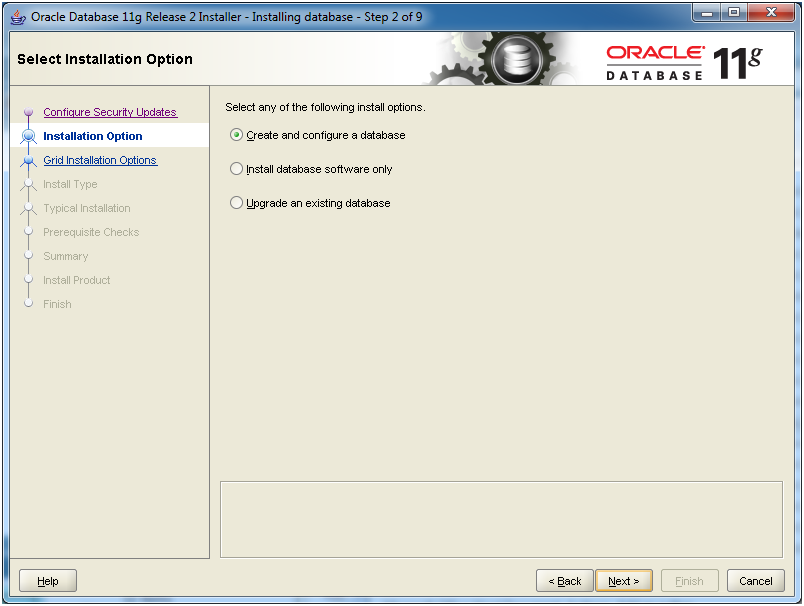
We will install Oracle software and immediately create a Database named as db11g (or SID = db11g).
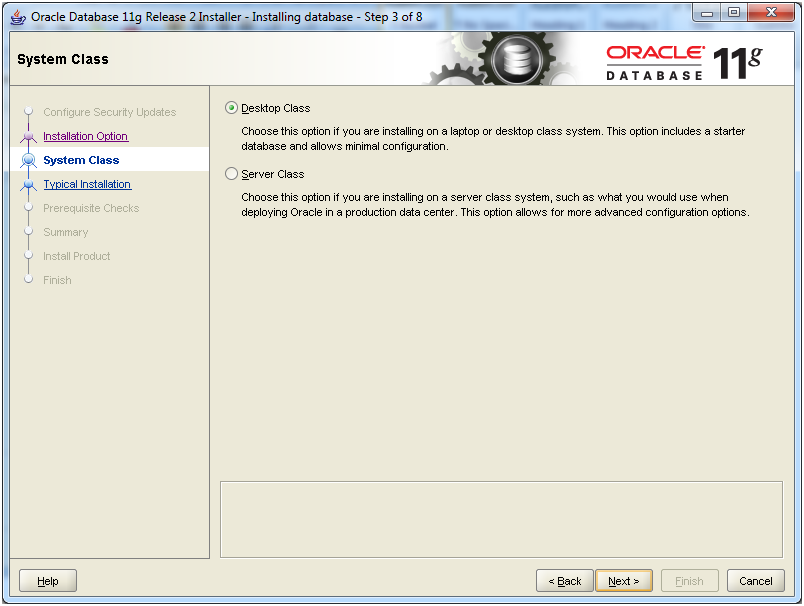
For the studying purpose or for small companies, select:
- Desktop class
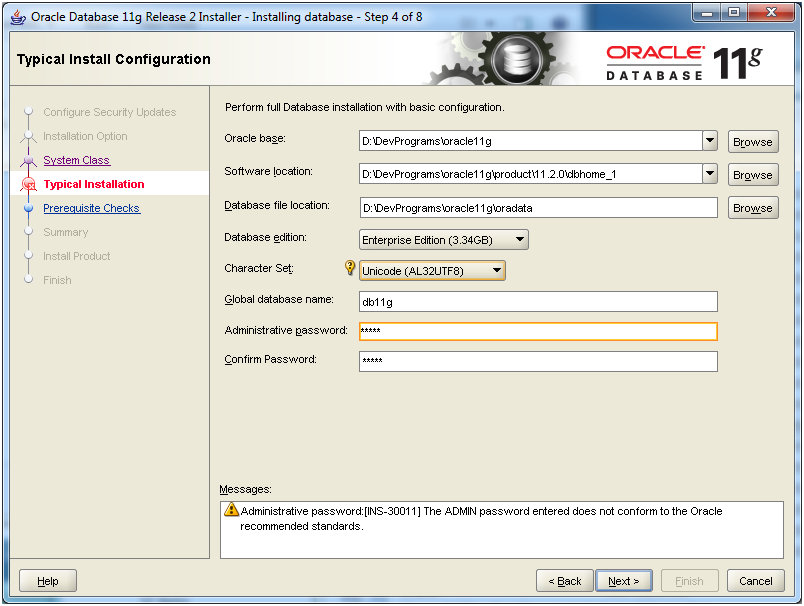
To store many kinds of language (including Vietnamese), you should select: Unicode (AL32UTF8)
- Character Set: Unicode (AL32UTF8)
- Global database name: db11g (You can select another name, this is the name of database, known as SID)
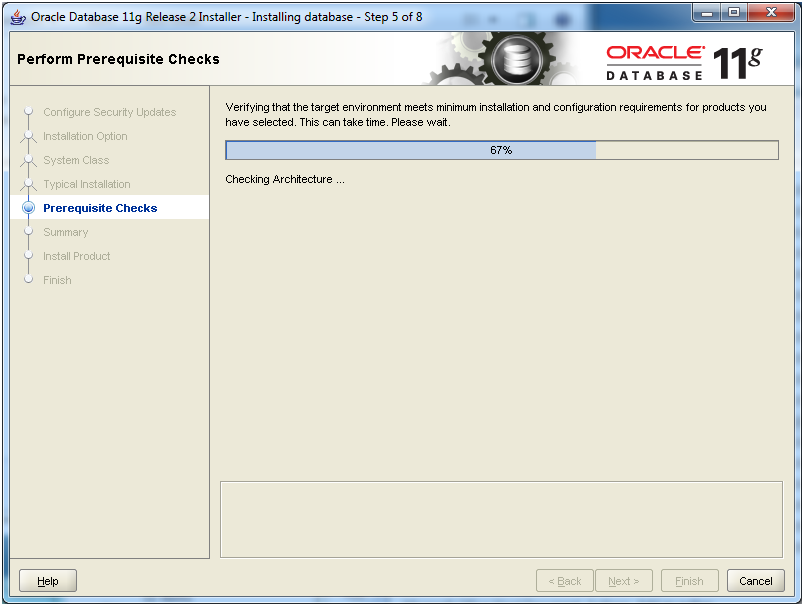
And wait until the installation is complete.
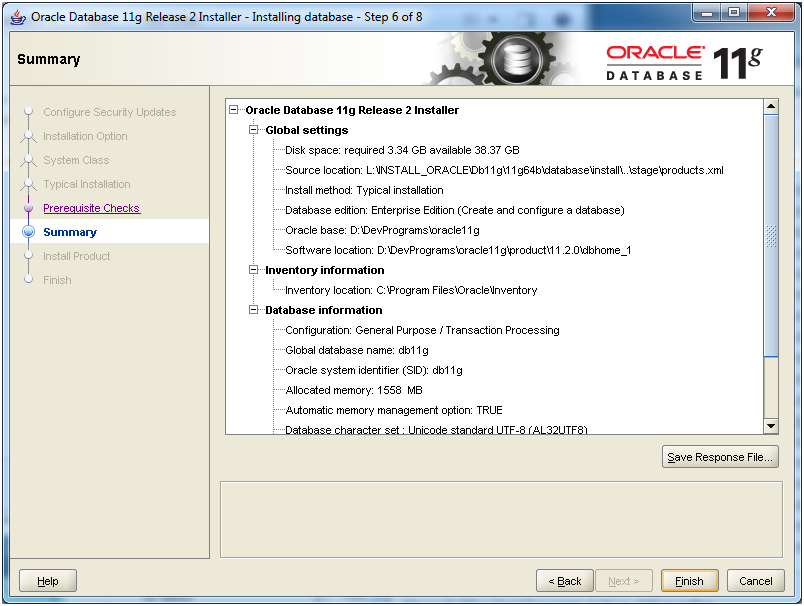
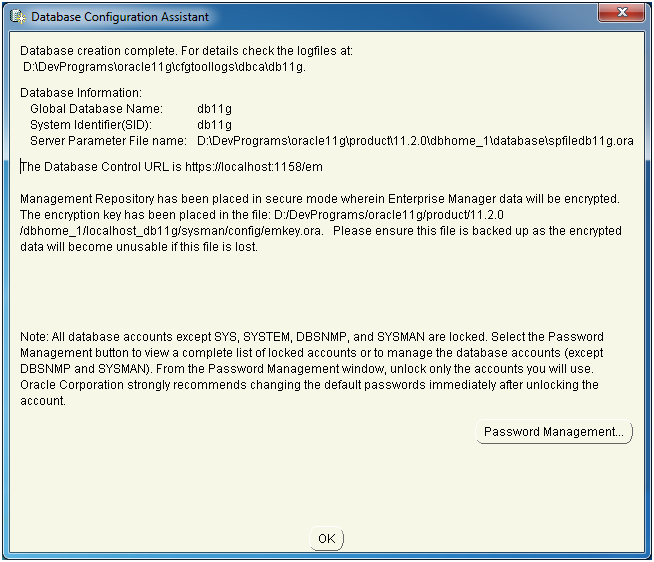
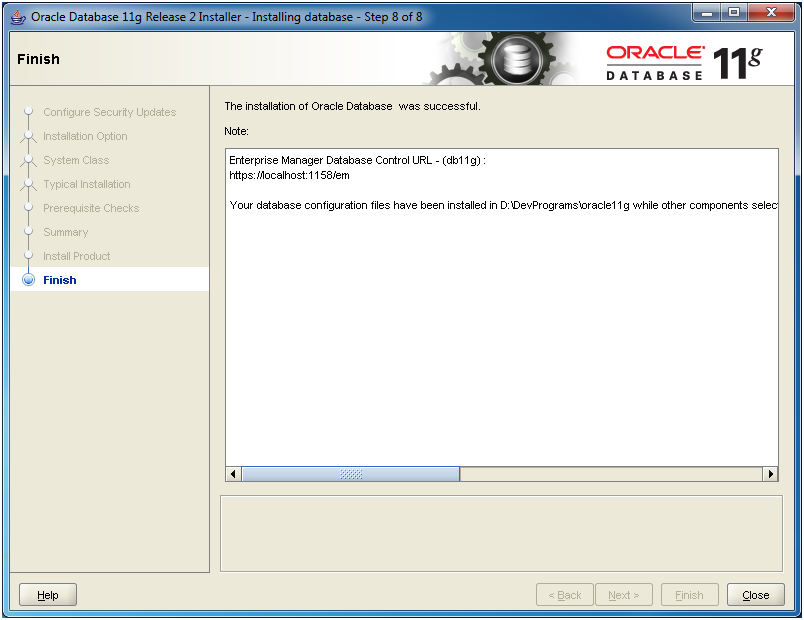
Now the installment of Oracle is successful. Parameters relating to database will be synthesized, and you should remember this information.
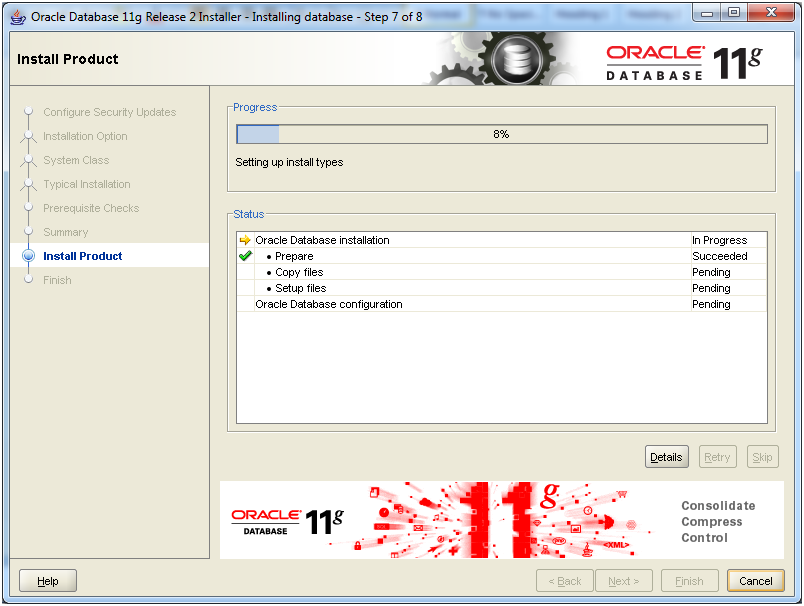
In the next step, the installer will create Database named as db11g like the previous step where we named.

This is the summary information after a successful installation:
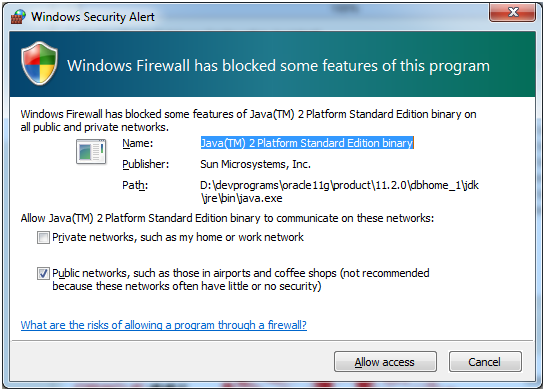
If Windows shows a warning of blocking the activity of Oracle, you click on "Allow access" for allowing Oracle to work.
4. Check the installation and install the expansion
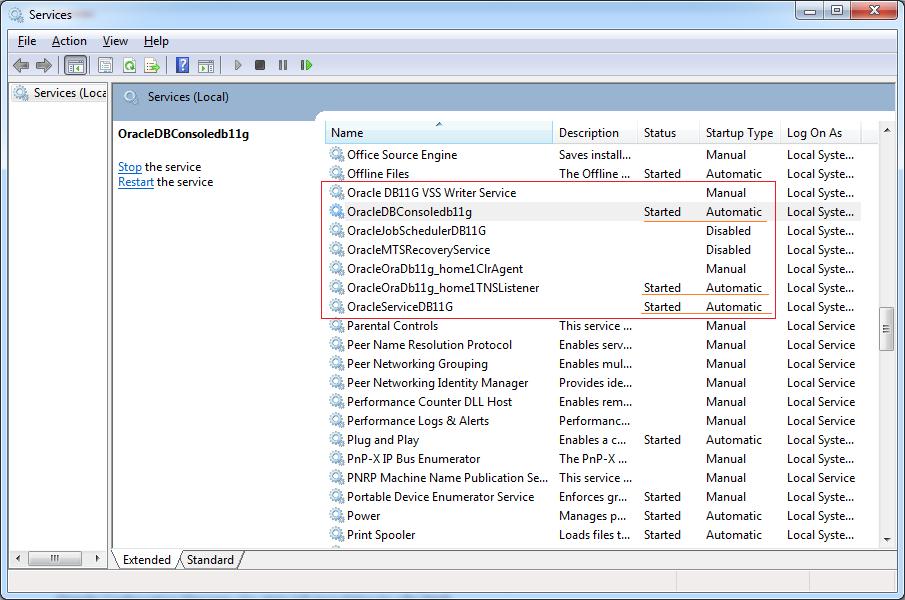
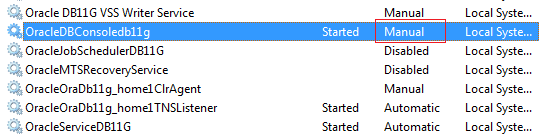
After the successful installation, services of Oracle are automatically started. We can access to Service of Windows to check.
There are 7 services of Oracle, but usually three services are enough for the operation:
- OracleDBConsole<sid>
- OracleOra<Sid>_home1TNSListener
- OracleService<SID>
Oracle DB Console
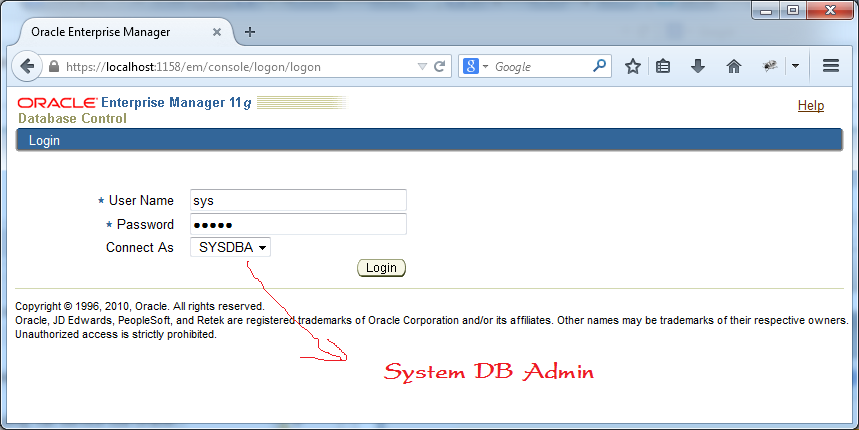
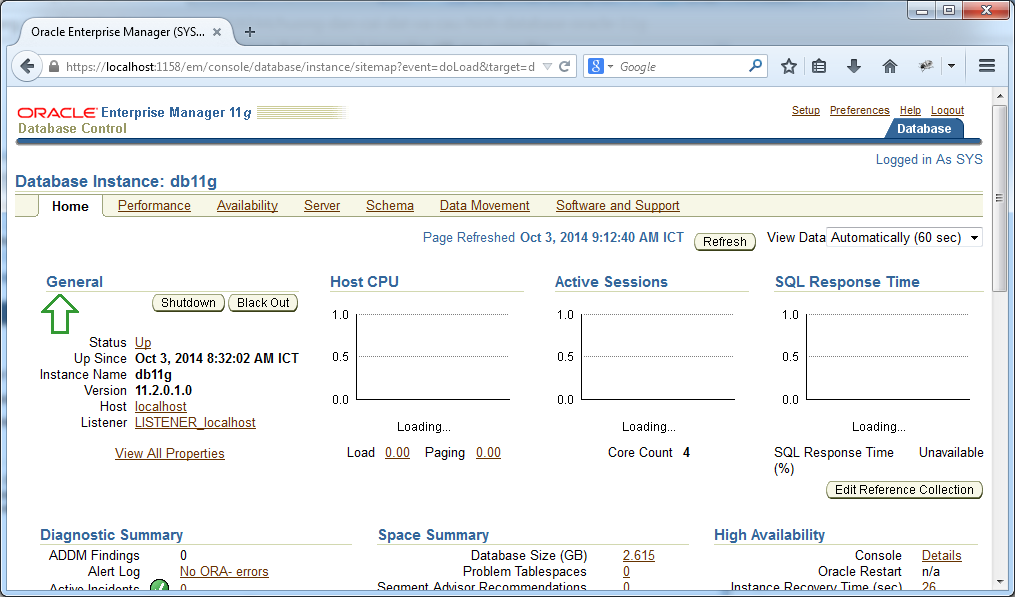
OracleDBConsole<sid> Service helps you access to the administration page to manage Database through URL:
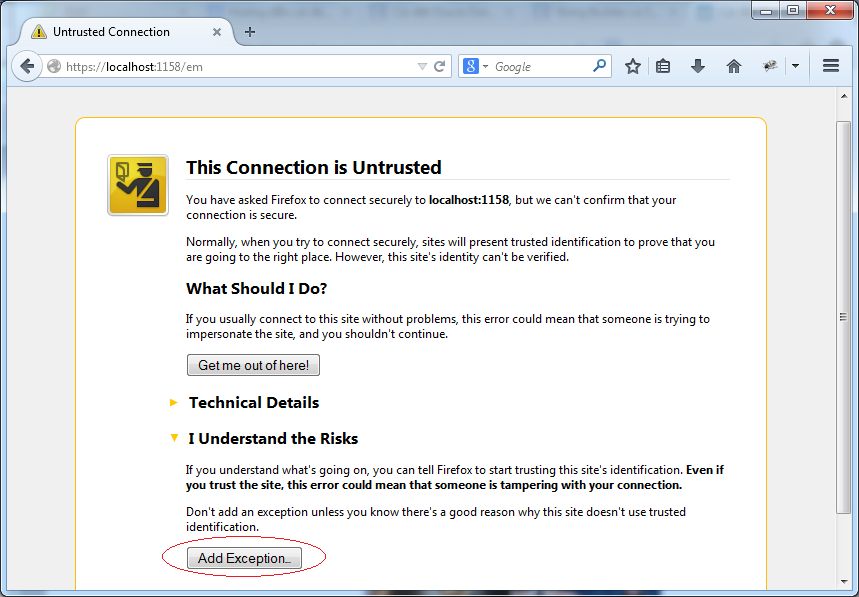
Using OracleDBConsole allows you to see overall how your DB is operating, how resources are used, how users work, and what order is executed,... (In this document, I do not mention it in detail).
If your Oracle is used for the purpose of learning, you can turn off the OracleDBConsole service for avoiding wasting computer resources unnecessarily. For the best, you turn the starting mode to Manual so that the service does not automatically start whenever the computer starts. You can actively run it if necessary.
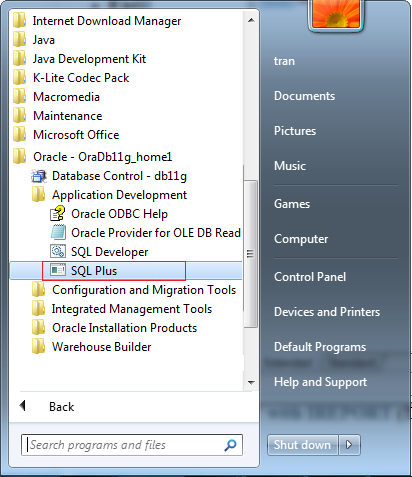
SQL Plus
SQL Plus is a simple Console tool that allows you to execute SQL command. Usually, we work with a more visual tool (It is unavailable when you install Oracle) that you need to install additionally. It can be software provided by a third party.
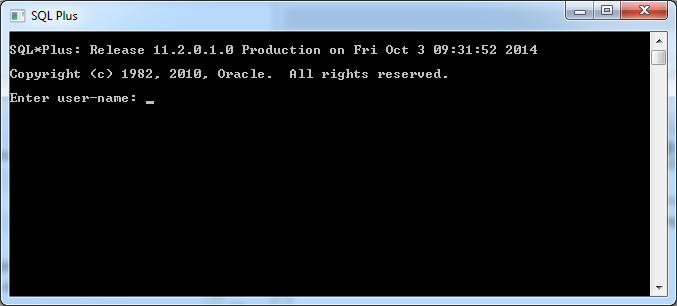
To have the highest permissions we log into user sys.
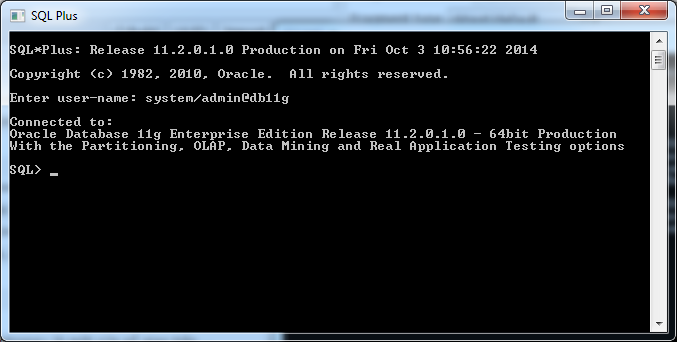
Syntax:
Syntax:
- <username>/<password>@<sid>
- sys/admin@db11g
- sys/admin@db11g as sysdba
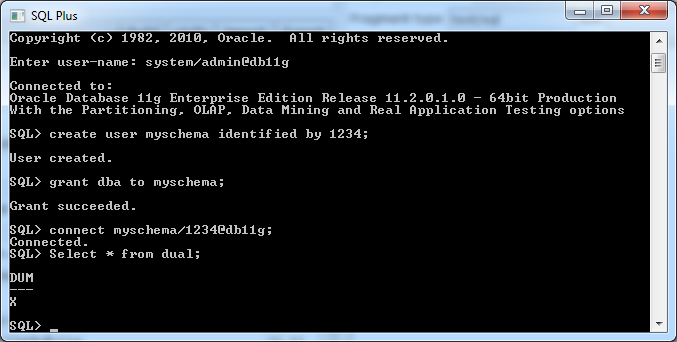
Create a new SCHEMA whose name is myschema and password is 1234. In essence, we create a user whose name is myschema, as user and schema are the same name in Oracle.
-- Create user (schema), password 1234
Create user myschema identified by 1234;

-- Grant to myschema.
-- For example: dba: DB Admin.
grant dba to myschema;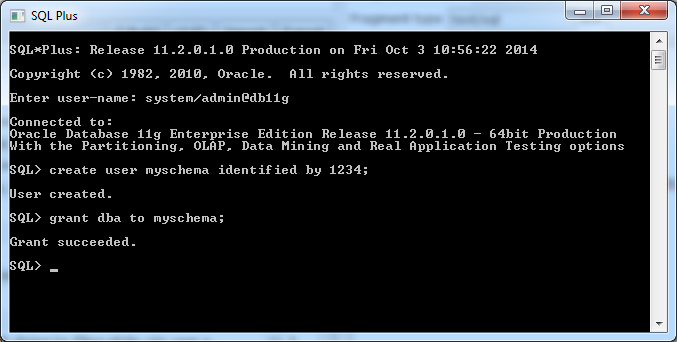
Connect to the Schema just created:
connect myschema/1234@db11g;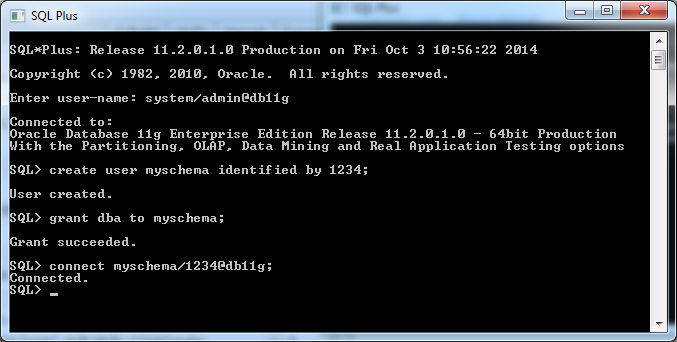
Try to query a table:
Note: DUAL is a system table, can use in all SCHEMA, can try query it.-- DUAL is a system table. Select * from Dual;
Create table:
-- Create table Account
Create table Account (User_Name varchar2(30), Full_Name varchar2(64) ) ;

-- Insert 2 row to Account.

Insert into Account(user_name, full_name) values ('gates', 'Bill Gate');

Insert into Account(user_name, full_name) values ('edison', 'Thomas Edison');

-- Query
Select * from Account;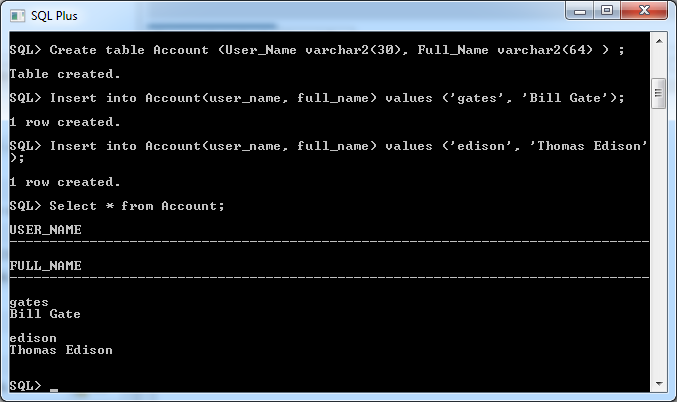
You should install a visual tool, SQL Plus is just a basic tool.
You can see the instruction of installing and using a visual tool (PL/SQL Developer):
Create new Database
As we all know, Oracle can create multiple databases.
Each database has a name, the name is usually the same as the SID (System Identify DB).
Database have one or more Schema
Each database has a name, the name is usually the same as the SID (System Identify DB).
Database have one or more Schema
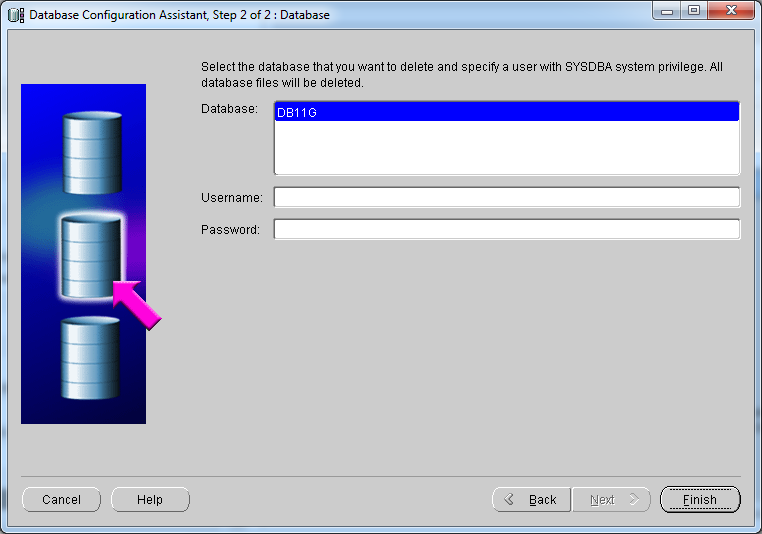
We rarely have to add a new Database, if any, we add a new Schema to an available Database. However, during the installation of Oracle, if you don't select to automatically create Database, you can use this function to create a new DB. Besides, if you install Database whose Character Set is unsuitable, you can delete DB and create a new one.
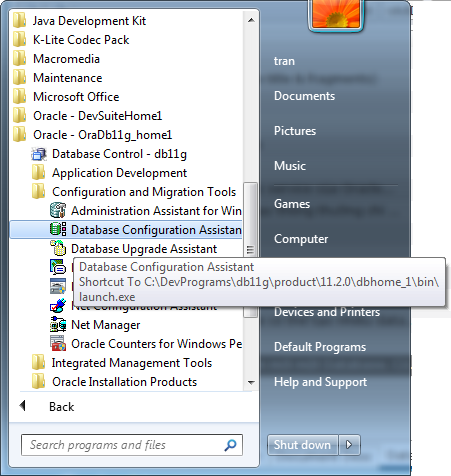
In case you want to delete available Database:

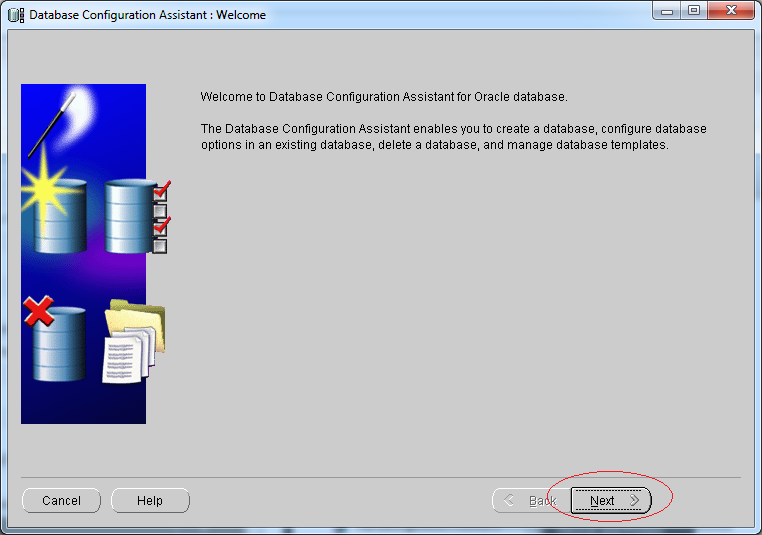
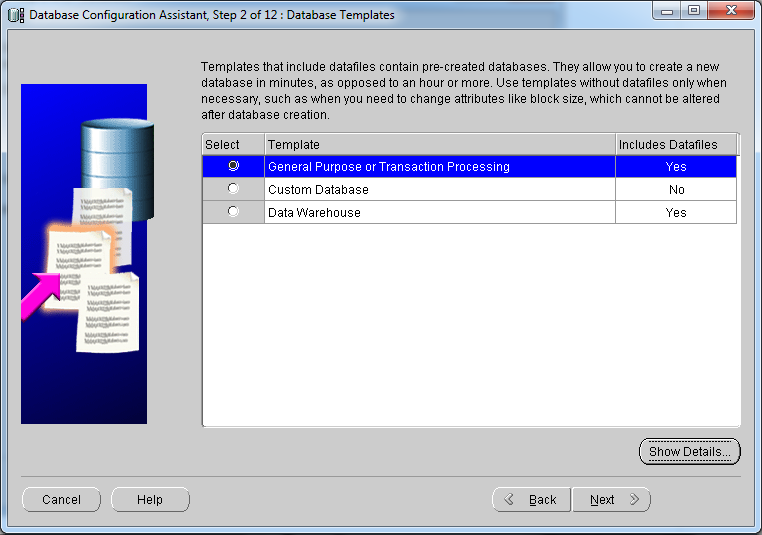
Crate a Database:
Enter Database name and SID. For the best, SID should be alike Database name.
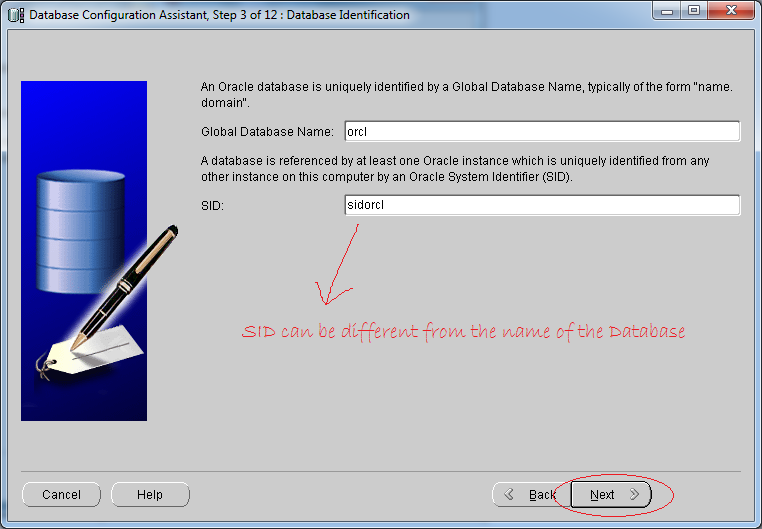
The installation is simple, you can continue.
Oracle Database Tutorials
- Install PL/SQL Developer on Windows
- Sample Oracle Database for Learning SQL
- SQL Tutorial for Beginners with Oracle
- Install Oracle Database 11g on Windows
- Install Oracle Database 12c on Windows
- Install Oracle Client on Windows
- Create Oracle SCOTT Schema
- Sample Database
- Database structure and Cloud features in Oracle 12c
- Importing and Exporting Oracle Database
- Oracle String functions
- Split comma separated string and pass to IN clause of select statement in Oracle
- Hierarchical Queries in Oracle
- Oracle Database Link and Synonym Tutorial with Examples
- Oracle PL/SQL Programming Tutorial with Examples
- XML Parser for Oracle PL/SQL
- Standard Database Auditing in Oracle
- Creating and Managing Oracle Wallet
Show More