Understanding Spring Cloud Eureka Server with Example
1. Eureka Server - Why?
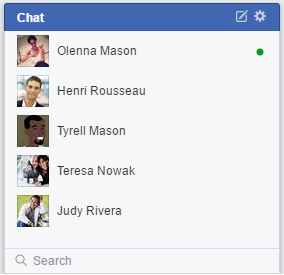
OK, I'm sure that you've ever used a Chat application to talk to your friends on the Internet. When you log in the Chat application on your computer, what will happen?
- You log in the Chat , which means that you inform with Chat Server that you are online.
- The Chat Server will provide you with a list of other people. They are online or offline status.
- And thus, you have discovered the list of online people and certainly, others also find out you.
In fact, when the number of Chat users increases, the number of Chat Servers increases, and they have a way to share the status of the user.
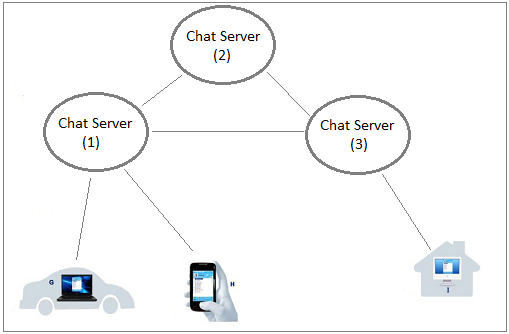
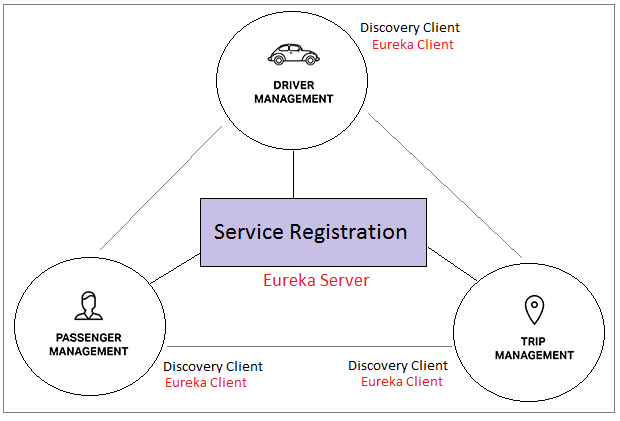
You build a distributed system that consists of a lot of services (applications) running independently on different servers. For these services are able to talk to each other, they need to "discover" each other. When discovering each other, they can call each other's services. Therefore, there needs to be something like the Chat Server tohelp services (applications) register its existence.
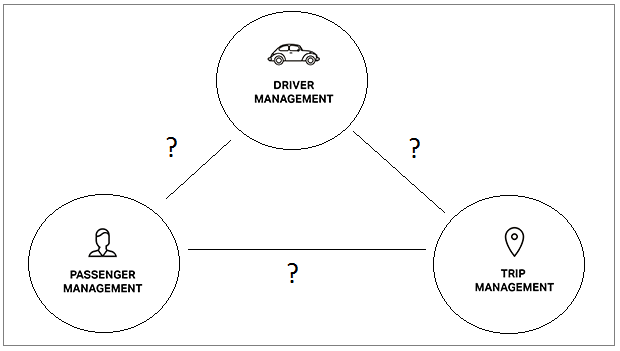
It is "Service Registration". All services (applications) of the distributed system have to be registered with the "Service Registration". It is like the fact that all people in a country must register for birth certificate.
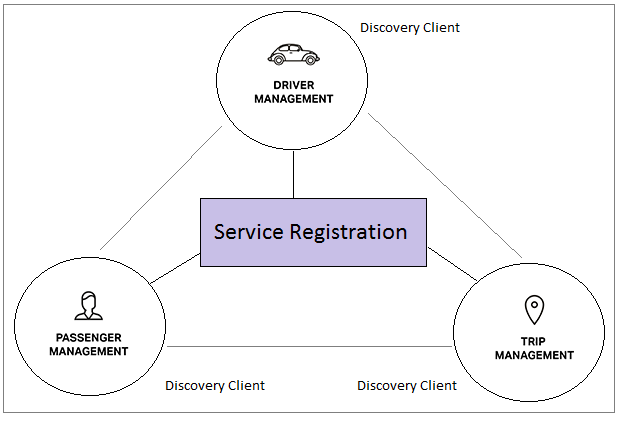
There are many technologies for you to obtain a "Service Registration". The Spring Cloud provides you with the following technology solutions:
- Eureka
- Zookeeper
- Cloud Foundry
- Consul
2. The objective of the lesson
In this post, I am going to guide you for creating one Service Registration using Spring Cloud Eureka Server.
It will be better if you learn about more information on the Netflix and Eureka introduced in the following posts:
- Tìm hiểu về Spring Cloud Netflix Eureka
The issues to be discussed in this lesson:
Step 1:
- Create one Service Registration using Spring Cloud Eureka Server.
- Run this application directly on the Eclipse and view Eureka Monitor.
Step 2:
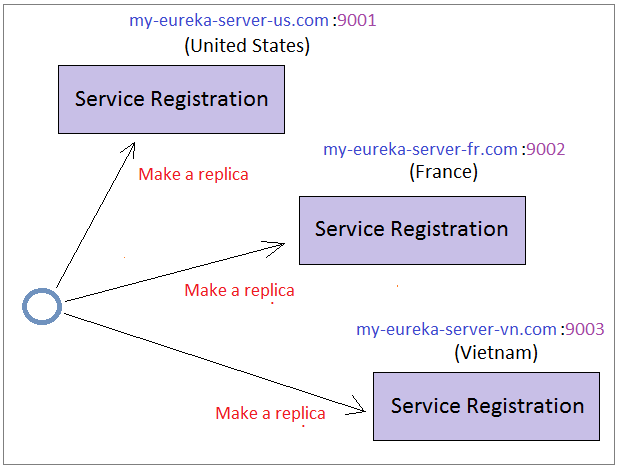
- Create replicas for application to deploy on different servers. Each replica will run a different domain name. Herein, we assume that the system has a lot of users therefore, many replicas are required to run on different servers to reduce overload
- Explain the status sharing mechanism between Eureka Servers.
3. Create Spring Boot project
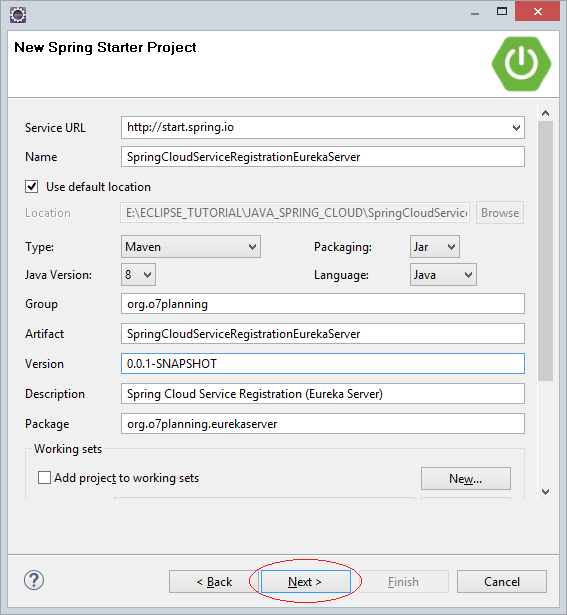
On the Eclipse, create a Spring Boot project:
Enter:
- Name: SpringCloudServiceRegistrationEurekaServer
- Group: org.o7planning
- Artifact: SpringCloudServiceRegistrationEurekaServer
- Description: Spring Cloud Service Registration (Eureka Server)
- Package: org.o7planning.eurekaserver
pom.xml
<?xml version="1.0" encoding="UTF-8"?>
<project xmlns="http://maven.apache.org/POM/4.0.0"
xmlns:xsi="http://www.w3.org/2001/XMLSchema-instance"
xsi:schemaLocation="http://maven.apache.org/POM/4.0.0
http://maven.apache.org/xsd/maven-4.0.0.xsd">
<modelVersion>4.0.0</modelVersion>
<groupId>org.o7planning</groupId>
<artifactId>SpringCloudServiceRegistrationEurekaServer</artifactId>
<version>0.0.1-SNAPSHOT</version>
<packaging>jar</packaging>
<name>SpringCloudServiceRegistrationEurekaServer</name>
<description>Spring Cloud Service Registration (Eureka Server)</description>
<parent>
<groupId>org.springframework.boot</groupId>
<artifactId>spring-boot-starter-parent</artifactId>
<version>1.5.9.RELEASE</version>
<relativePath/> <!-- lookup parent from repository -->
</parent>
<properties>
<project.build.sourceEncoding>UTF-8</project.build.sourceEncoding>
<project.reporting.outputEncoding>UTF-8</project.reporting.outputEncoding>
<java.version>1.8</java.version>
<spring-cloud.version>Edgware.RELEASE</spring-cloud.version>
</properties>
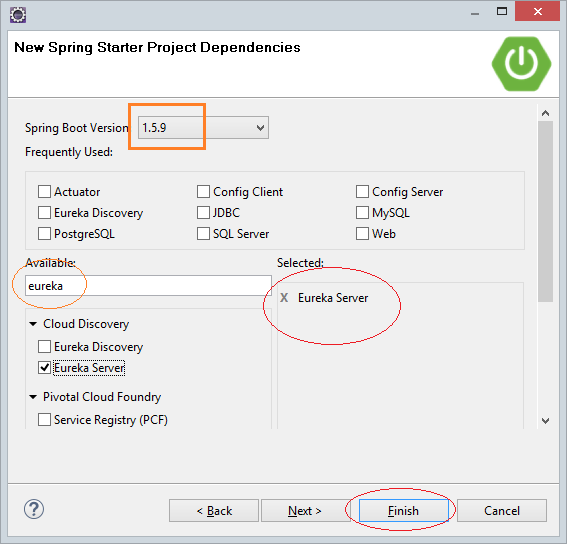
<dependencies>
<dependency>
<groupId>org.springframework.cloud</groupId>
<artifactId>spring-cloud-starter-eureka-server</artifactId>
</dependency>
<dependency>
<groupId>org.springframework.boot</groupId>
<artifactId>spring-boot-starter-test</artifactId>
<scope>test</scope>
</dependency>
</dependencies>
<dependencyManagement>
<dependencies>
<dependency>
<groupId>org.springframework.cloud</groupId>
<artifactId>spring-cloud-dependencies</artifactId>
<version>${spring-cloud.version}</version>
<type>pom</type>
<scope>import</scope>
</dependency>
</dependencies>
</dependencyManagement>
<build>
<plugins>
<plugin>
<groupId>org.springframework.boot</groupId>
<artifactId>spring-boot-maven-plugin</artifactId>
</plugin>
</plugins>
</build>
</project>4. @EnableEurekaServer
For this application becomes a Service Registration, you need to use @EnableEurekaServer. This Annotation informs to the Spring that you should run a registration service by Netflix technology (Netflix Eureka).
SpringCloudServiceRegistrationEurekaServerApplication.java
package org.o7planning.eurekaserver;

import org.springframework.boot.SpringApplication;
import org.springframework.boot.autoconfigure.SpringBootApplication;
import org.springframework.cloud.netflix.eureka.server.EnableEurekaServer;

@EnableEurekaServer
@SpringBootApplication
public class SpringCloudServiceRegistrationEurekaServerApplication {

    public static void main(String[] args) {
        SpringApplication.run(SpringCloudServiceRegistrationEurekaServerApplication.class, args);
    }
}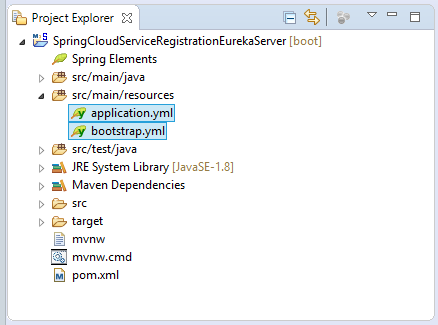
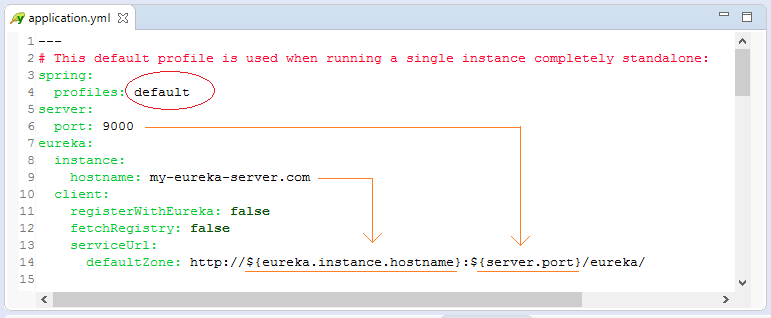
application.yml
---
# This default profile is used when running a single instance completely standalone:
spring:
  profiles: default
server:
  port: 9000
eureka:
  instance:
    hostname: my-eureka-server.com
  client:
    registerWithEureka: false
    fetchRegistry: false
    serviceUrl:
      defaultZone: http://${eureka.instance.hostname}:${server.port}/eureka/

# united-states, france, and vietnam illustrate running 3 intercommunicating instances.
# This example has them running side-by-side on localhost
# -- which is unrealistic in production
# -- but does illustrate how multiple instances collaborate.
#
# Run by opening 3 separate command prompts:
# java -jar -Dspring.profiles.active=united-states SpringCloudServiceRegistrationEurekaServer.jar
# java -jar -Dspring.profiles.active=france SpringCloudServiceRegistrationEurekaServer.jar
# java -jar -Dspring.profiles.active=vietnam SpringCloudServiceRegistrationEurekaServer.jar

---
spring:
  profiles: united-states
  application:
    name: eureka-server-clustered   # ==> This is Service-Id
server:
  port: 9001
eureka:
  instance:
    hostname: my-eureka-server-us.com
  client:
    registerWithEureka: true
    fetchRegistry: true
    serviceUrl:
      defaultZone: http://my-eureka-server-fr.com:9002/eureka/,http://my-eureka-server-vn.com:9003/eureka/

---
spring:
  profiles: france
  application:
    name: eureka-server-clustered   # ==> This is Service-Id
server:
  port: 9002
eureka:
  instance:
    hostname: my-eureka-server-fr.com
  client:
    registerWithEureka: true
    fetchRegistry: true
    serviceUrl:
      defaultZone: http://my-eureka-server-us.com:9001/eureka/,http://my-eureka-server-vn.com:9003/eureka/

---
spring:
  profiles: vietnam
  application:
    name: eureka-server-clustered    # ==> This is Service-Id
server:
  port: 9003
eureka:
  instance:
    hostname: my-eureka-server-vn.com
  client:
    registerWithEureka: true
    fetchRegistry: true
    serviceUrl:
      defaultZone: http://my-eureka-server-us.com:9001/eureka/,http://my-eureka-server-fr.com:9002/eureka/
In this application, I configure on the application.yml file instead of application.properties. You can learn more about difference between *.yml file and *.properties file under the following:
- properties vs yml
5. Run the application on Eclipse
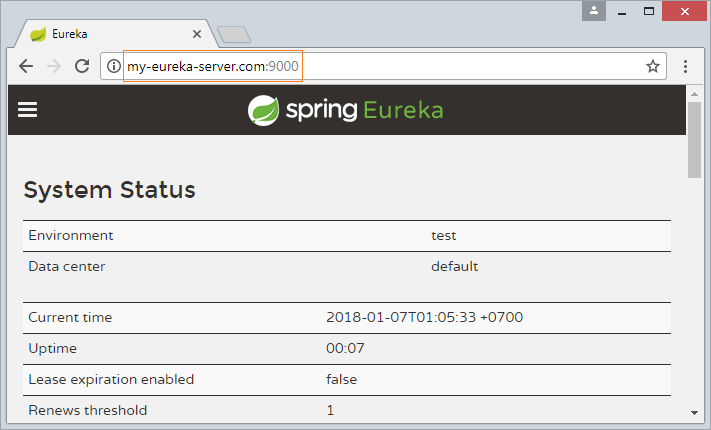
When you run this application directly on Eclipse, the default profile will be used to configure this application.
Eureka Monitor allows you to see the list of active and registered services (applications) with this Eureka Server, and see the replicas of this application running on the distributed system. You can access the Eureka Monitor by the URL below,
"Default" profile is configured to run on my-eureka-server.com domain name. By configuring the domain name on the "hosts" file, you can obtain such domain name.
On the Windows, open the file:
- C:\Windows\System32\drivers\etc\hosts
Add the following configuration snippet:
C:\Windows\System32\drivers\etc\hosts
127.0.0.1       my-eureka-server.com
127.0.0.1       my-eureka-server-us.com
127.0.0.1       my-eureka-server-fr.com
127.0.0.1       my-eureka-server-vn.com
To edit the "hosts" file in other operating systems, you can see the following instruction:
And you have obtained my-eureka.com domain name. It is noted that this domain name works only on your computer.
6. Run many replicas
First of all, you need to use the "Maven Install" function to create the jar file. Right click on the project and select:
- Run As/Maven Install
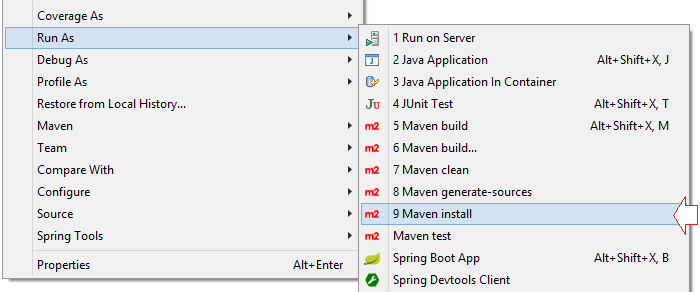
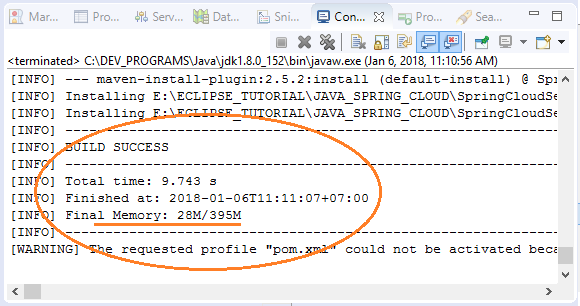
After running "Maven Install" successfully, you get a jar file located in the target directory of the project.
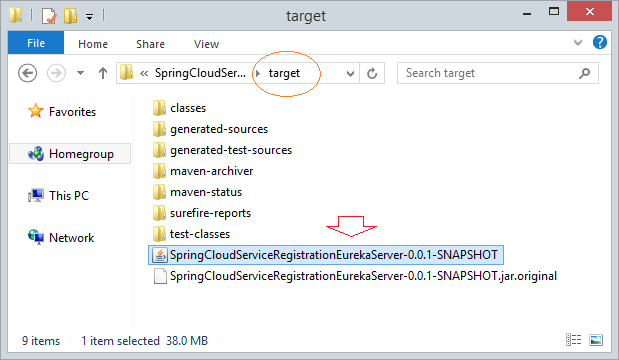
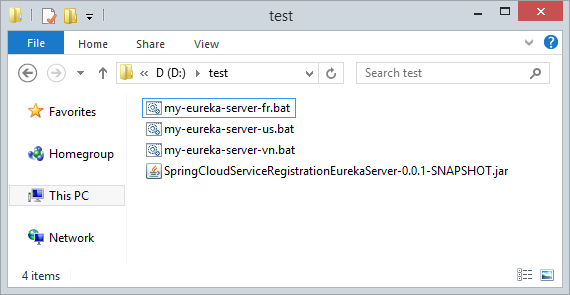
Copy the jar file just created to a directory and create 3 CMD files:
- eureka-server-us.bat
- eureka-server-fr.bat
- eureka-server-vn.bat
my-eureka-server-us.bat
java -jar -Dspring.profiles.active=united-states SpringCloudServiceRegistrationEurekaServer-0.0.1-SNAPSHOT.jarmy-eureka-server-fr.bat
java -jar -Dspring.profiles.active=france SpringCloudServiceRegistrationEurekaServer-0.0.1-SNAPSHOT.jarmy-eureka-server-vn.bat
java -jar -Dspring.profiles.active=vietnam SpringCloudServiceRegistrationEurekaServer-0.0.1-SNAPSHOT.jarWe are simulating the creation of three replicas and deployment of them on three different servers, with three different domain names.

Run the 3 above BAT files.
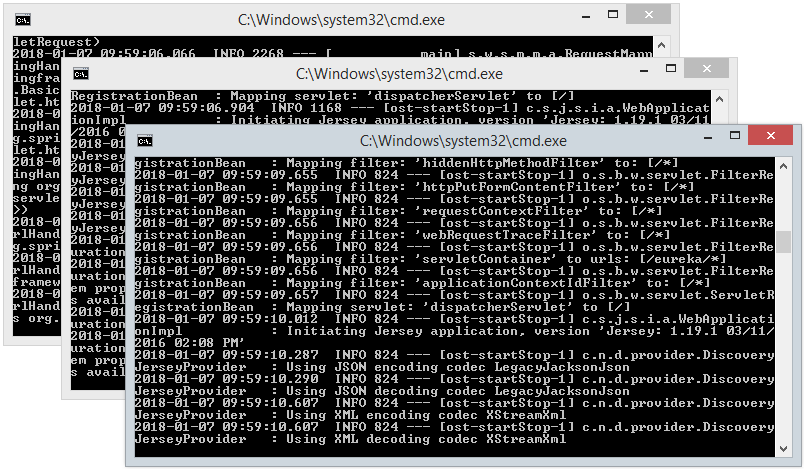
OK, now, you can access the following links and view the results:
Spring Cloud Tutorials
- What is Cloud Computing?
- Introduction to Netflix and its cloud computing technology
- Introduction to Spring Cloud
- Understanding Spring Cloud Config Server with Example
- Understanding Spring Cloud Config Client with Example
- Understanding Spring Cloud Eureka Server with Example
- Understanding Spring Cloud Discovery Eureka Client with Example
- Undertanding load balancing in Spring Cloud with Ribbon and example
Show More