Create, Update and Delele Data using ADF Form in ADF BC
1. The Objective of the lesson
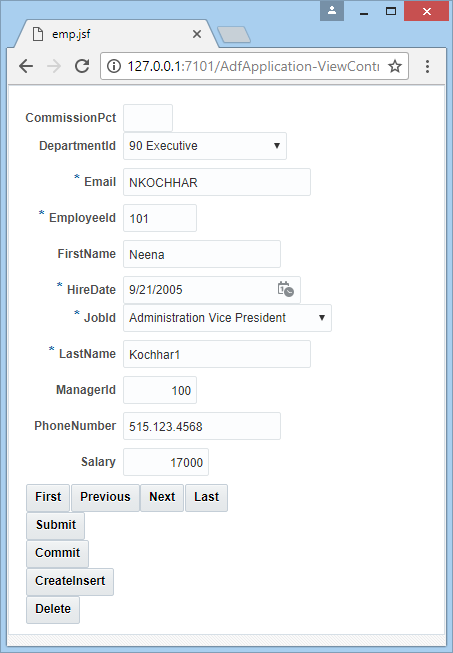
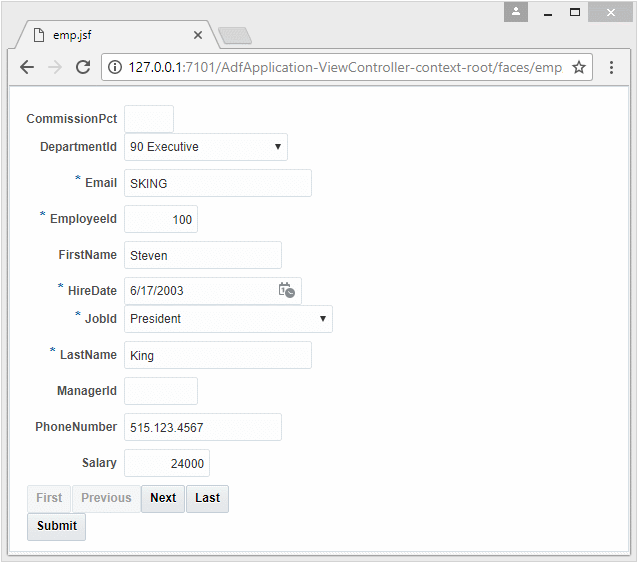
In this lesson, I instruct you how to create an ADF Fusion applicationthat allows displaying data on the ADF Form with Row Navigation. The ADF Form allows you to add, edit data of a record or delete a record.
This is the image of the application:
2. Create the application
First of all, you need to create an ADF Fusion application with the following basic settings:
- Create ADF Fusion Web Application.
- Connect it to a database.
- Createan Application Module.
- Create Entity Objects.
- Create default View Objects.
You can see the following instructions:
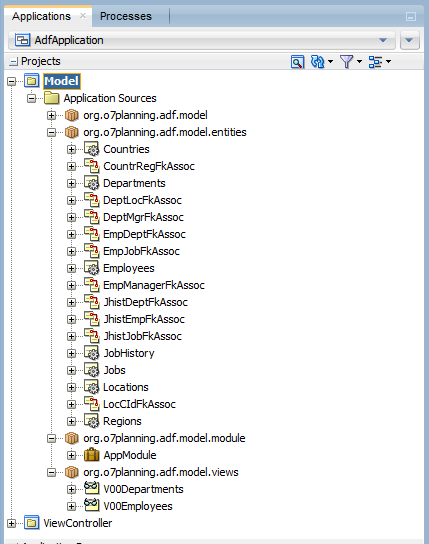
After the above steps, you have an application as the following illustration:
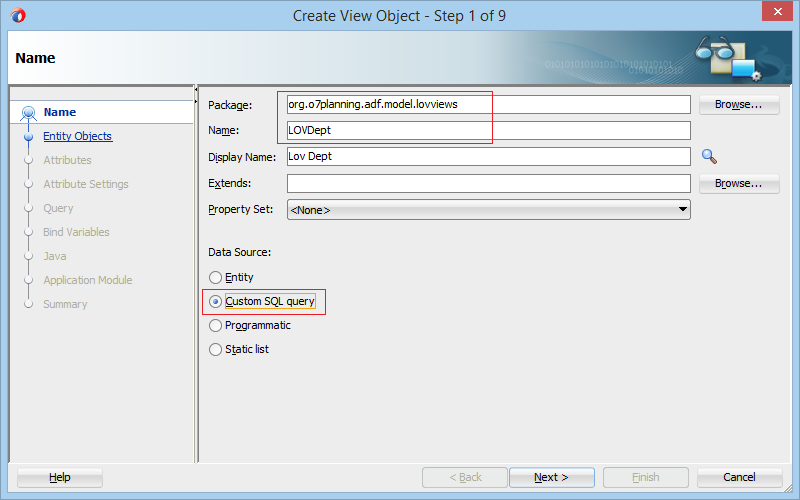
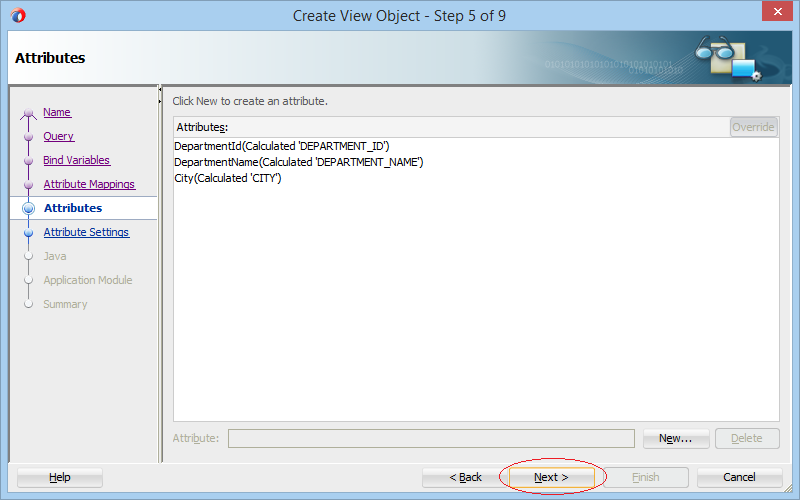
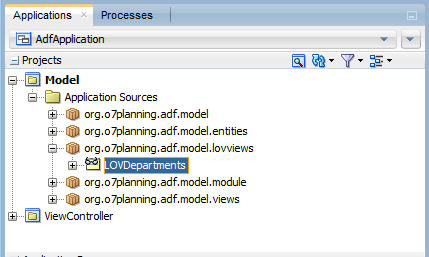
3. Create LOV View Object
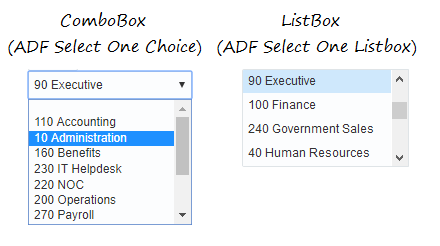
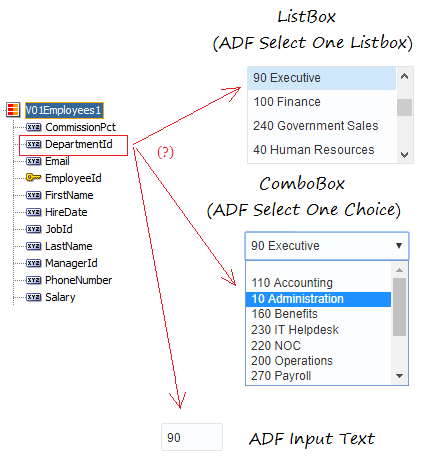
When you create a new staff( EMPLOYEES table), you need to select a department (DEPARTMENTS table) for this staff throught a ComboBox, ListBox, LOV (List Of Values),..
You need to create LOV View Objects, which will be used in many functions of the application.
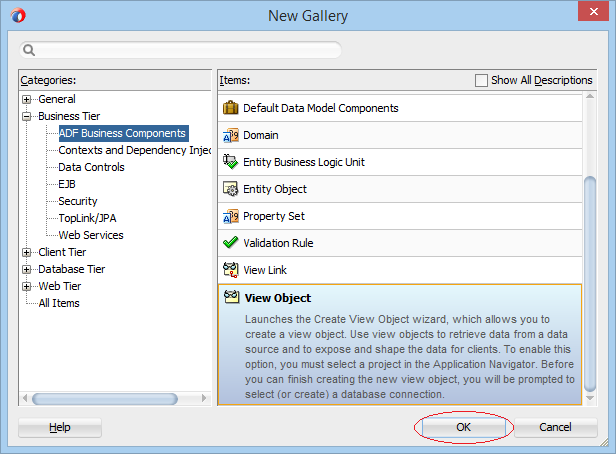
On the JDeveloper , select:
- File/New/From Gallery...
- >> Bussiness Tier/ADF Bussiness Components/View Object
Enter :
- Package: org.o7planning.adf.model.lovviews
- Name: LOVDepartments
Select Dep.Department_Id
      ,Dep.Department_Name
      ,Loc.City
From   Departments Dep
      ,Locations   Loc
Where  Dep.Location_Id = Loc.Location_Id(+)
Order By Dep.Department_Name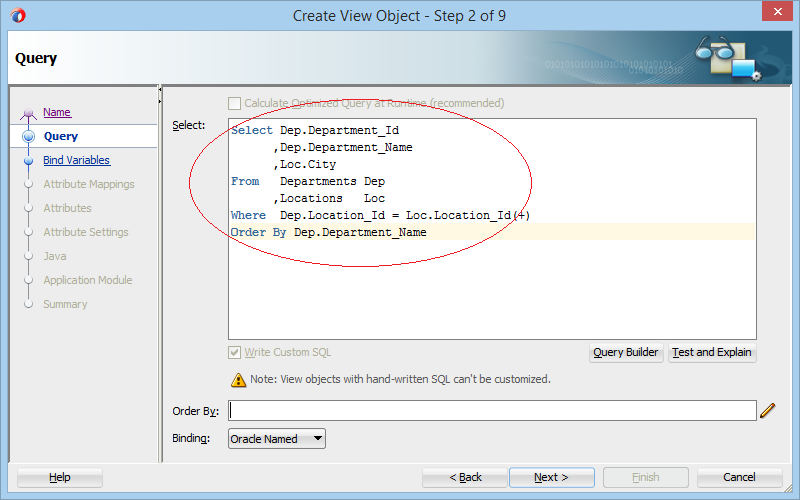
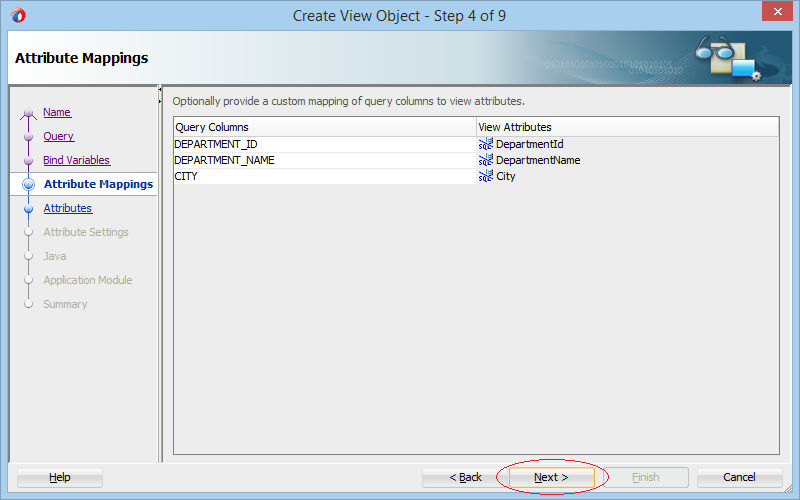
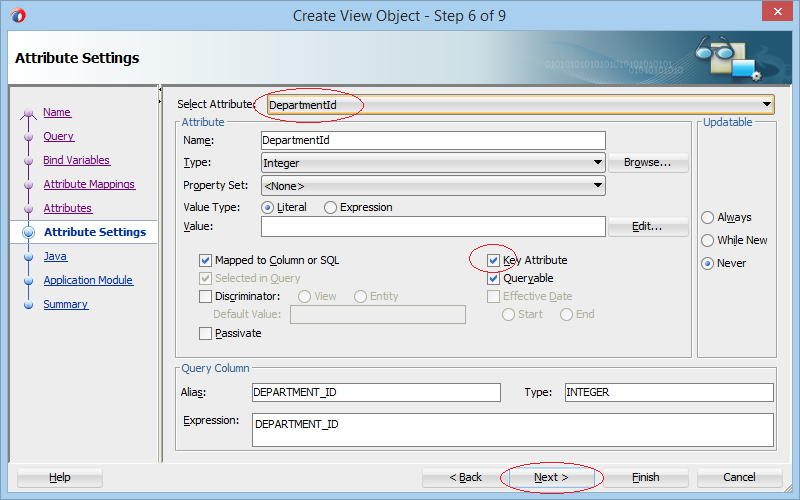
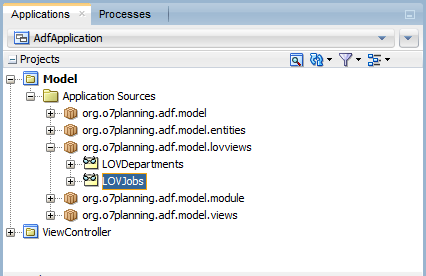
The View Object (LOVDepartments) has been created:
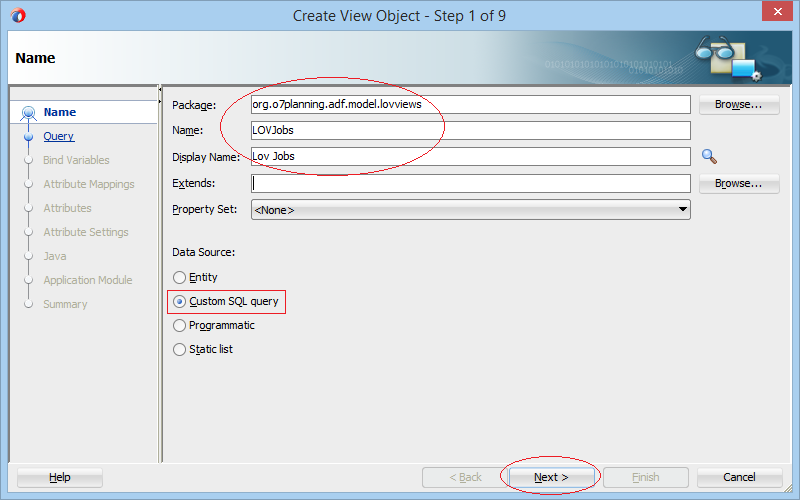
LOVJobs
Similarly, continue creating another LOV View Object named LOVJobs:
Select j.Job_Id
      ,j.Job_Title
From   Jobs j
Order By j.Job_Title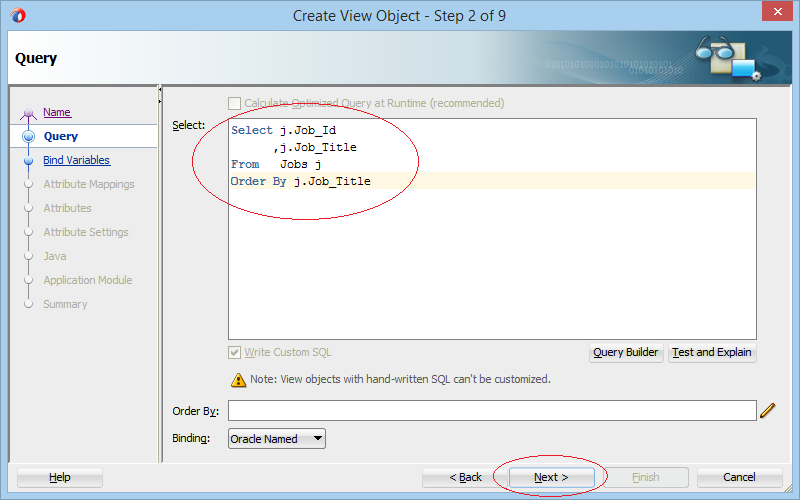
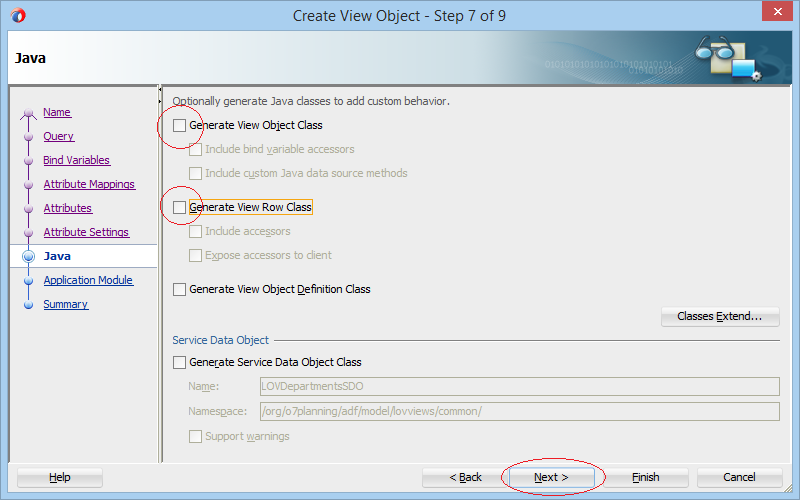
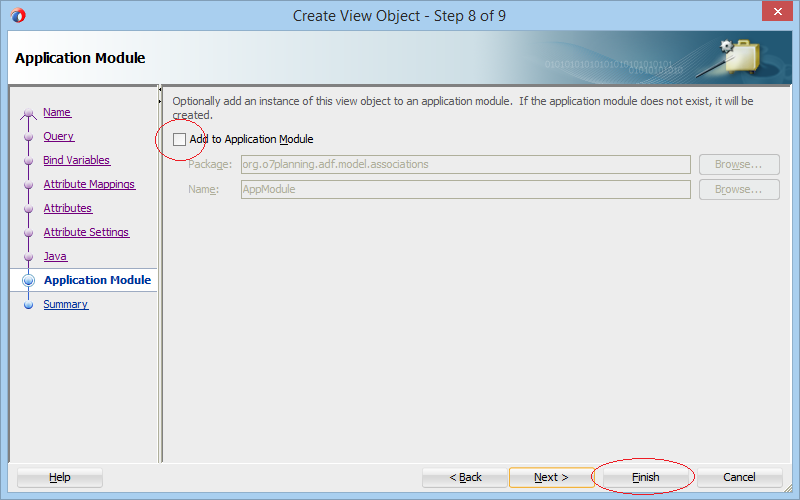
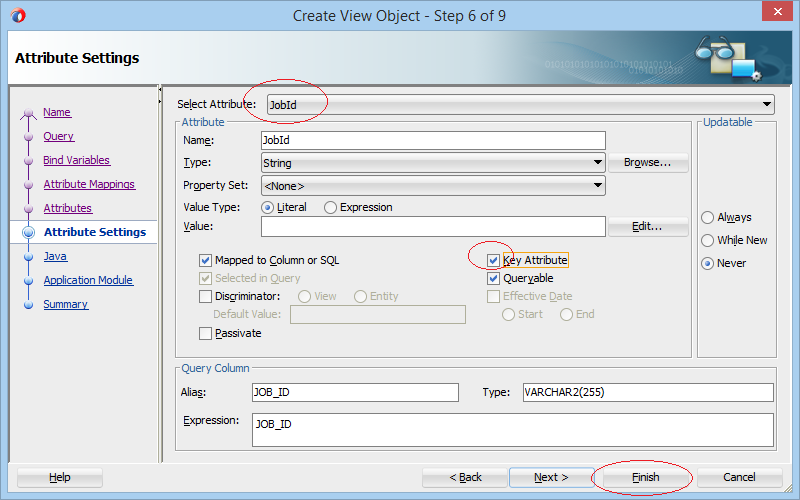
Next .. Next ... Next
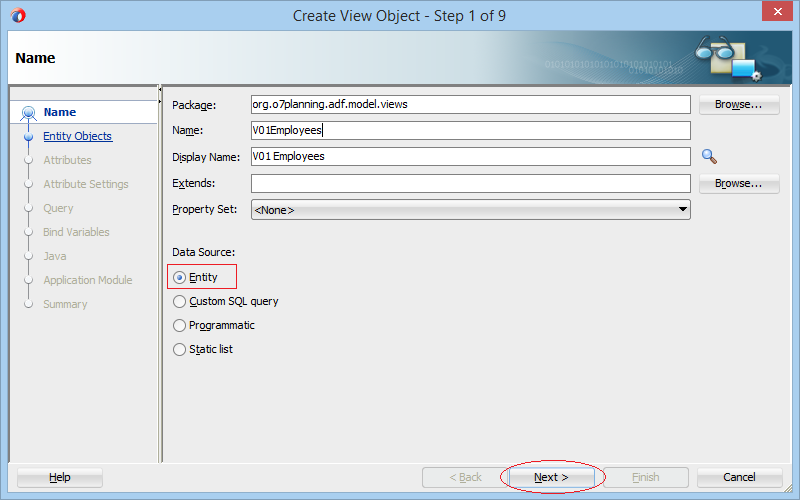
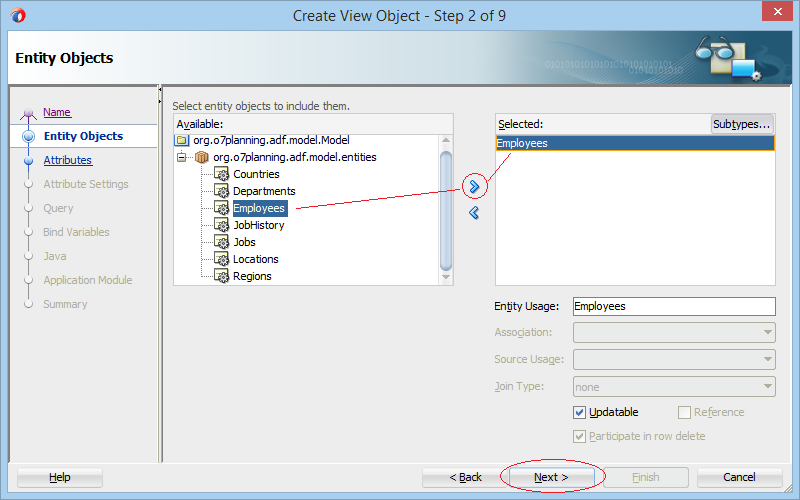
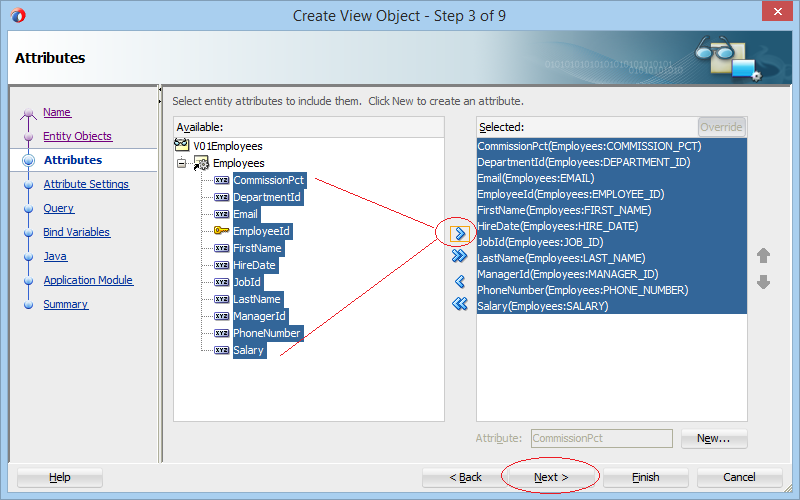
4. Create View Object (V01Employees)
On JDeveloper select:
- File/New/From Gallery...
- >> Bussiness Tier/ADF Bussiness Components/View Object

Register V01Employees with Application Module:

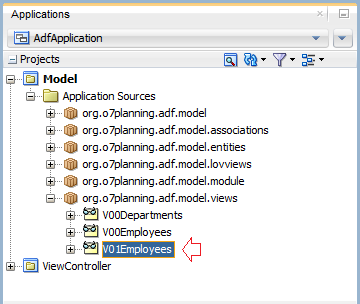
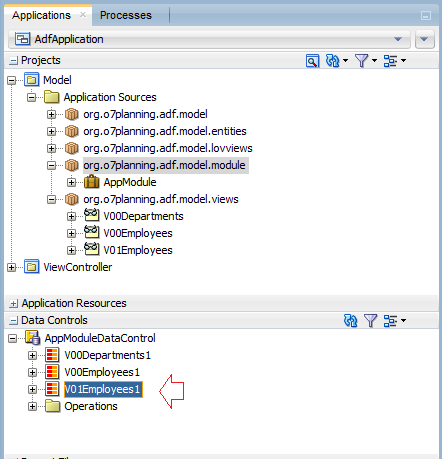
After registering the V01Employees which has been seen on the Data Controls.
5. Create hints for user interface (UI Hints)
When you design the interface of a website, for example, V00Emp (View Object) having 11 attributes, which are equivalent to 11 columns in the database table, ADF tools will help you create the ADF Form. (Form for entering data).
You need to create hints for ADF Tools.
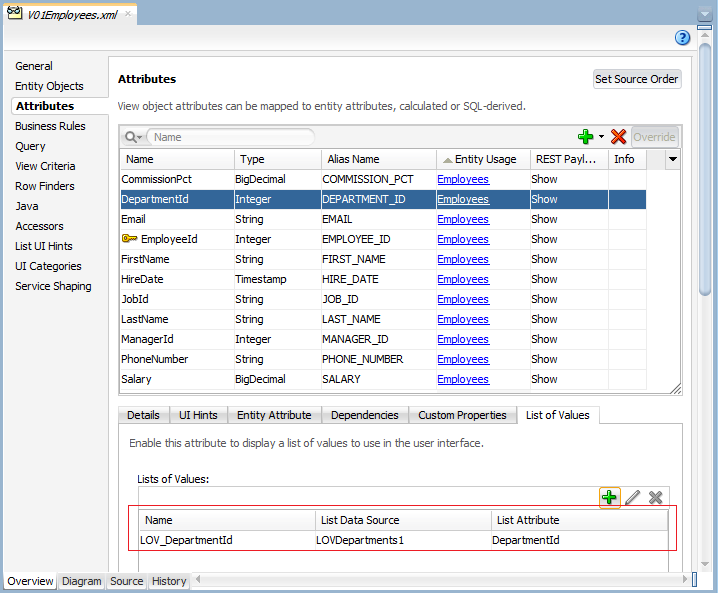
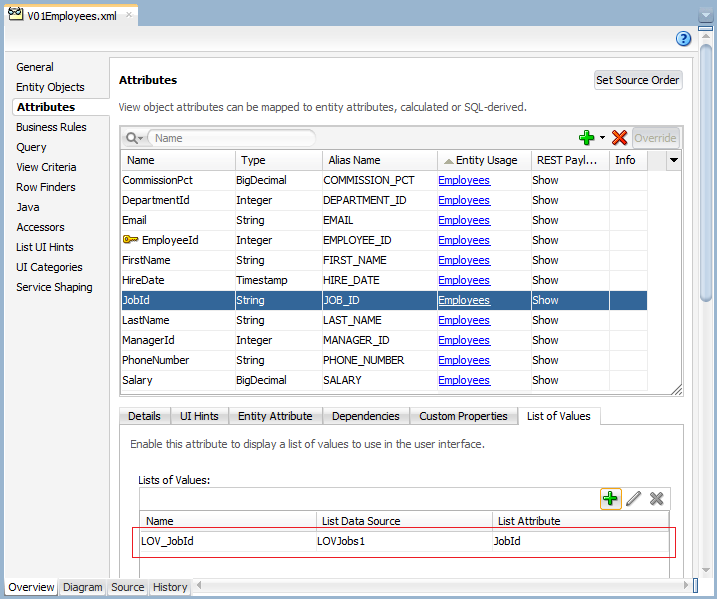
Open V01Employees (View Object):
Create UI Hints for DepartmentId attribute.
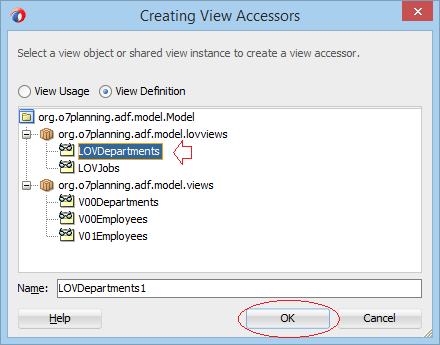
Select the DepartmentId attribute and create new "List Of Values" for it.
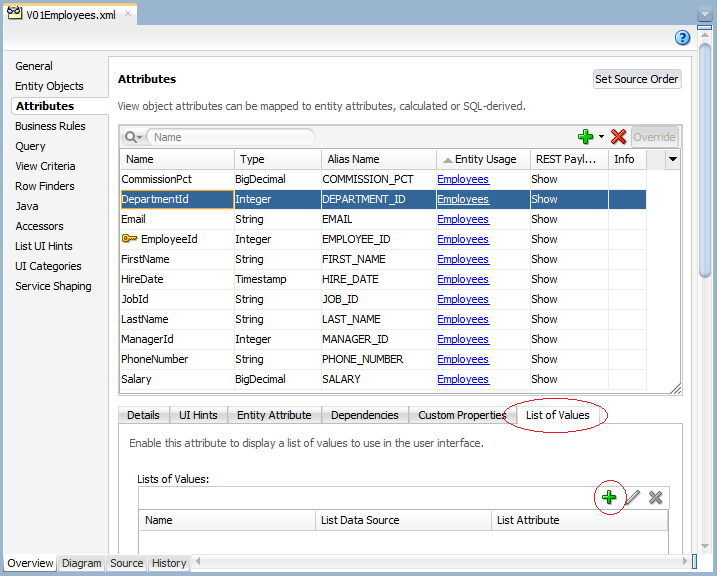
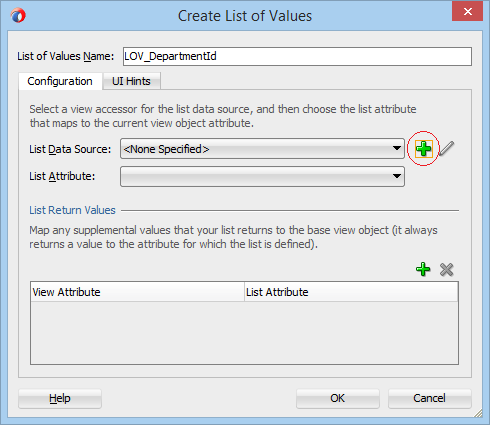
Select LOVDepartments (LOV View Object) which have been created in the above steps by you.
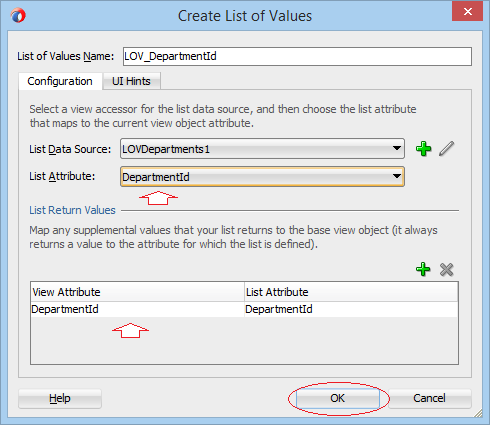
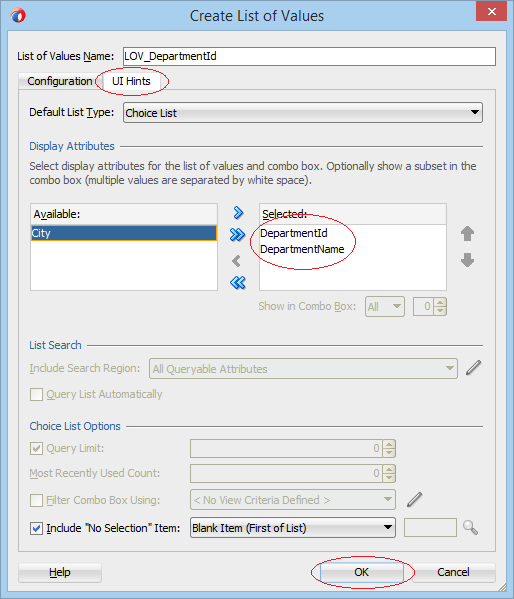
Here I set up to display DepartmentId column by ComboBox type. If you want to display DepartmentId by LOV (List Of Values) type, you can refer to another instruction below:
Switch to TAB: UI Hints.
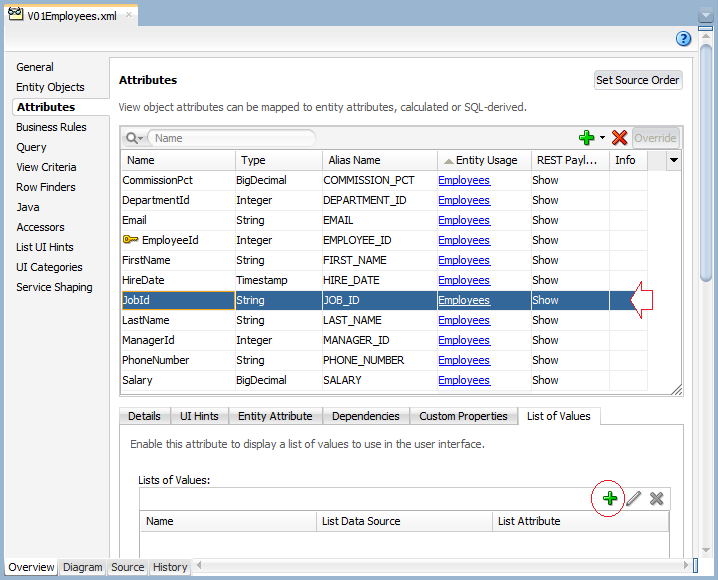
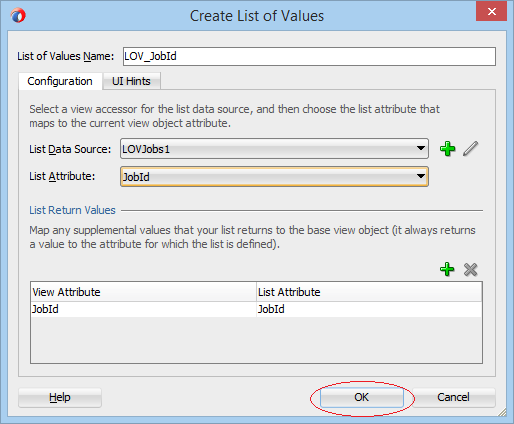
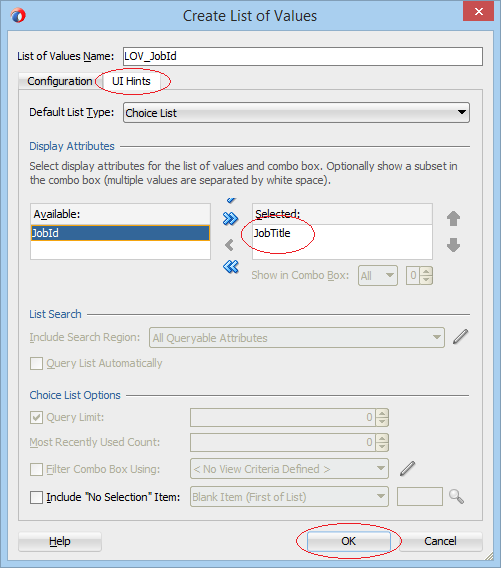
Create UI Hints for JobId attribute
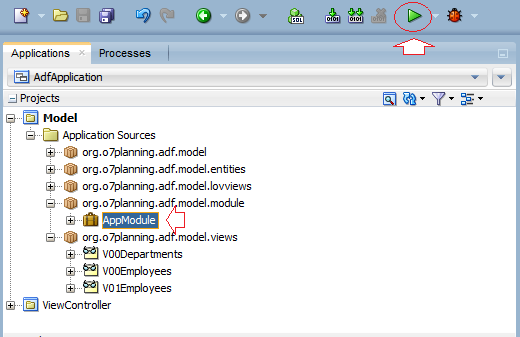
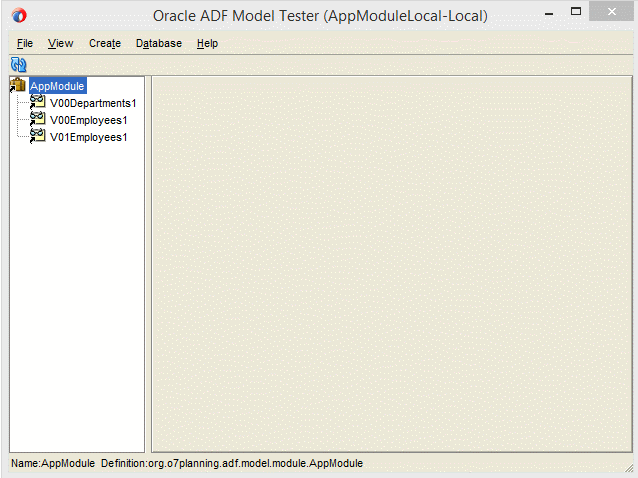
Test V01Employees uses Oracle ADF Model Tester:
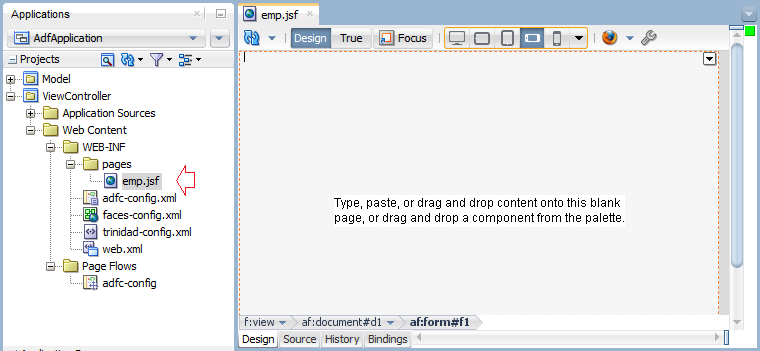
6. Create View - emp
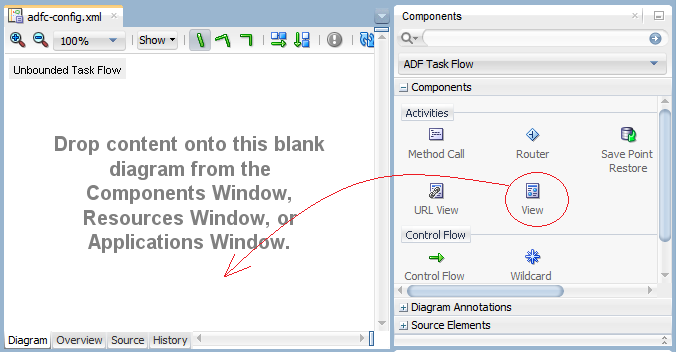
Open adf-config.xml then drag and drop View object into it.
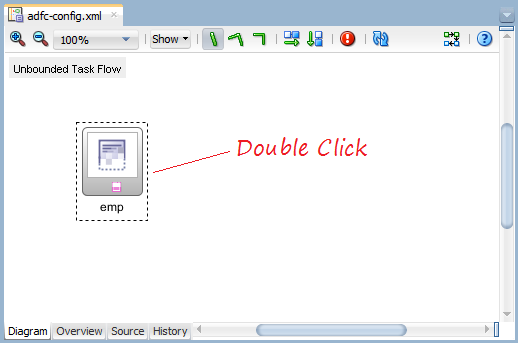
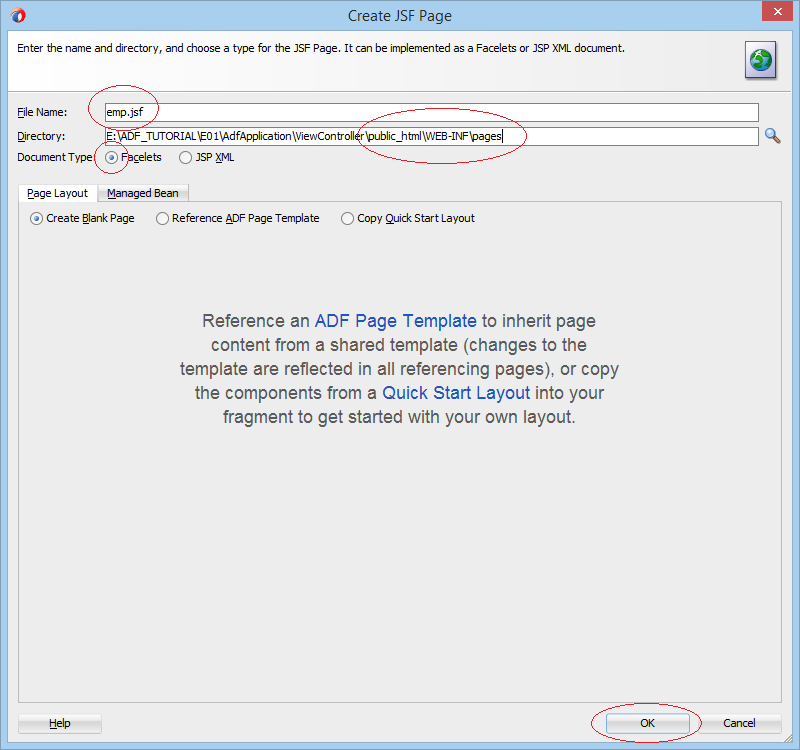
Double click on emp (View) in adf-config.xml to create a source file.
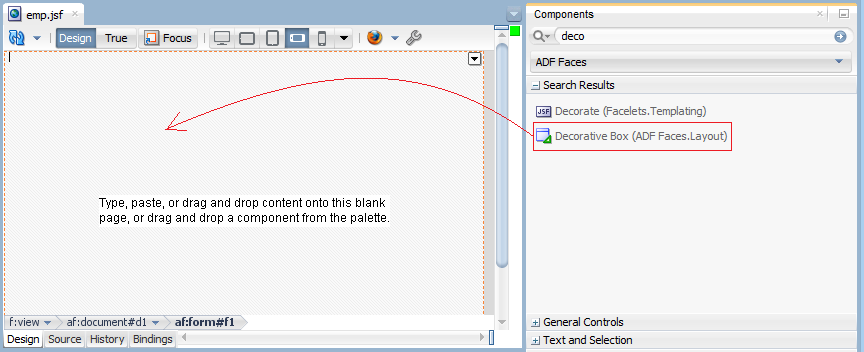
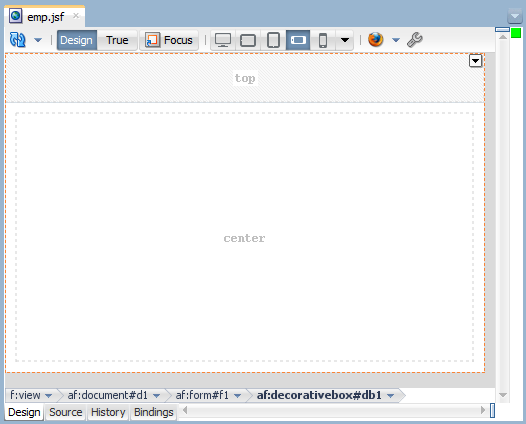
Search with "deco" keyword, drag and drop "Decorative Box (ADF Faces.Layout)" object into emp.jsf window.
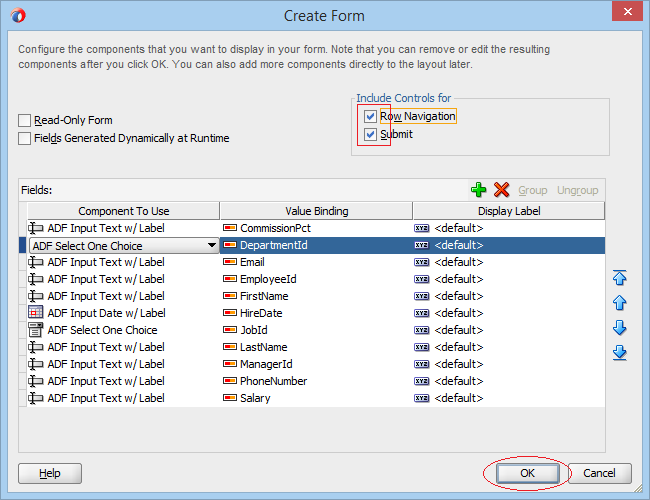
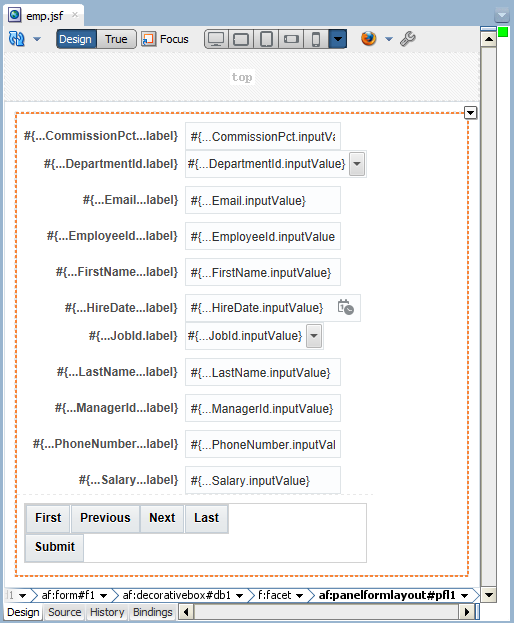
7. Create ADF Form
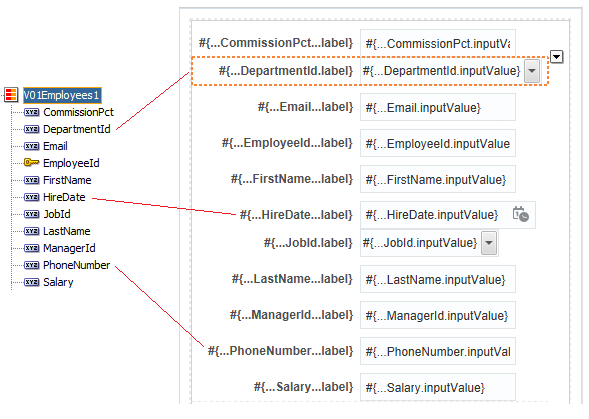
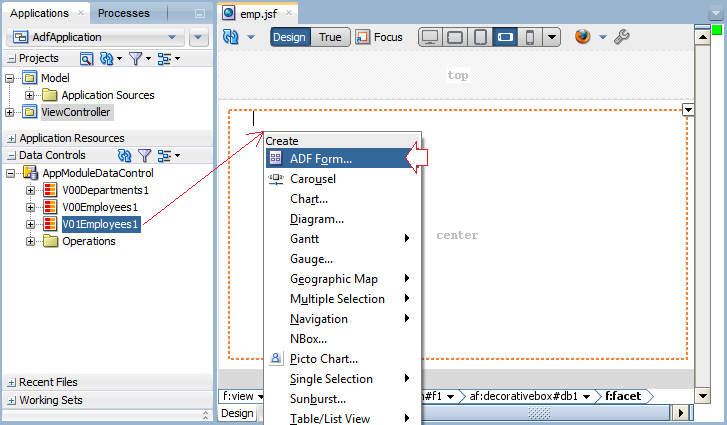
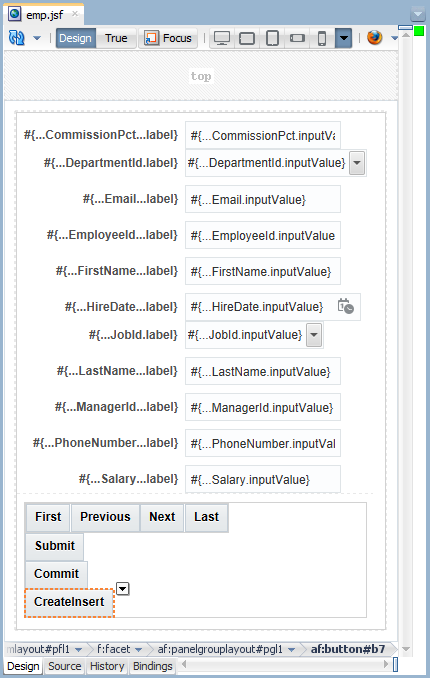
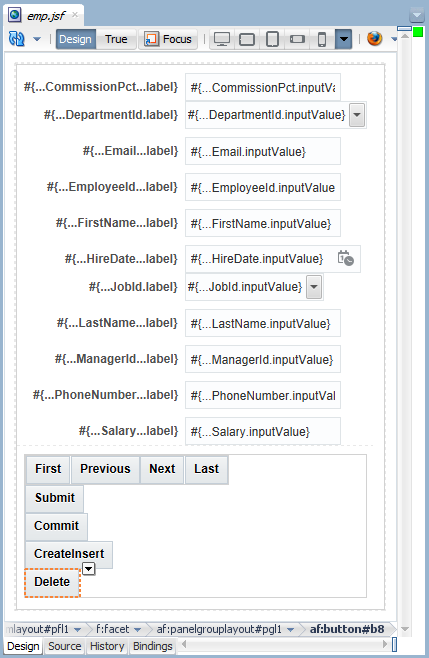
Drag and drop V01Employees1 (View Object) from Data Controls into Center region of emp.jsf, and select ADF Form, as illustrated below:
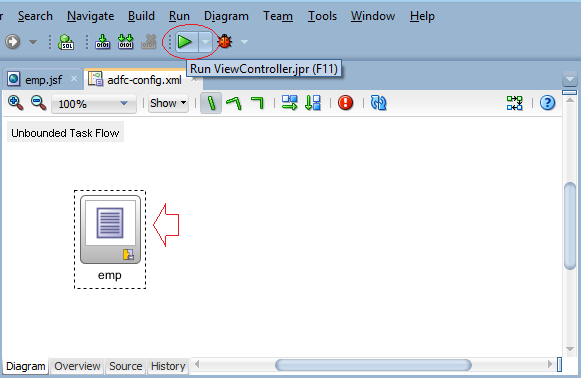
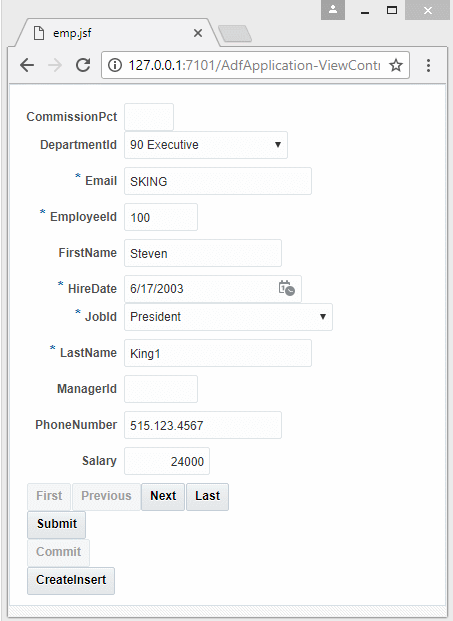
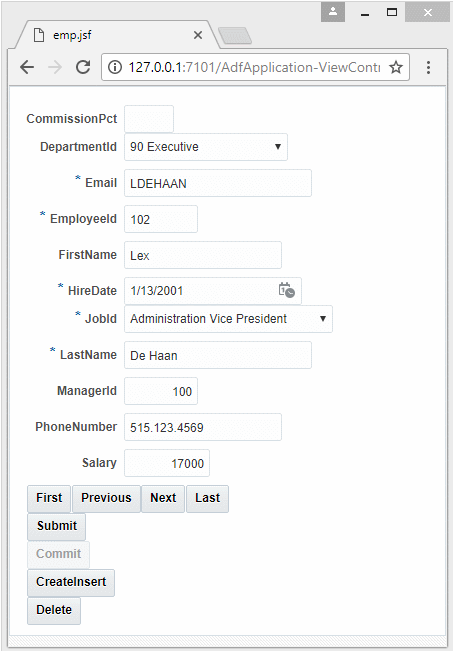
OK, Now you can run the application. Select emp (View) in adf-config.xml and press Run or F11.
8. Submit & Commit
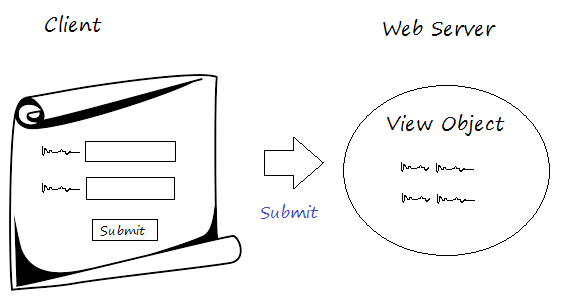
ADF creates you a "Submit" button to submit website, but the data has not been "Commit" yet. Therefore, there is no change in data at the database.
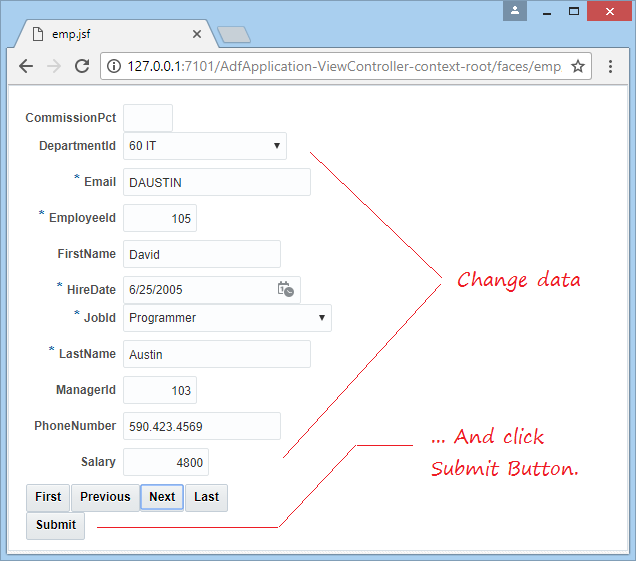
When an user presses "Submit" button, data will be updated into View Object, and there is no change at the database.
To make changes at database level, you need to perform Commit function. You have two ways to do this:
- First way : Call Commit everytime when you Submit.
- Second way: Create Commit button.
First way: Call Commit everytime when you Submit.
Call the Commit function when the user presses Submit button.
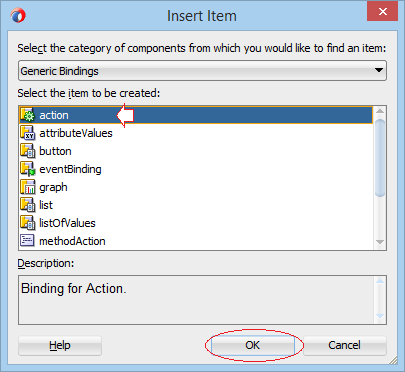
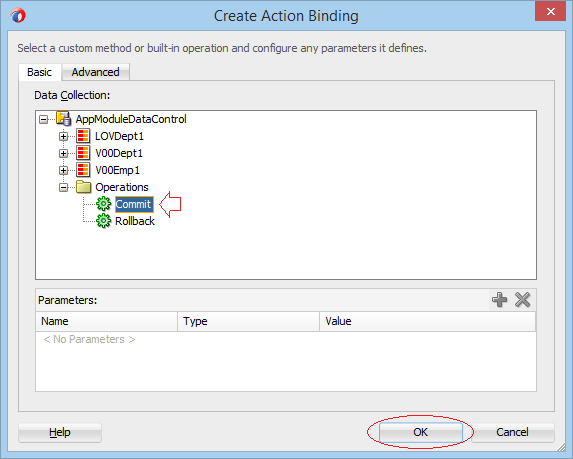
On the emp.jsf window, switch to TAB - Bindings, Press  icon to add a "Binding".
icon to add a "Binding".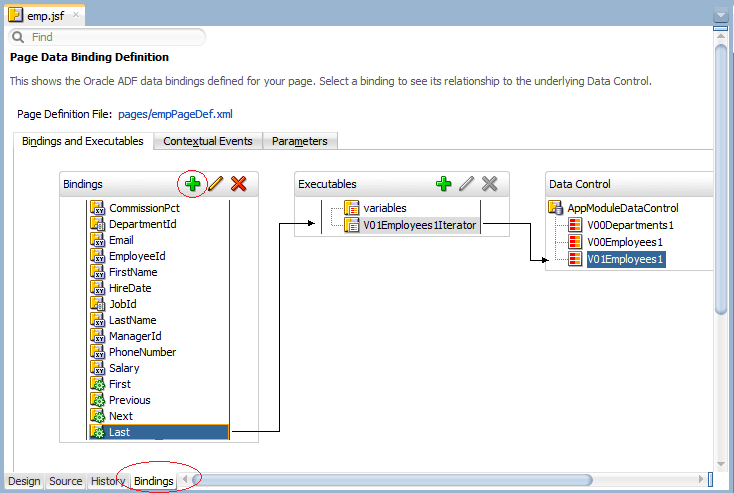
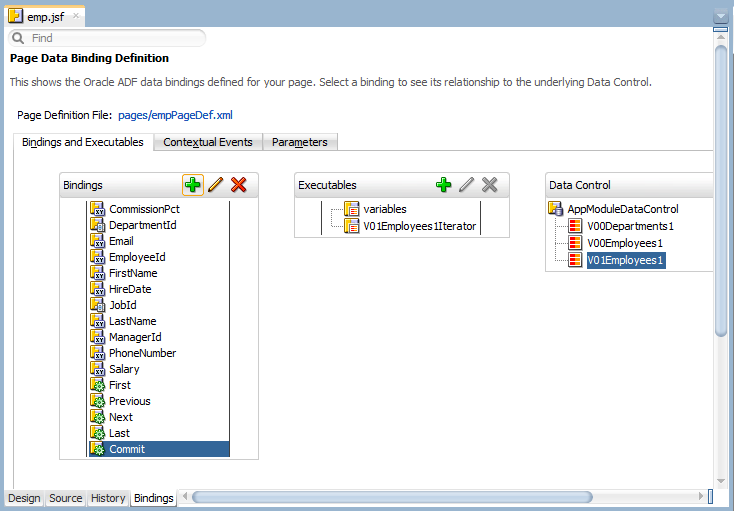
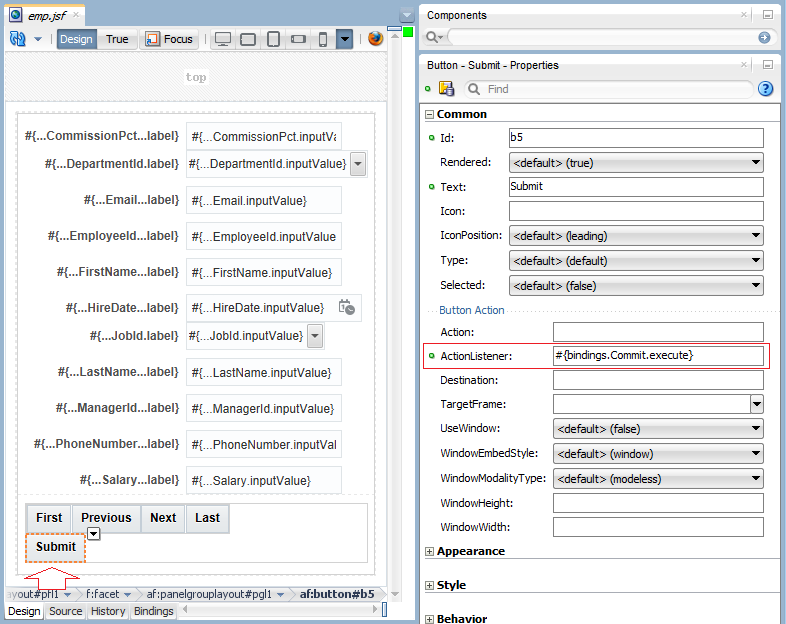
On the emp.jsf window, move back to the TAB - Design, Select the "Submit" button and change values for ActionListener attribute.
- AcionListener = #{bindings.Commit.execute}
Second way: Create Commit button
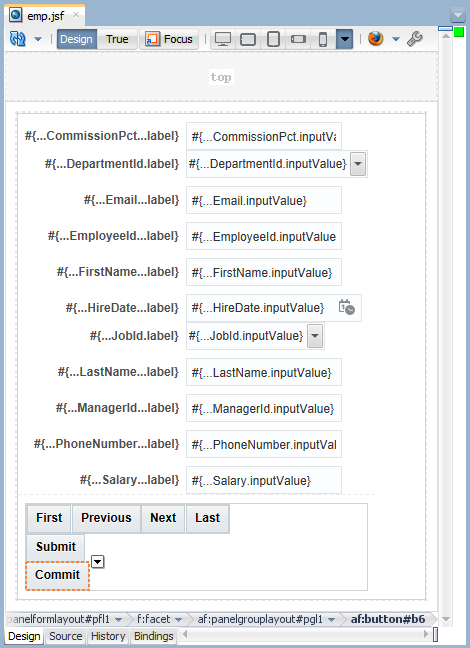
Everytime when you change a record, and press Submit, the changes will be updated to the View Object. Finally, press Commit to update all changed records to the database.
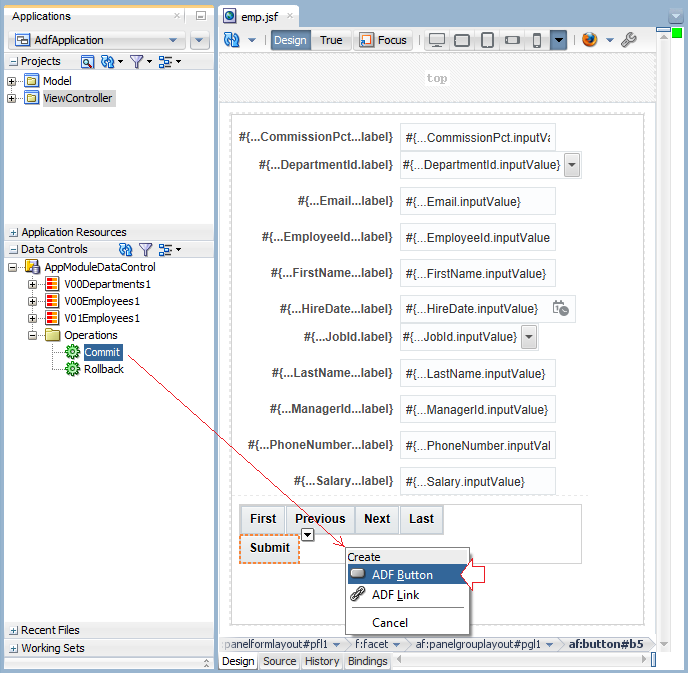
Drag and drop the "Commit" object from "Data Controls" to the emp.jsf window to create a "ADF Button":
9. Assign value to the column from Sequence when creating a record.
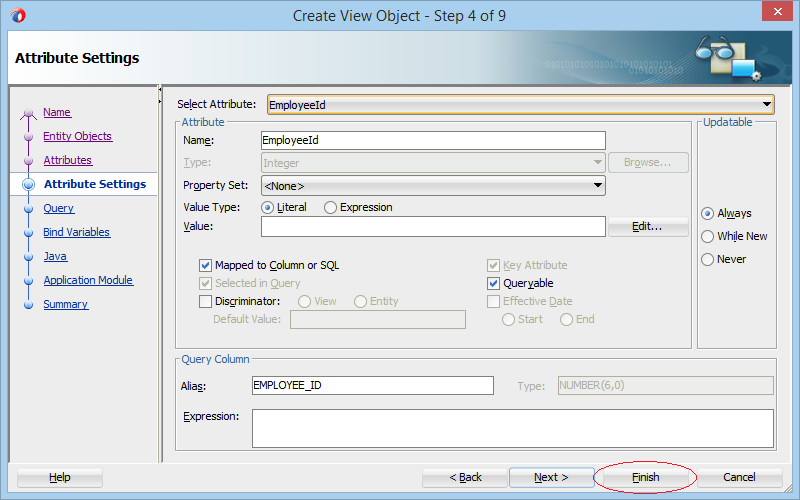
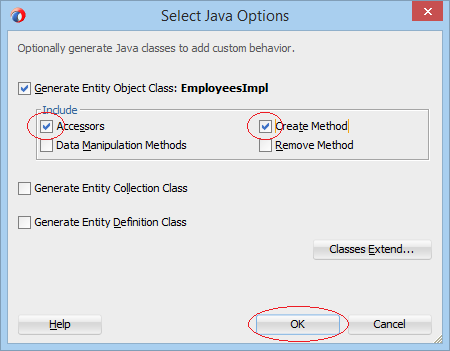
When you create a new record for the EMPLOYEES table, EMPLOYEE_ID column will be assigned values from sequence - EMPLOYEES_SEQ. You need to tell the ADF about that by confirguring on Entity Object (Employees).
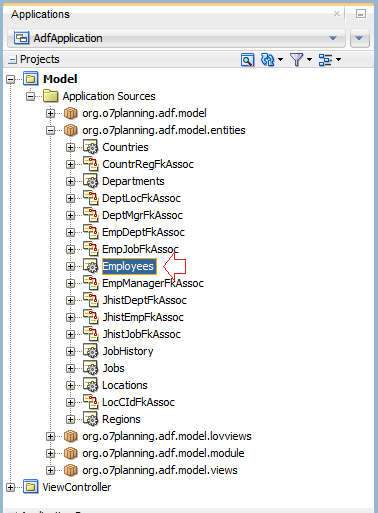
Open Entity Object: Employees
The EmployeeId attribute is of the type Integer. Please change it into Number type (As illustrated below):

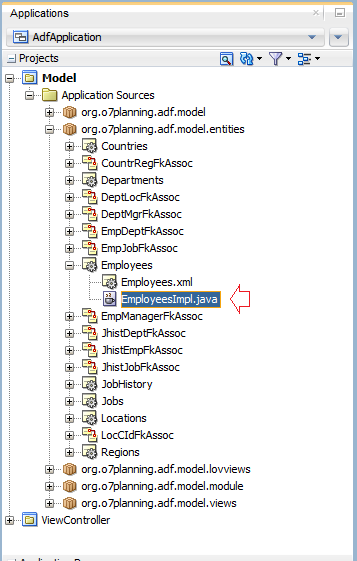
You need to create a corresponding class with Employees (Entity Object).
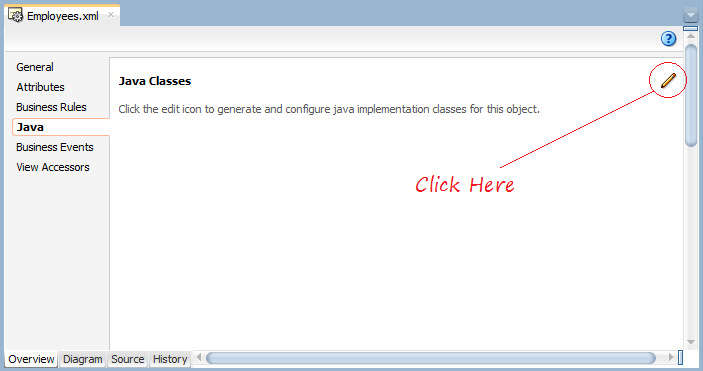
The EmployeesImpl class has been created.
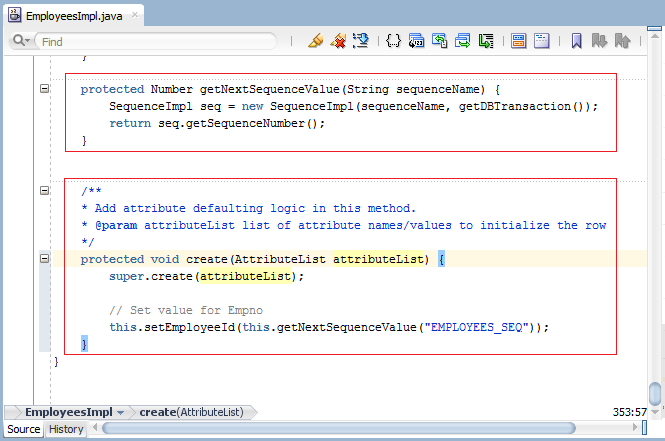
Java will call EmployeesImpl.create(AttributeList) method to create an EMPLOYEE record. Therefore, at this method, you need to get values from Sequence to assign to EMPLOYEE_ID column.
Add this following code to the EmployeesImpl class:
** EmpoyeesImpl **
import oracle.jbo.server.SequenceImpl;

// ....

protected Number getNextSequenceValue(String sequenceName) {
    SequenceImpl seq = new SequenceImpl(sequenceName, getDBTransaction());
    return seq.getSequenceNumber();
}


/**
* Add attribute defaulting logic in this method.
* @param attributeList list of attribute names/values to initialize the row
*/
protected void create(AttributeList attributeList) {
    super.create(attributeList);

    // Set value for Empno
    this.setEmployeeId(this.getNextSequenceValue("EMPLOYEES_SEQ"));
}
10. Create a new record
You have created an ADF Form above, allowing editting records. In this next section, you need to create a new record.
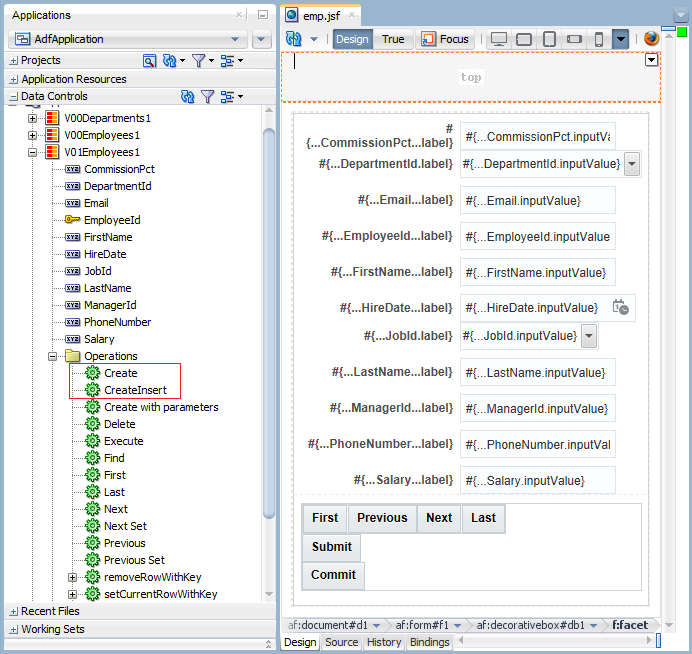
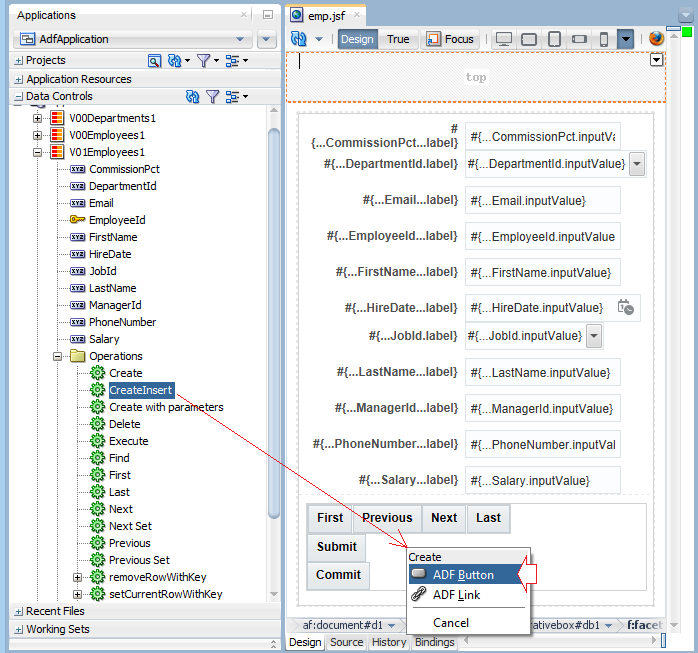
You need to drag and drop either "Create" or "CreateInsert" from "Data Controls" into (emp.jsf) design window to create an ADF Button.
Create vs CreateInsert
What happens if you use "Create" operator?
** Create **
// Create a new row for the View Object
Row newRow = yourViewObject.createRow();

// Mark the row as being "initialized", but not yet new
newRow.setNewRowState(Row.STATUS_INITIALIZED);
What happens if you use "CreateInsert" operator?
** CreateInsert **
// Create a new row for the View Object
Row newRow = yourViewObject.createRow();

// Mark the row as being "initialized", but not yet new
newRow.setNewRowState(Row.STATUS_INITIALIZED);

// Insert the new row into the View Object's default rowset
yourViewObject.insertRow(newRow);
Drag and drop the "CreateInsert" object into the emp.jsf window to create an "ADF Button".
Run your website:
When the user presses "CreateInsert" button, a row of data is created and inserted into the "RowSet" of View Object. The user enters information, and presses Submit, the changes are updated to View Object.There will be no record create at the database until Commit is called.You can see further explanation at the above "Submit & Commit" section.
11. Delete Record
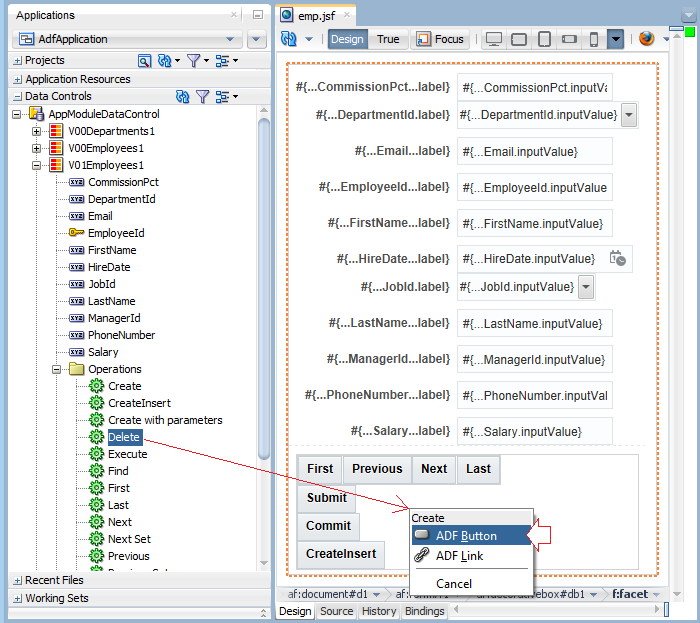
Drag and drop "Delete" object from "Data Controls" into thedesign window of the emp.jsf to create an "ADF Button":
When the user presses "Delete" button, current data row will be deleted from the "RowSet" of View Object, which means that the record has not really been removed from the database. It is only removedfromthe database when Commit is called.You can see more explanation at the above "Submit & Commit" section.
Run your website again:
Java Oracle ADF Tutorials
- Install Oracle JDeveloper 12c on Windows
- Steps to create a ADF Fusion Web application using ADF Business Components
- Create a Search Page in ADF BC using Parameter Form and display on ADF Table
- Create, Update and Delele Data using ADF Form in ADF BC
- Creating LOV (List Of Values) in Oracle ADF BC
- Undertanding Associations, View Links and Master-Detail in Oracle ADF BC
Show More