CKEditor Tutorial (CKEditor 4)

2. What is CKEditor?
CKEditor is a ready-for-use HTML text editor designed to simplify web content creation. It's a WYSIWYG editor that brings common word processor features directly to your web pages.
CKEditor is an Open source application, which means it can be modified in any way you want. It benefits from an active community that is constantly evolving the application with free add-ons and a transparent development process.
3. Download CKEditor
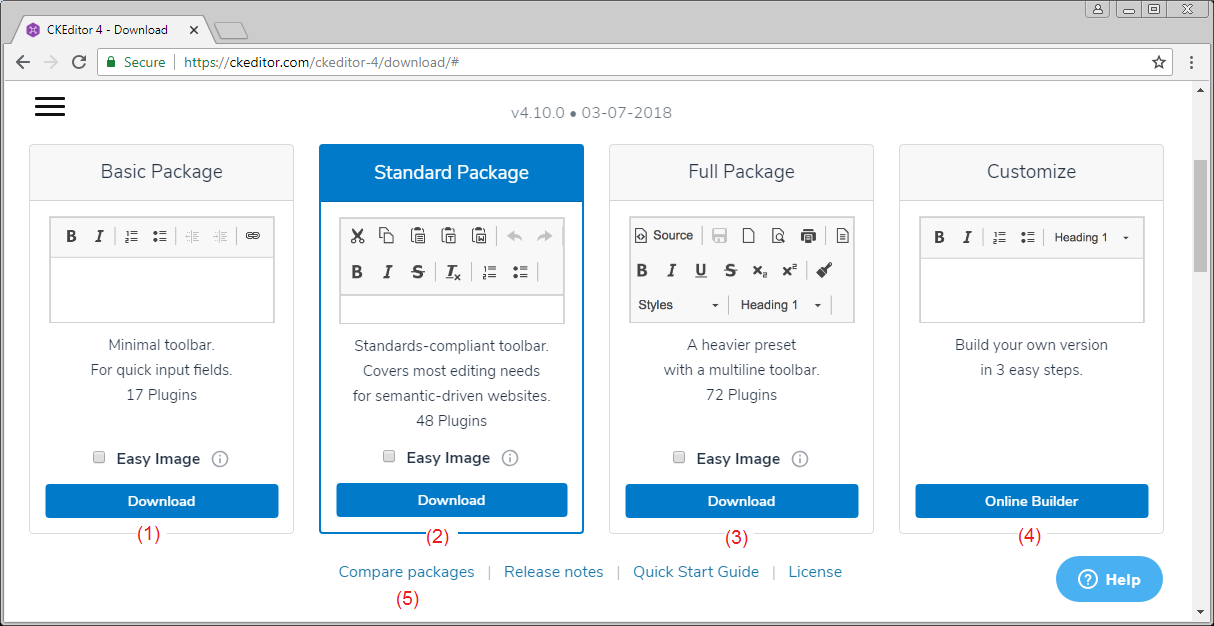
- Basic Package:
- This is the basic package, which includes the basic functions of CKEditor, and is compact package.
- Standard Package:
- This is a standard package, which has about 48 plugins.
- Full Package:
- Here is the complete package, with all plugins of CKEditor . And this is the full package.
- Customize CKEditor Package:
- This is a customized package, you can choose to download the necessary plugin.
You can click on the link (5) to see more differences between the packages.
Here, I will download the full package:
Download result:
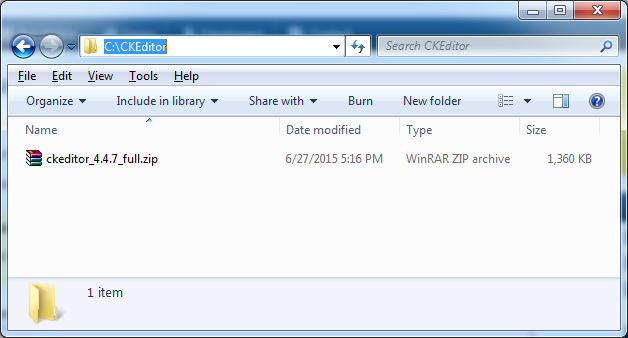
Unzip:

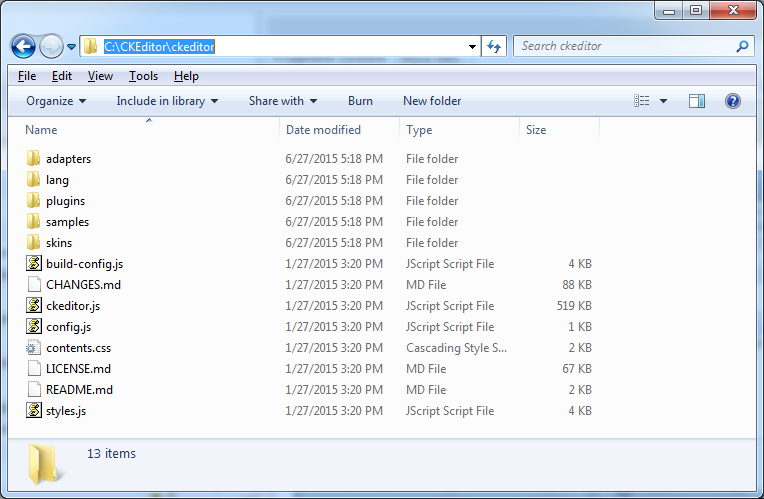
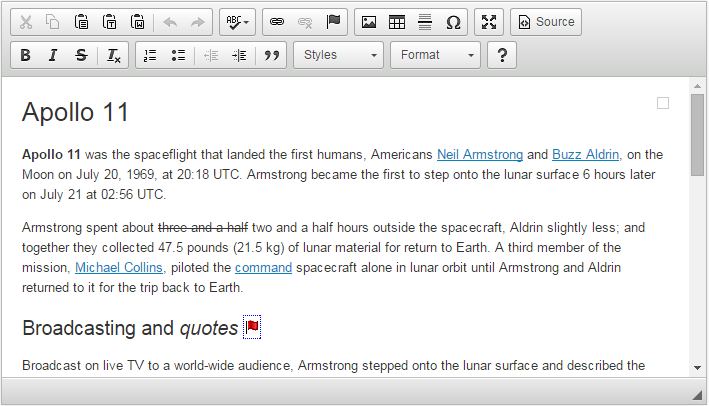
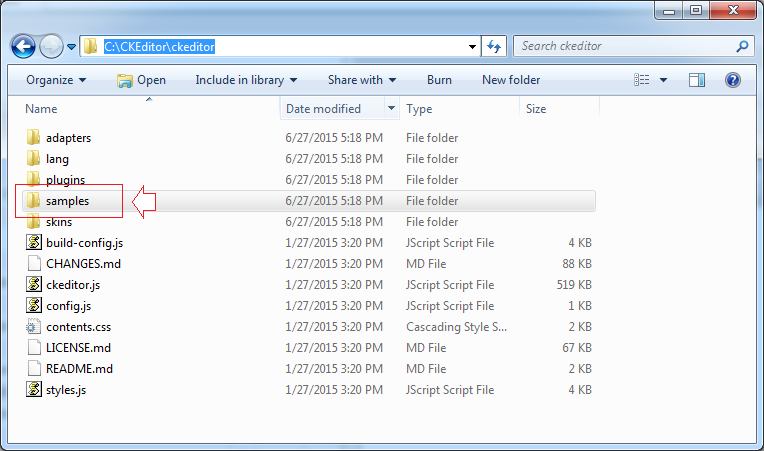
You can see examples of CKEditor in samples folder:
4. Basic Examples
All the examples in this document are on samples directory of CKEditor that you have downloaded. But I try to make it easier for you to reach more easily.
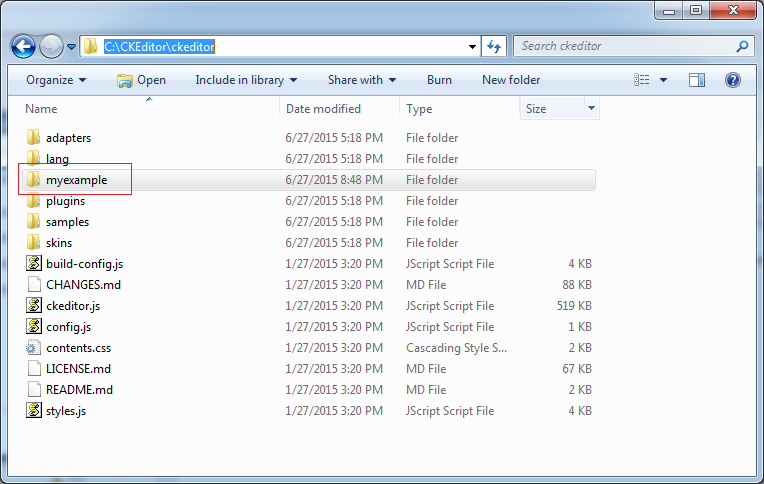
Create myexamples folder, examples in this document will be placed in that folder.
Replace Textarea Elements Using JavaScript Code
Simple example using CKEditor.replace(..) to replace <textarea> by CKEditor.
replacebycode.html
<!DOCTYPE html>
<html>
<head>
    <meta charset="utf-8">
    <title>Replace Textarea by Code</title>

    <!-- (1) : Declaration for CKEditor library -->
    <script src="../ckeditor.js"></script>

</head>
<body>
    <h2>Replace Textarea Elements Using JavaScript Code</h2>

    <form action="" method="post">

        <!-- (2): textarea will replace by CKEditor -->
        <textarea id="editor1" name="editor1" cols="80" rows="10">
            <p>Hello <strong>CKEditor</strong></p>
        </textarea>

         <!-- (3): Javascript code to replace textarea with id='editor1' by CKEditor -->
        <script>

            CKEDITOR.replace( 'editor1' );

        </script>

    </form>
</body>
</html>
Try example:
The results run the example:

Replace textarea elements by class name
<textarea> has name attribute, and class = "ckeditor" will automatically be replaced by CKEditor
<texarea name = "editor1" class="ckeditor"> </texarea>


<textarea name = "editor2" class="ckeditor"> Text </textarea>
replacebyclass.html
<!DOCTYPE html>
<html>
<head>
   <meta charset="utf-8">
   <title>Replace Textareas by Class Name</title>

   <script src="../ckeditor.js"></script>

</head>
<body>

   <h1>Replace Textarea Elements by Class Name</h1>

   <form action="" method="post">

       <textarea class="ckeditor" name="editor1" cols="80" rows="10">

           <p>Hello <strong>CKEditor</strong></p>

       </textarea>

    </form>

</body>
</html>
Try example:
Create editors with jQuery
Example create CKEditor using JQuery.
jquery.html
<!DOCTYPE html>
<html>
<head>
<meta charset="utf-8">
<title>jQuery Adapter — CKEditor Sample</title>
<script src="http://code.jquery.com/jquery-1.11.0.min.js"></script>
<script src="../ckeditor.js"></script>
<script src="../adapters/jquery.js"></script>
<script>
$( document ).ready( function() {
$( '#editor1' ).ckeditor();
} );
function setValue() {
$( '#editor1' ).val( $( 'input#val' ).val() );
}
</script>
</head>
<body>
<h1 class="samples">Create Editors with jQuery</h1>
<form action="" method="post">
<textarea id="editor1" name="editor1" cols="80" rows="10">
<p>Hello <strong>CKEditor</strong></p>
</textarea>
<input type="text" id="val" value="I'm using jQuery val()!" size="30">
<input onclick="setValue();" type="button" value="Set value">
</form>
</body>
</html>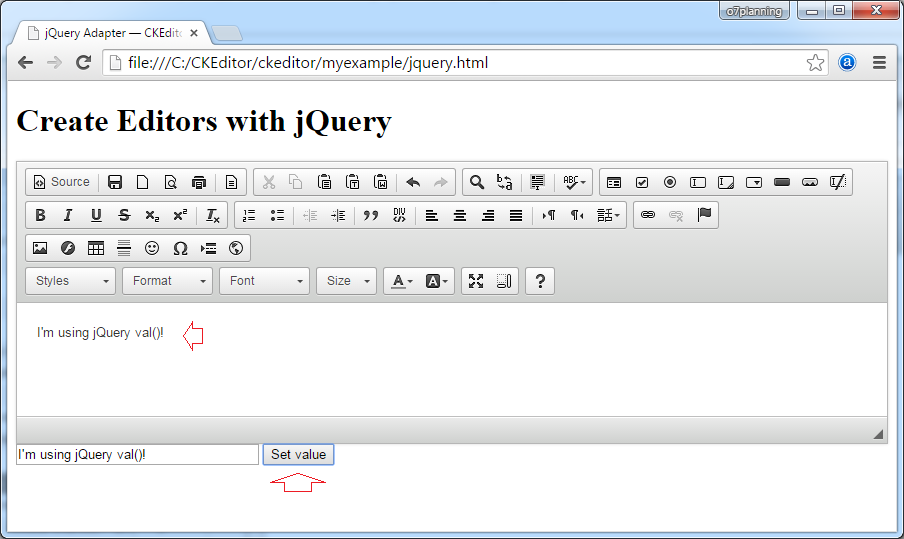
Try it:
5. Basic Customization
Change the background color of interface
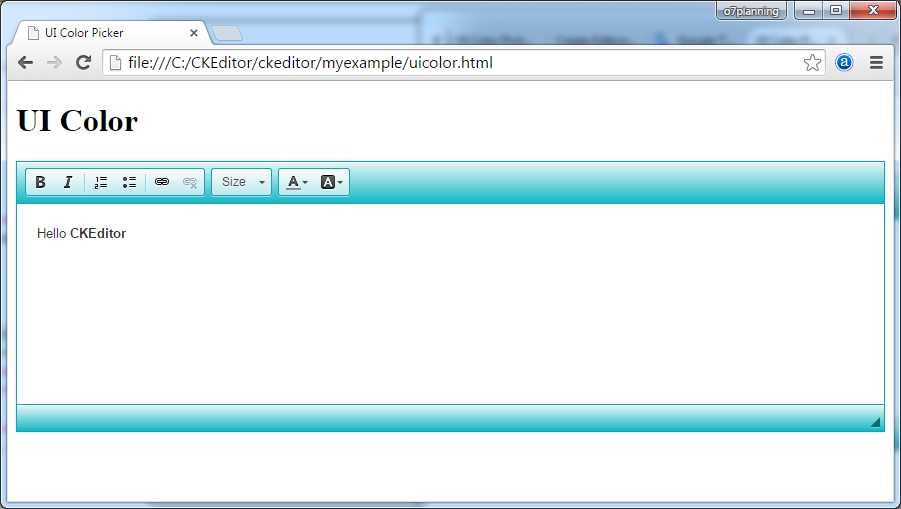
CKEDITOR.replace( 'textarea_id', {
    uiColor: '#14B8C4'
});
uicolor.html
<!DOCTYPE html>
<html>
<head>
   <meta charset="utf-8">
   <title>UI Color Picker</title>

   <script src="../ckeditor.js"></script>

</head>
<body>
   <h1>UI Color</h1>

   <textarea id="editor1" name="editor1" cols="80" rows="10">
       <p>Hello <strong>CKEditor</strong></p>
   </textarea>

   <script>

       // Replace the <textarea id="editor1"> with an CKEditor
       // instance, using default configurations.
       CKEDITOR.replace( 'editor1', {
           uiColor: '#14B8C4',
           toolbar: [
               [ 'Bold', 'Italic', '-', 'NumberedList', 'BulletedList', '-', 'Link', 'Unlink' ],
               [ 'FontSize', 'TextColor', 'BGColor' ]
           ]
       });

   </script>
</body>
</html>
Try it:
See more:
Change Language
uilanguages.html
<!DOCTYPE html>
<html>
 <head>
    <meta charset="utf-8">
    <title>User Interface Globalization</title>

    <script src="../ckeditor.js"></script>

 </head>
 <body>

    <h1>User Interface Languages</h1>
    <form action="" method="post">

       <select onchange="createEditor( this.value );" id="languages">
          <option value="en-gb">English (United Kingdom)</option>
          <option value="vi">Vietnamese</option>
          <option value="zh-cn">Chinese Simplified</option>
          <option value="zh">Chinese Traditional</option>
       </select>

       <textarea id="editor1" name="editor1"  cols="80" rows="10">
             <p>Hello <strong>CKEditor</strong></p>
       </textarea>

       <script>
          var editor;

          function createEditor( languageCode ) {
              if ( editor )
                  editor.destroy();

              // Replace the <textarea id="editor1"> with an CKEditor
              // instance, using default configurations.
              editor = CKEDITOR.replace( 'editor1', {
                  language: languageCode,

                  on: {
                      instanceReady: function() {
                          // Wait for the editor to be ready to set
                          // the language combo.
                          var languages = document.getElementById( 'languages' );
                          languages.value = this.langCode;
                          languages.disabled = false;
                      }
                  }
              });
          }

          // At page startup, load the default language:
          createEditor( '' );

       </script>

    </form>
 </body>
</html>
Note: The list of language codes and language names you can see in:
- <CKEditor_Home>/samples/assets/uilanguages/languages.js

Try it:
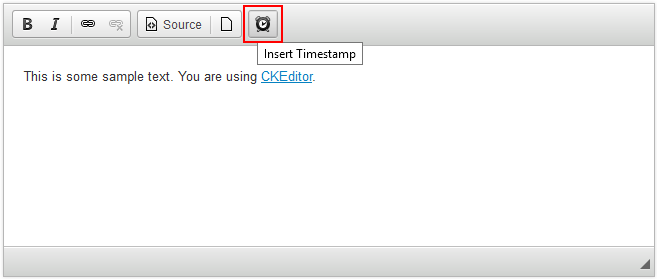
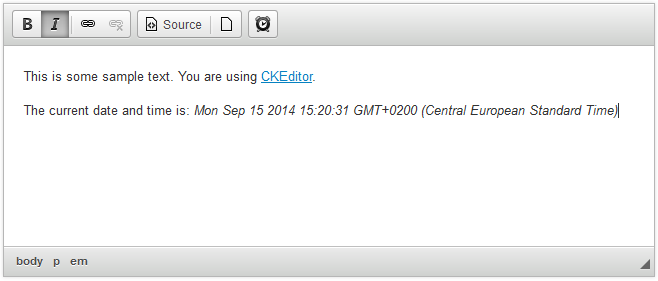
6. Inline Editing
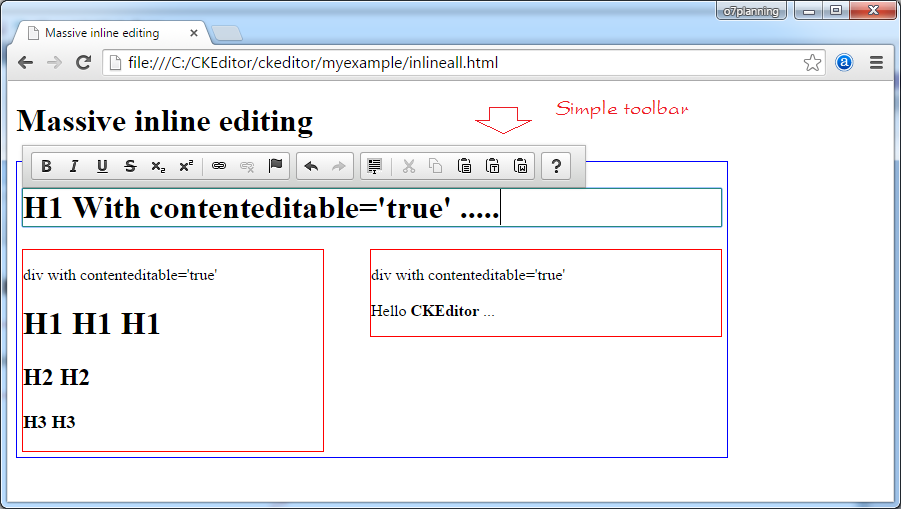
Massive inline editor creation
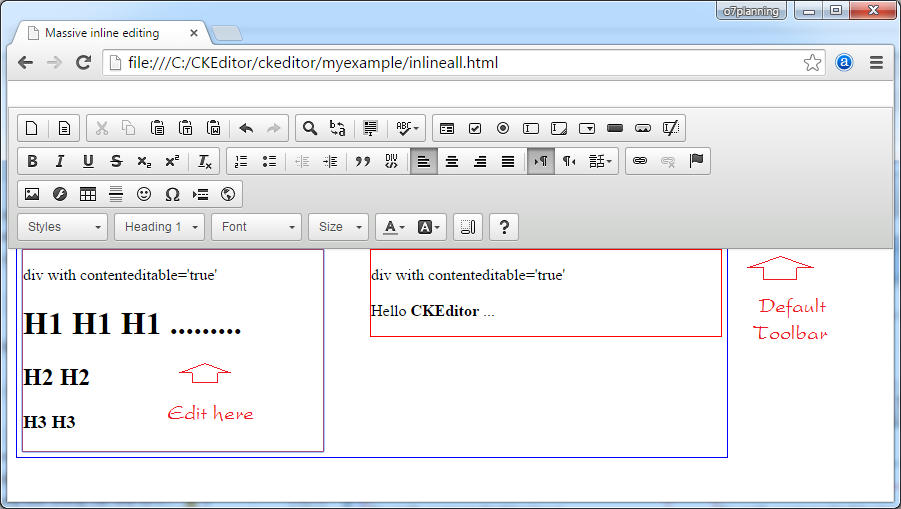
This sample page demonstrates the inline editing feature - CKEditor instances will be created automatically from page elements with contenteditable = "true":
You can modify the contents inside the HTML element which has contenteditable = 'true'. And CKEditor toolbar is displayed when you modify.
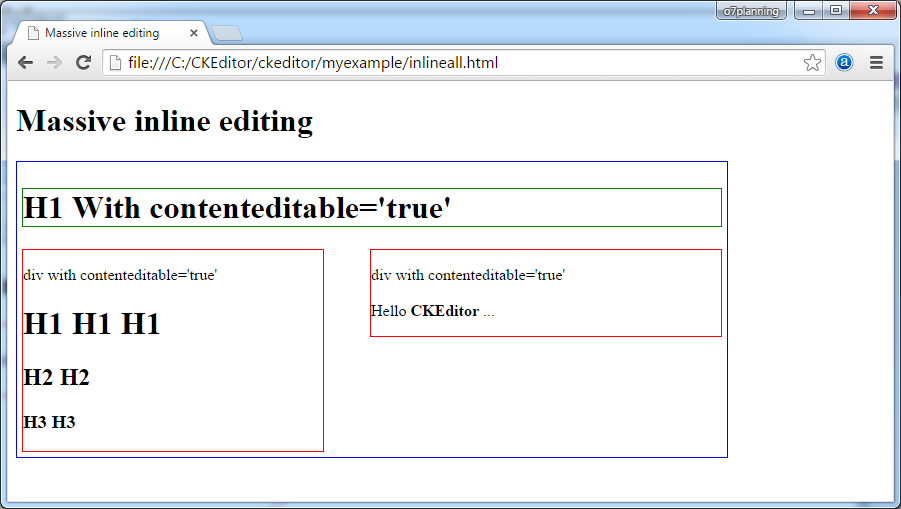
- If h1, h2, h3 or tag has id = taglist, and has contenteditable = 'true', the toolbar displays simple (Removed colorbutton, find, flash, fonts,... plugin)
- Conversely toolbar displayed by default.
Here are pictures run example:
inlineall.html
<!DOCTYPE html>
<html>
  <head>
     <meta charset="utf-8">
     <title>Massive inline editing</title>
     <script src="../ckeditor.js"></script>

     <script>

        // The "instanceCreated" event is fired for every editor instance created.
        CKEDITOR.on( 'instanceCreated', function( event ) {
            var editor = event.editor,
                element = editor.element;

            // Customize editors for headers and tag list.
            // If element (h1, h2, h3 or id='taglist') and contenteditable="true"
            // These editors don't need features like smileys, templates, iframes etc.

            if ( element.is( 'h1', 'h2', 'h3' ) || element.getAttribute( 'id' ) == 'taglist' ) {
                // Customize the editor configurations on "configLoaded" event,
                // which is fired after the configuration file loading and
                // execution. This makes it possible to change the
                // configurations before the editor initialization takes place.

                editor.on( 'configLoaded', function() {

                    // Remove unnecessary plugins to make the editor simpler.
                    editor.config.removePlugins = 'colorbutton,find,flash,font,' +
                        'forms,iframe,image,newpage,removeformat,' +
                        'smiley,specialchar,stylescombo,templates';

                    // Rearrange the layout of the toolbar.
                    editor.config.toolbarGroups = [
                        { name: 'editing',        groups: [ 'basicstyles', 'links' ] },
                        { name: 'undo' },
                        { name: 'clipboard',    groups: [ 'selection', 'clipboard' ] },
                        { name: 'about' }
                    ];
                });
            }
        });

     </script>
  </head>
  <body>
     <h1>Massive inline editing</h1>

     <div id="container" style="border: 1px solid blue;width: 700px; display:inline-block;padding:5px;">

          <h1 contenteditable="true" style="border:1px solid green;">
              H1 With contenteditable='true'
          </h1>

          <div style="border: 1px solid red; float: left;width: 300px;" contenteditable="true">
             div with contenteditable='true'
             <h1>H1 H1 H1</h1>
             <h2>H2 H2</h2>
             <h3>H3 H3</h3>
          </div>

          <div style="border: 1px solid red; float: right;width: 350px;" contenteditable="true">
             div with contenteditable='true' <br><br>
             Hello <b>CKEditor</b> ...
          </div>

      </div>

  </body>
</html>
Try it:
Convert element into an inline editor by code
inlinebycode.html
<!DOCTYPE html>
<html>
<head>
<meta charset="utf-8">
<title>Inline Editing by Code — CKEditor Sample</title>
<script src="../ckeditor.js"></script>
<style>
#editable
{
padding: 10px;
float: left;
}
</style>
</head>
<body>
<h1>Inline Editing by Code</h1>
<div id="editable" contenteditable="true" style="border:1px solid red;">
<p>Hello <strong>CKEditor</strong></p>
</div>
<script>
// We need to turn off the automatic editor creation first.
CKEDITOR.disableAutoInline = true;
var editor = CKEDITOR.inline( 'editable' );
</script>
</body>
</html>Replace textarea with inline editor
inlinetextarea.html
<!DOCTYPE html>
<html>
   <head>
      <meta charset="utf-8">
      <title>Replace Textarea with Inline Editor</title>

      <script src="../ckeditor.js"></script>

      <style>
         /* Style the CKEditor element to look like a textfield */
         .cke_textarea_inline
         {
         padding: 10px;
         height: 200px;
         overflow: auto;
         border: 1px solid gray;
         -webkit-appearance: textfield;
         }
      </style>

   </head>
   <body>
      <h1>Replace Textarea with Inline Editor</h1>


      <textarea name="article-body" style="height: 200px">
               <p>Hello <strong>CKEditor</strong></p>
      </textarea>

      <script>
         CKEDITOR.inline( 'article-body' );
      </script>

   </body>
</html>
Inline editor with jQuery
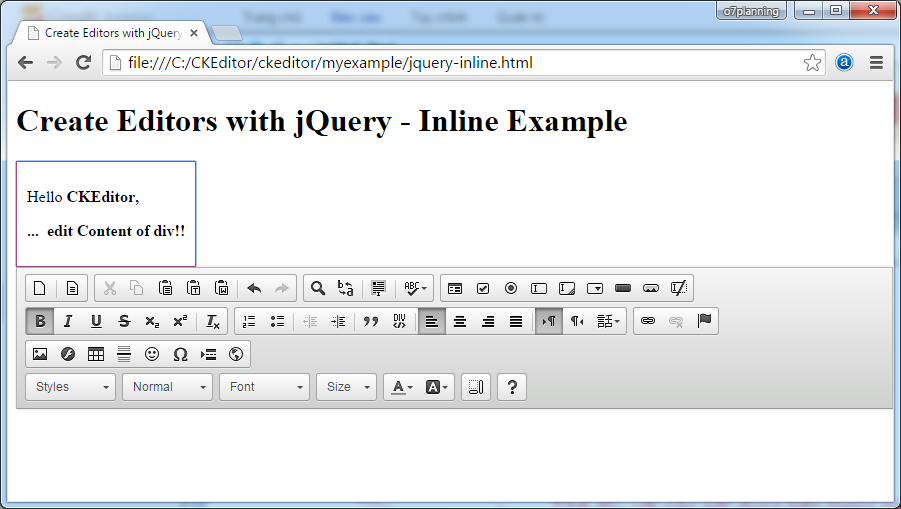
jquery-inline.html
<!DOCTYPE html>
<html>
<head>
  <meta charset="utf-8">
  <title>Create Editors with jQuery - Inline Example</title>
  <script src="http://code.jquery.com/jquery-1.11.0.min.js"></script>

  <script src="../ckeditor.js"></script>
  <script src="../adapters/jquery.js"></script>

  <style>

      #editable
      {
          padding: 10px;
          float: left;
      }

  </style>

  <script>

      CKEDITOR.disableAutoInline = true;

      $( document ).ready( function() {
          $( '#editable' ).ckeditor(); // Use CKEDITOR.inline().
      } );

  </script>
</head>
<body>

  <h1>Create Editors with jQuery - Inline Example</h1>

  <form action="" method="post">

      <div id="editable" contenteditable="true" style="border: 1px solid red;">
          <p>Hello <strong>CKEditor</strong></p>
      </div>

  </form>


</body>
</html>
7. CKEditor Configuration
- Static configuration:
- It will take effect for all ckeditor, the ones that do not specify the configuration
- The configuration for a specific CKEditor:
- It is only effective for CKEditor be configured.
Static Configuration
Static configuration:
- It will take effect for all CKEditor, the ones that do not specify the configuration.
Consider for example a static configuration:
// Configuring the toolbar, displays a few buttons.
CKEDITOR.config.toolbar = [  ['Font','FontSize'], ['Bold','Italic']  ];

// Configuring UI Color.
CKEDITOR.config.uiColor = '#9AB8F3';

CKEDITOR.config.width = '500px';
CKEDITOR.config.height = '70px';
config-static.html
<!DOCTYPE html>
<html>
<head>
    <meta charset="utf-8">
    <title>Config CKEditor - Static config</title>
    <script src="../ckeditor.js"></script>


    <script>
        // Cấu hình lại toolbar, hiển thị một vài Button.
        CKEDITOR.config.toolbar = [  ['Font','FontSize'], ['Bold','Italic']  ];

        // Cấu hình lại màu nền giao diện.
        CKEDITOR.config.uiColor = '#9AB8F3';
        CKEDITOR.config.resize_enabled = false;
        CKEDITOR.config.width = '500px';
        CKEDITOR.config.height = '70px';
    </script>
</head>
<body>
    <h3>CKEditor Static config</h3>

    <p>CKEditor 1</p>
    <textarea class="ckeditor" name="editor1" >
         <p>This is CKEditor 1</p>
    </textarea>

    <p>CKEditor 2</p>
    <textarea class="ckeditor" name="editor2" >
         <p>This is CKEditor 2</p>
    </textarea>

</body>
</html>
Run example:
See more:
Configure for specific CKEditor
With each 'ckeditor' in a page, you can configure differently for them. For example, a page with 2 different CKEditor with Toolbar differences in Button number.
config-instance.html
<!DOCTYPE html>
<html>
<head>
    <meta charset="utf-8">
    <title>Config CKEditor - instance config</title>
    <script src="../ckeditor.js"></script>


    <script>

        // Background color
        CKEDITOR.config.uiColor = '#FFE6E6';

        // Do not allow resizing
        CKEDITOR.config.resize_enabled = false;

    </script>
</head>
<body>
    <h3>CKEditor instance config</h3>

    <p>CKEditor 1</p>
    <textarea id="editor1" name="editor1">
         <p>This is CKEditor 1</p>
    </textarea>

    <p>CKEditor 2</p>
    <textarea id="editor2" name="editor2">
         <p>This is CKEditor 2</p>
    </textarea>

    <script>
       CKEDITOR.replace( 'editor1' , {
          toolbar: [  ['Font','FontSize'], ['Bold','Italic']  ],
          width: '300px',
          height: '80px',
          resize_enabled : true
       } );

       CKEDITOR.replace( 'editor2' , {
          toolbar: [  ['Font'], ['Bold' ]  ],
          width: '500px',
          height: '100px'
       } );
    </script>

</body>
</html>
Try it:
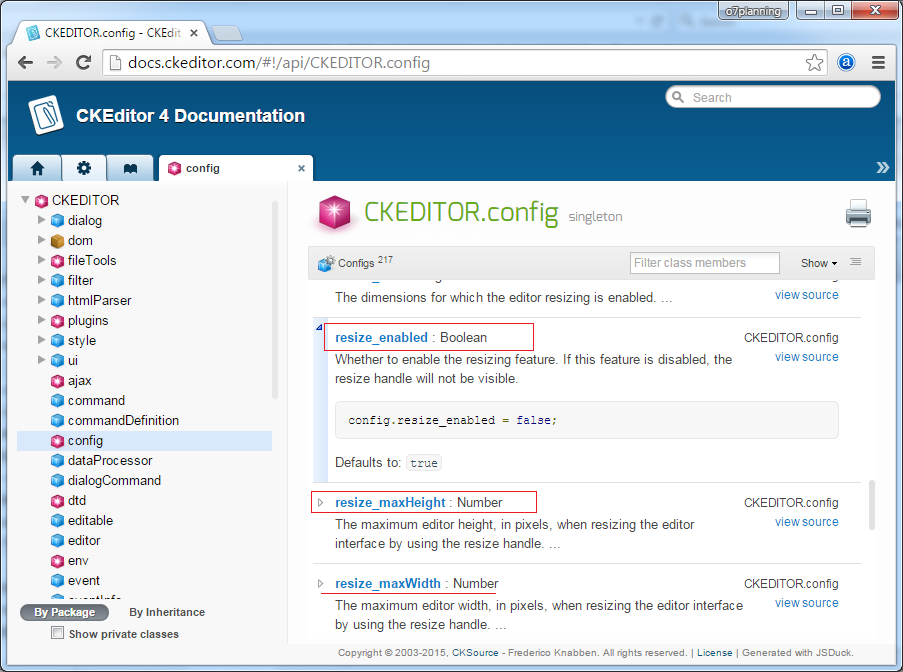
The configuration attributes
You can find list of configuration attributes at:
8. Toolbar Configurations
There are several approaches to CKEditor toolbar configuration to choose from:
- Using the Toolbar Configurator
- ..
- "Item by Item" Configuration
- config.toolbar
- Toolbar Groups Configuration
- config.toolbarGroups
Toolbar "Item by Item" Configuration
You can configure the Toolbar follow "Item by Item" type , which means that you declare the groups, each group consisting of Buttons.
Here is a snippet of code with Toolbar configuration.
// Declaring groups, each group with the buttons.

CKEDITOR.config.toolbar = [

   { name: 'my_document', items: [ 'Source', '-', 'NewPage', 'Preview', '-', 'Templates' ] },

   { name: 'my_clipboard', items: [ 'Cut', 'Copy', 'Paste' ] },

   '/',

   { name: 'my_styles', items: [ 'Bold', 'Italic', 'Format' ] }

];
You may also do not need to declare the name of the group.
CKEDITOR.config.toolbar = [

   [ 'Source', '-', 'NewPage', 'Preview', '-', 'Templates' ],

   [ 'Cut', 'Copy', 'Paste' ] ,

   '/',

   [ 'Bold', 'Italic', 'Format' ]

];
toolbar-itembyitem.html
<!DOCTYPE html>
<html>
<head>
    <meta charset="utf-8">
    <title>CKEditor Toolbar Configuration - Item by Item</title>
    <script src="../ckeditor.js"></script>


    <script>

    CKEDITOR.config.toolbar = [

        { name: 'my_document', items: [ 'Source', '-', 'NewPage', 'Preview', '-', 'Templates' ] },

        { name: 'my_clipboard', items: [ 'Cut', 'Copy', 'Paste' ] },

        '/',

        { name: 'my_styles', items: [ 'Bold', 'Italic', 'Format' ] }

    ];

    CKEDITOR.config.height = '300px';

    </script>
</head>
<body>

<h3>CKEditor Toolbar Configuration - Item by Item</h3>


<textarea class="ckeditor" name="editor1">
    <pre>
    CKEDITOR.config.toolbar = [

        { name: 'my_document', items: [ 'Source', '-', 'NewPage', 'Preview', '-', 'Templates' ] },

        { name: 'my_clipboard', items: [ 'Cut', 'Copy', 'Paste' ] },

        '/',

        { name: 'my_styles', items: [ 'Bold', 'Italic', 'Format' ] }

    ];
    </pre>
</textarea>

</body>
</html>
Run example:
Toolbar Groups Configuration
The Benefits of Group Configuration:
The most important benefit of toolbar grouping configuration over the "item by item" configuration is: automation.
It is now possible for plugin developers to define into which toolbar group their plugins should add buttons.
It is now possible for plugin developers to define into which toolbar group their plugins should add buttons.
While not mandatory, having all groups and sub-groups configured (including the ones that you do not use) is recommended because at any moment in the future, when a new plugin gets installed, its button will automatically appear in the toolbar without further configuration requirements.
Example:
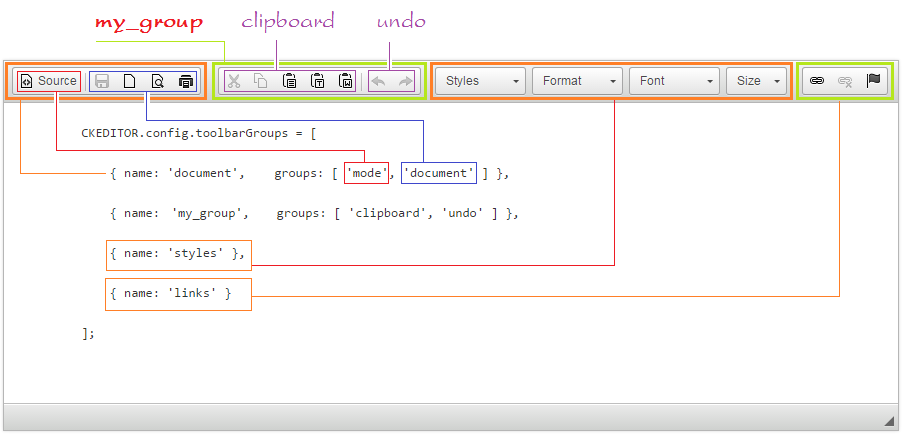
// Ckeditor has built the basic group called "mode", "document", "clipboard", "undo", "styles", "links" .....
// You can define your group with any name, and contain the basic group of CKEditor.
// Your group can namesake with available group of Ckeditor .
// Your group may not need to list the sub-group, then by default it will contain one sub-group has the same name as your group.

CKEDITOR.config.toolbarGroups = [

   { name: 'document',    groups: [ 'mode', 'document' ] },

   { name: 'my_group',   groups: [ 'clipboard', 'undo' ] },

   { name: 'styles' },

   { name: 'links' }

];
Benefit of Toolbar Groups Configuration is when you change CKEditor library to a newer version, if in a certain group in the new version adds a new button, it will automatically be displayed on the toolbar, you do not need to modify the code of your page
You can force row-breaks in the toolbar by adding
'/' into the list.CKEDITOR.config.toolbarGroups = [
{ name: 'document', groups: [ 'mode', 'document' ] },
{ name: 'my_clipboard', groups: [ 'clipboard', 'undo' ] },
'/',
{ name: 'styles' },
{ name: 'links' }
];
toolbar-group.html
<!DOCTYPE html>
<html>
<head>
<meta charset="utf-8">
<title>CKEditor Toolbar Groups Configuration</title>
<script src="../ckeditor.js"></script>
<script>
CKEDITOR.config.toolbarGroups = [

   { name: 'document',    groups: [ 'mode', 'document' ] },

   { name: 'my_clipboard',   groups: [ 'clipboard', 'undo' ] },

   '/',

   { name: 'styles' },

   { name: 'links' }
];
CKEDITOR.config.height = '300px';
</script>
</head>
<body>
<h3>CKEditor Toolbar Groups Configuration</h3>
<textarea class="ckeditor" name="editor1">
<pre>
CKEDITOR.config.toolbarGroups = [
{ name: 'document', groups: [ 'mode', 'document' ] },
{ name: 'my_group', groups: [ 'clipboard', 'undo' ] },
{ name: 'styles' },
{ name: 'links' }
];
</pre>
</textarea>
</body>
</html>Run example:
List of group and Item available on ckeditor
This is the definition of groups in CKEditor 3.x:
{ name: 'document', items : [ 'Source','-','Save','NewPage','DocProps','Preview','Print','-','Templates' ] },

{ name: 'clipboard', items : [ 'Cut','Copy','Paste','PasteText','PasteFromWord','-','Undo','Redo' ] },

{ name: 'editing', items : [ 'Find','Replace','-','SelectAll','-','SpellChecker', 'Scayt' ] },

{ name: 'forms', items : [ 'Form', 'Checkbox', 'Radio', 'TextField', 'Textarea', 'Select', 'Button', 'ImageButton', 'HiddenField' ] },

{ name: 'basicstyles', items : [ 'Bold','Italic','Underline','Strike','Subscript','Superscript','-','RemoveFormat' ] },

{ name: 'paragraph', items : [ 'NumberedList','BulletedList','-','Outdent','Indent','-','Blockquote','CreateDiv',
                               '-','JustifyLeft','JustifyCenter','JustifyRight','JustifyBlock','-','BidiLtr','BidiRtl' ] },

{ name: 'links', items : [ 'Link','Unlink','Anchor' ] },

{ name: 'insert', items : [ 'Image','Flash','Table','HorizontalRule','Smiley','SpecialChar','PageBreak','Iframe' ] },

{ name: 'styles', items : [ 'Styles','Format','Font','FontSize' ] },

{ name: 'colors', items : [ 'TextColor','BGColor' ] },

{ name: 'tools', items : [ 'Maximize', 'ShowBlocks','-','About' ] }