Android ContextMenu Tutorial with Examples
1. Android ContextMenu
When you are not able to allocate any space of your user interface for an essential function, you can use a Context Menu. The Context Menu is a floating menu on display in order to respond a long press, namely 500 milliseconds by default. The Context Menu may contain multiple Menu Items and Sub Menus.
In Android, a standard long press duration is 500 milliseconds. You can have this value by calling the ViewConfiguration.getLongPressTimeout() method. Users can adjust this value in Settings, which will work for all the applications on the device.
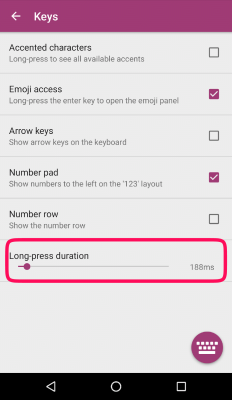
As an application developer, you cannot set a different value for "the long press period", however, you can definitely use some tricks to simulate a long press with customizing period of time as well as handle some related actions. (See more in the appendix at the end of the article.)
When a View is registered to a Long-Press event, the system will call the onCreateContextMenu() method to create and display the Context Menu.
@Override
protected void onCreate(Bundle savedInstanceState) {
    super.onCreate(savedInstanceState);
    setContentView(R.layout.activity_main);

    this.button = (Button) this.findViewById(R.id.button_test);

    this.registerForContextMenu(this.button);
}

@Override
public void onCreateContextMenu(ContextMenu menu, View view, ContextMenu.ContextMenuInfo menuInfo) {
    super.onCreateContextMenu(menu, view, menuInfo);

    menu.setHeaderTitle("Context Menu");

    MenuInflater inflater = getMenuInflater();
    inflater.inflate(R.menu.layout_context_menu, menu);
}

// You may not need "Android Resource File" to have a ContextMenu.
// Using Java to create Context Menu.
public void onCreateContextMenu_2(ContextMenu menu, View view, ContextMenu.ContextMenuInfo menuInfo) {
    super.onCreateContextMenu(menu, view, menuInfo);

    menu.setHeaderTitle("Context Menu");

    // groupId, itemId, order, title
    MenuItem menuItemUpload = menu.add(1, 1, 1, "Upload");
    MenuItem menuItemBookmark = menu.add(2, 2, 2, "Bookmark");

    // groupId, itemId, order, title
    SubMenu subMenuShare=  menu.addSubMenu(3, 3, 3, "Share");
    subMenuShare.add(4, 31, 1, "Google" );
    subMenuShare.add(5, 32, 2, "Instagram");
}
When users click on a Menu Item, the onContextItemSelected() method is called.
@Override
public boolean onContextItemSelected(MenuItem item) {

    switch (item.getItemId()) {
        case R.id.menuItem_bookmark:
            Toast.makeText(this, "Bookmark", Toast.LENGTH_SHORT).show();
            break;
        case R.id.menuItem_upload:
            Toast.makeText(this, "Upload", Toast.LENGTH_SHORT).show();
            break;
        case R.id.menuItem_facebook:
            Toast.makeText(this, "Share Facebook", Toast.LENGTH_SHORT).show();
            break;
        case R.id.menuItem_instagram:
            Toast.makeText(this, "Share Instagram", Toast.LENGTH_SHORT).show();
            break;
        default:
            Toast.makeText(this, item.getTitle(), Toast.LENGTH_SHORT).show();
            break;
    }
    return true;
}
You can use the XML Android Resource File to design the interface of a Context Menu. Nonetheless, the Context Menu of an application is quite simple, so creating a Context Menu completely from Java code is also a good choice (See more in the example below).
Note: Some attributes of the <item> (Menu Item) have no effect when placed in a Context Menu, for example:
- app:showAsAction
- android:icon (Not work in Android 3.0+/API 11+)
2. An example of Context Menu
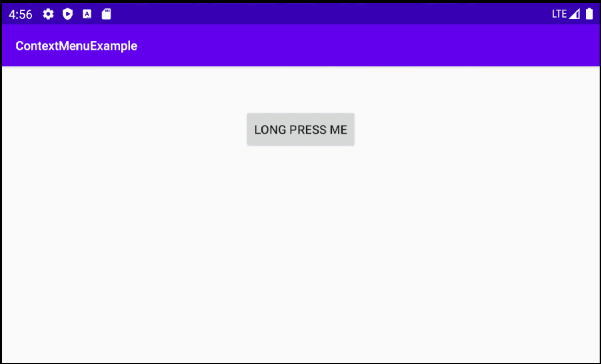
Alright, now we will set an example of the Context Menu. Let's preview the example:

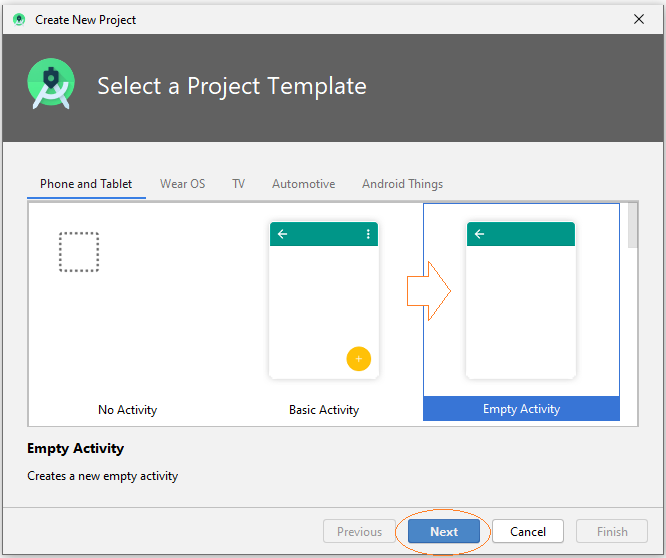
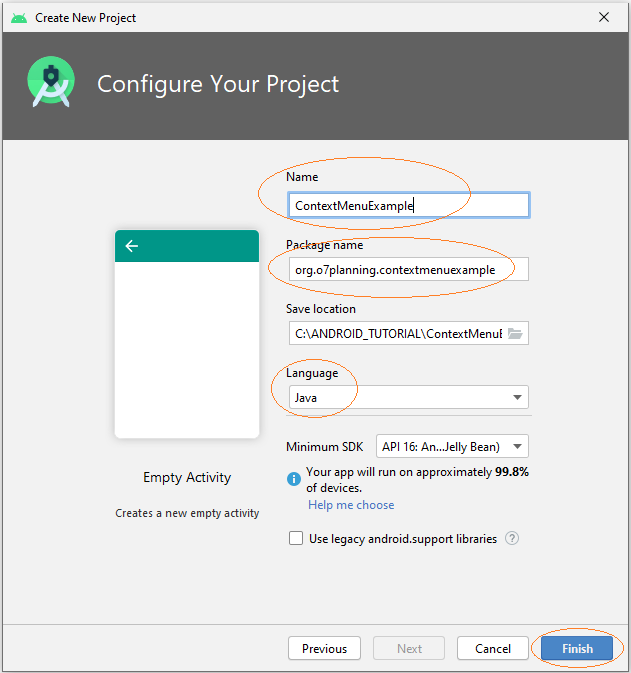
On Android Studio, create a new project.
- Name: ContextMenuExample
- Package name: org.o7planning.contextmenuexample
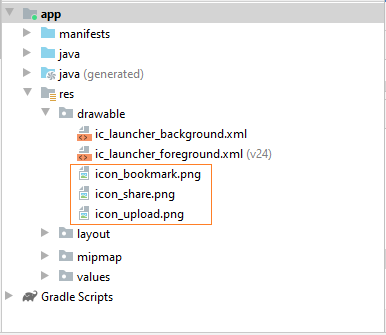
Note: Since Android 3.0 (API 11), Context Menu have not supported icons, but you can copy some icons below into the drawable folder to support older Android devices, or you can skip this step.
 |  |  |
icon_upload.png | icon_bookmark.png | icon_share.png |
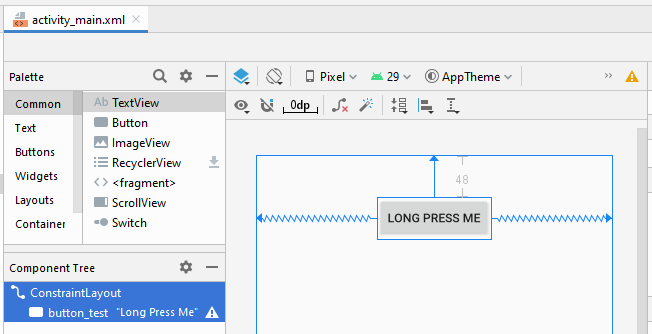
The main interface of the application is extremely simple, with only one Button. When users long press on the Button, a Context Menu will be displayed.
activity_main.xml
<?xml version="1.0" encoding="utf-8"?>
<androidx.constraintlayout.widget.ConstraintLayout
xmlns:android="http://schemas.android.com/apk/res/android"
xmlns:app="http://schemas.android.com/apk/res-auto"
xmlns:tools="http://schemas.android.com/tools"
android:layout_width="match_parent"
android:layout_height="match_parent"
tools:context=".MainActivity">
<Button
android:id="@+id/button_test"
android:layout_width="wrap_content"
android:layout_height="wrap_content"
android:layout_marginTop="48dp"
android:text="Long Press Me"
app:layout_constraintEnd_toEndOf="parent"
app:layout_constraintStart_toStartOf="parent"
app:layout_constraintTop_toTopOf="parent" />
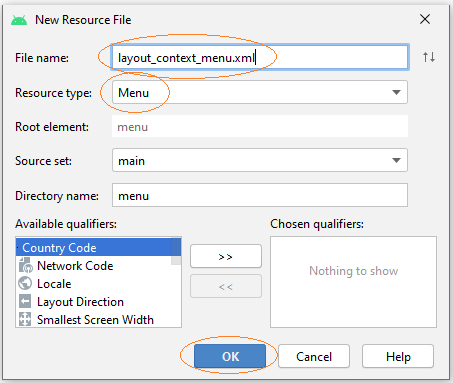
</androidx.constraintlayout.widget.ConstraintLayout>On Android Studio, select:
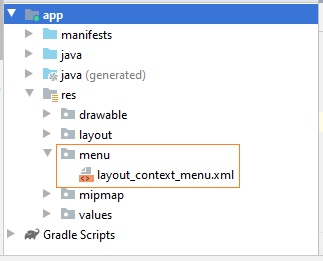
- File > New > Android Resource File

- File name: layout_context_menu.xml
- Resource type: Menu
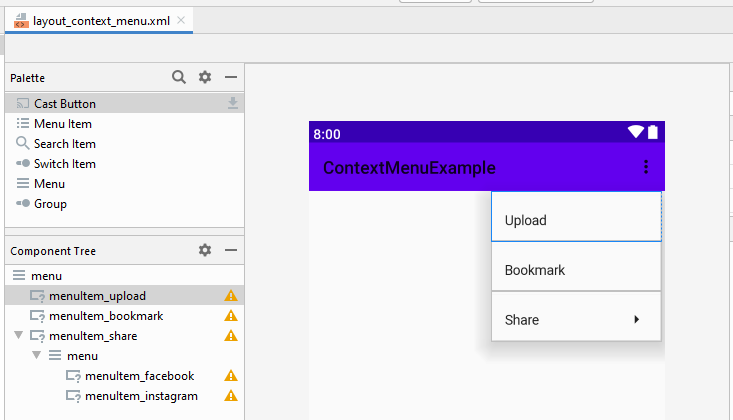
On Android Studio, start with designing the interface of the Context Menu:
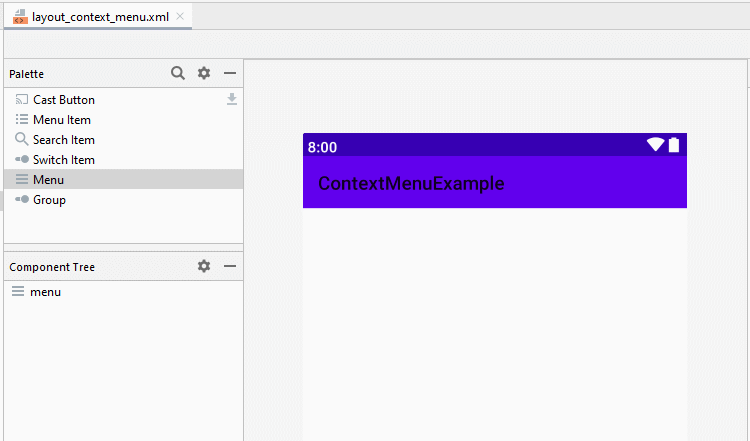
Then set ID, Title and Icon for the Menu Items:

layout_context_menu.xml
<?xml version="1.0" encoding="utf-8"?>
<menu xmlns:app="http://schemas.android.com/apk/res-auto"
    xmlns:android="http://schemas.android.com/apk/res/android">
    <item
        android:id="@+id/menuItem_upload"
        android:icon="@drawable/icon_upload"
        android:title="Upload" />
    <item
        android:id="@+id/menuItem_bookmark"
        android:icon="@drawable/icon_bookmark"
        android:title="Bookmark" />
    <item
        android:id="@+id/menuItem_share"
        android:icon="@drawable/icon_share"
        android:title="Share">
        <menu>
            <item
                android:id="@+id/menuItem_facebook"
                android:title="Facebook" />
            <item
                android:id="@+id/menuItem_instagram"
                android:title="Instagram" />
        </menu>
    </item>
</menu>
MainActivity.java
package org.o7planning.contextmenuexample;

import androidx.appcompat.app.AppCompatActivity;

import android.annotation.SuppressLint;
import android.os.Bundle;
import android.util.Log;
import android.view.ContextMenu;
import android.view.MenuInflater;
import android.view.MenuItem;
import android.view.SubMenu;
import android.view.View;
import android.widget.Button;
import android.widget.Toast;

public class MainActivity extends AppCompatActivity {

    private static final String LOG_TAG = "ContextMenuExample";

    private Button button;

    @Override
    protected void onCreate(Bundle savedInstanceState) {
        super.onCreate(savedInstanceState);
        setContentView(R.layout.activity_main);

        this.button = (Button) this.findViewById(R.id.button_test);

        this.registerForContextMenu(this.button);
    }

    @SuppressLint("RestrictedApi")
    @Override
    public void onCreateContextMenu(ContextMenu menu, View view, ContextMenu.ContextMenuInfo menuInfo) {
        super.onCreateContextMenu(menu, view, menuInfo);

        menu.setHeaderTitle("Context Menu");

        MenuInflater inflater = getMenuInflater();
        inflater.inflate(R.menu.layout_context_menu, menu);

        // com.android.internal.view.menu.ContextMenuBuilder
        Log.i(LOG_TAG, ">>>>> Menu class: " + menu.getClass().getName());
        // com.android.internal.view.menu.MenuBuilder
        Log.i(LOG_TAG, ">>>>> Menu superclass: " + menu.getClass().getSuperclass().getName());
    }

    // You may not need "Android Resource File" to have a ContextMenu.
    // Using Java to create Context Menu.
    @SuppressLint("RestrictedApi")
    public void onCreateContextMenu_2(ContextMenu menu, View view, ContextMenu.ContextMenuInfo menuInfo) {
        super.onCreateContextMenu(menu, view, menuInfo);

        menu.setHeaderTitle("Context Menu");

        // groupId, itemId, order, title
        MenuItem menuItemUpload = menu.add(1, 1, 1, "Upload");
        MenuItem menuItemBookmark = menu.add(2, 2, 2, "Bookmark");
        menuItemUpload.setIcon(R.drawable.icon_upload);
        menuItemBookmark.setIcon(R.drawable.icon_bookmark);


        // groupId, itemId, order, title
        SubMenu subMenuShare=  menu.addSubMenu(3, 3, 3, "Share");
        subMenuShare.setIcon(R.drawable.icon_share);

        subMenuShare.add(4, 31, 1, "Google" );
        subMenuShare.add(5, 32, 2, "Instagram");
    }

    @Override
    public boolean onContextItemSelected(MenuItem item) {

        switch (item.getItemId()) {
            case R.id.menuItem_bookmark:
                Toast.makeText(this, "Bookmark", Toast.LENGTH_SHORT).show();
                break;
            case R.id.menuItem_upload:
                Toast.makeText(this, "Upload", Toast.LENGTH_SHORT).show();
                break;
            case R.id.menuItem_facebook:
                Toast.makeText(this, "Share Facebook", Toast.LENGTH_SHORT).show();
                break;
            case R.id.menuItem_instagram:
                Toast.makeText(this, "Share Instagram", Toast.LENGTH_SHORT).show();
                break;
            default:
                Toast.makeText(this, item.getTitle(), Toast.LENGTH_SHORT).show();
                break;
        }
        return true;
    }
}Android Programming Tutorials
- What is needed to get started with Android?
- Install Android Studio on Windows
- Install Intel® HAXM for Android Studio
- Configure Android Emulator in Android Studio
- Android Tutorial for Beginners - Hello Android
- Android Tutorial for Beginners - Basic examples
- Using image assets and icon assets of Android Studio
- Using Android Device File Explorer
- Enable USB Debugging on Android Device
- Setting SD Card for Android Emulator
- How to know the phone number of Android Emulator and change it
- How to add external libraries to Android Project in Android Studio?
- How to disable the permissions already granted to the Android application?
- How to remove applications from Android Emulator?
- Android UI Layouts Tutorial with Examples
- Android LinearLayout Tutorial with Examples
- Android TableLayout Tutorial with Examples
- Android FrameLayout Tutorial with Examples
- Android Button Tutorial with Examples
- Android ToggleButton Tutorial with Examples
- Android Switch Tutorial with Examples
- Android ImageButton Tutorial with Examples
- Android FloatingActionButton Tutorial with Examples
- Android CheckBox Tutorial with Examples
- Android RadioGroup and RadioButton Tutorial with Examples
- Android Chip and ChipGroup Tutorial with Examples
- ChipGroup and Chip Entry Example
- Android QuickContactBadge Tutorial with Examples
- Android Space Tutorial with Examples
- Android Toast Tutorial with Examples
- Create a custom Android Toast
- Android SnackBar Tutorial with Examples
- Android TextView Tutorial with Examples
- Android TextClock Tutorial with Examples
- Android EditText Tutorial with Examples
- Android TextInputLayout Tutorial with Examples
- Android TextWatcher Tutorial with Examples
- Format Credit Card Number with Android TextWatcher
- Android Clipboard Tutorial with Examples
- Create a simple File Chooser in Android
- Create a simple File Finder Dialog in Android
- Android AutoCompleteTextView and MultiAutoCompleteTextView Tutorial with Examples
- Android ImageView Tutorial with Examples
- Android ImageSwitcher Tutorial with Examples
- Android ScrollView and HorizontalScrollView Tutorial with Examples
- Android WebView Tutorial with Examples
- Android SeekBar Tutorial with Examples
- Android Dialog Tutorial with Examples
- Android AlertDialog Tutorial with Examples
- Android CharacterPickerDialog Tutorial with Examples
- Android DialogFragment Tutorial with Examples
- Android DatePicker Tutorial with Examples
- Android TimePicker Tutorial with Examples
- Android TimePickerDialog Tutorial with Examples
- Android DatePickerDialog Tutorial with Examples
- Android Chronometer Tutorial with Examples
- Android RatingBar Tutorial with Examples
- Android ProgressBar Tutorial with Examples
- Android Spinner Tutorial with Examples
- Android OptionMenu Tutorial with Examples
- Android ContextMenu Tutorial with Examples
- Android PopupMenu Tutorial with Examples
- Android Fragments Tutorial with Examples
- Android ListView Tutorial with Examples
- Android ListView with Checkbox using ArrayAdapter
- Android GridView Tutorial with Examples
- Android CardView Tutorial with Examples
- Android ViewPager2 Tutorial with Examples
- Android StackView Tutorial with Examples
- Android Camera Tutorial with Examples
- Android MediaPlayer Tutorial with Examples
- Android VideoView Tutorial with Examples
- Playing Sound effects in Android with SoundPool
- Android Networking Tutorial with Examples
- Android JSON Parser Tutorial with Examples
- Android SharedPreferences Tutorial with Examples
- Android Internal Storage Tutorial with Examples
- Android External Storage Tutorial with Examples
- Android Intents Tutorial with Examples
- Example of an explicit Android Intent, calling another Intent
- Example of implicit Android Intent, open a URL, send an email
- Android Services Tutorial with Examples
- Android Notifications Tutorial with Examples
- Android SQLite Database Tutorial with Examples
- Google Maps Android API Tutorial with Examples
- Android Text to Speech Tutorial with Examples
- Android AsyncTask Tutorial with Examples
- Android AsyncTaskLoader Tutorial with Examples
- Get Phone Number in Android using TelephonyManager
- Android SMS Tutorial with Examples
- Android Phone Call Tutorial with Examples
- Android Wifi Scanning Tutorial with Examples
- Android 2D Game Tutorial for Beginners
Show More