C# Programming for Team using Visual Studio and SVN
2. The installation requires
This is a working model for Java team using Visual Studio and SVN:
The Programmers of team participate together to develop an application, the working result of each member will be posted on SVN Repository as well as be shared to other members.
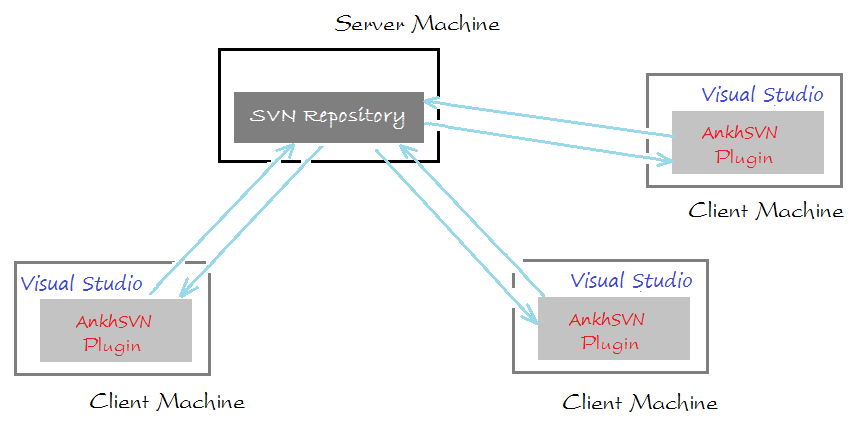
To get SVN Repository, you need to install a SVN Server like Visual SVN on some computer, and it will be a SVN server. You can see the instruction of installing and configuring Visual SVN at:
- Use SVN Repository for free XP-Dev
Next on each member's computer must be installed AnkhSVN, this is a plugin for Visual Studio to communicate with SVN Server.
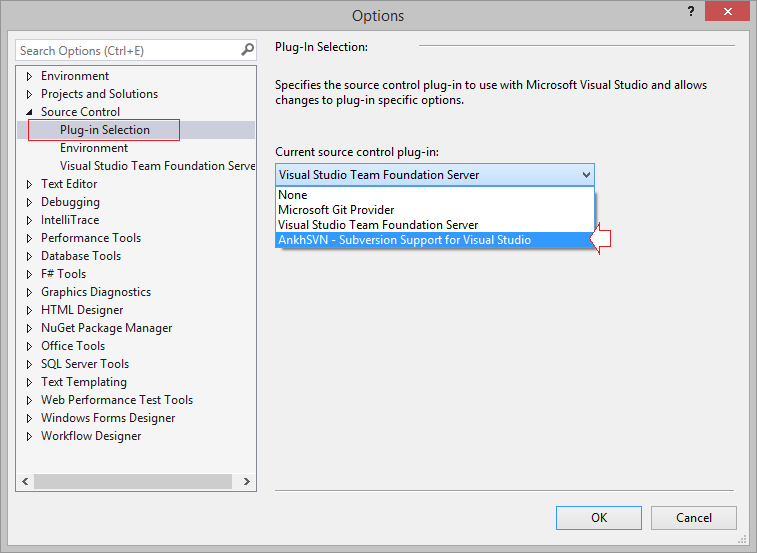
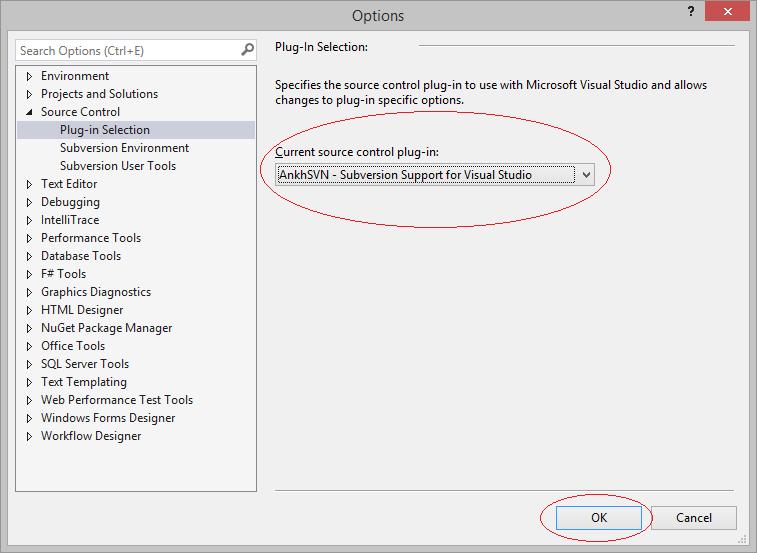
3. SVN configuration for Visual Studio
After you set up AnkhSVN, you need to restart Visual Studio and start the configure SVN Plugin for Visual Studio.
In Visual Studio select:
- Tools/Options
4. Share Project to SVN Repository
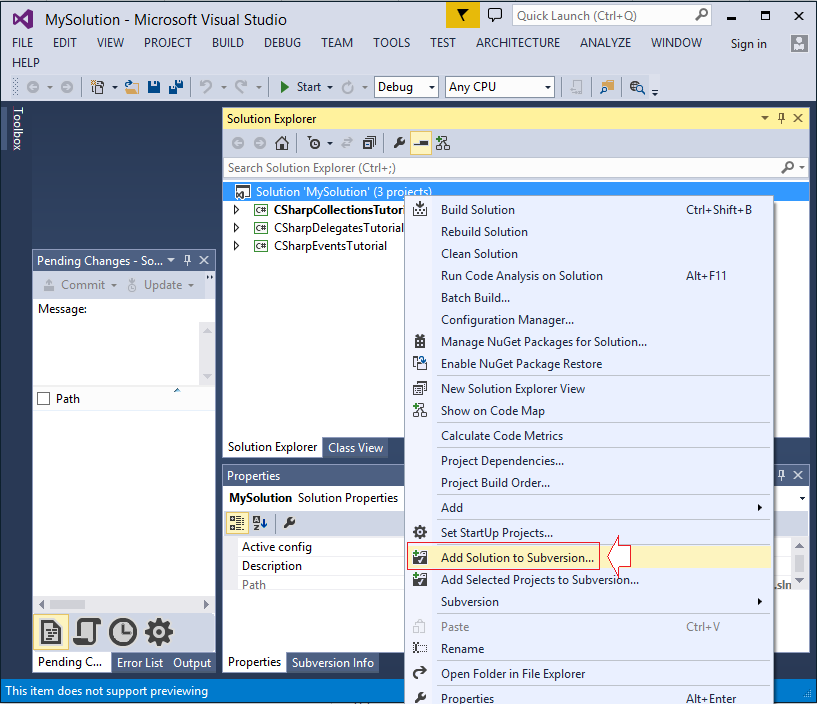
First, a member needs to share the code of the initial project on SVN Repository.
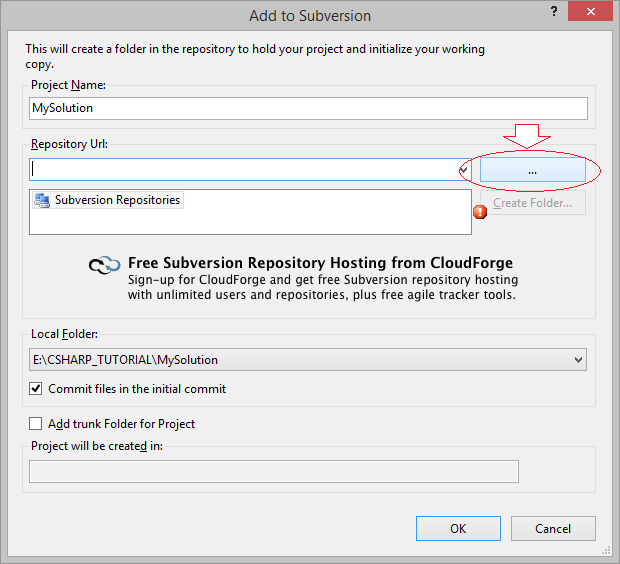
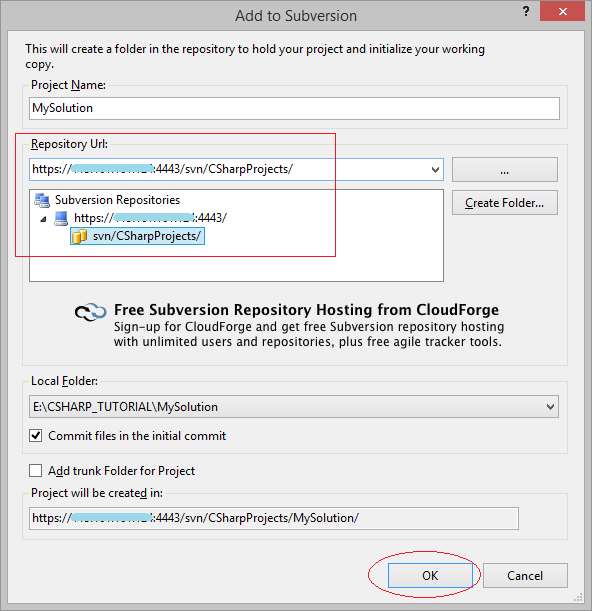
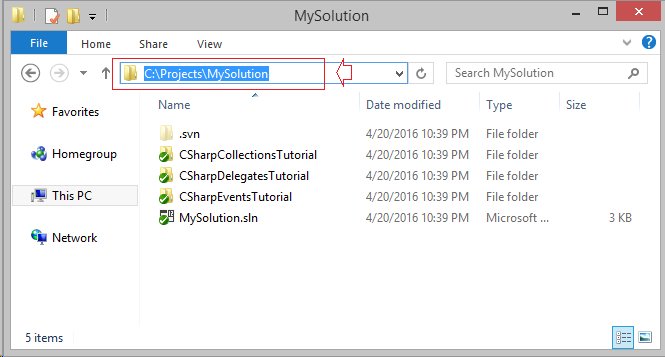
Assuming that on Visual Studio, I have 01 Solution named as MySolution which contains 3 Projects. I will post MySolution on SVN Repository.

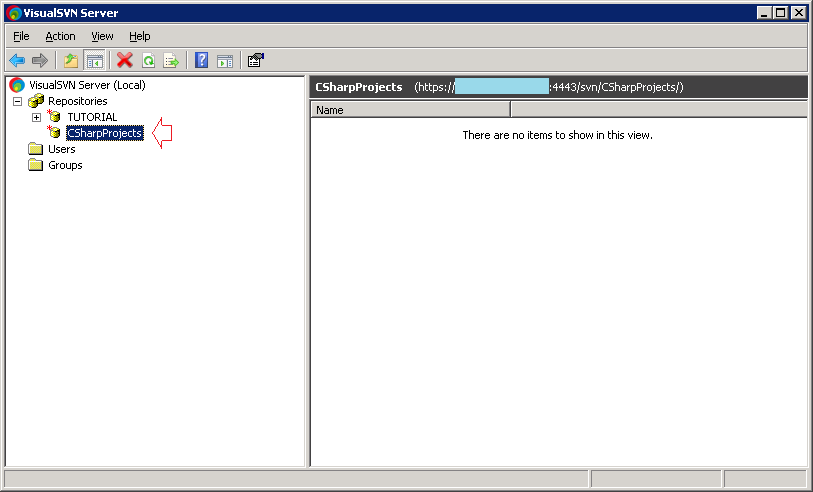
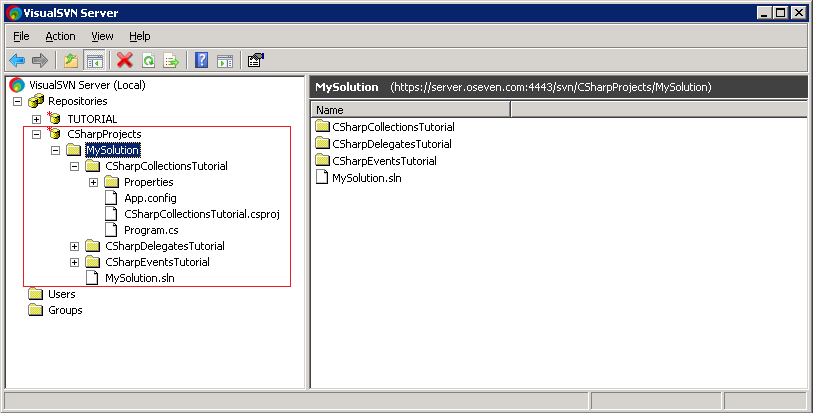
On Visual SVN, a Repository named as CSharpProjects has been created.
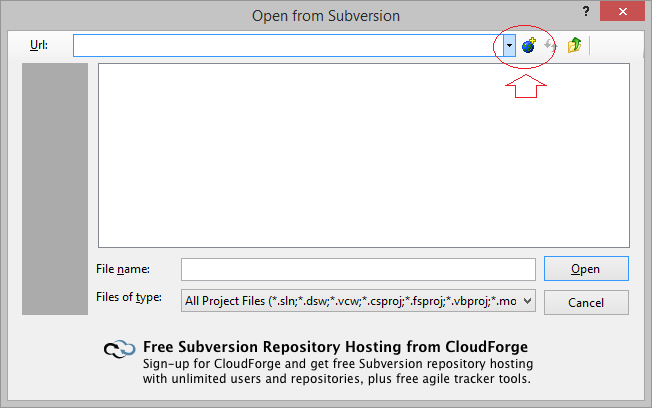
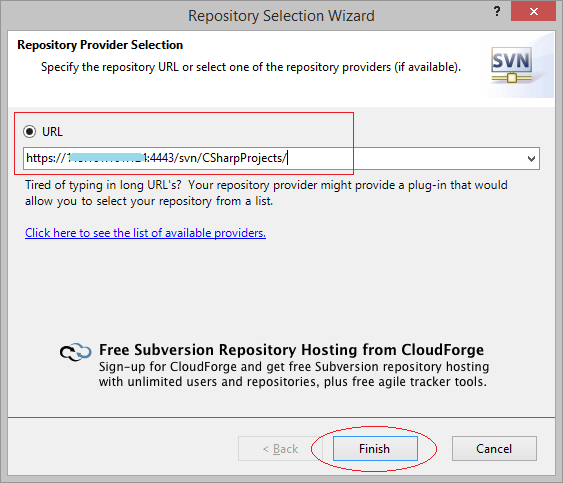
Copy URL:
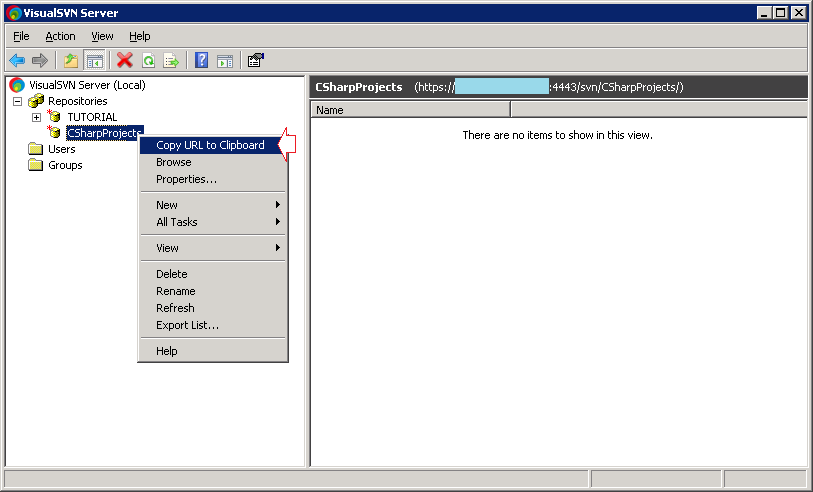
Copy URL of the SVN Repository.
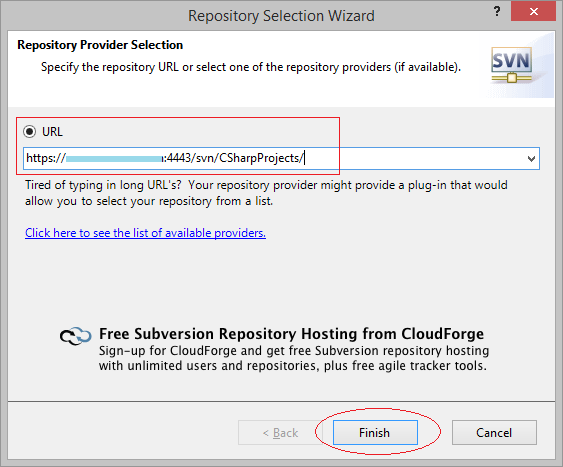
- https://TRAN-VMWARE/svn/CSharpProjects/
You can change the name server by IP address.
If you use XP-DEV and create a SVN Repository, you will also have the corresponding URL, using this URL.
Back to Visual Studio.
We will share 2 Project: ProjectController & ProjectModel into repository JavaProjects:
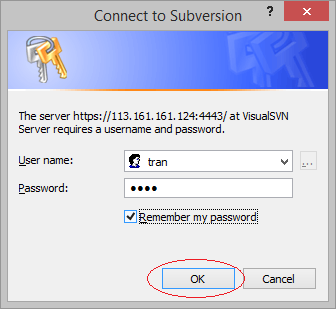
Enter SVN account:
MySolution and its Projects are posted on SVN Repository.
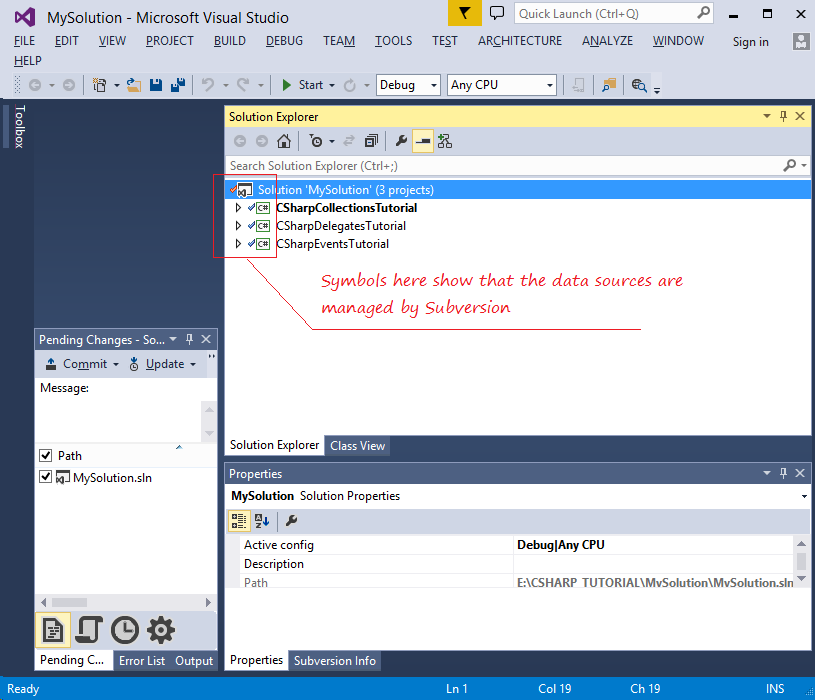
See in Visual SVN Server:
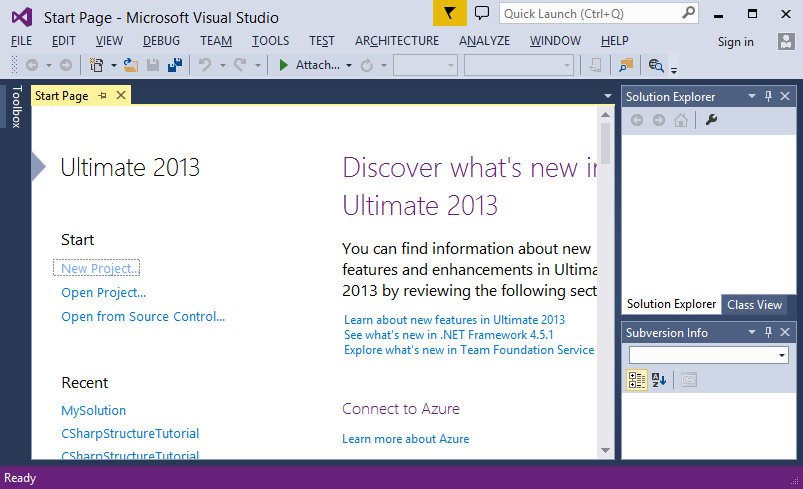
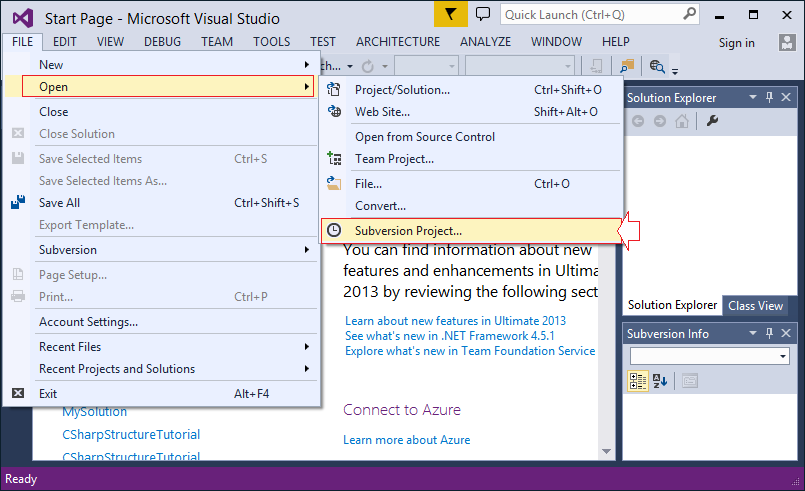
5. Checkout Project from SVN Repository
Other members in the group will checkout Projects from Repository to our own computer.
Open Visual Studio:

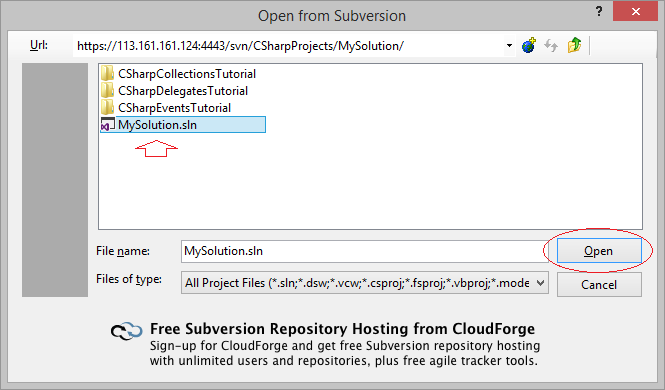
Selecting the folder location where Solution (containing projects) will be saved on local computer.
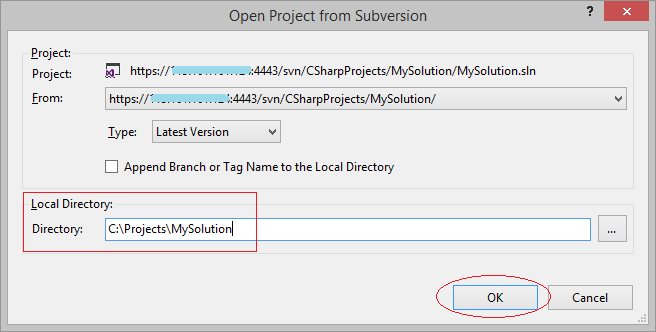
Solution is downloaded to your computer from SVN Repository:
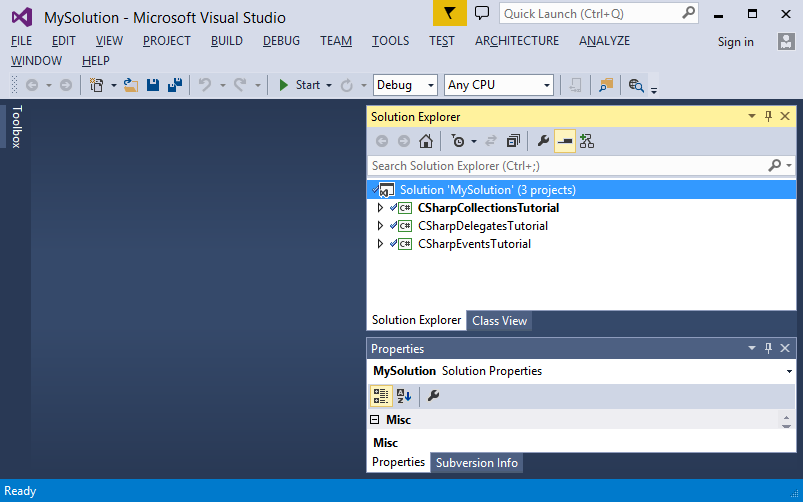
You can check it on the local folder.
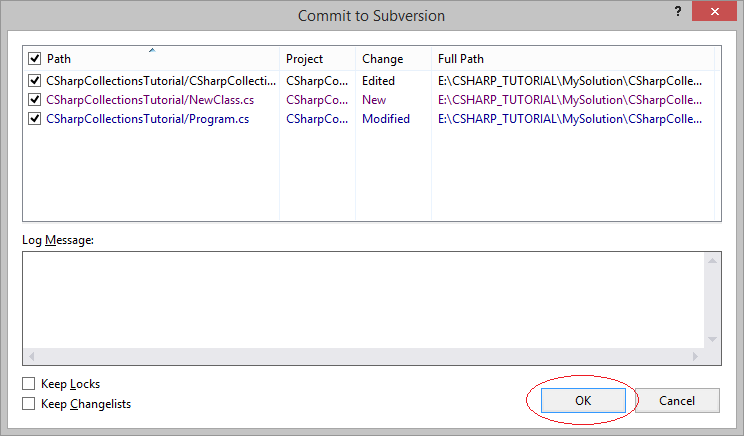
6. Commit
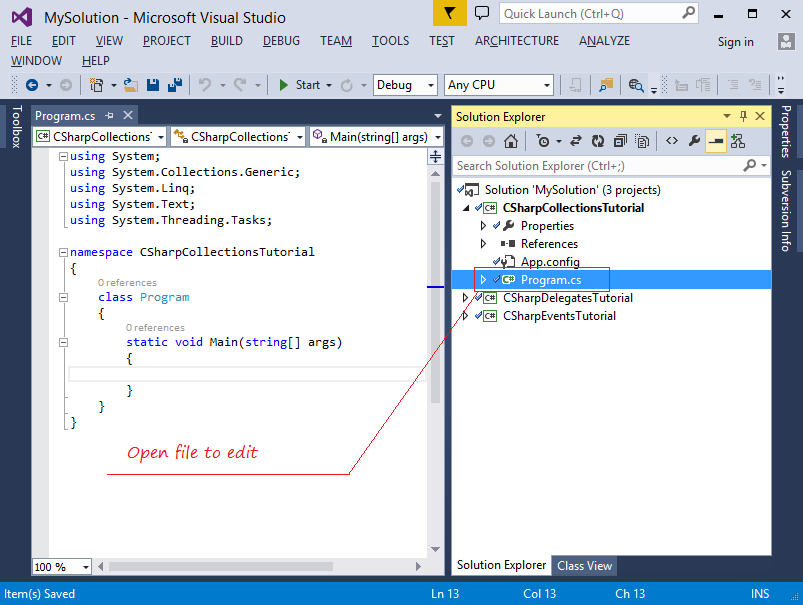
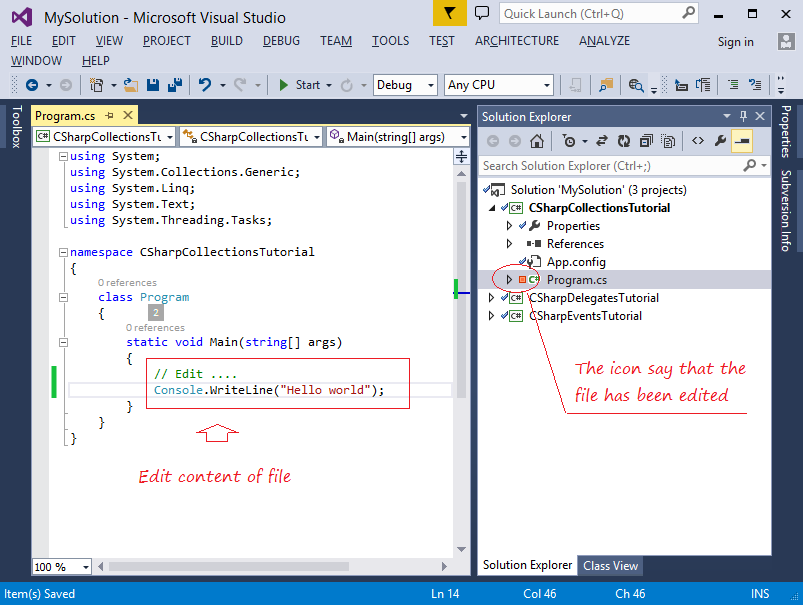
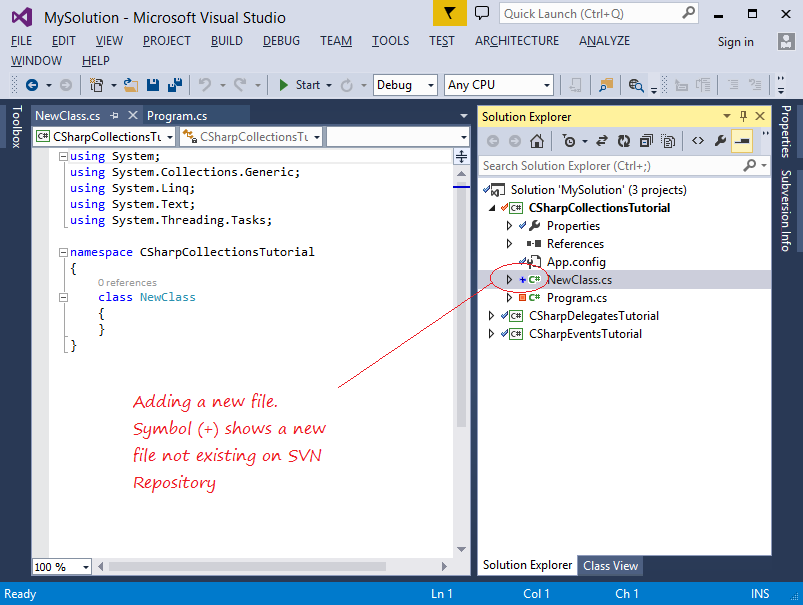
Now we modify (or add) files on Projects, and Commit them to Repository.
Add a new file.
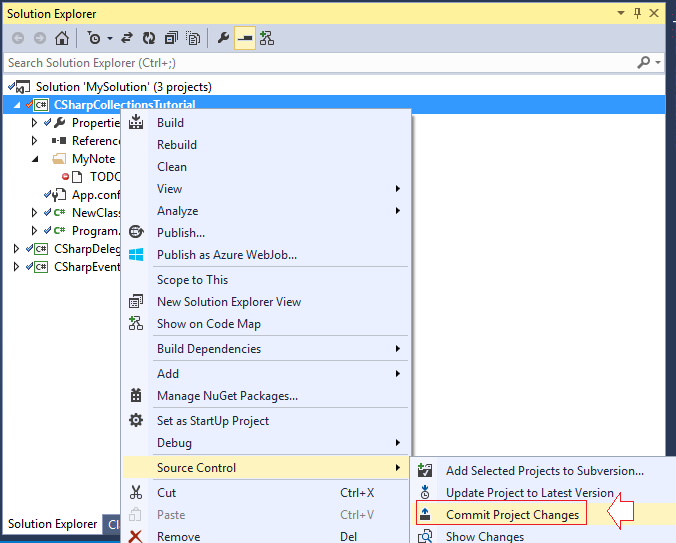
To put the changed data on SVN Repository, you can right-click on Solution then select "Commit Solution Changes". This way will put all of the new files or the changed files in all Projects of Solution on SVN Repository.
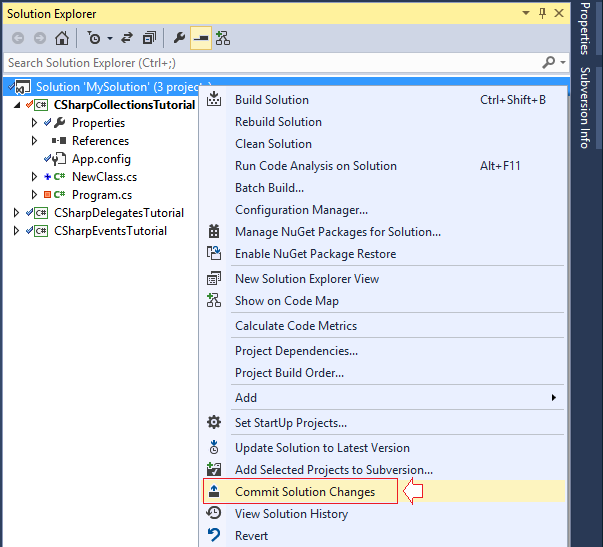
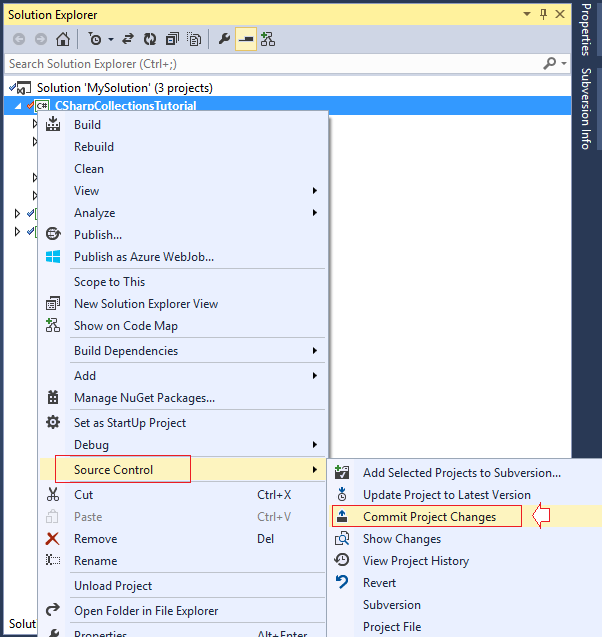
You can right click on Project with new file or modification, then select:
- Source Control/Commit Project Changes

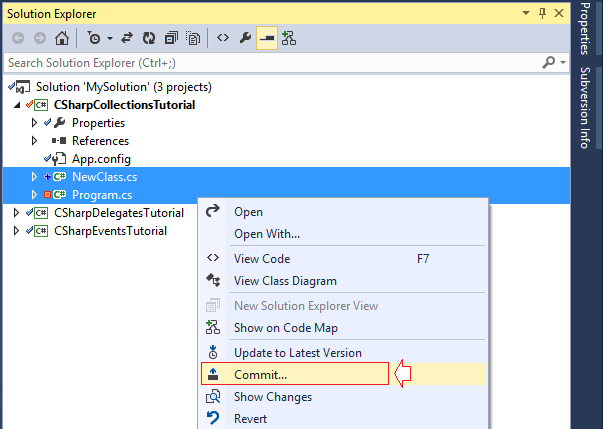
You can also select the new files, and the files was modified to post up SVN Repository:
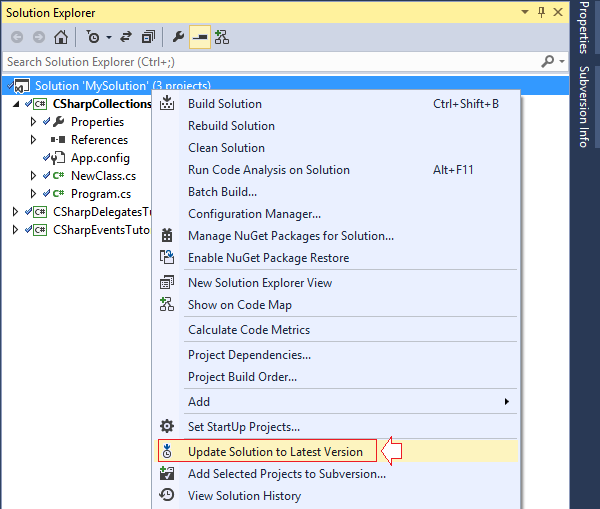
7. Update
By using the function Update, you can update the new files and files changing from SVN Repository.
Right-click on Solution, then select "Update Solution to Lastest version" in order to update all the changes of Projects in Solution. If there is a new project on the SVN Repository, the project will be download to local computer.
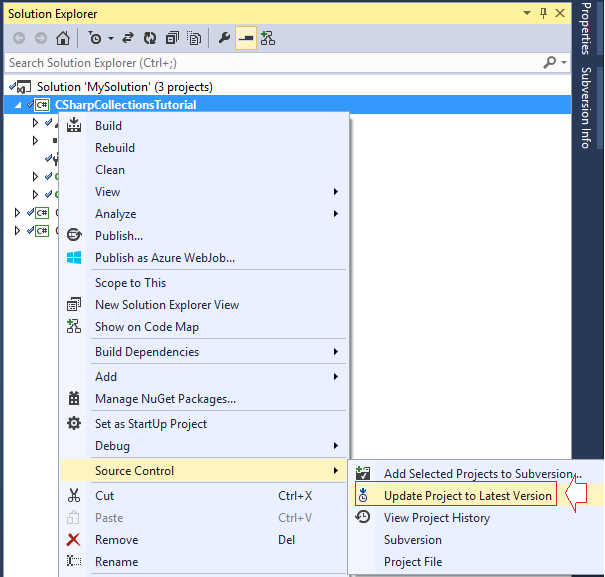
You can also update the changes of a particular Project.
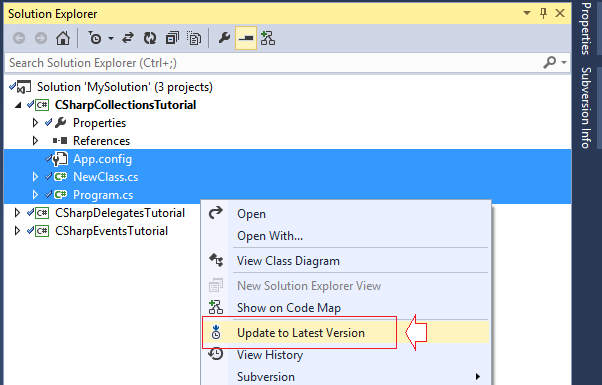
Or updating the changes of specific files or folders.
8. The basic functions
We will learn about how to use some important functions.
Add to svn:ignore
When you want SVN to ignore and not to bring a folder or a file to SVN Repository, you can use the function: Ignore
For example, you have a folder containing data files you don't want to share as the below illustrated image:
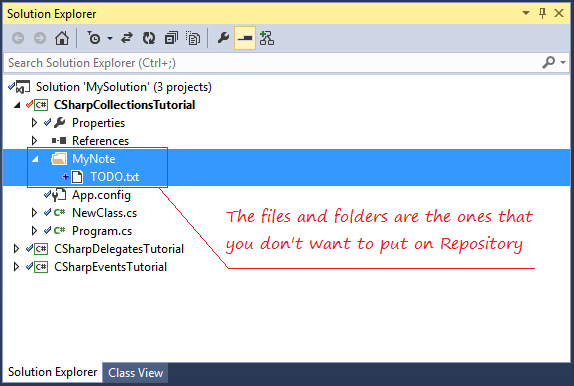
Right-click the MyNote folder, select:
- Subversion -> Ignore -> Ignore Files in Folder (*).
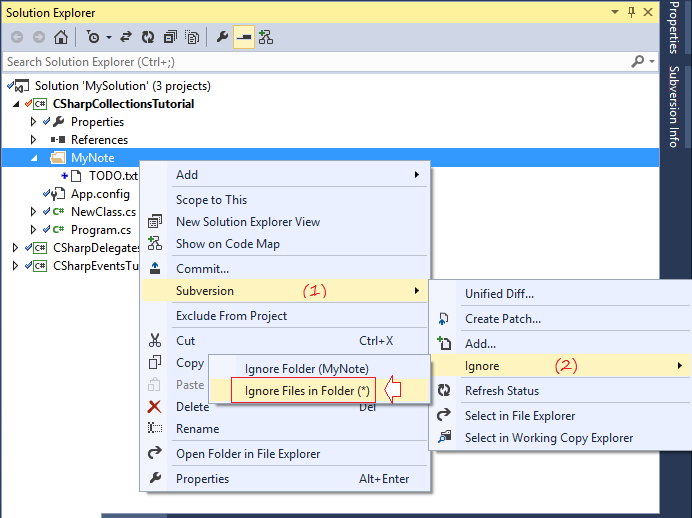
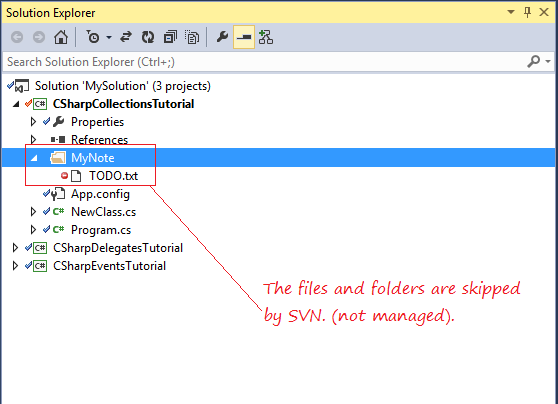
After finishing the "Ignore" function, you have to commit the changes.
TODO -
C# Programming Tutorials
- Inheritance and polymorphism in C#
- What is needed to get started with C#?
- Quick learning C# for Beginners
- Install Visual Studio 2013 on Windows
- Abstract class and Interface in C#
- Install Visual Studio 2015 on Windows
- Compression and decompression in C#
- C# Multithreading Programming Tutorial with Examples
- C# Delegates and Events Tutorial with Examples
- Install AnkhSVN on Windows
- C# Programming for Team using Visual Studio and SVN
- Install .Net Framework
- Access Modifier in C#
- C# String and StringBuilder Tutorial with Examples
- C# Properties Tutorial with Examples
- C# Enums Tutorial with Examples
- C# Structures Tutorial with Examples
- C# Generics Tutorial with Examples
- C# Exception Handling Tutorial with Examples
- C# Date Time Tutorial with Examples
- Manipulating files and directories in C#
- C# Streams tutorial - binary streams in C#
- C# Regular Expressions Tutorial with Examples
- Connect to SQL Server Database in C#
- Work with SQL Server database in C#
- Connect to MySQL database in C#
- Work with MySQL database in C#
- Connect to Oracle Database in C# without Oracle Client
- Work with Oracle database in C#
Show More