Create and edit animations with GifCam
1. What is GifCam ?
GifCam is a free animation software with simple manipulations. It operates like a camera on top of all windows to help you take a picture of any desired area and save them as animated images. This program provides a variety of high-quality animation methods.
GifCam captures an area or full screen and saves it as an animated image. The created product is saved in a GIF (or AVI) file with small size.
The operating principle of the GifCam is to continually capture the area which a user wants. Each photo taken is a frame. The GifCam automatically compares the difference between previous and following frames, and renders only different pixels and increases the delay for a frame if the following frame doesn't change. Based on this principle the created product is a GIF file with small size but its quality is very good.
The GifCam also allows you to edit the content of animated image to be created, such as adding text to the animated image, changing the delay of a frame, etc.
The main features of the GifCam:
- Capture screen areas or full screen and save as animated image.
- Support with many animation methods.
- Automatically detect coincided frames
- Add a text to a frame
- Edit a frame
- Capture the motion of mouse
3. Use the GifCam
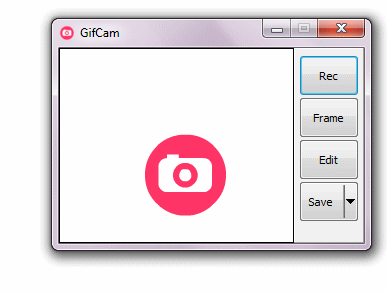
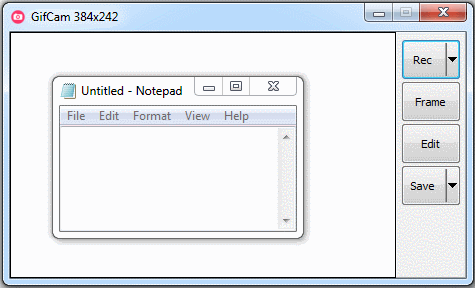
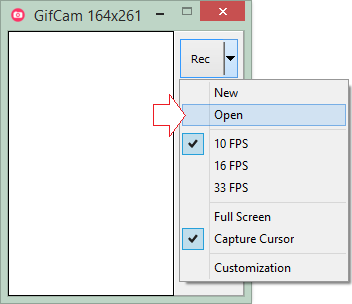
The GifCam program consists of only one gifcam.exe file. The GifCam window opens, you can adjust the area you want to record to create an animated image.

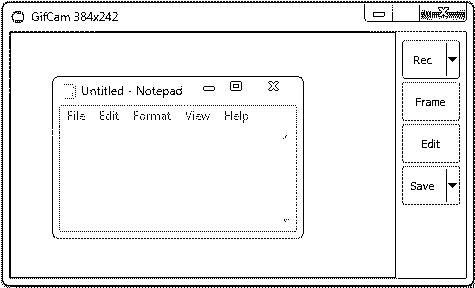
Use "Full Screen" option, if you want to record full screen and use "Capture Cursor" if you want to record the image of mouse when it moves within the recording area of the GifCam.
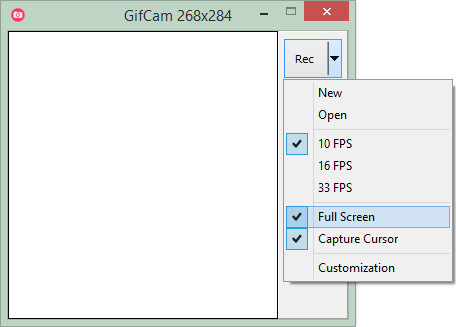
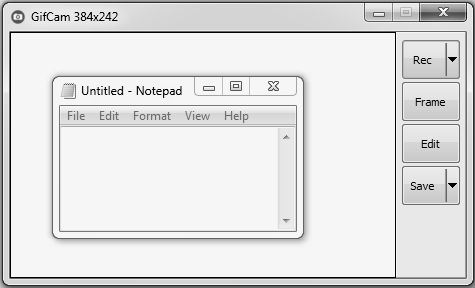
After finishing alignment of areas to be recorded, press "Rec" button to start recording.
After finishing the recording, you can save the result in a file. At this time, you have more other options for the quality of output, and the format of the file created.
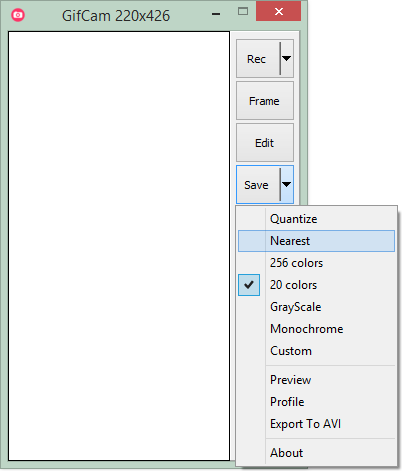
- Quantize: Create an image with the best quality.
- 256 colors: Retains only 256 colors on the image (Capacity will be more compact)
- GrayScale: Animate with the 2 colors such as white and black..
- Monochrome: Monochrome.
- Preview: Preview results before saving in a file.
- Export To AVI: Select output format as AVI (a video format), if this option is not selected, the file created will have GIF format.
The following are some results based on quality options.
20 Colors:

GrayScale:
Monochrome:
4. Edit animation
USe "Open" function to open the GIF file which you want to to edit
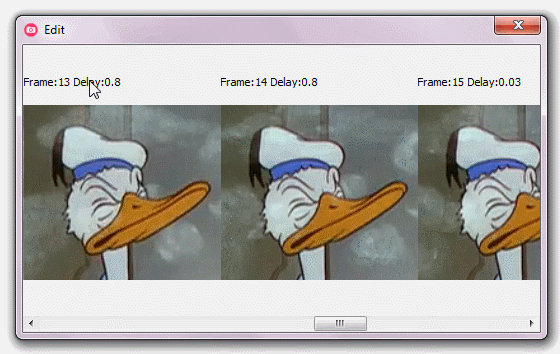
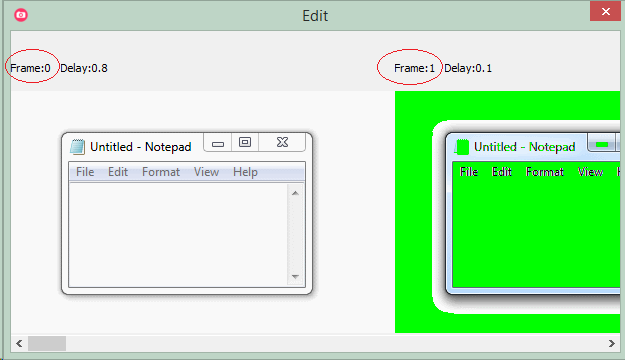
After that, press Edit.

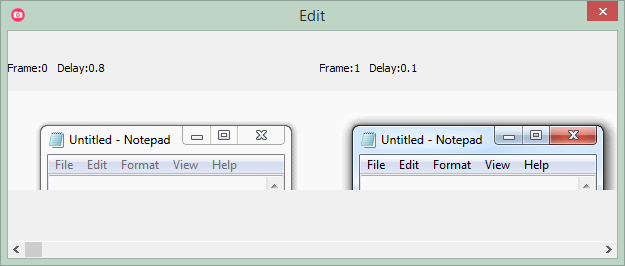
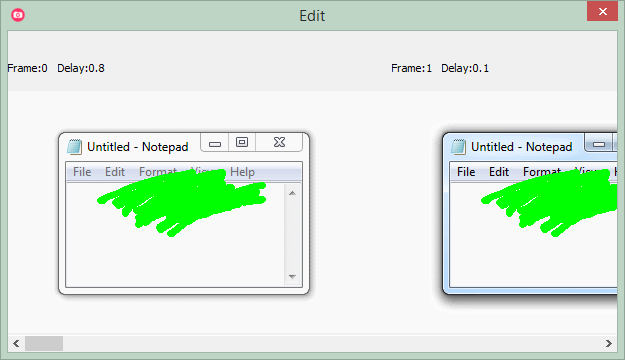
On "Edit" window, you can see frames. Frame 0 is the first image. The following frames have green areas which are positions where fixels don't change from its previous frame. It will be considered as transparent area.
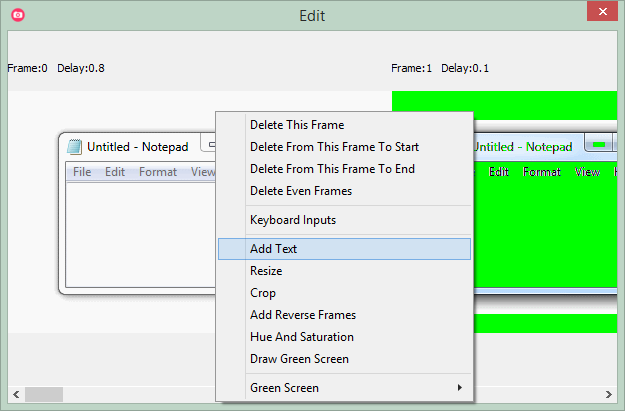
Right click on the Frame that you want to edit.
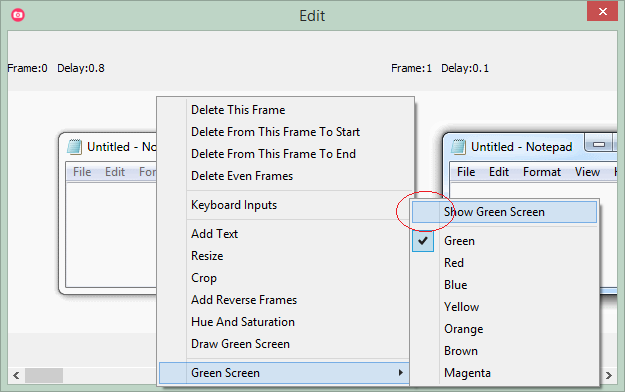
Remove the "Show Green Screen" option:
Delete This Frame
Delete the selected Frame
Delete From This Frame to Start
Delete the frames from the first frame to the selected frame.
Delete From This Frame to End
Delete frames from the selected frame to the final frame.
Delete Even Frames
Delete frames with even order number.
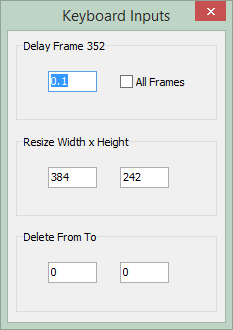
Keyboard Inputs
Enter values from the keyboard to:
- Edit delay time for the selected (or all) frame(s)
- Edit the size of all frames.
- Delete frames from N1 position to N2 position.
Add Text
Add text to current frame.
Resize
Change the size of all frames.
Crop
Crop all frames, and retains only the areas in which you are interested.

The result after cropping.
Add Reverse Frames
Add reverse frames to the end. Example: your animated image has 10 frames (F0, F1, ... F9). After using this function, the frames (F9, F8,... F0) will be added to the end, thus, your animated image will have 20 frames.
Draw Green Screen
Draw a transparent area.
Software and utility applications
- Install Atom Runner
- Install OpenSSH Server on Windows
- Install Microsoft Visual C++ Build Tools
- Install and use Tortoise SVN
- Install PuTTY on Windows
- Install and Use Paint.net
- Create and edit animations with GifCam
- Install cURL on Windows
- Install cURL on Ubuntu
- Install Pinta on Ubuntu - Mspaint for ubuntu
- Introduction to Google Drive
- Install Atom Editor
- Lightshot - Screenshot tool for Mac and Windows
Show More