Oracle APEX Tutorial for Beginners (APEX 5.0)
1. Introduction
In this document, I will instruct you to work with Oracle Application Express (Oracle APEX) 5.x:
You can see instruction document of installing and configuring Oracle APEX on:
2. Create Workspace
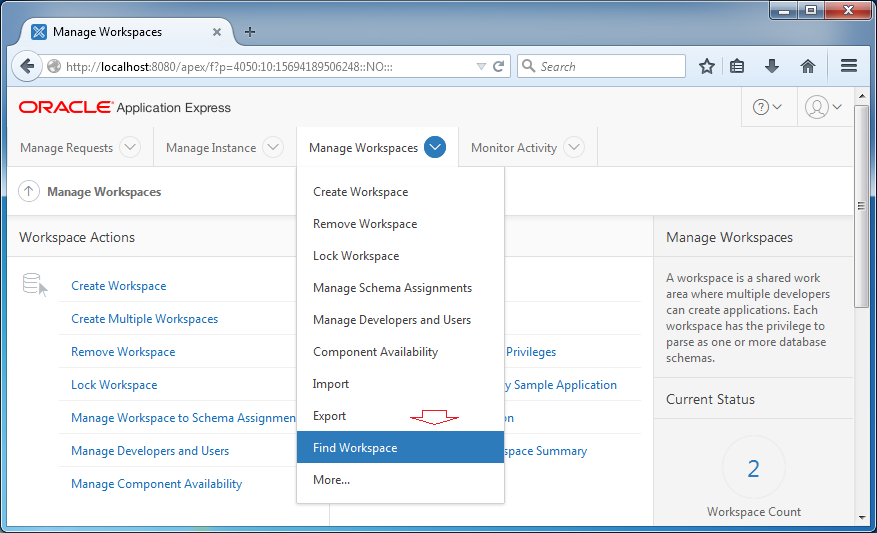
First, you need to log in the administration system of Oracle APEX in order to declare a Workspace. A Workspace will work with a SCHEME in database. Workspace contains Applications (including a system of forms, reports, and so on), managing users who participate in programming, or users who use the application.
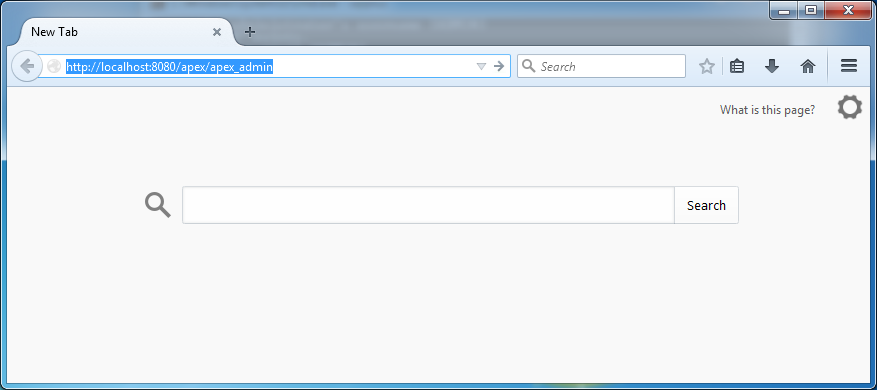

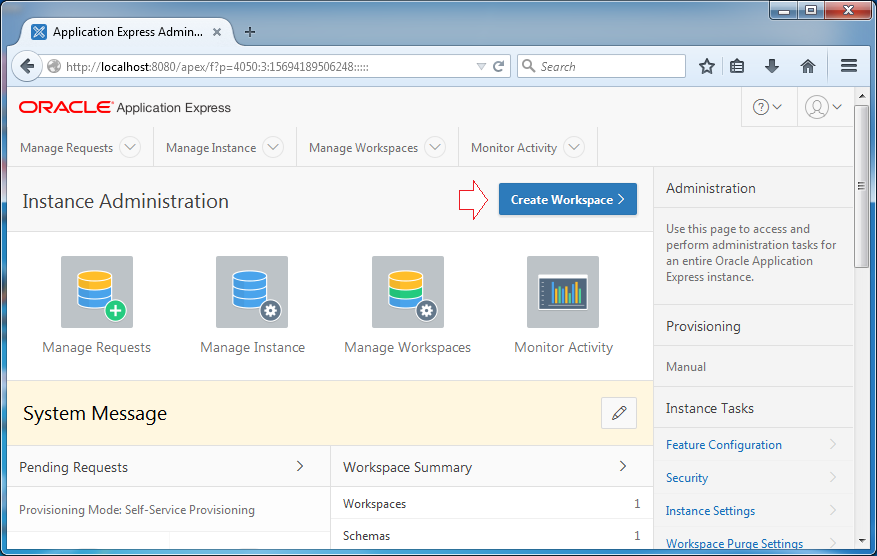
You need to create new Workspace:
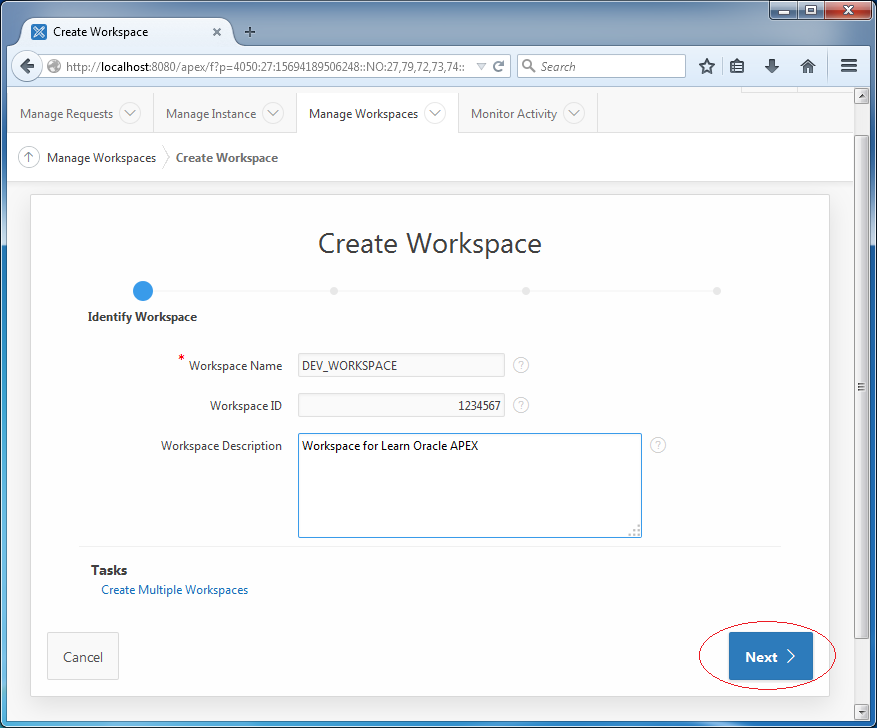
Enter:
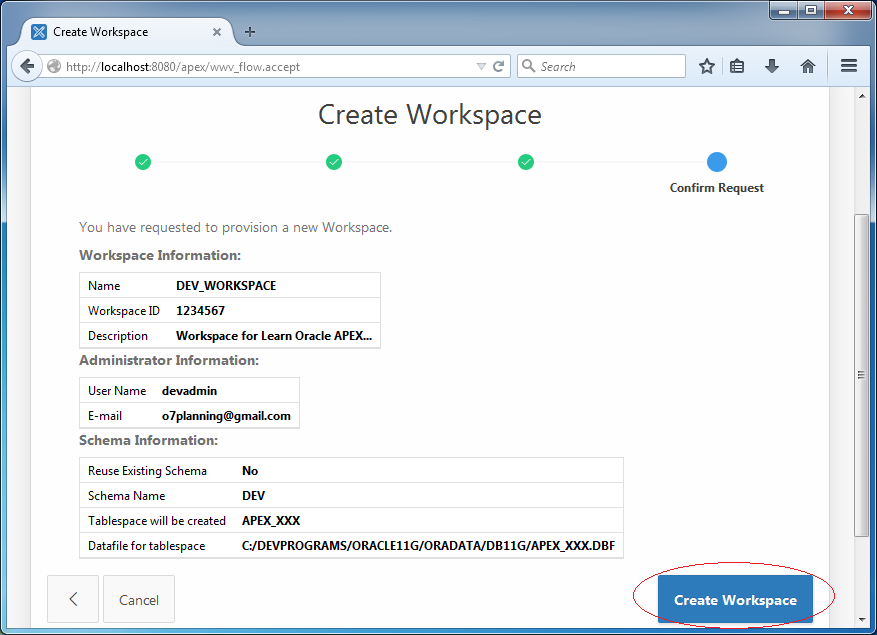
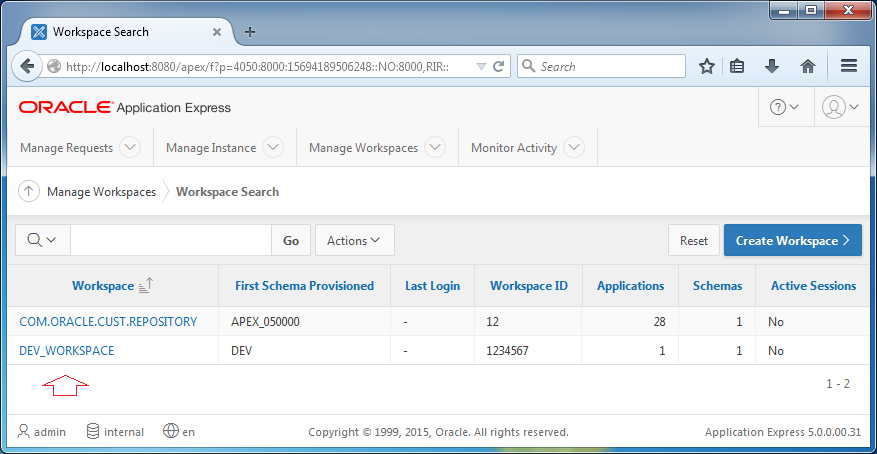
- Workspace Name: DEV_WORKSPACE
- Workspace ID: 1234567
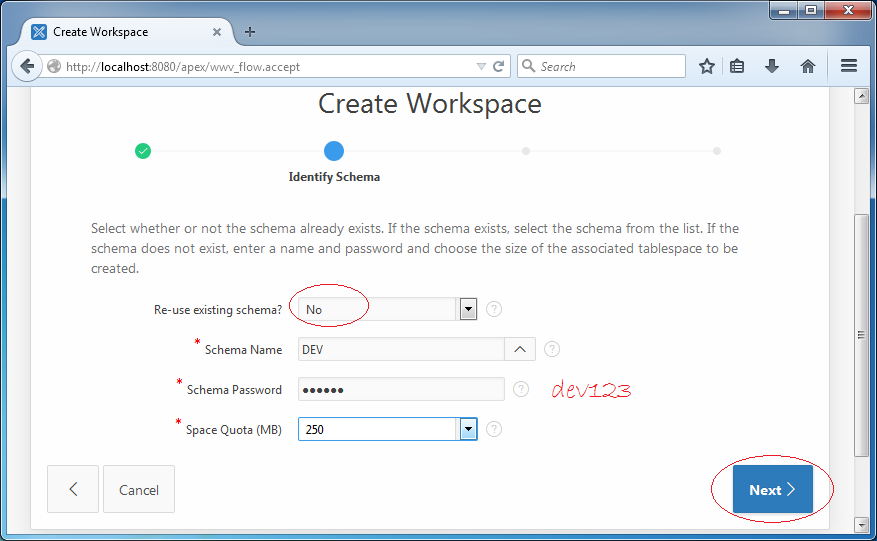
You can select a SCHEMA available in Database. Here I create a new SCHEMA named DEV with password dev123.
If you use Oracle 12c, the schema name may have to start with ##. For example: ##DEV.
In the previous step, you created a SCHEMA named DEV. It means 1 user database is created and named DEV.
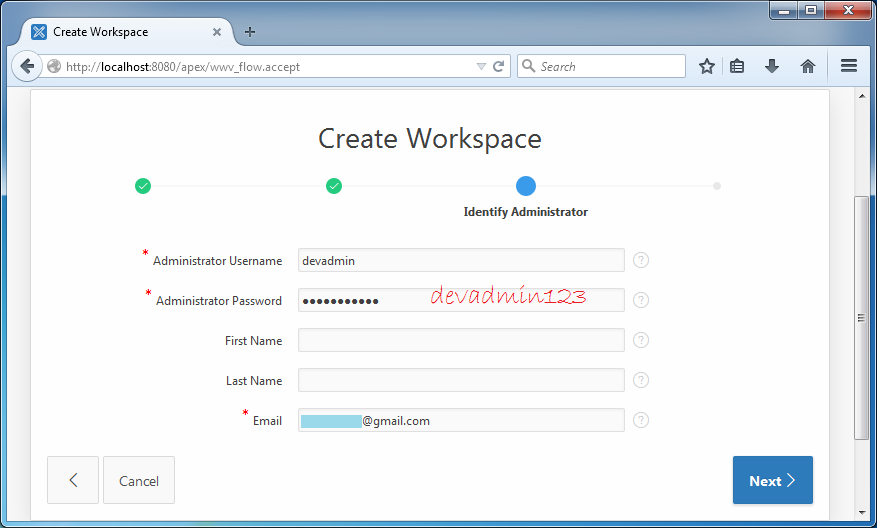
In this step, you need to declare a administration User of Workspace. It is not a user database, but it is a administration user of this APEX Workspace. It is capable of creating applications, other users as programmers, or users who use the application...
In this step, you need to declare a administration User of Workspace. It is not a user database, but it is a administration user of this APEX Workspace. It is capable of creating applications, other users as programmers, or users who use the application...
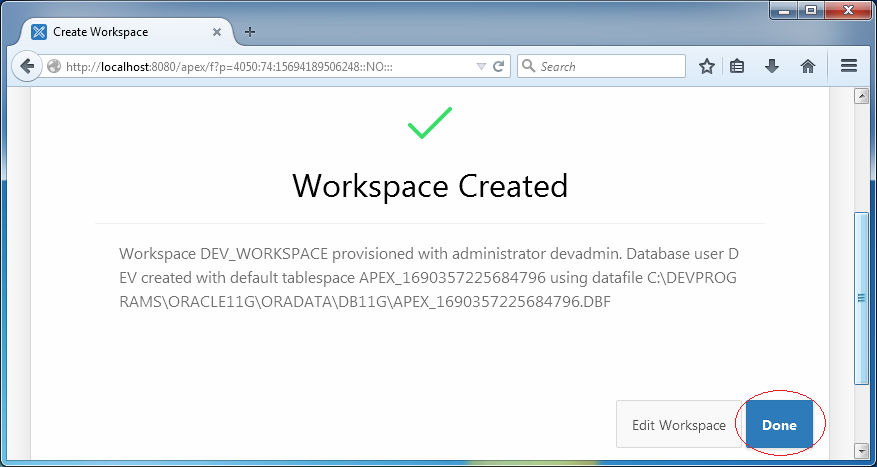
Your Workspace has been created. You can see the list of current Workspace and edit if you want.
3. Work with Workspace
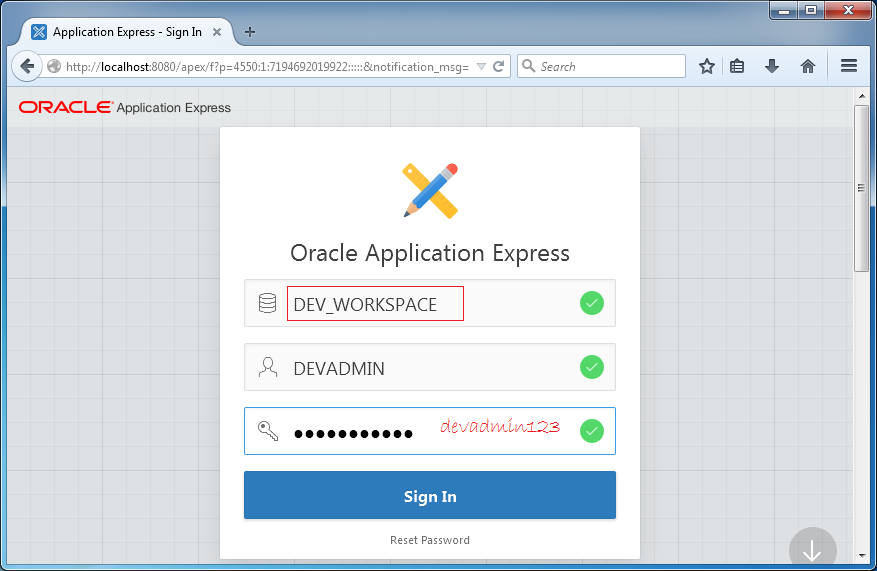
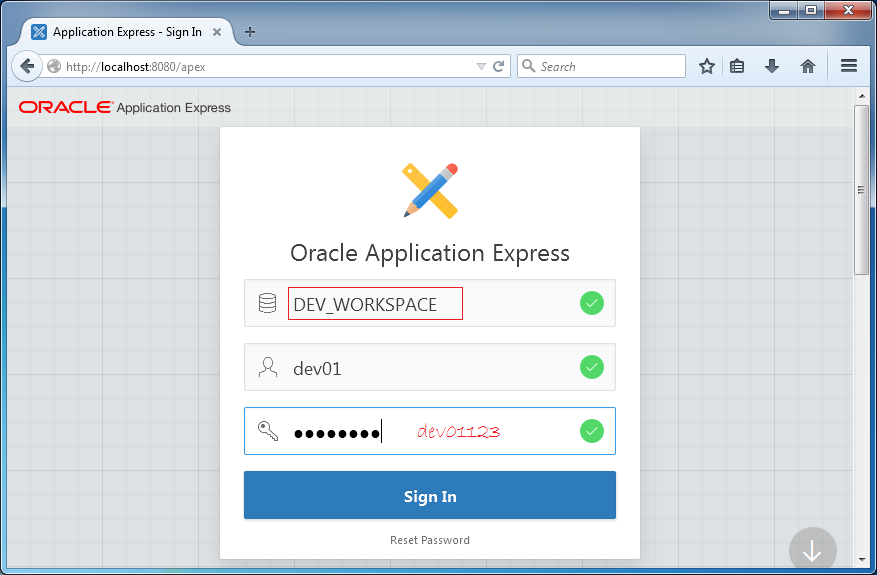
In the above step, you created a Workspace named DEV_WORKSPACE. Now we will log in and work with this Workspace.
Enter:
- Workspace: DEV_WORKSPACE
- User Name: devadmin
- Password: devadmin123
In the first time of logging in Workspace, the system require you to change your password, but you can keep your password intact.
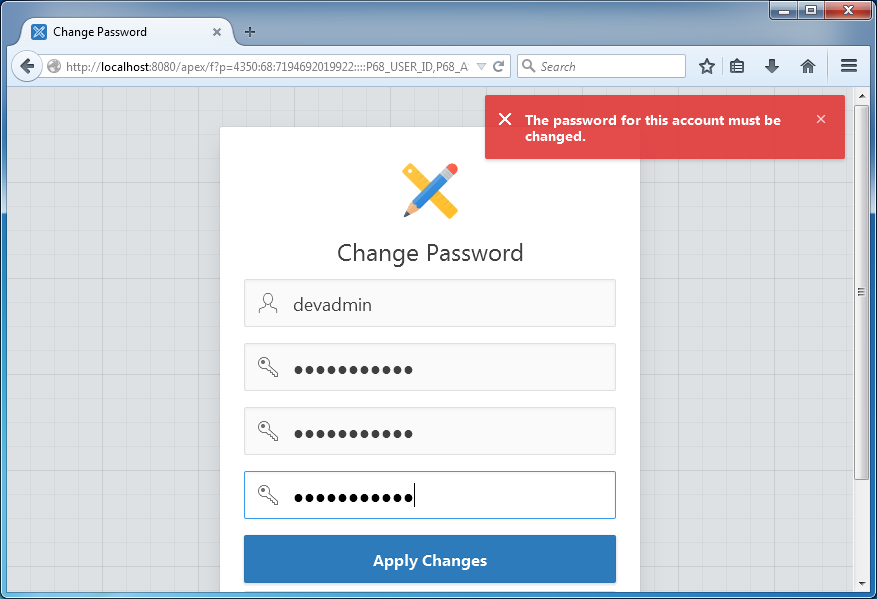
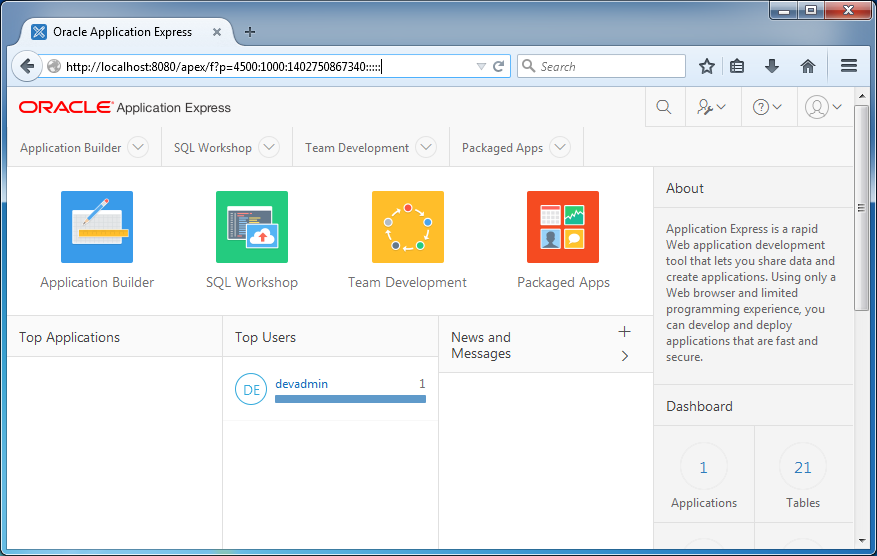
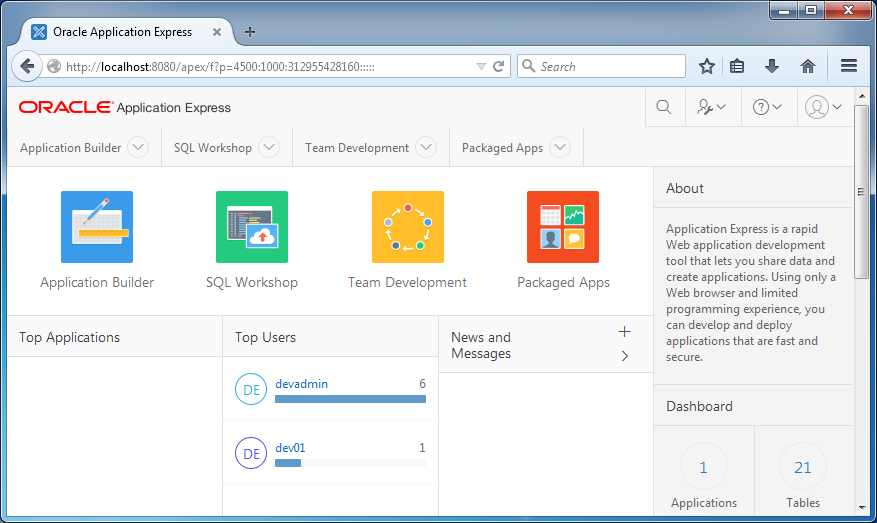
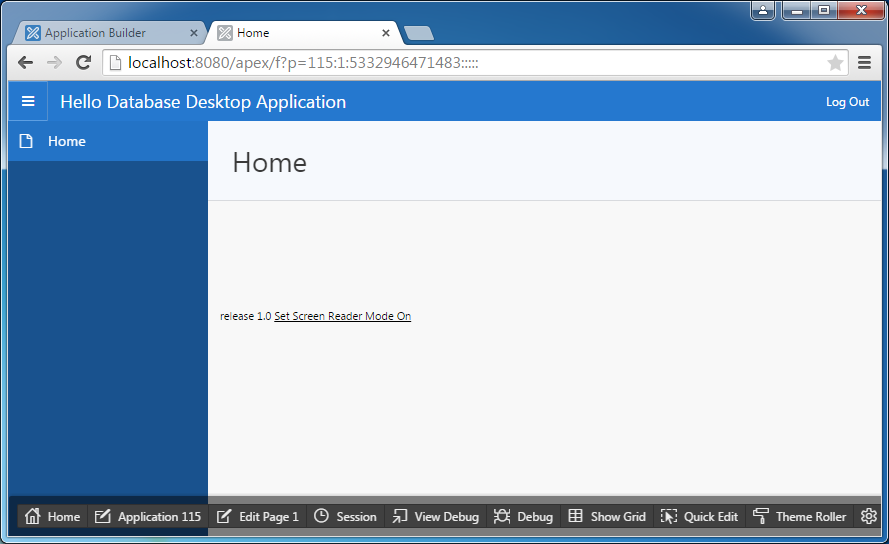
You are logged in DEV_WORKSPACE Workspace.
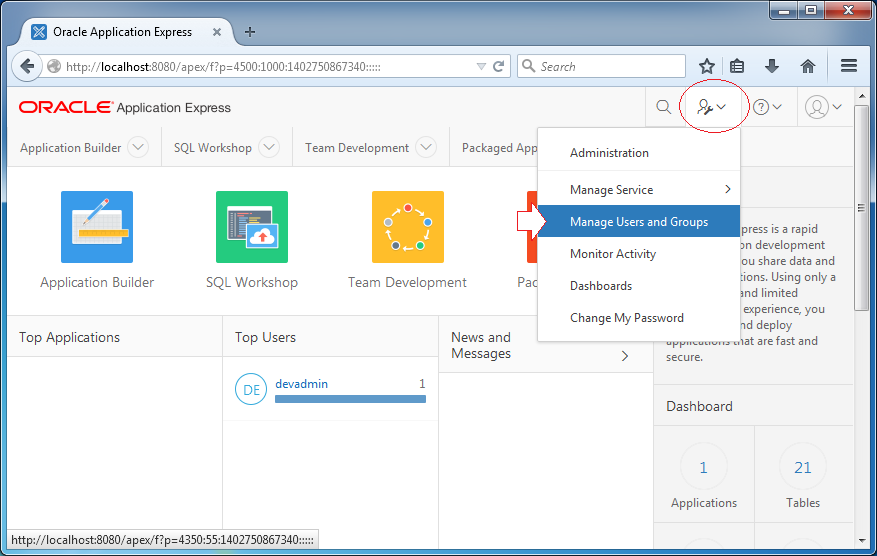
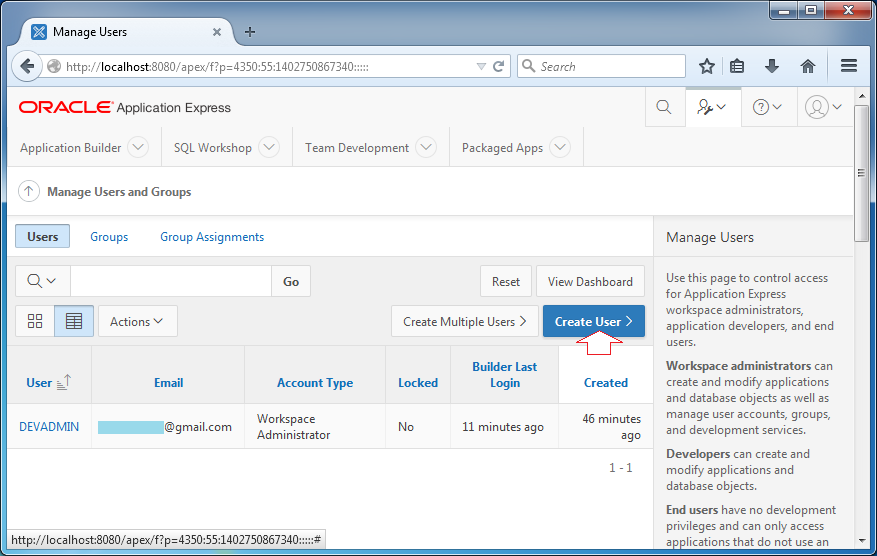
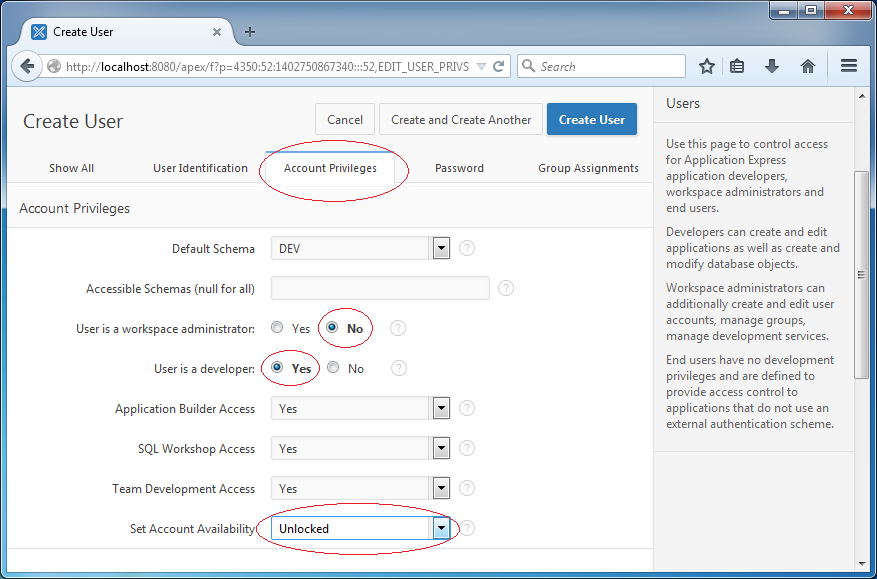
4. User and Group Management in Workspace
After logging in Workspace as an acting admin, you can create users and groups for Workspace.
Enter:
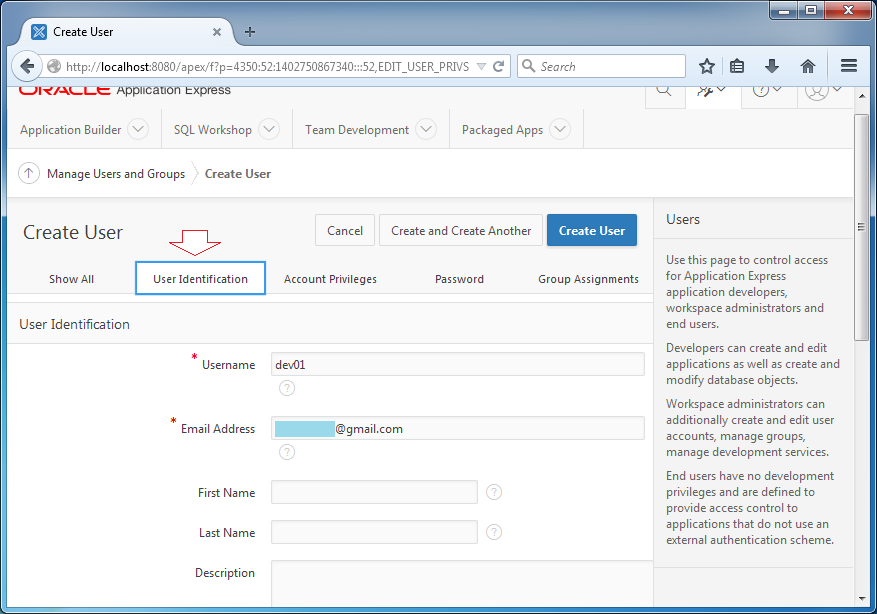
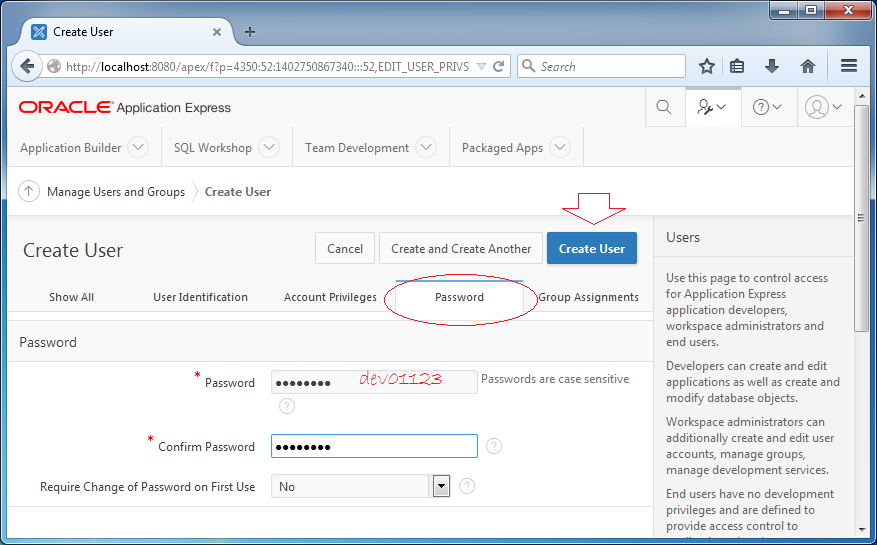
User dev01 has been created.
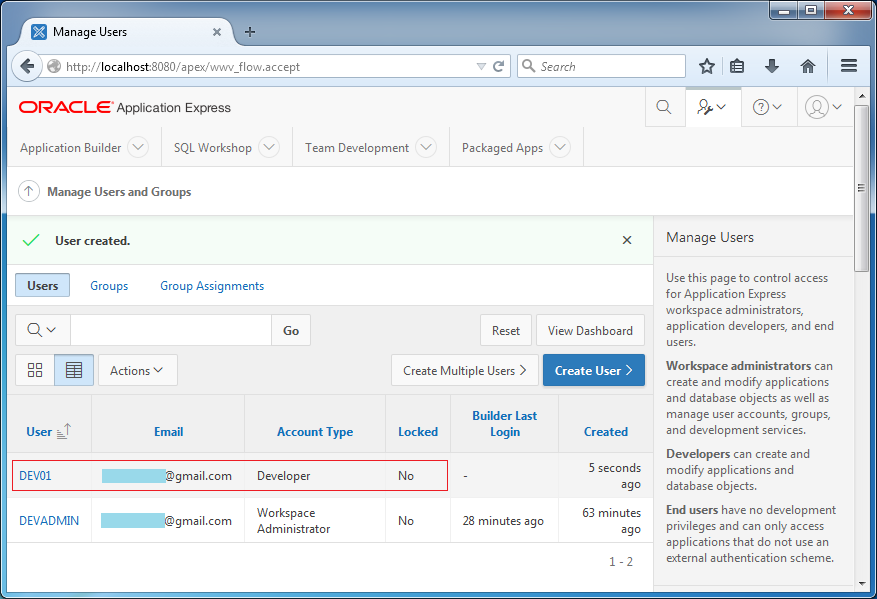
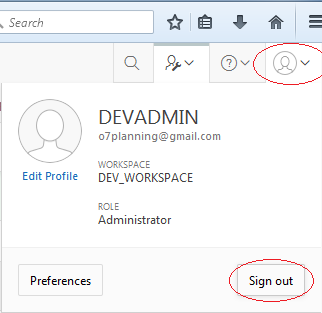
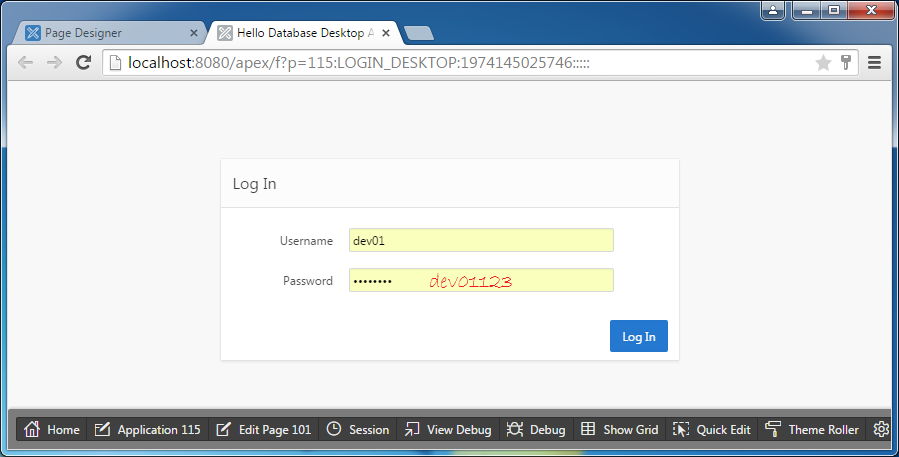
Now you can log out the system in order to log in with user dev01. You are now ready for programming Oracle APEX.
5. View table and data
You need to log in with a user as the role of a programmer.
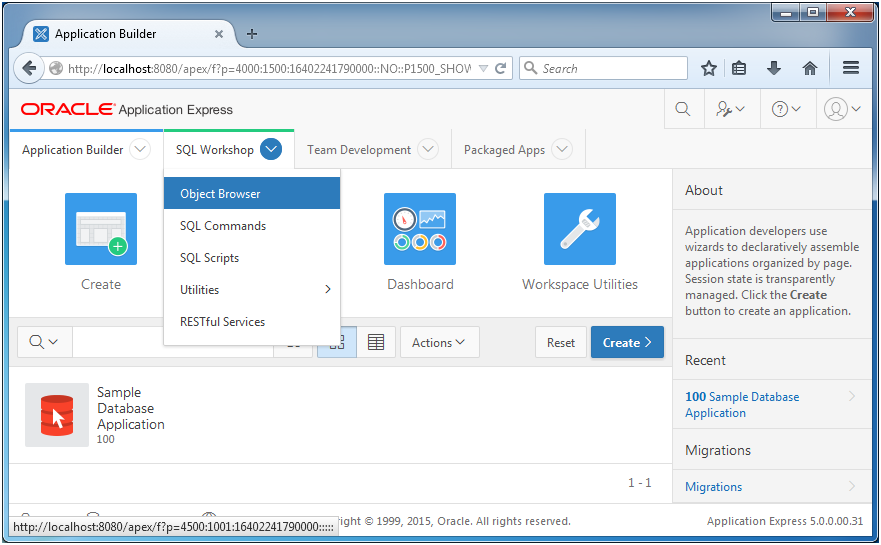
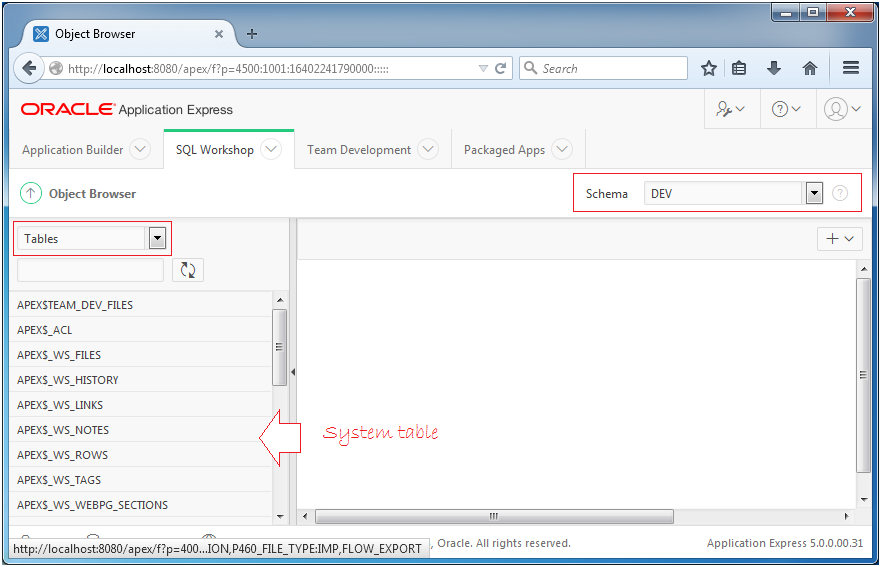
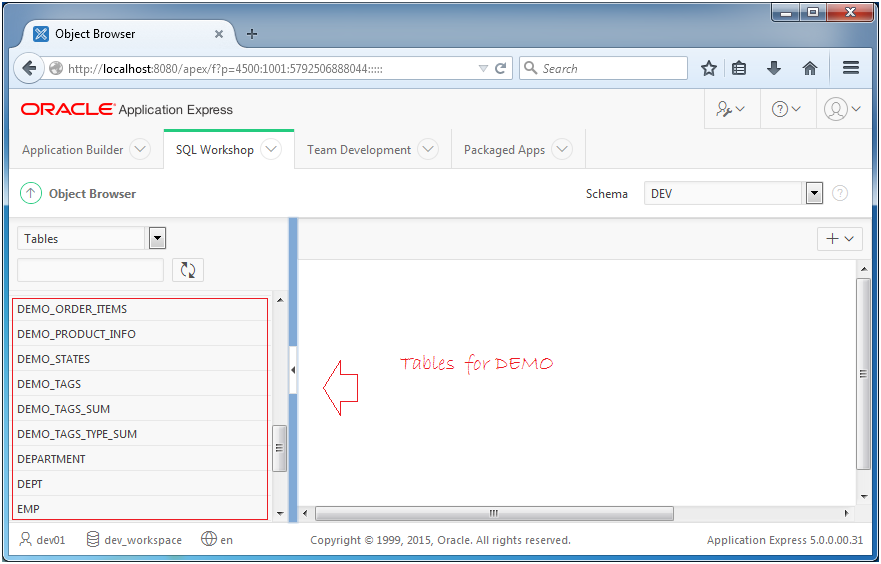
Look at Objects in Schema through Object Browser.
In the previous step, you created Schema DEV through Oracle APEX. This schema currently has system tables and some DEMO tables available in Oracle APEX, and some related Sequences.
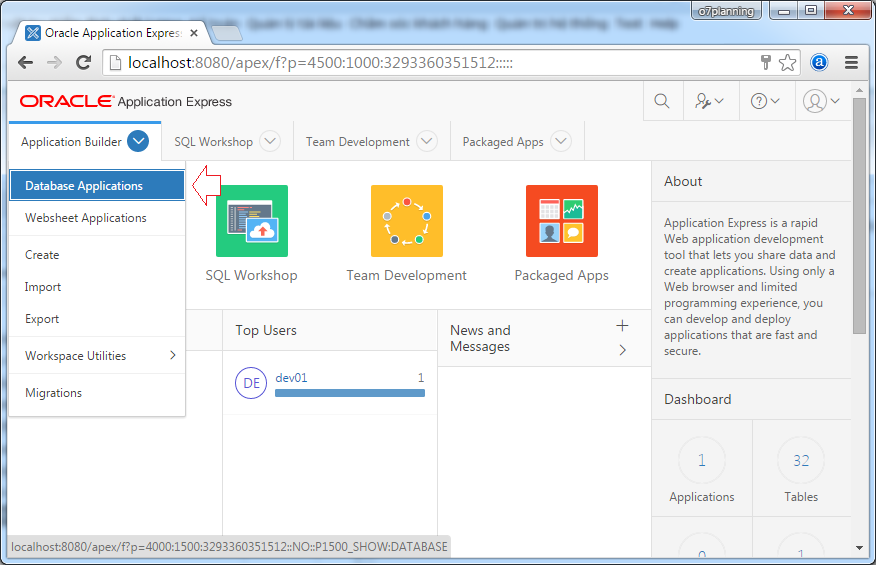
6. Create Application
In Oracle APEX, you can create an application in accordance with one of three types:
- Desktop Application
- Websheet Application
- Mobile Application
For a beginner Oracle APEX, it is best to have an example with Database Desktop Application. In fact, this application still runs on the web but its interface is quite similar to a typical Desktop application.
In this document, I instruct you to create a Hello World Oracle Apex application in form of Database Desktop Application.
Create Database Desktop Application
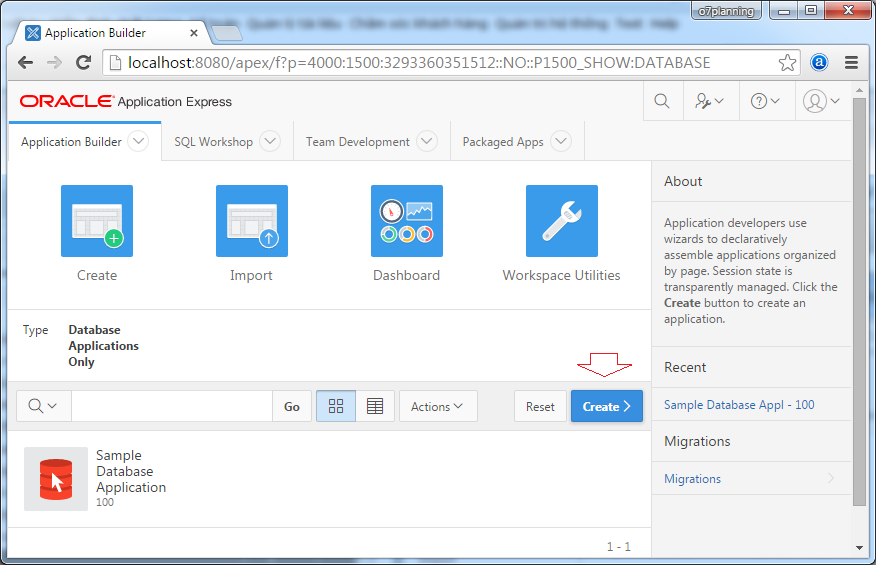
Create new Database Desktop Application:
Click button to create a new application:
Enter the name of the application:
- Hello Database Desktop Application
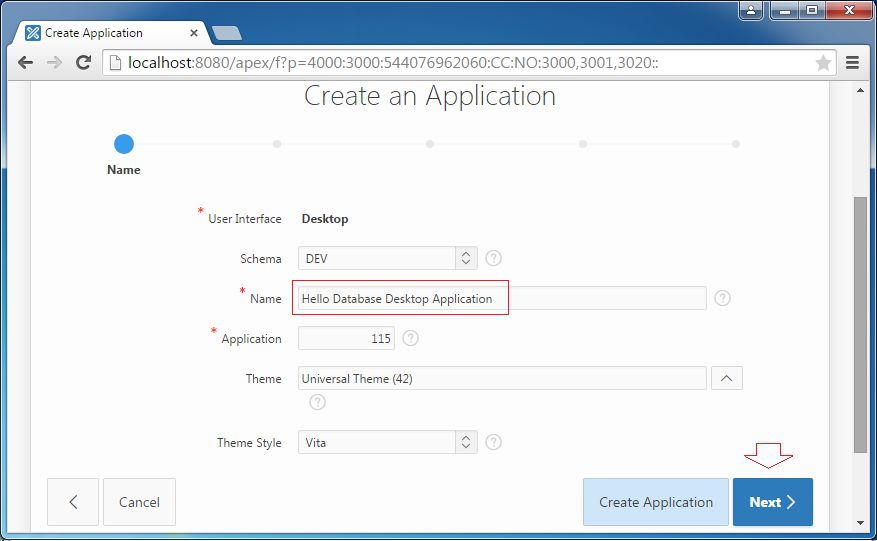
By default, Home page is created simultaneously with the application. You can add other pages into the application by clicking "Add Page". It is best to add them later.
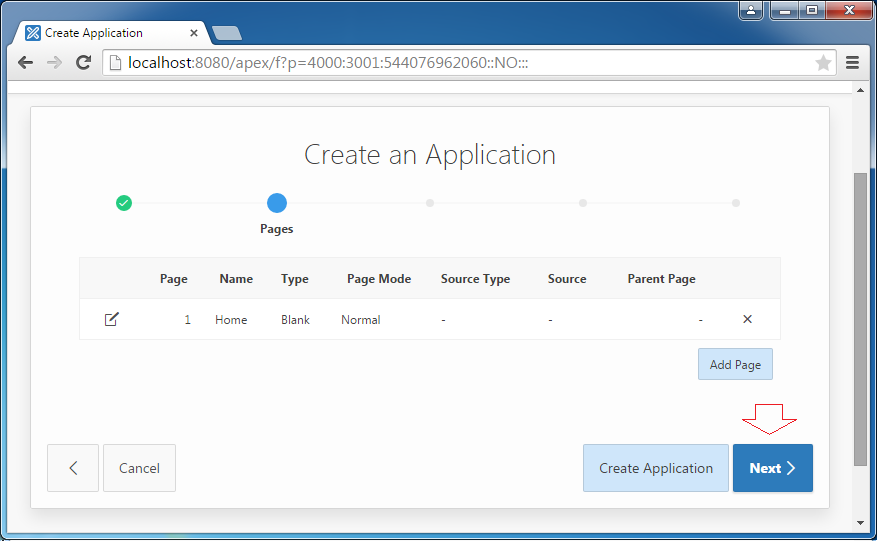
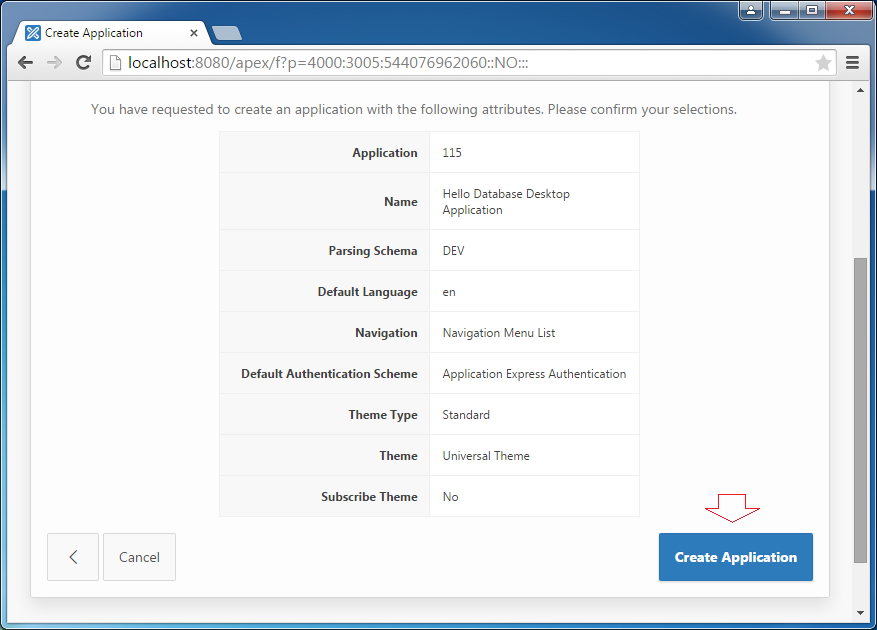
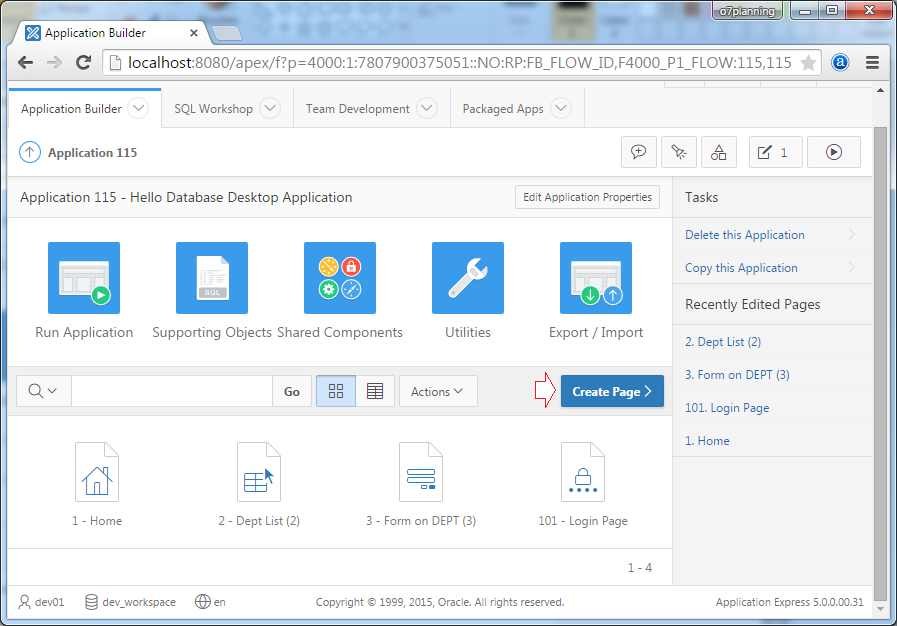
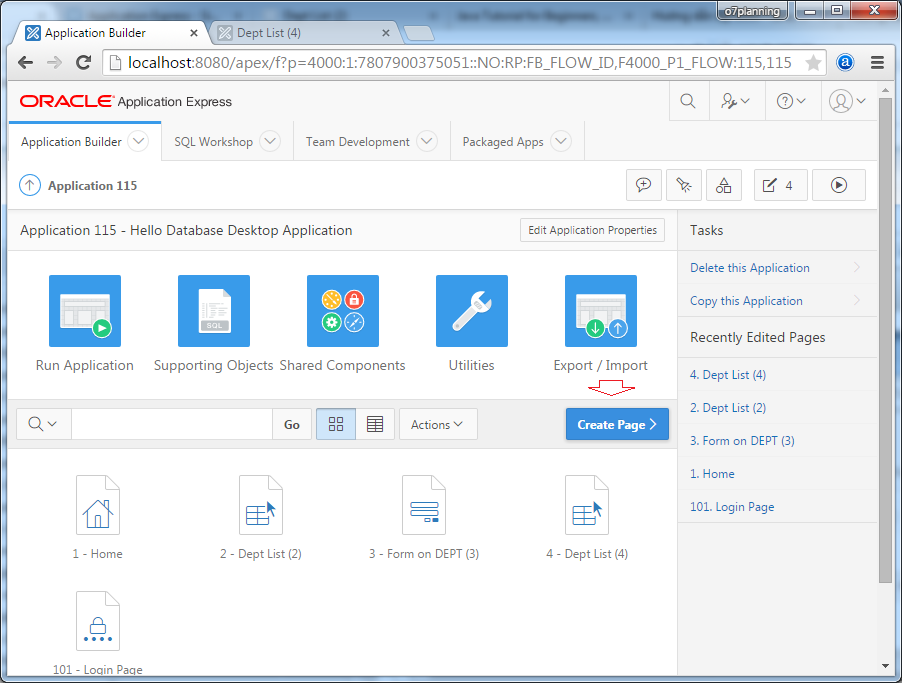
Your application has been created. Its ID is 115 and it has two Login & Home pages.
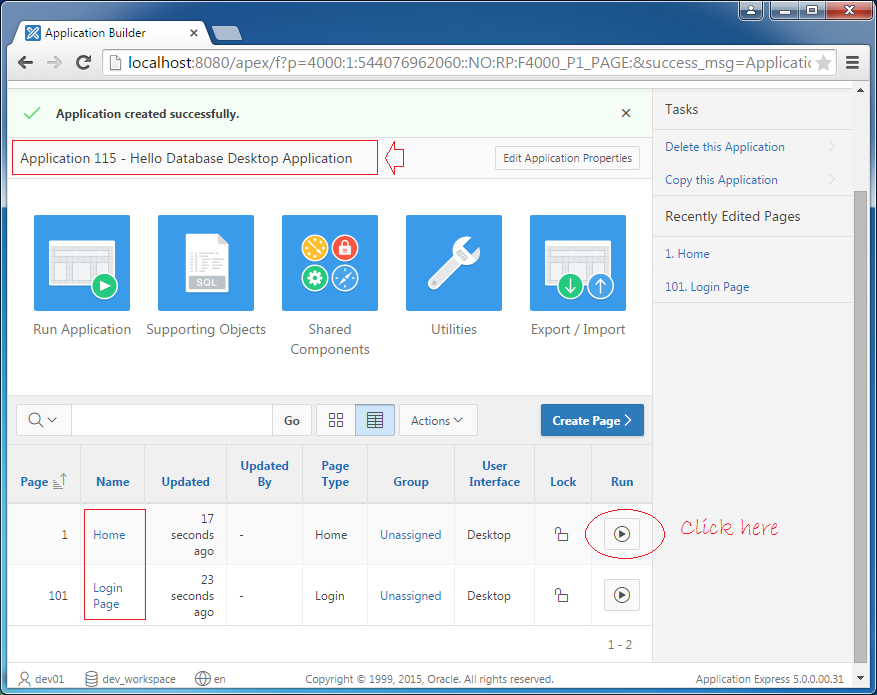
Currently, Home page has not been designed. However, you can click on the icon  to test the web.
to test the web.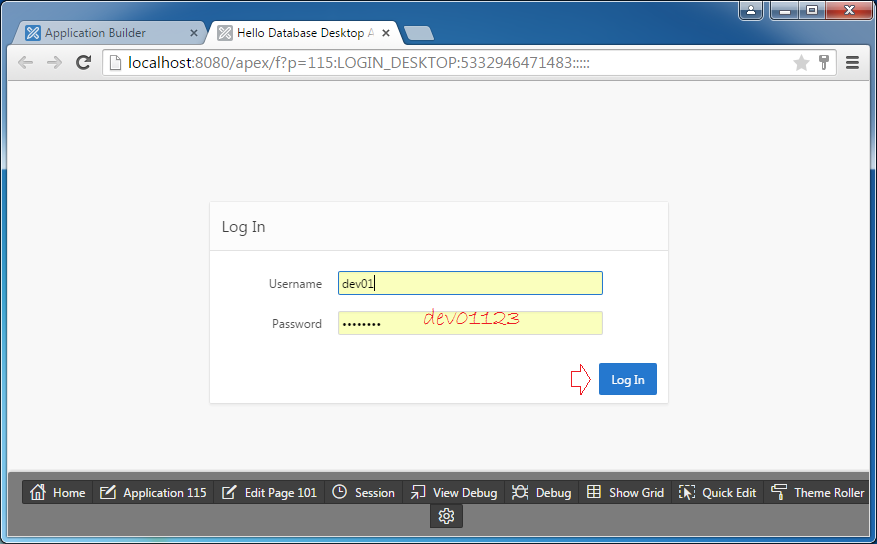
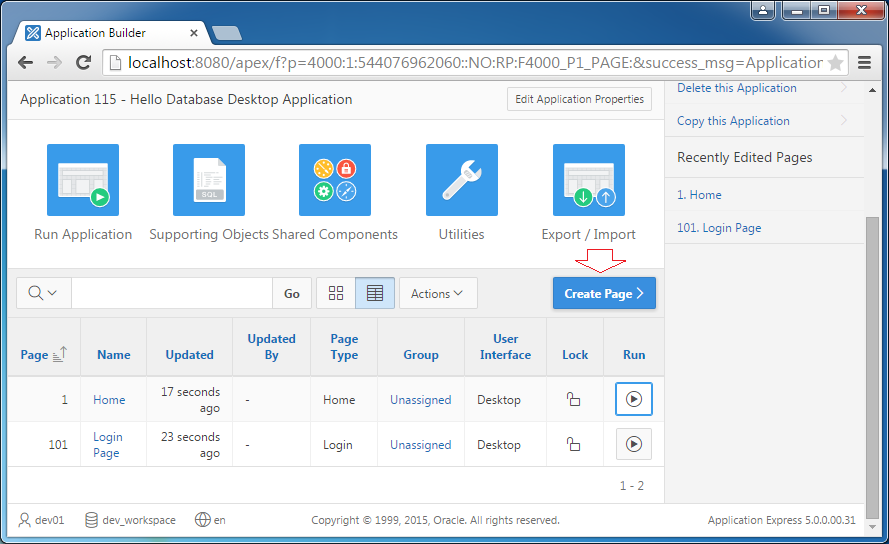
Create your first page
Next, we add a page displaying a list of departments (DEPT Table) and a page used to create and edit the information of departments. To be simple, we create this page in form of an available Template of Oracle APEX. In the next part, I will instruct you to create a new page from a blank page so that you can thoroughly understand the issue.
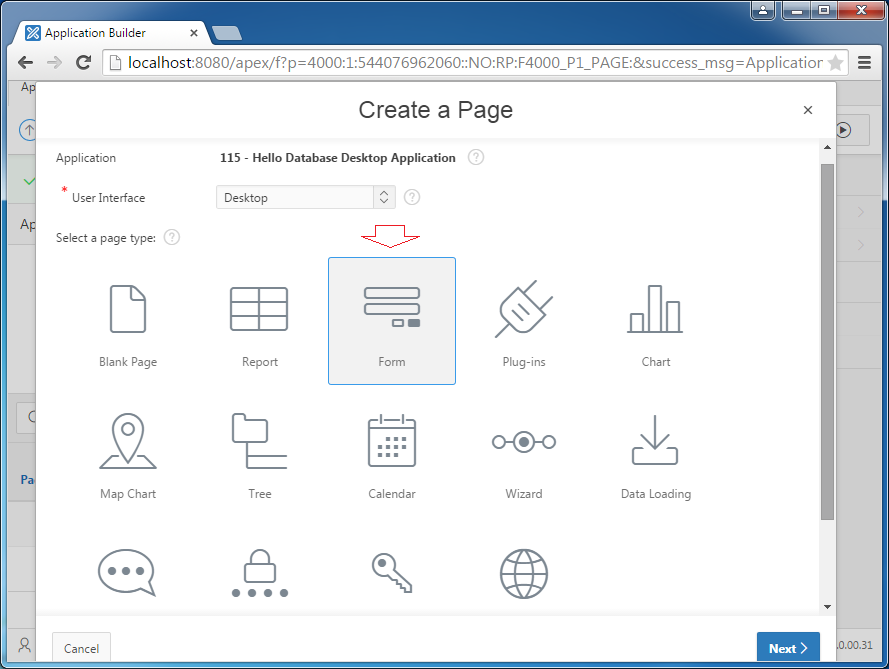
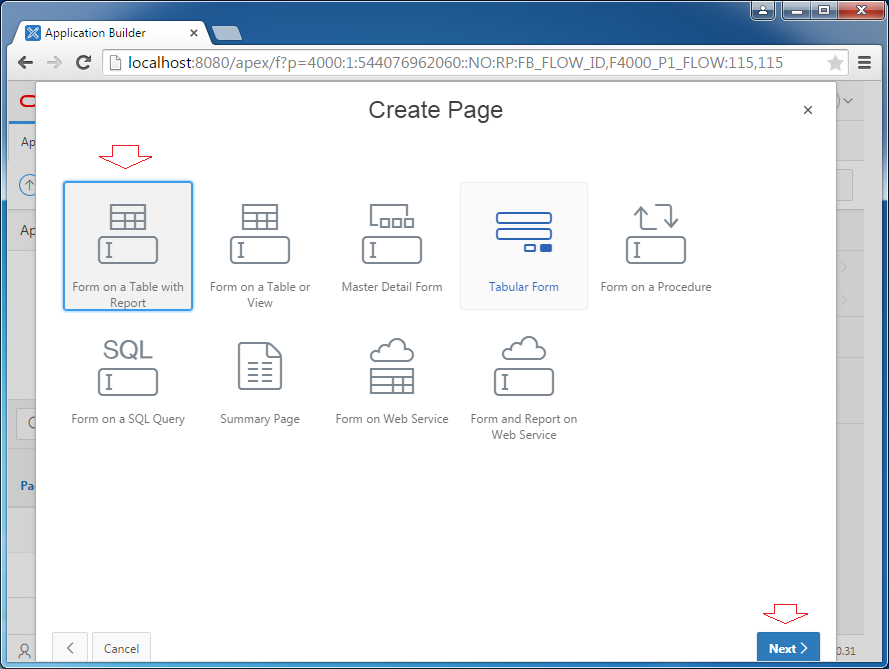
Select "Form on a Table with Report". To this template, Oracle APEX will provide you with two pages which include a page of list of departments (DEPT) and a form of creating (and edit) information of departments.
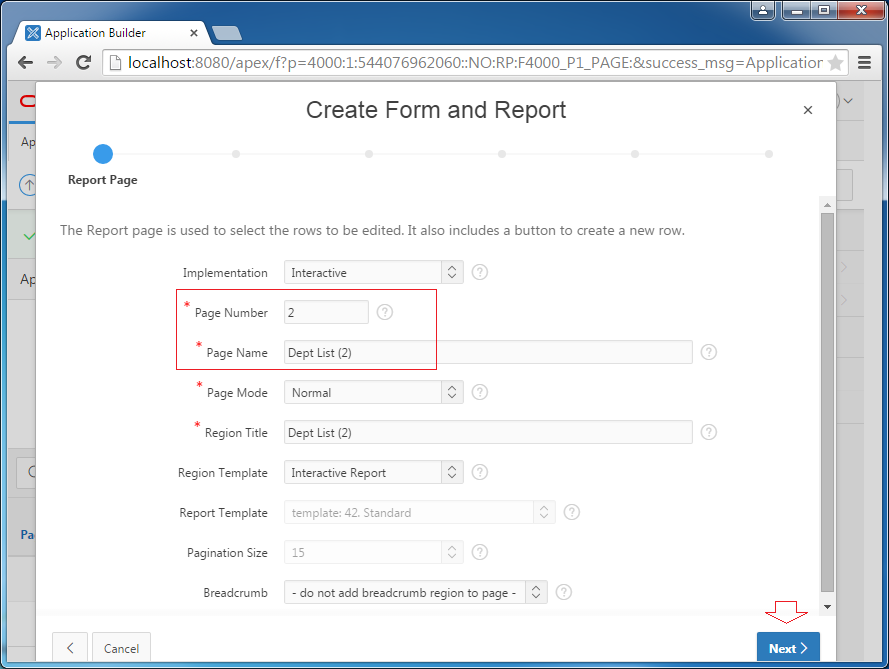
First, Oracle APEX requires you to enter the information for the page containing the list of departments (DEPT). Page Number is an important attribute you have to remember. I grant 2 to Page Number of this page. (Note: Home page have Page Number = 1).
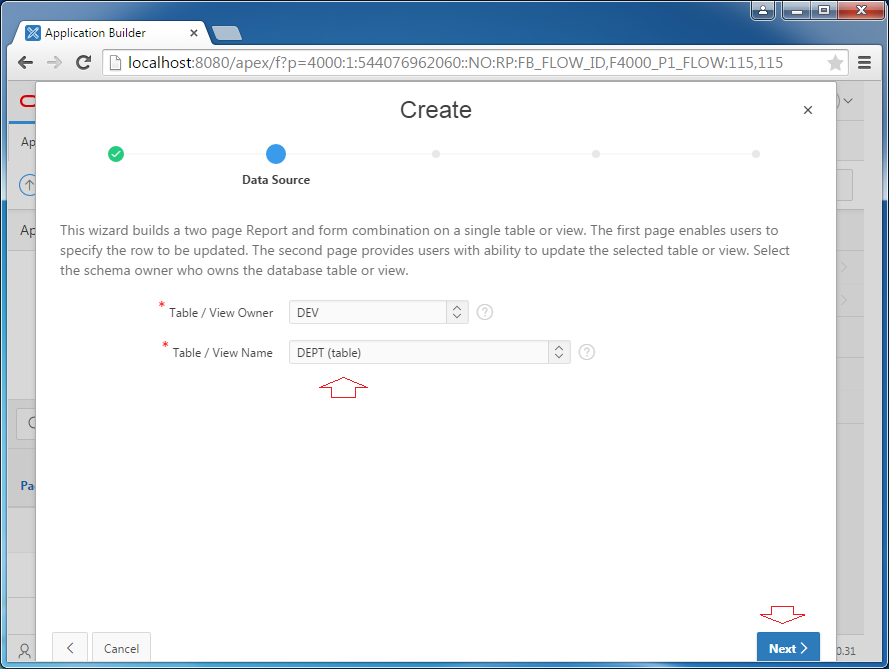
Select DEPT table:
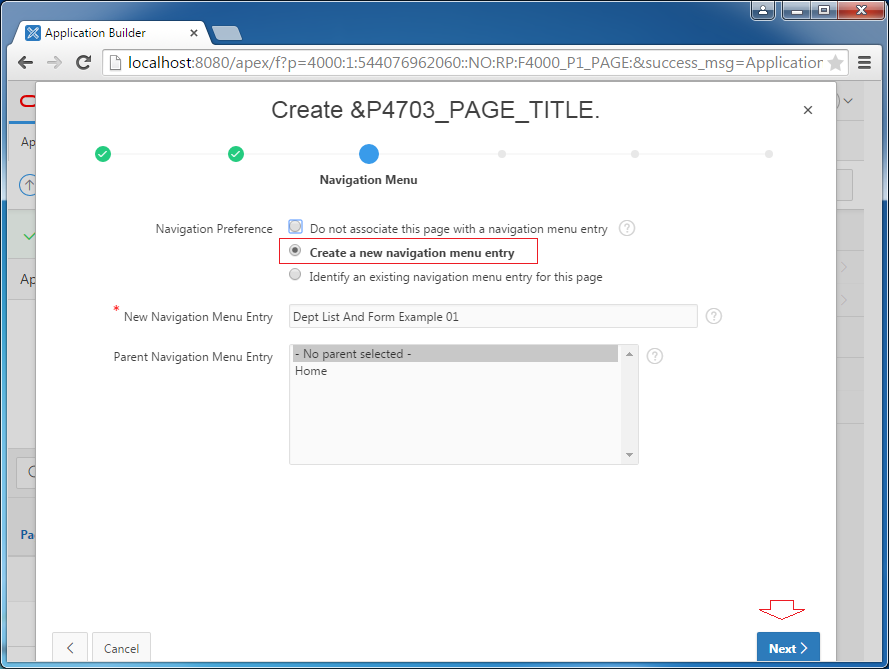
Enter Menu:
- New Navigation Menu Entry: Dept List (2)
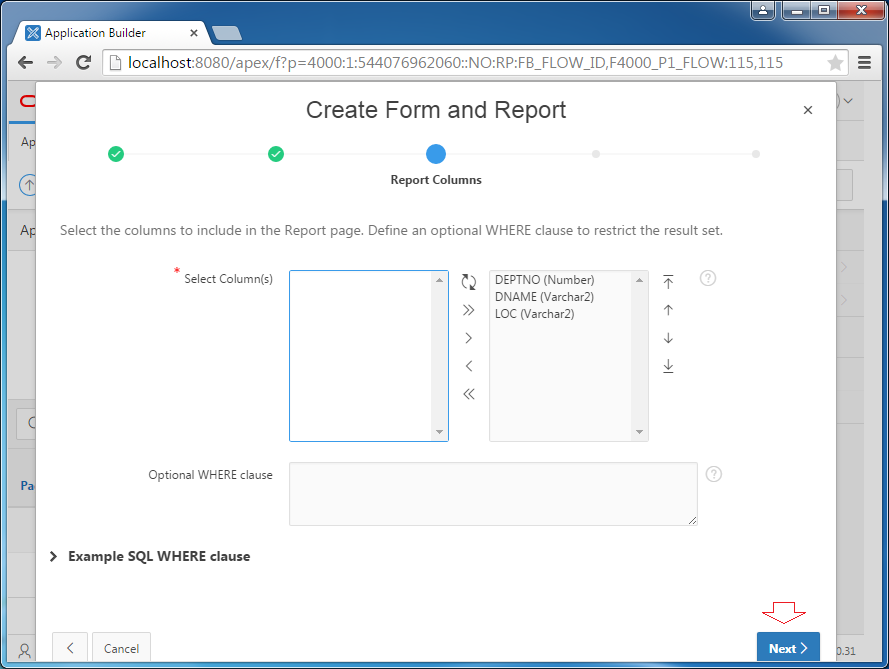
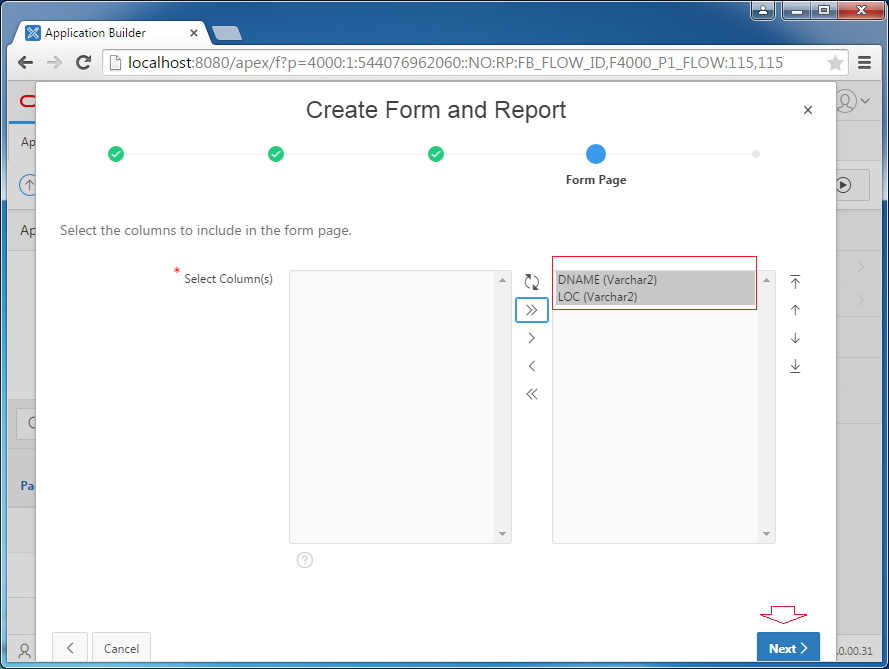
Choose columns to display:
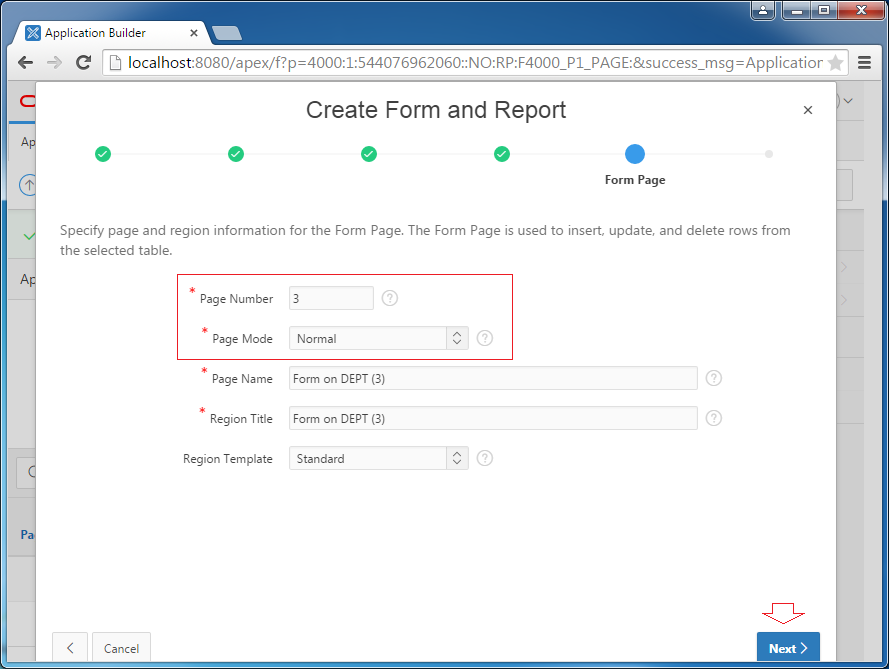
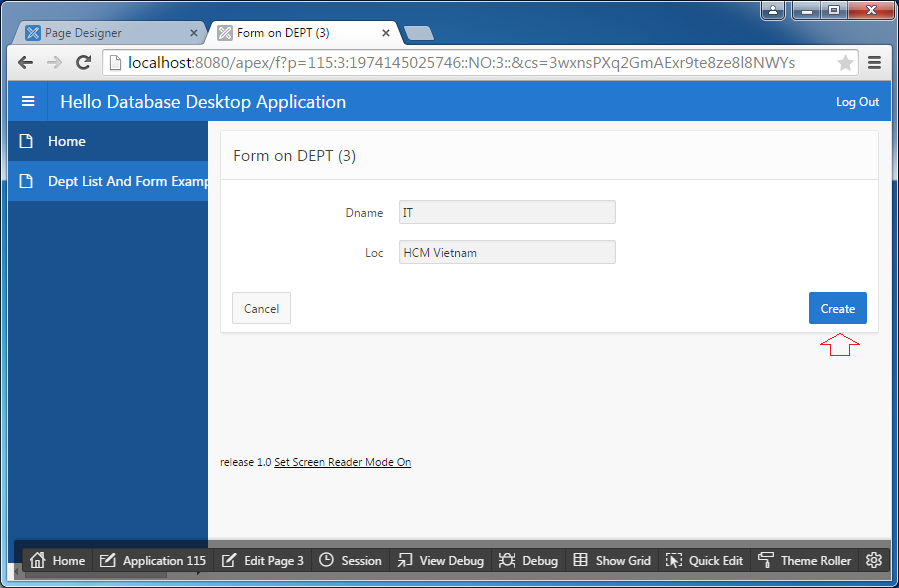
Next is the page to enter department information. Here I assign 3 for Page Number.
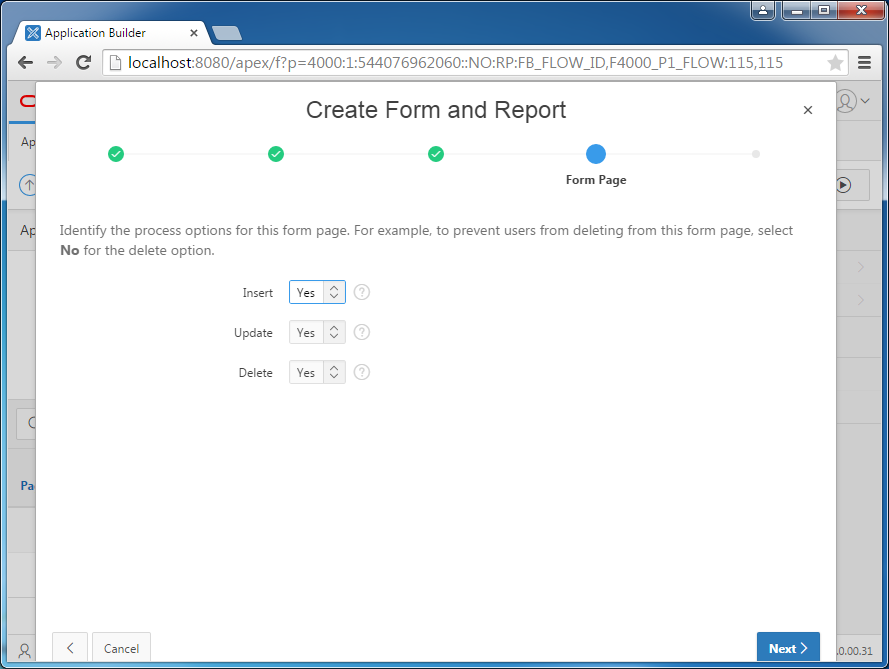
Page Mode:
- Normal: It means when you click on creating a new department, the web will move to a new page so that you can enter the information of the department.
- Model Dialog: It means when you click on creating a new department, a Dialog will display so that you can enter the information.
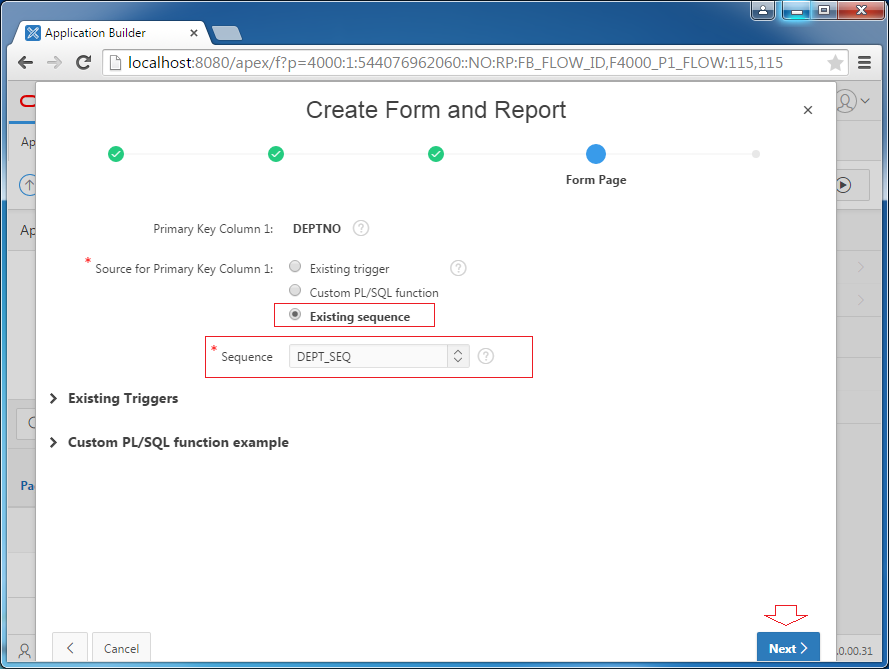
Select Primary Key Column:
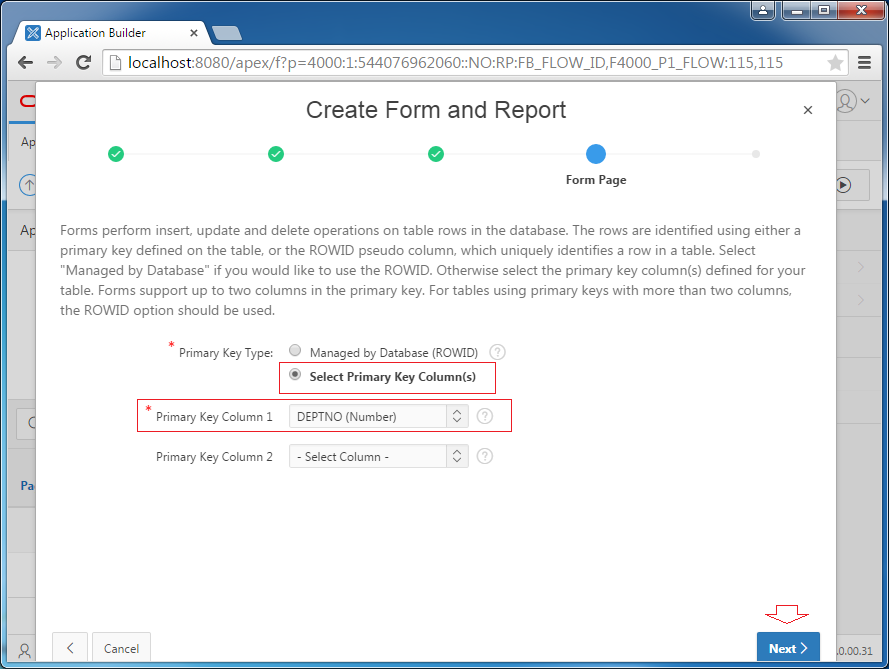
When you create a new DEPT record, DEPTNO column will be automatically granted for a value by DEPT_SEQ sequence.
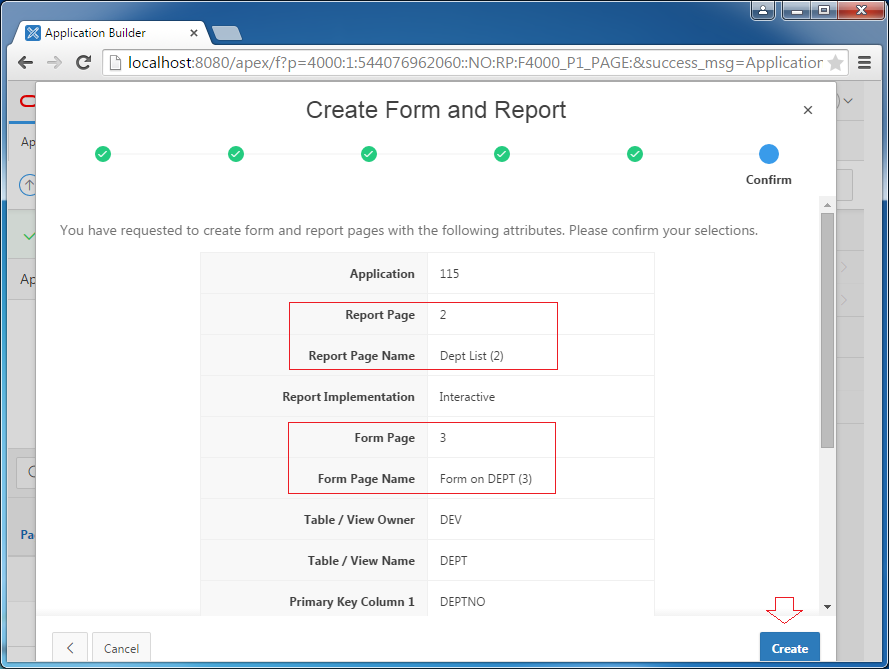
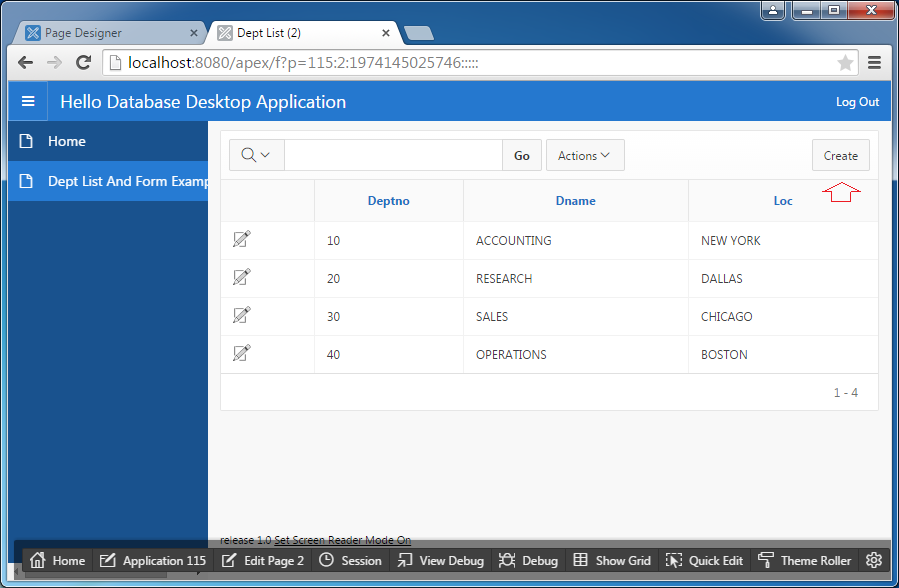
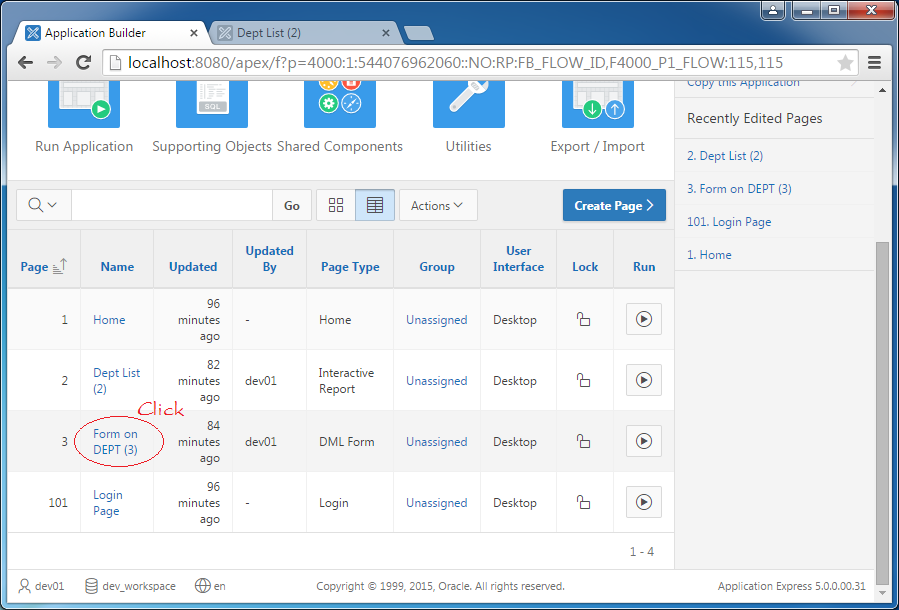
Two pages have been created. First, have a trial run.
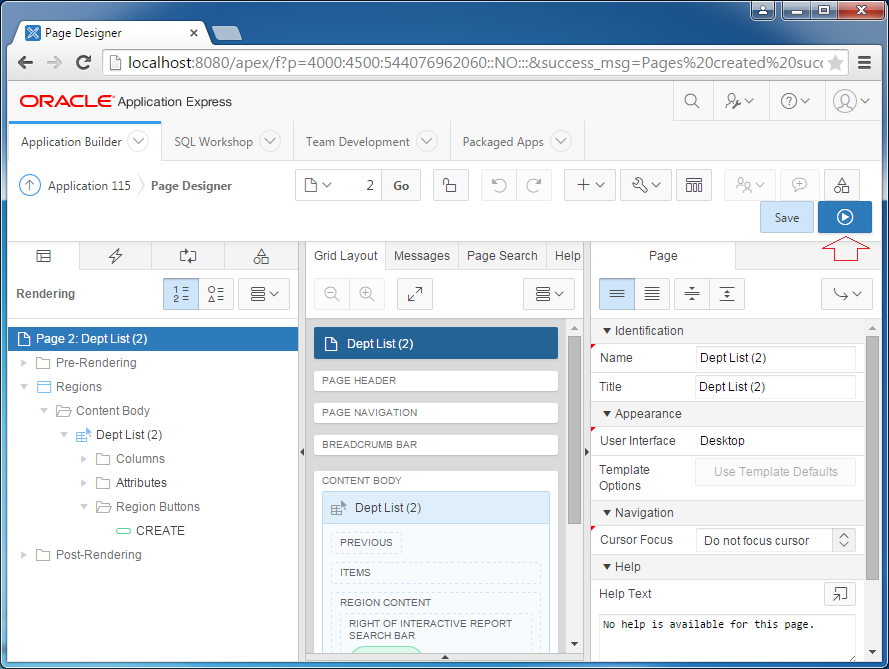
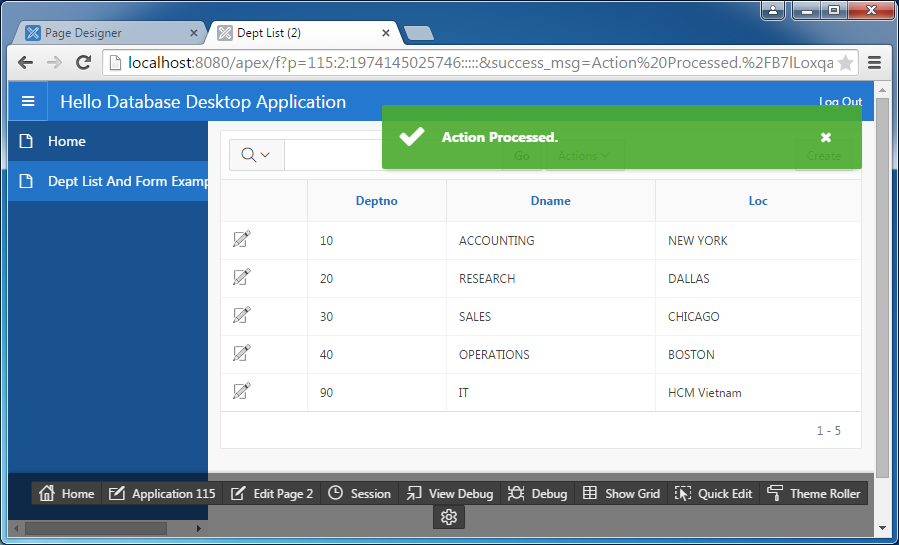
OK, everything is perfect. Return to design screen to discover what Oracle APEX has created.
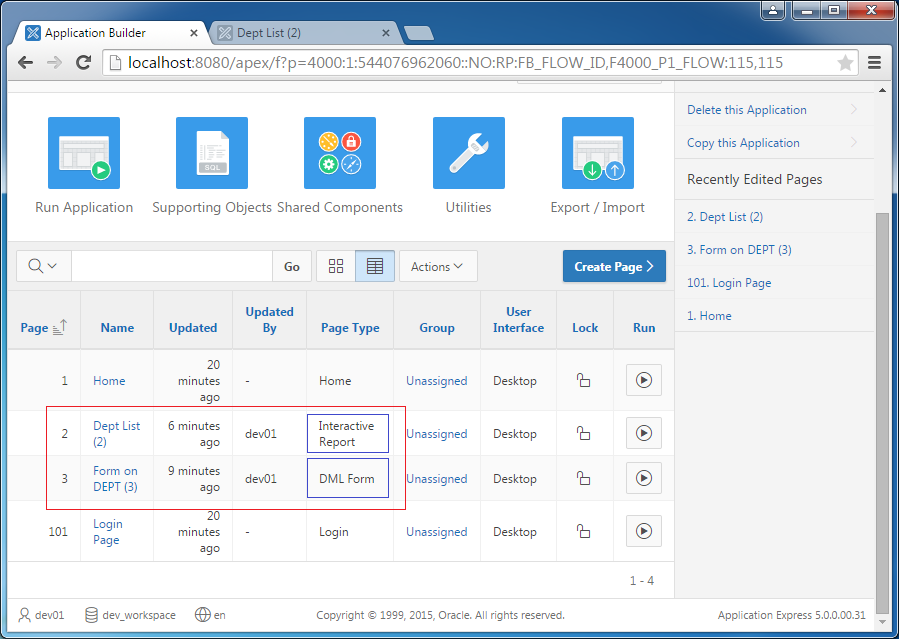
Oracle APEX creates two pages in form of "Interactive Report" and "DML Form".
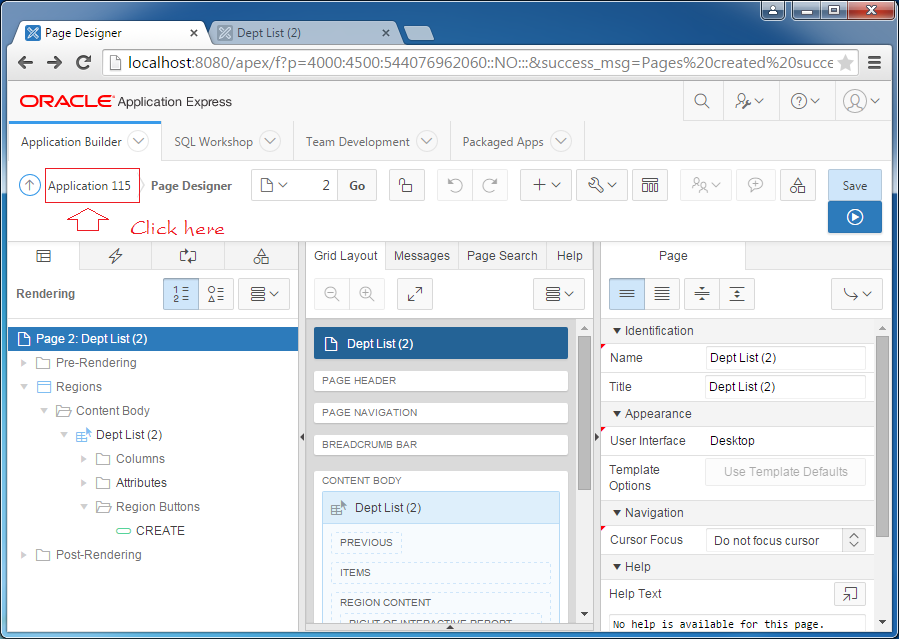
Click "Form on DEPT (3)" to edit.
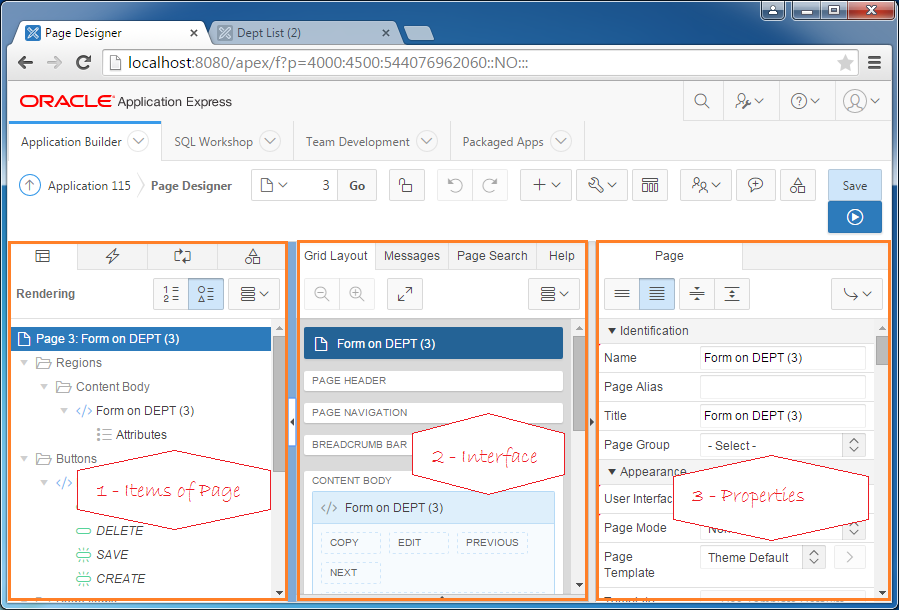
In the above illustrative image, you will see the design screen is divided into three parts:
- Items of the page, including Regions, Buttons, and Processing.
- Interface of the page. A page usually has six regions:
- PAGE HEADER
- PAGE NAVIGATION
- BREADCRUMB BAR
- CONTENT BODY
- FOOTER
- INLINE DIALOGS
- When you select a item of the page as mentioned in part 1, its attributes will display in part 3.
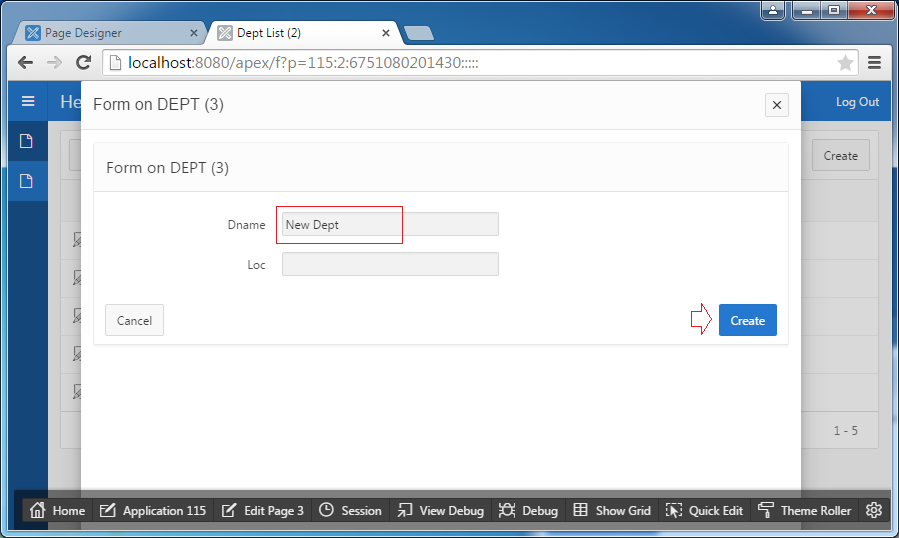
Example: You click on PAGE item,change the attribute of Page Mode into "Model Dialog", and click on save as the following illustrative image:
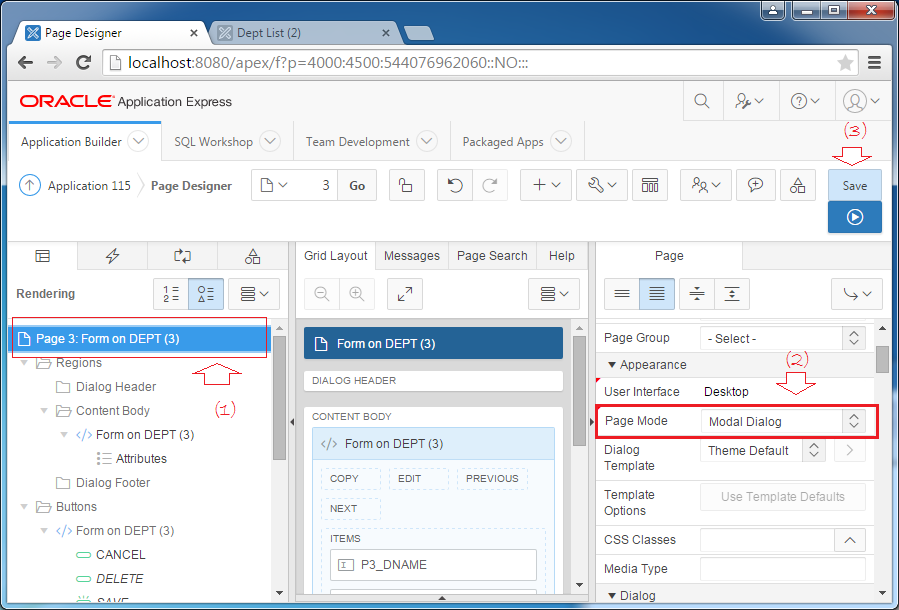
And rerun this page.
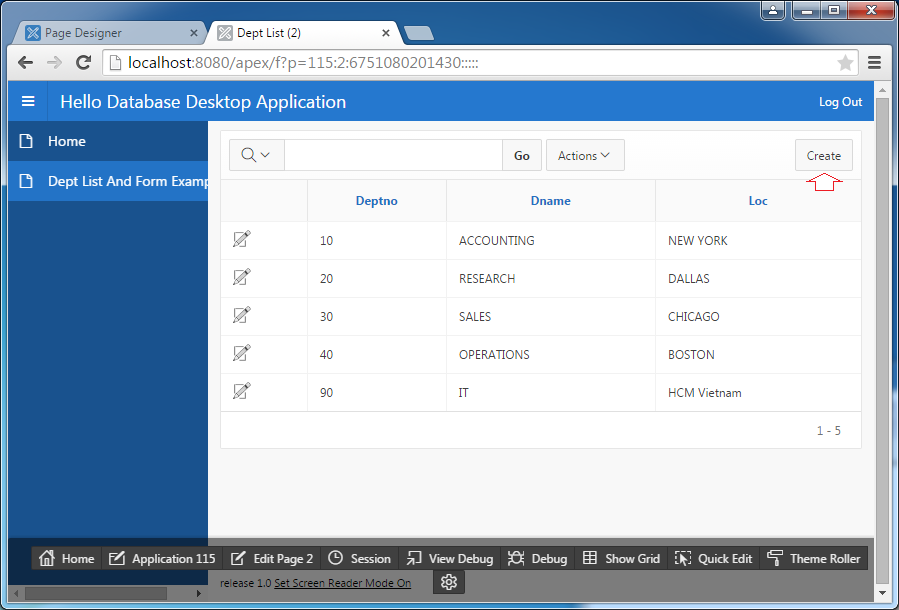
A Dialog will be opened and it allows you to enter the information of a new department.
Create a page from scratch
In the above parts, I introduced you how to quickly create a web with processing codes automatically created by Oracle APEX. In order to understand Oracle APEX much more, in this part, I will recreate the above example from scratch without using available templates of Oracle APEX.
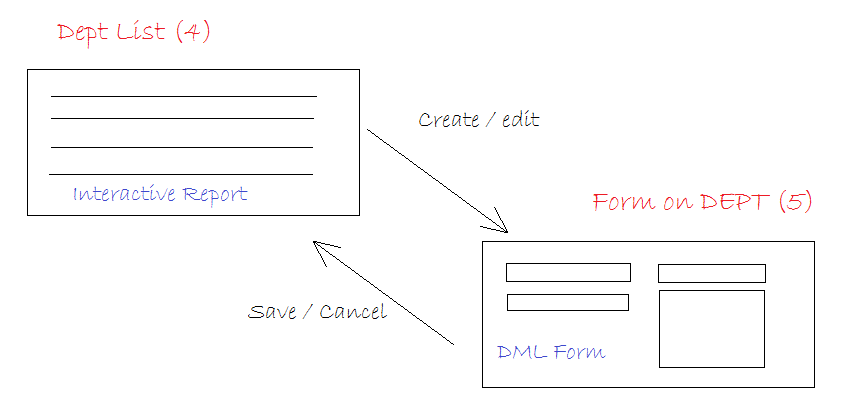
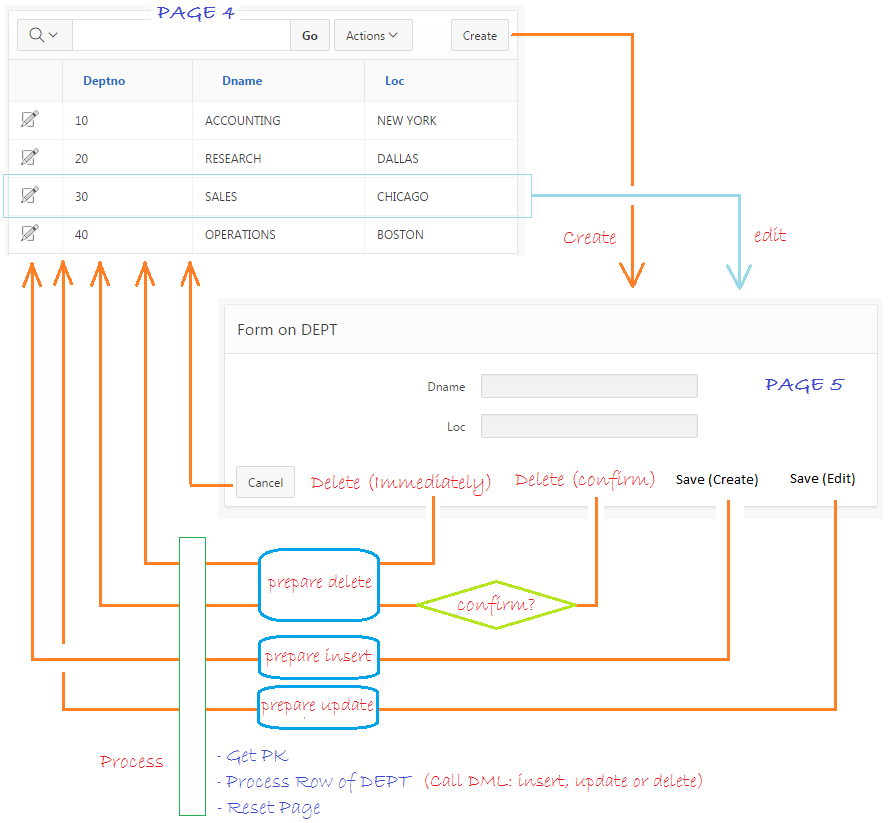
This is the model of 2 pages I will create:
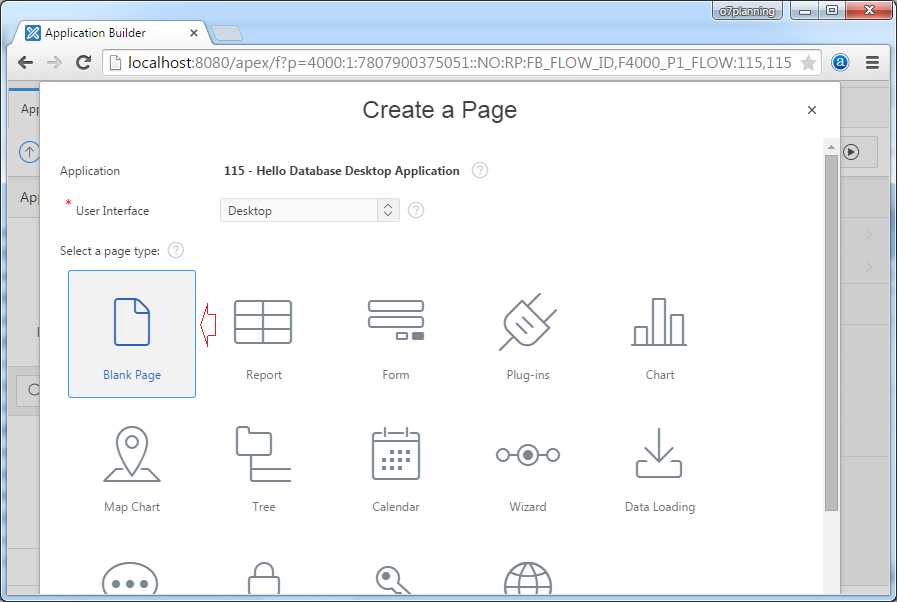
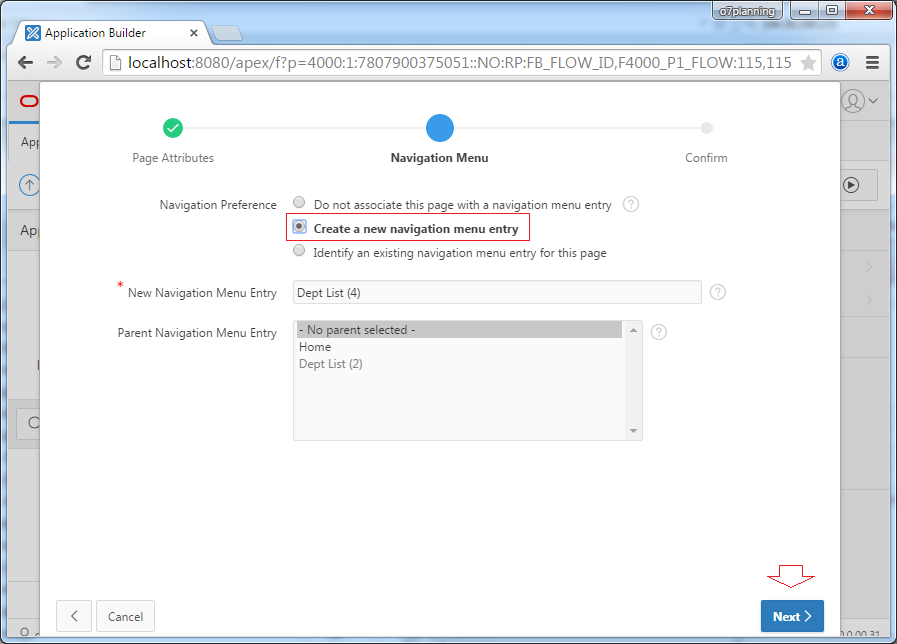
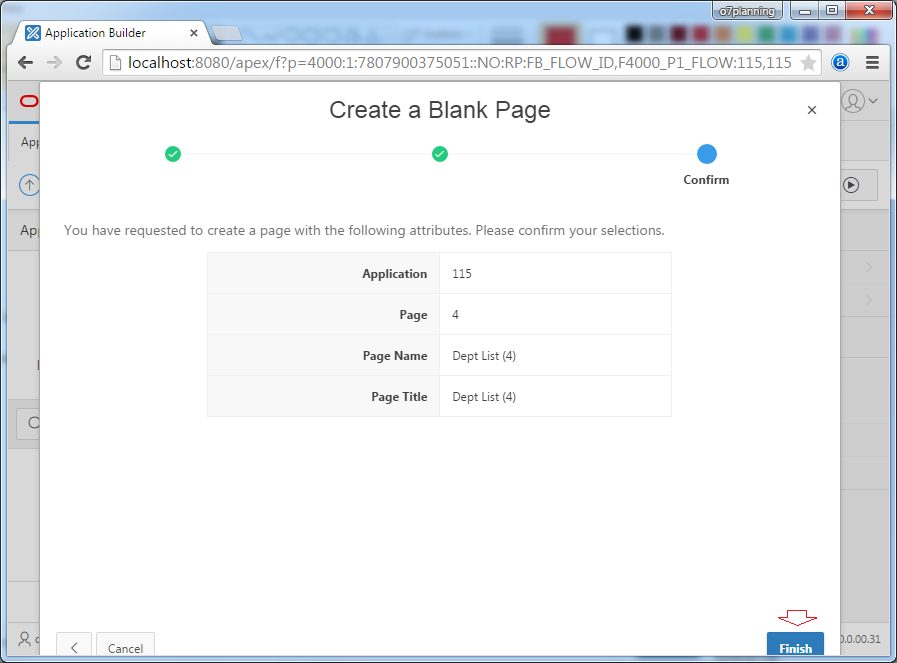
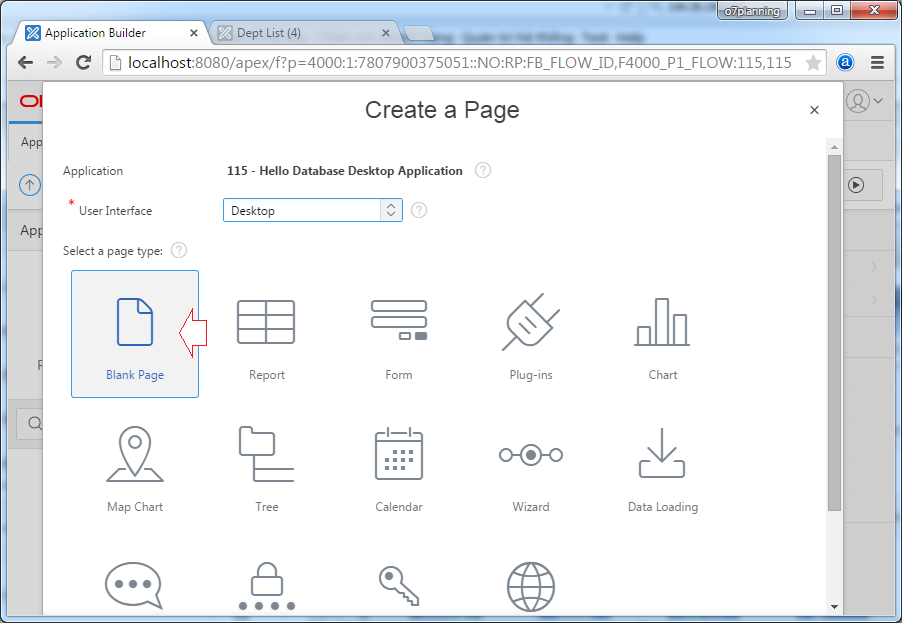
- Create Page
Select blank page:
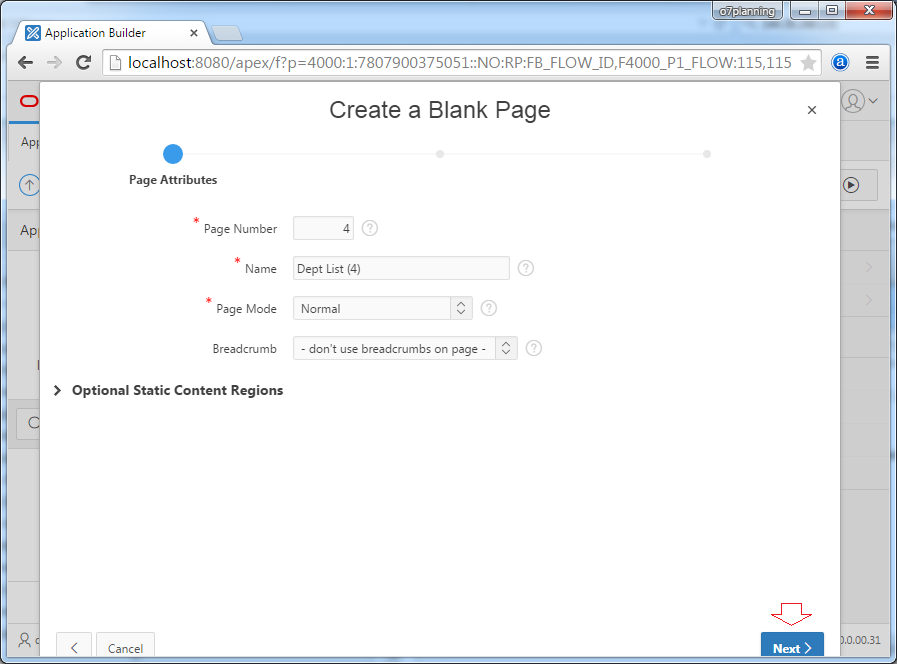
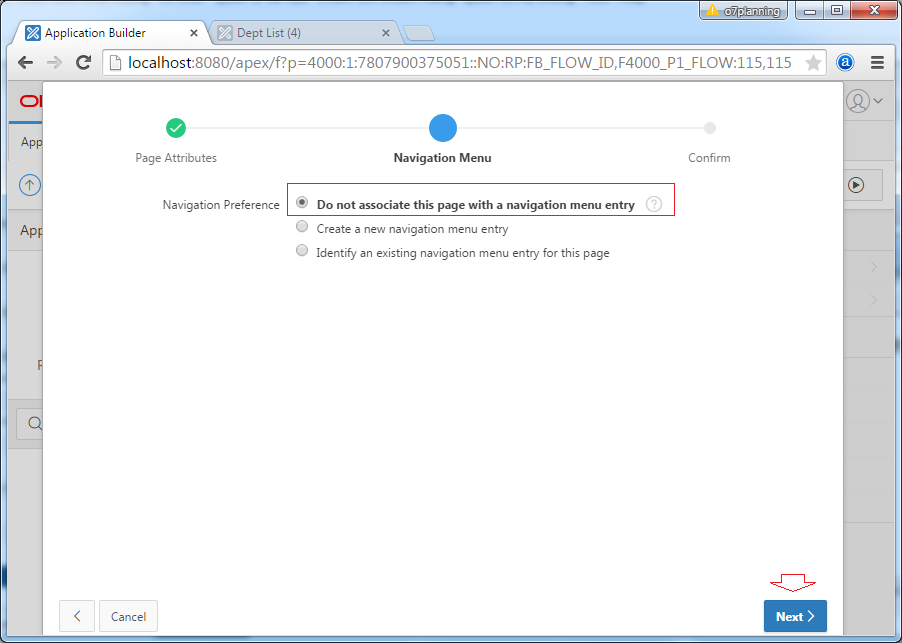
Page list of departments (DEPT) will be put on the menu.
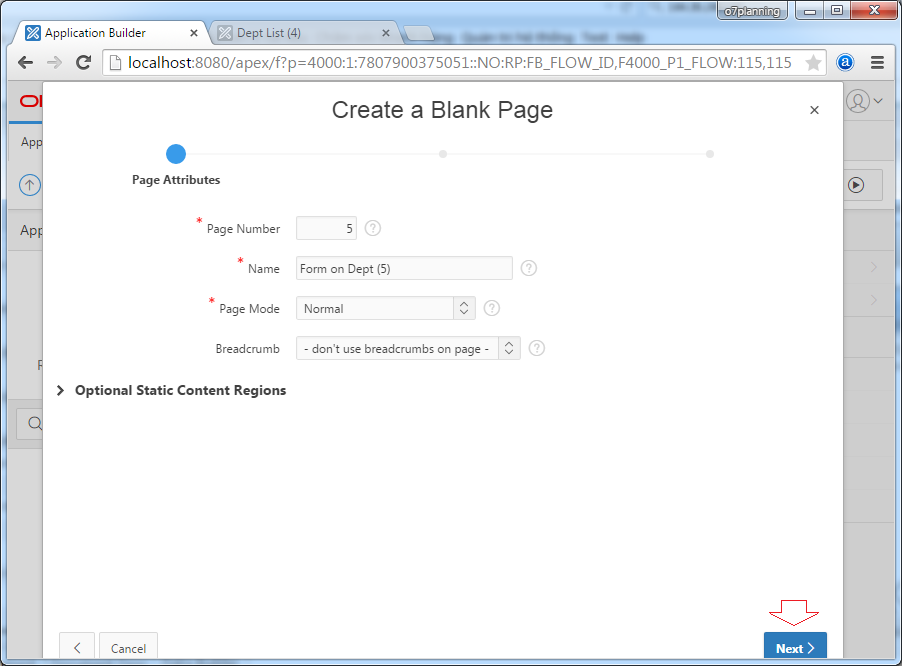
A blank page was created. We create the shown list of departments, this region will be included in "Content Body" section.
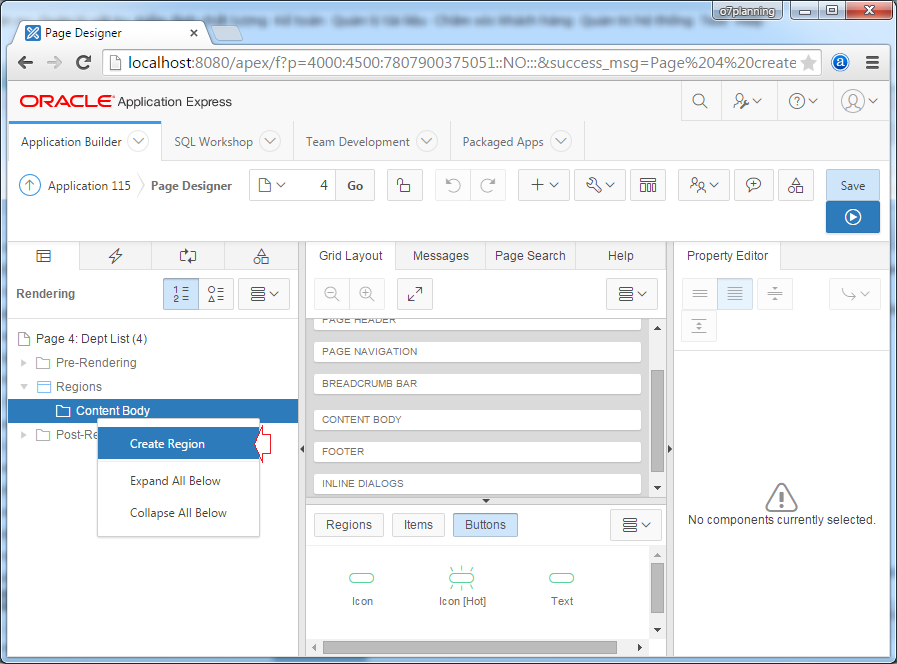
A new region has been created:
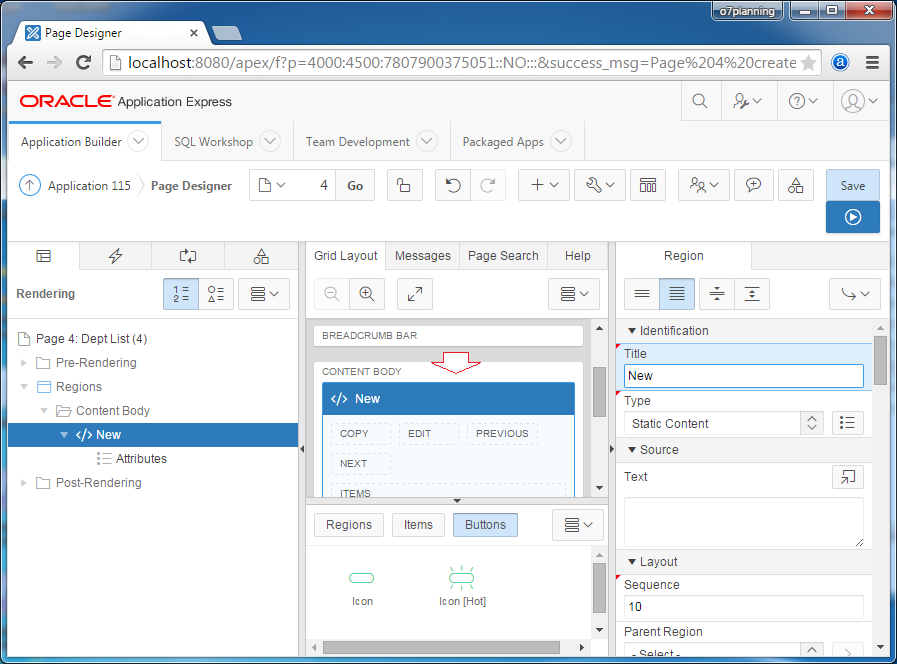
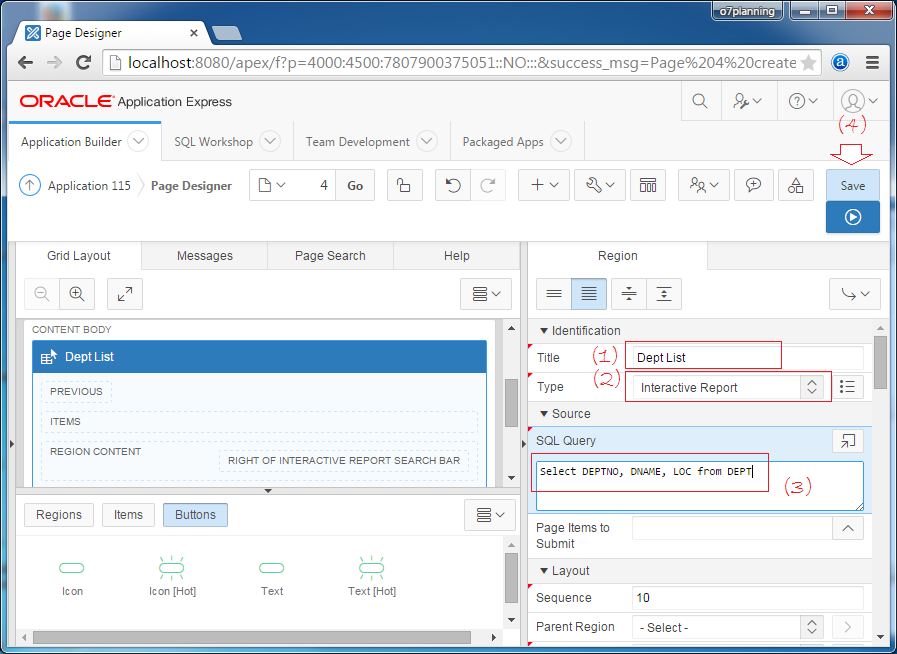
Enter information into the region you create:
- Title: Dept List
- Type: Interactive Report
- Source SQL Query: Select DEPTNO, DNAME, LOC from DEPT
- SAVE
Now you can press the RUN ( ), for testing
), for testing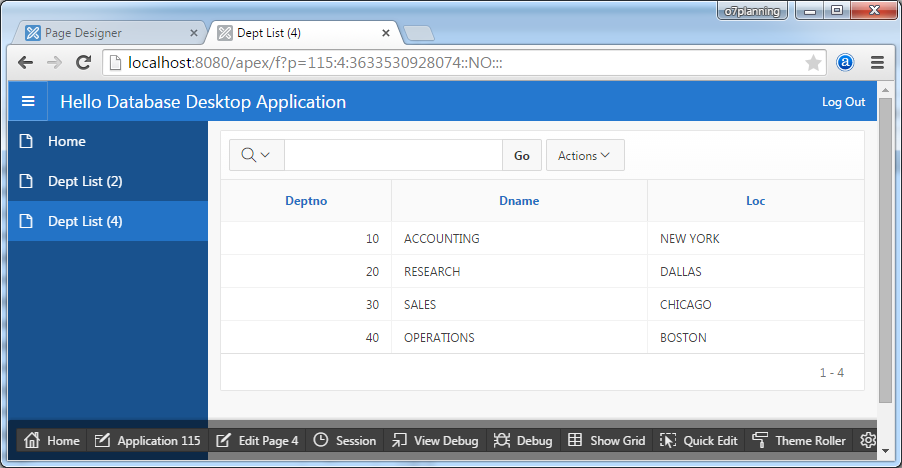
You need to add a column that contains editing icons, as shown below:
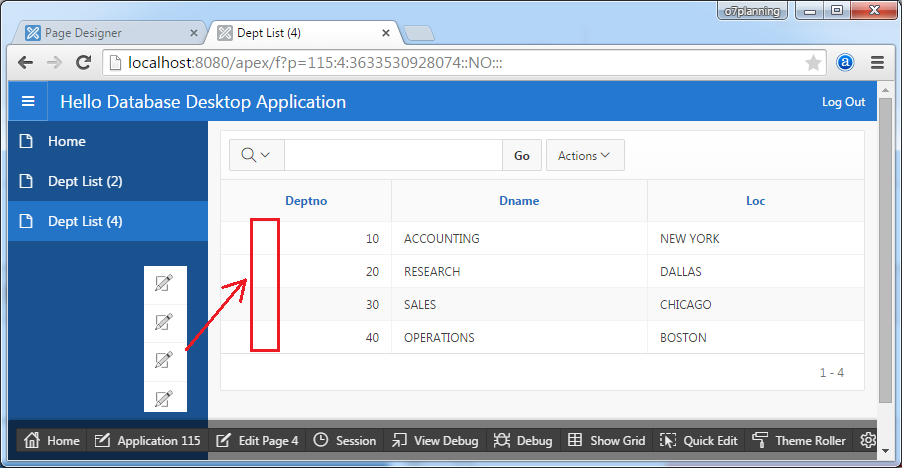
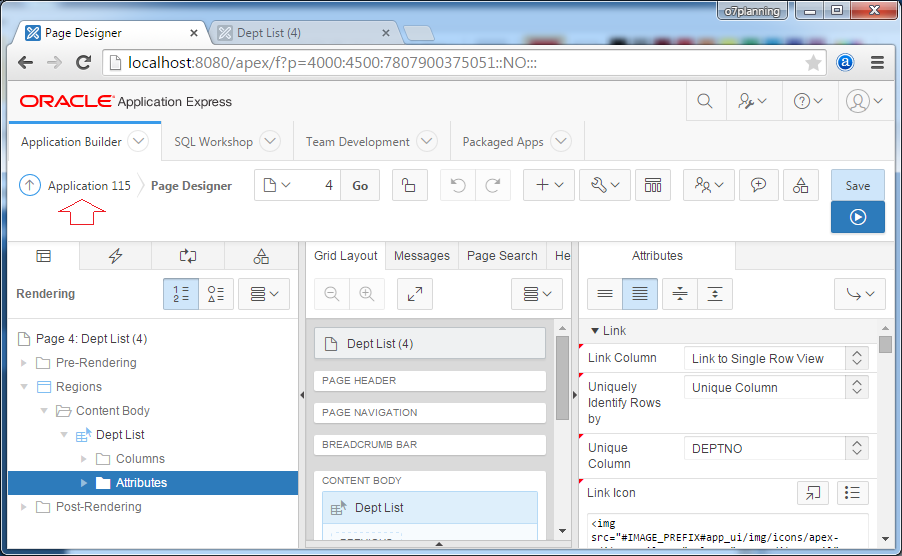
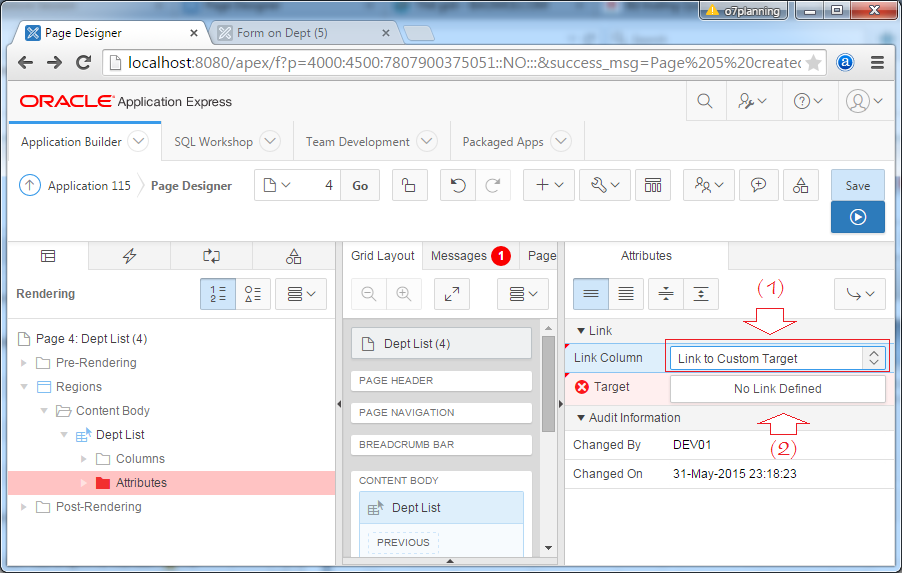
Choose Attributes in "Dept List" section. And setting the properties as shown below:
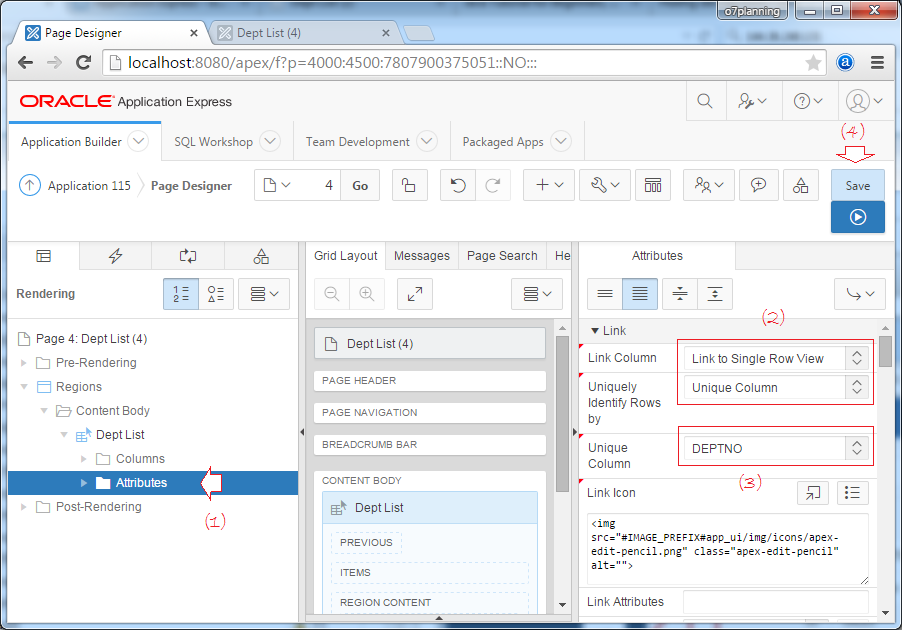
Link Column = Link to Single Row View
That means that when you click on the icon view (modify) records, the application will jump to a default page (displays record information)
Link Column = Link to Custom Target
Use to jump to your custom page, to display record information. (To be mentioned later).
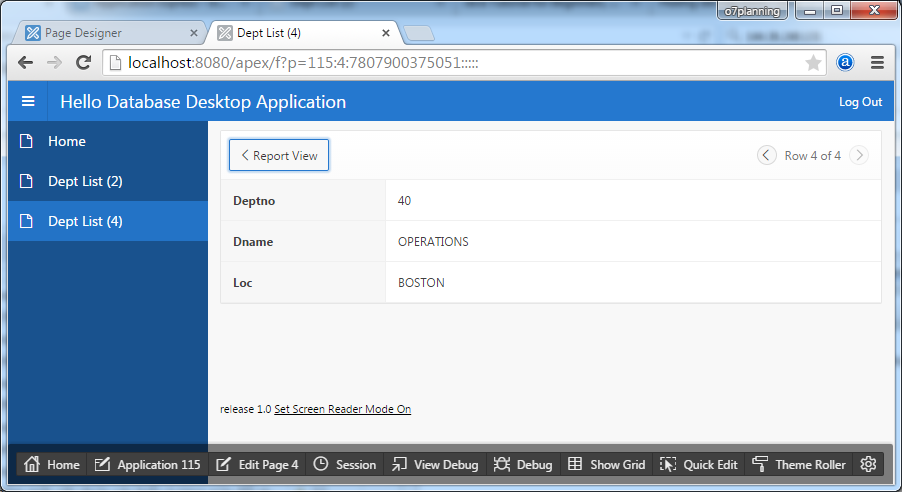
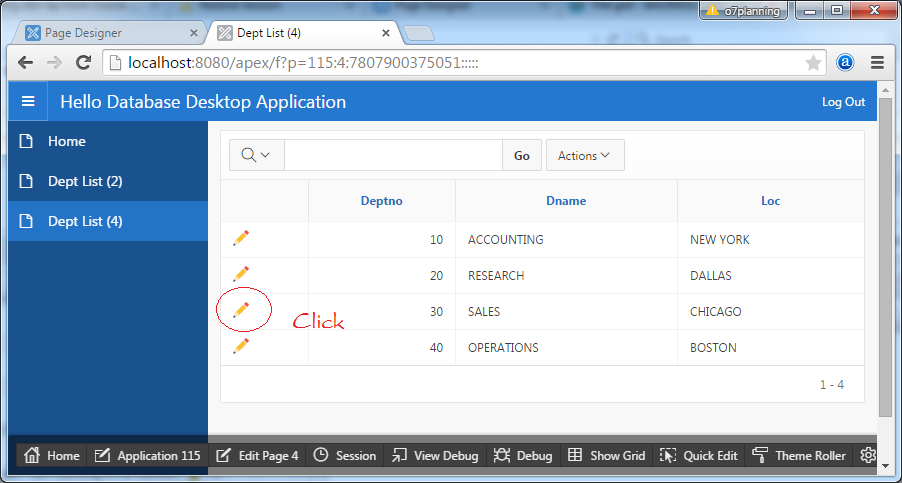
Rerun this page:
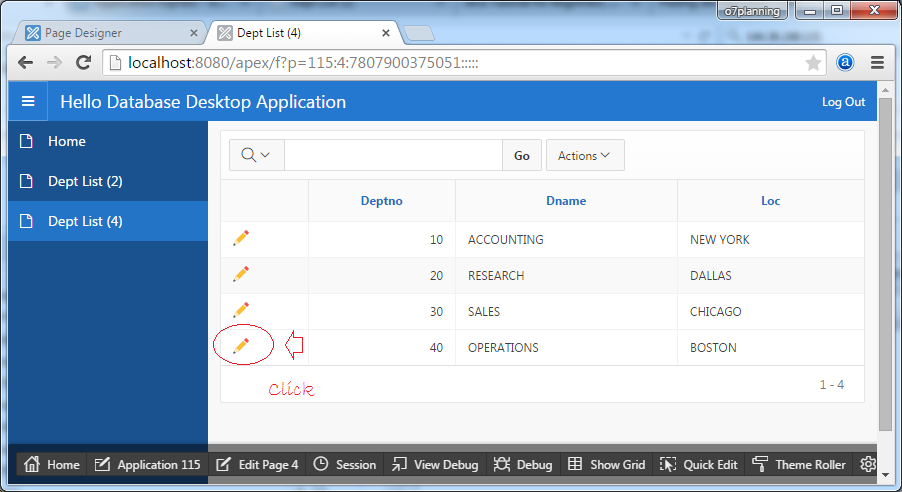
Web page will turn to a default page, and show information that you have selected.
Form
Next, we create a Form page, when you click to modify or create a department, it will turn to this page.

A blank page is created, we will create a region containing form.

Enter informations for new creating region:
- Title: Form on Dept
- Type: Static Content
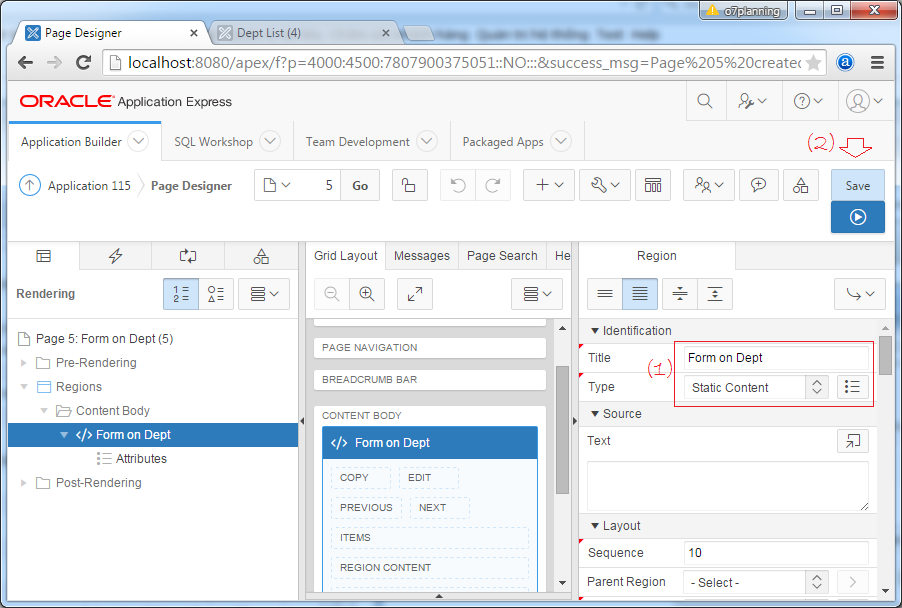
Note: With type of "Region Type = Static Content". You need to create Items in this region, and write the handlers to display and write data to the DB.
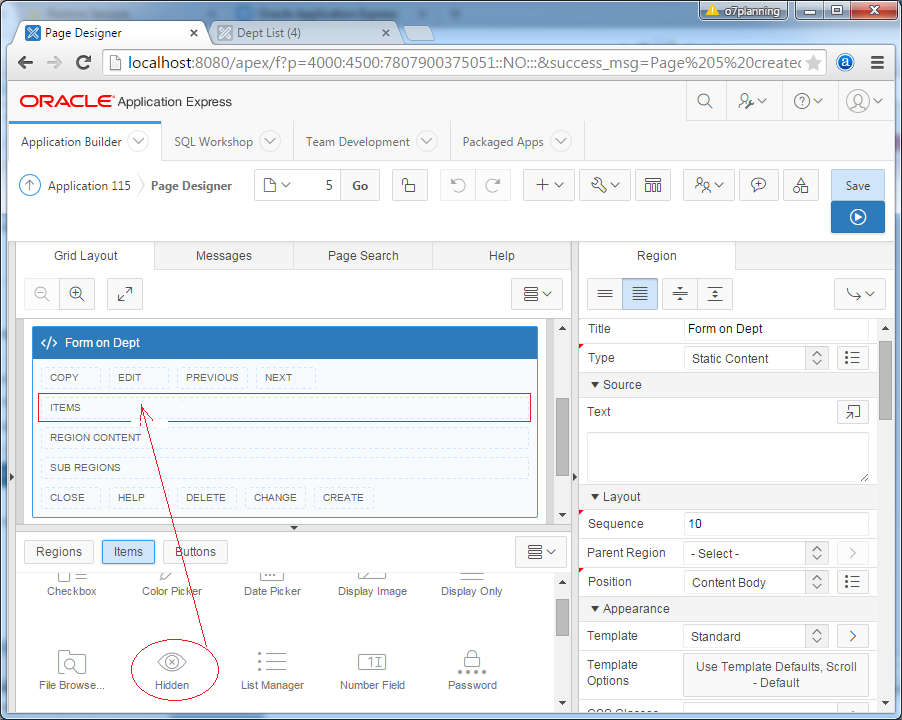
We will create three fields:
- Hidden: DEPTNO
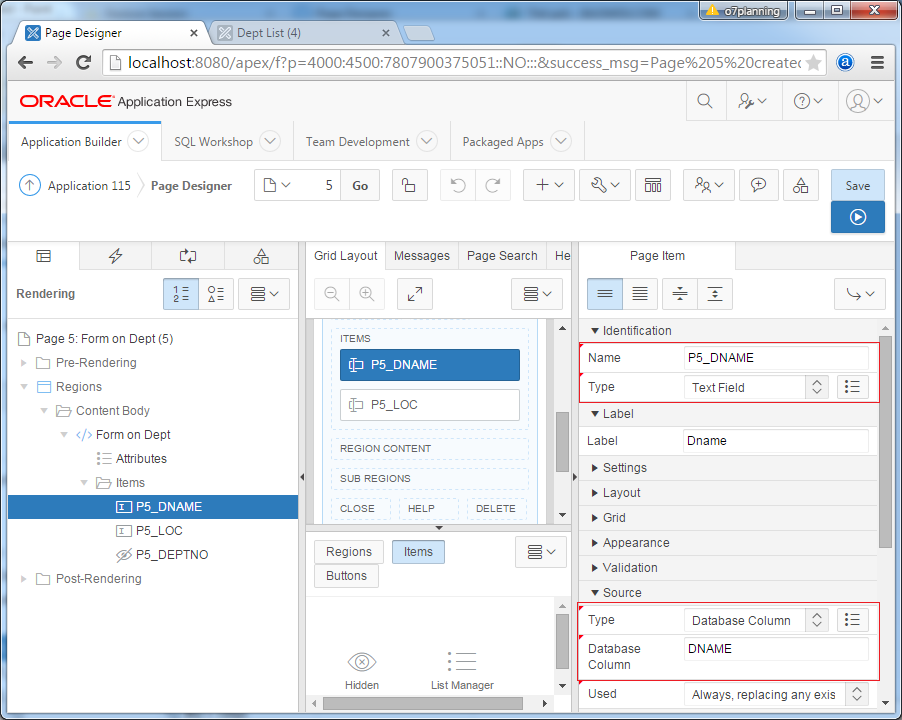
- Text Field: DNAME
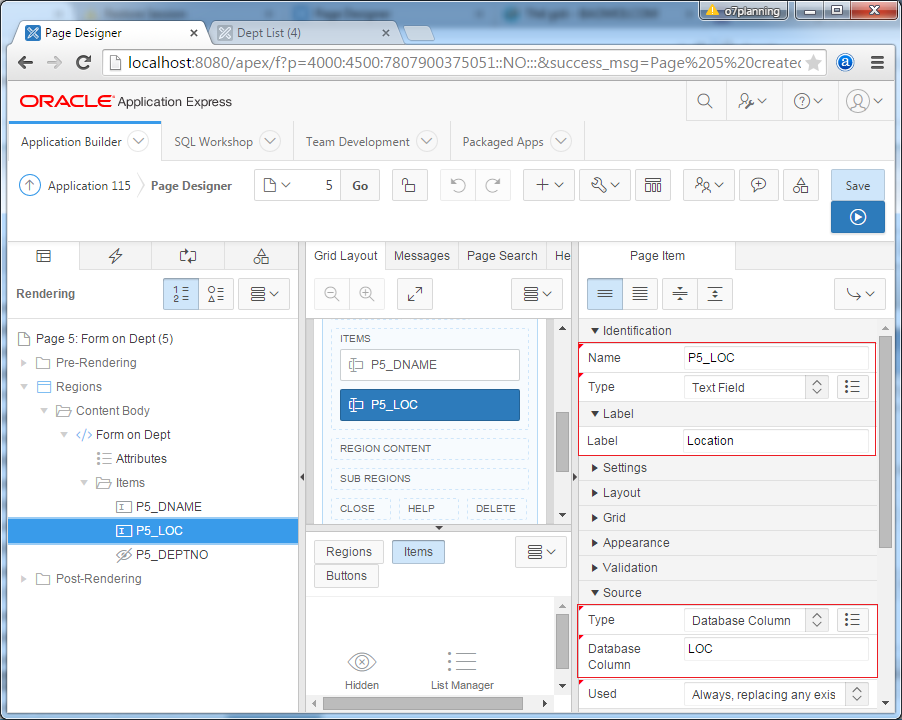
- Text Field: LOC
Drag and drop an Hidden item into ITEMS area as shown below:
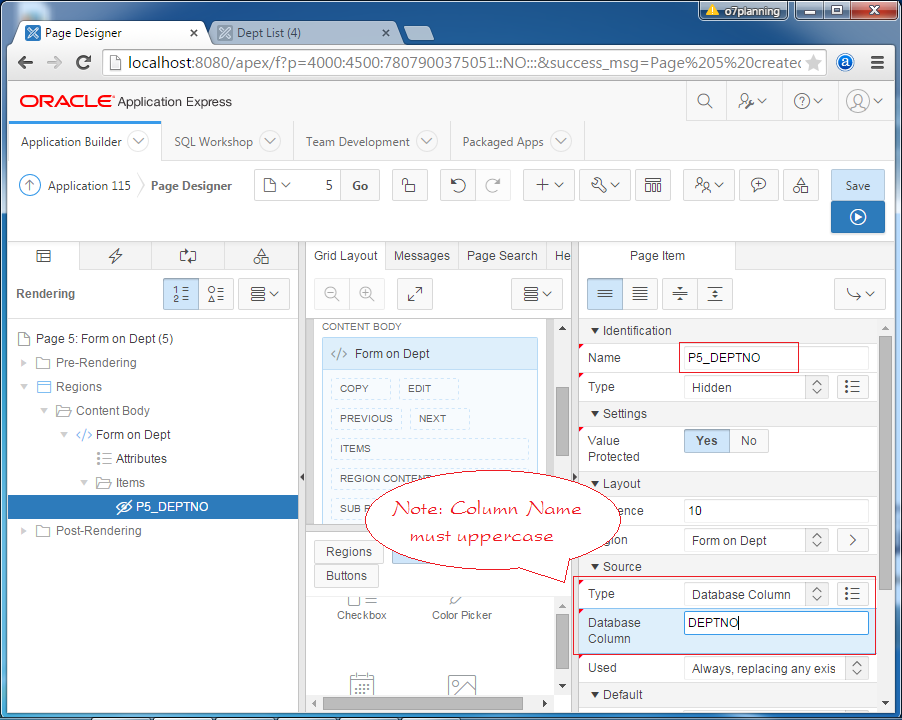
Setting properties for Item:
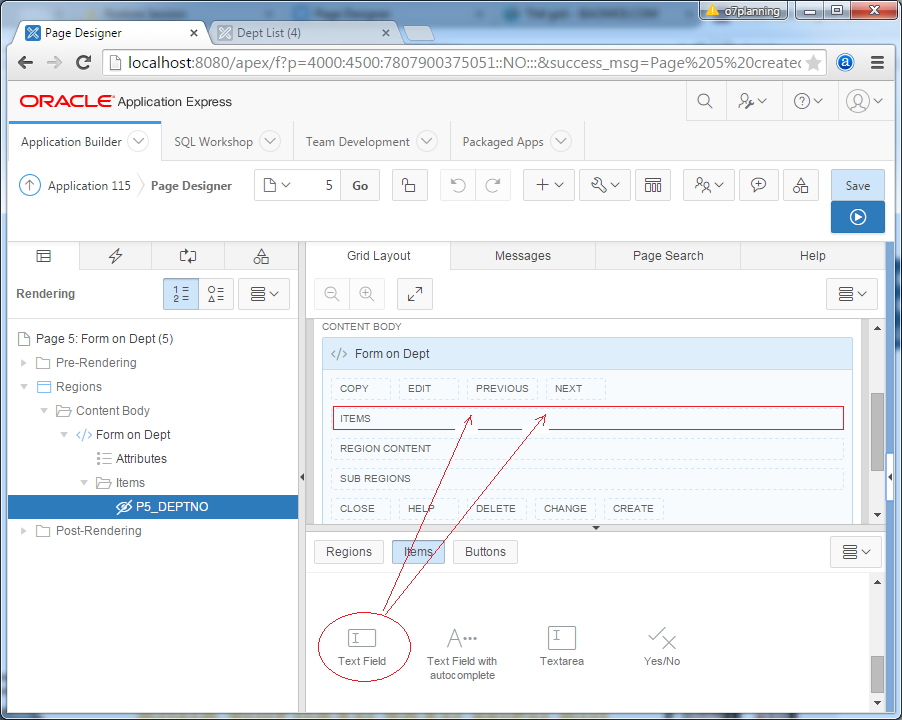
Similarly create 2 TEXT-FIELD:
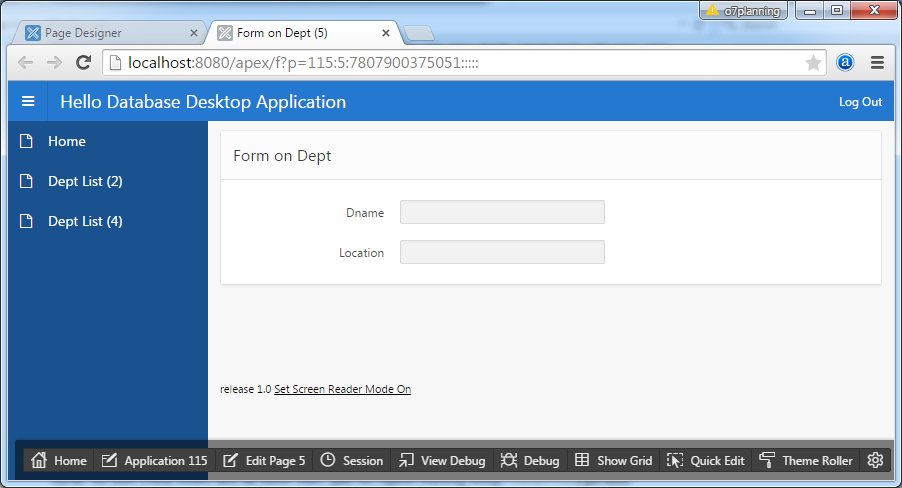
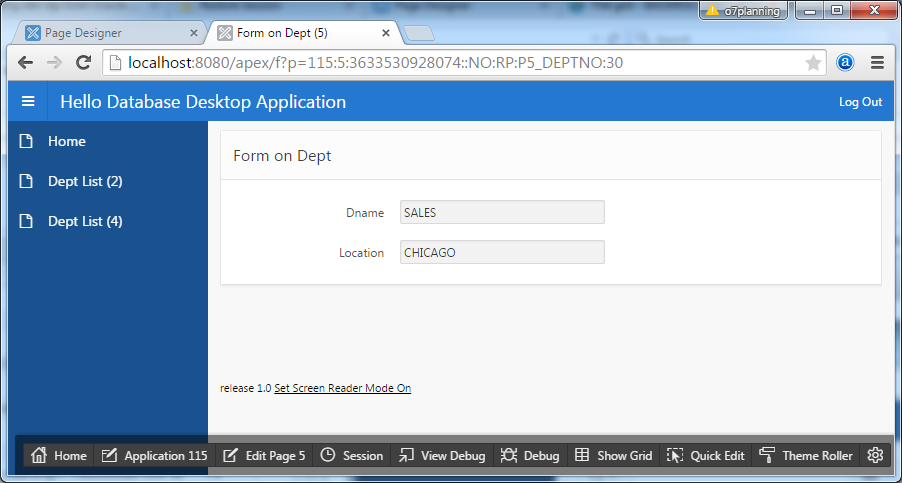
Testting:
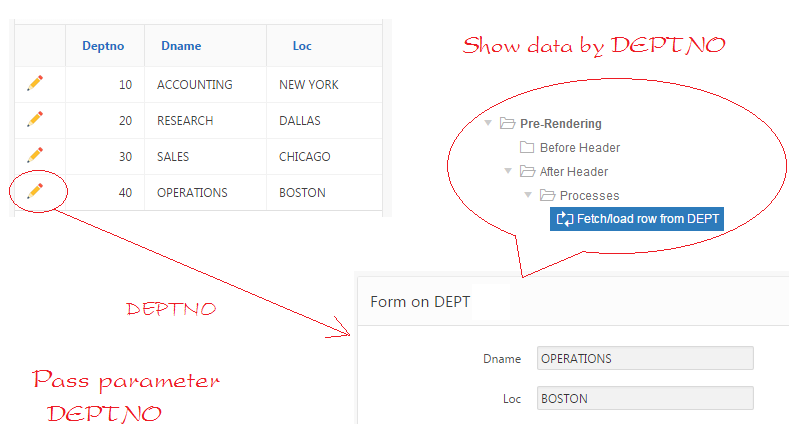
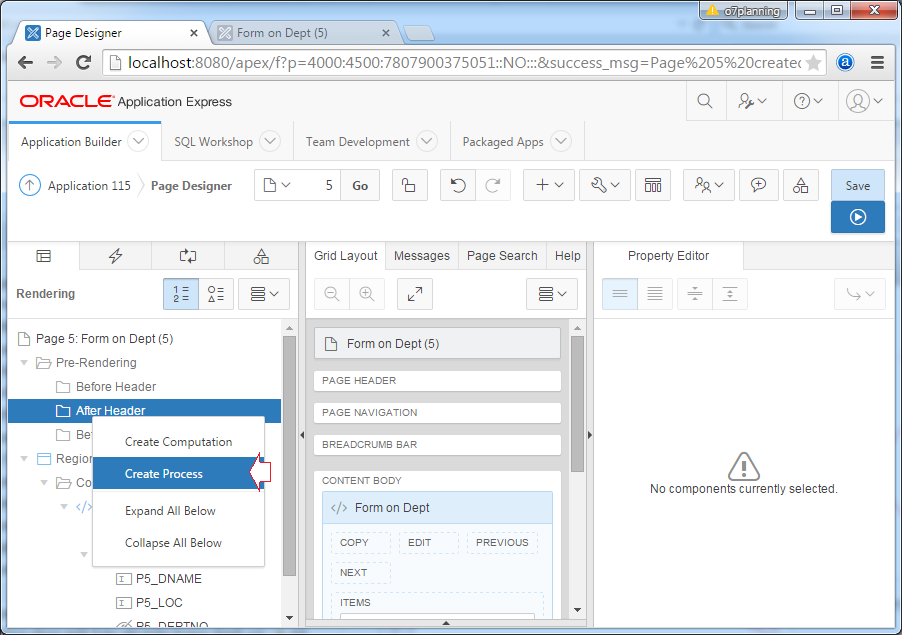
The user selects a record on list (page 4) to modify, it will be turned to Form page (page 5) and pass ID of record. You need to make a Process (On Pre-Rendering) on page 5 to load data and shown on Form:
Make a process in:
- Pre-Rendering/After Header
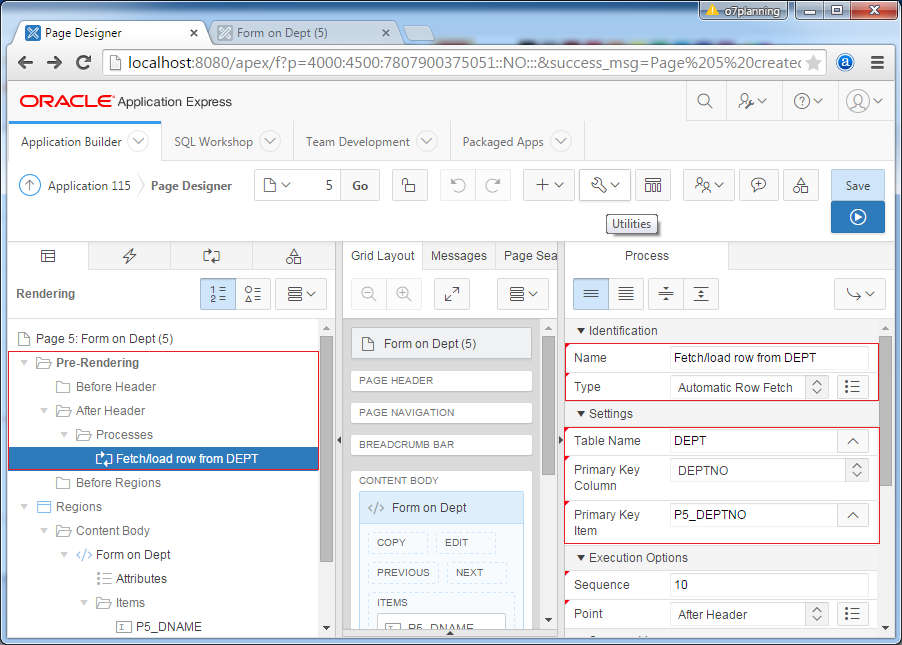
Enter:
- Name: Fetch/load row From DEPT
- Type: Automatic Row Fetch
- Table Name: DEPT
- Primary Key Column: DEPTNO
- Primary Key Item: P5_DEPTNO
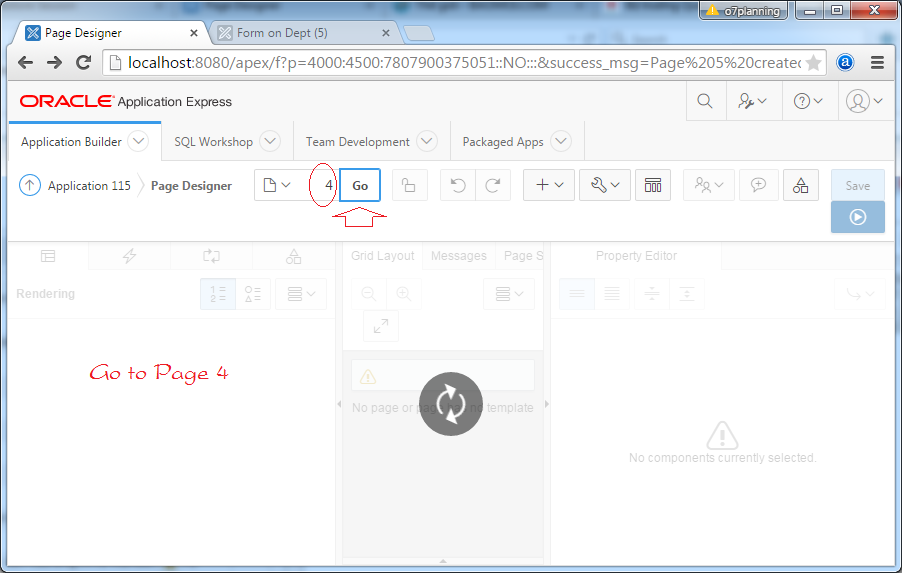
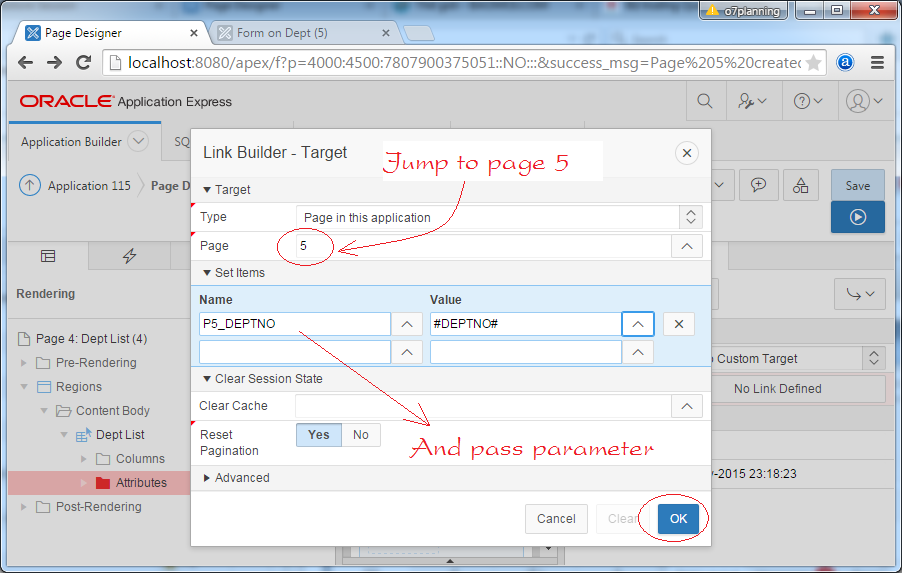
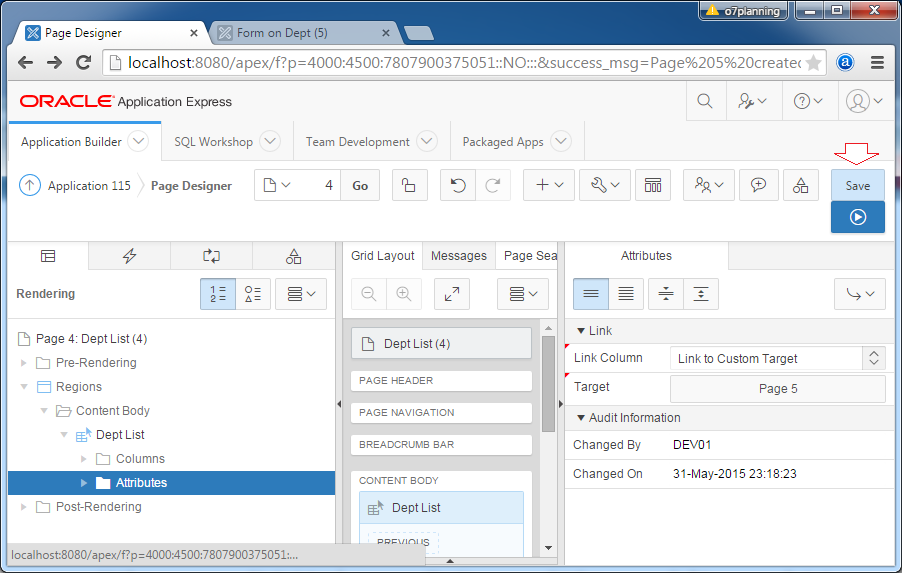
Turn back page 4 (Dept List (4)) to set the parameters passed from page 4 to page 5.
Save and test page:
Next, we add new creating functions and Save record as shown below:
On page 4:
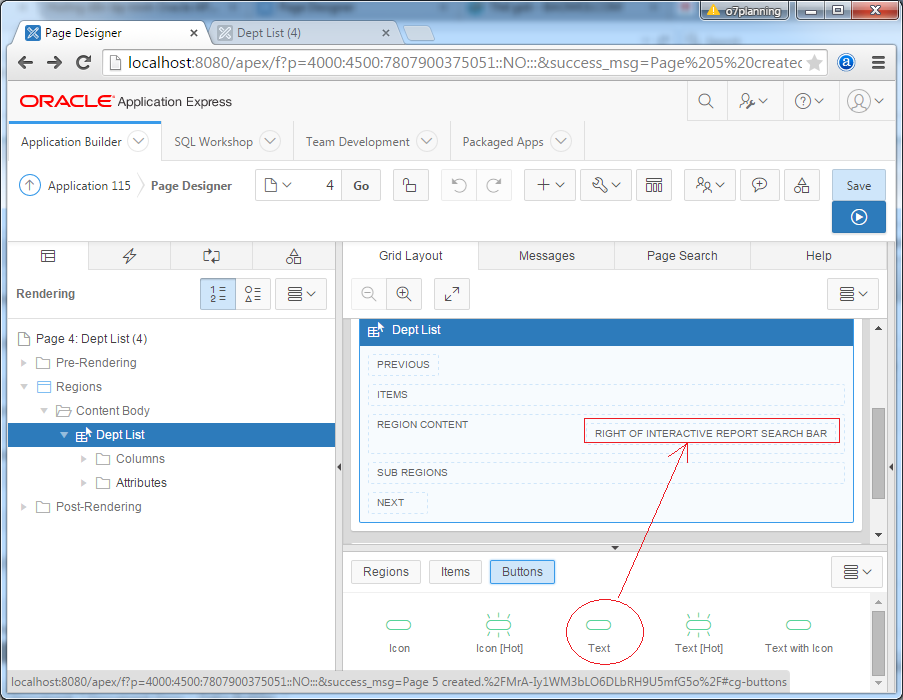
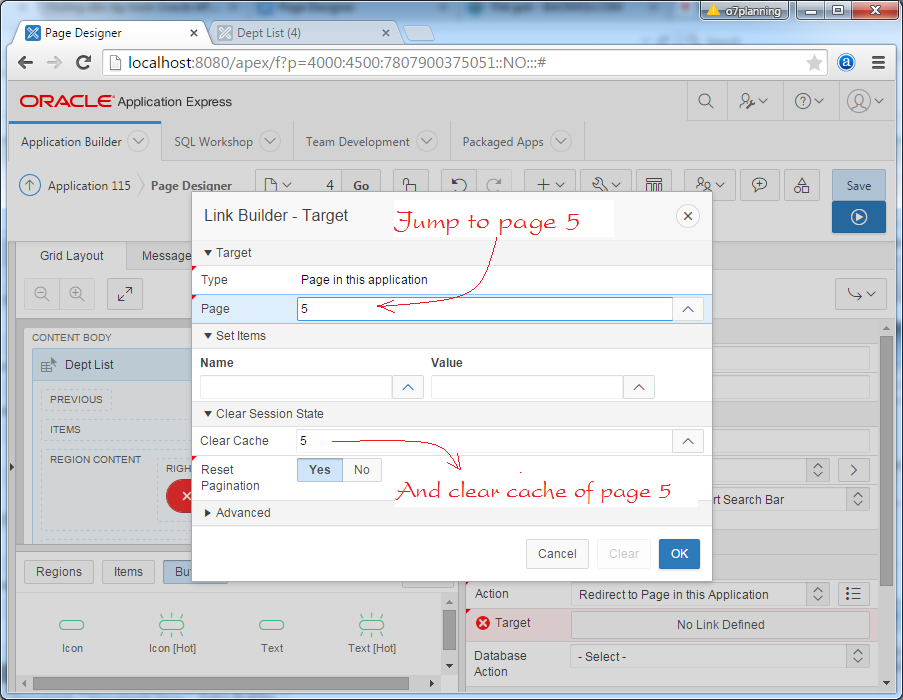
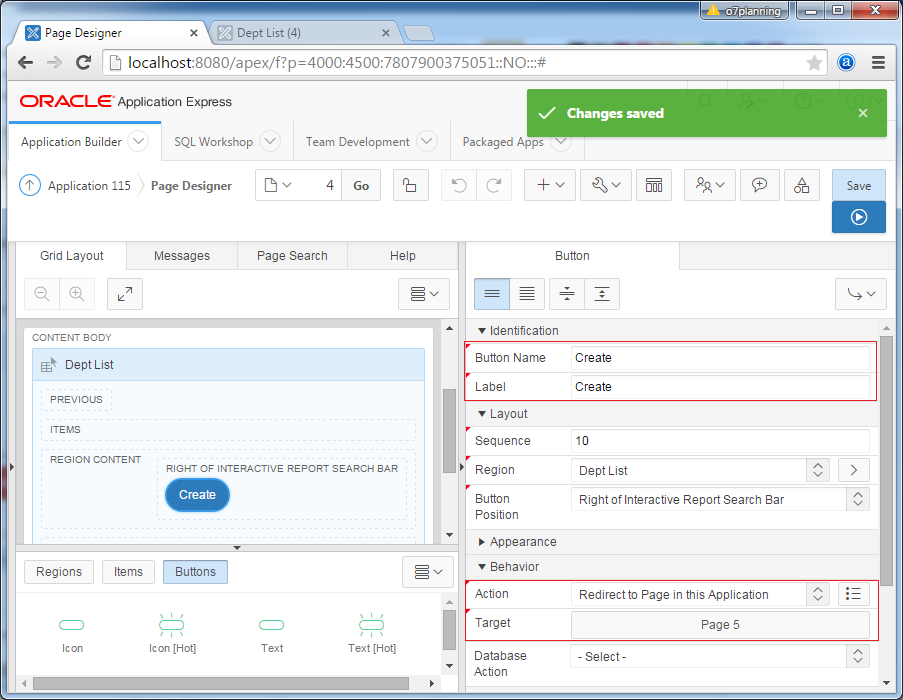
Next Jump to page 5.
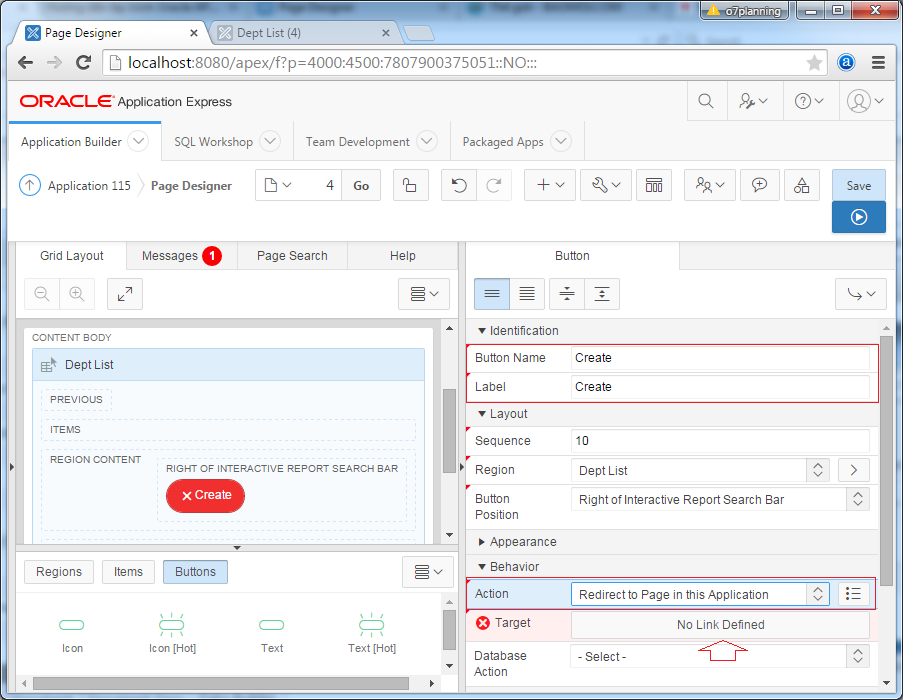
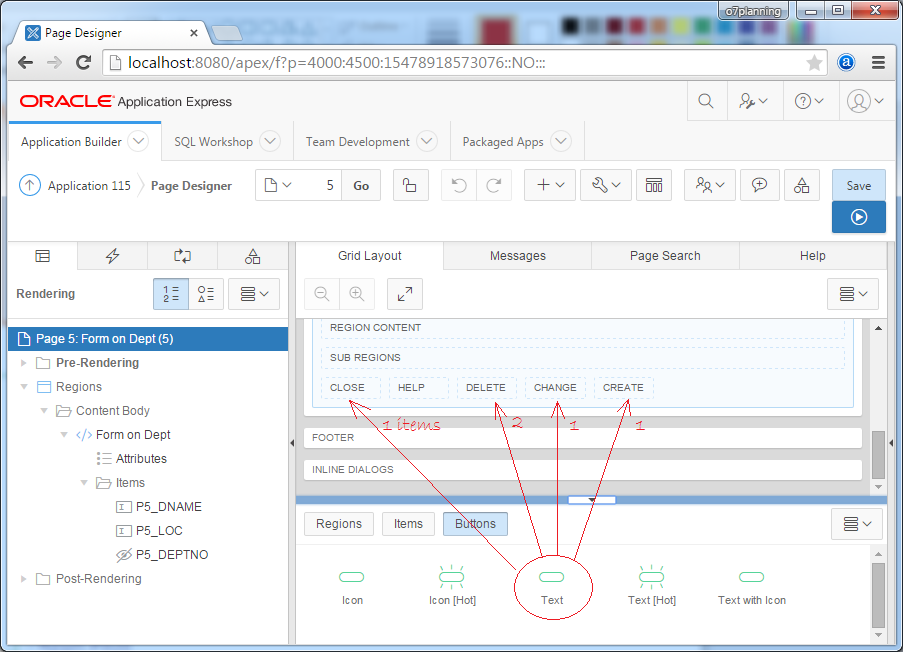
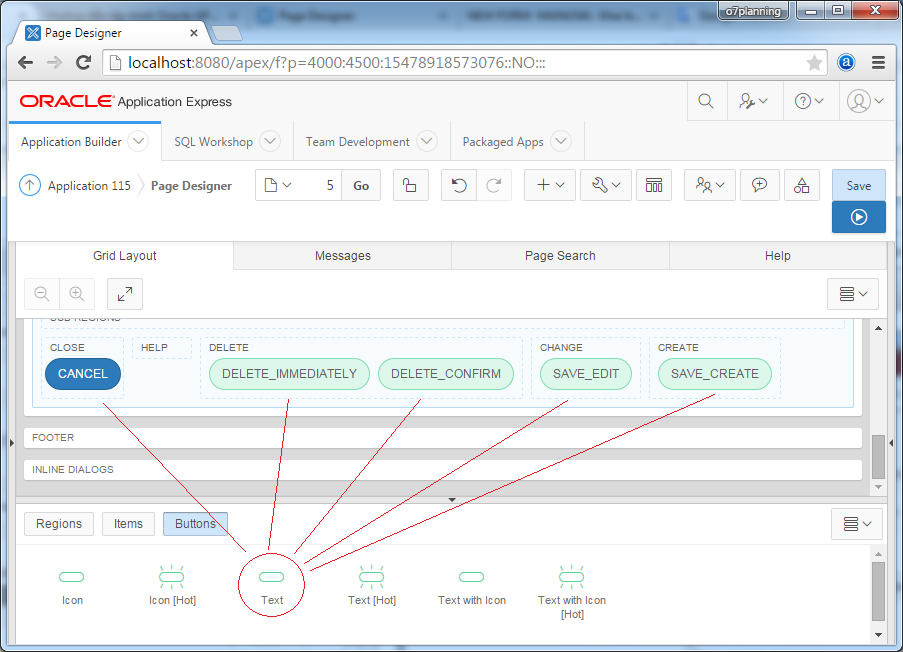
Drag and drop buttons to positions on design screen as shown below:
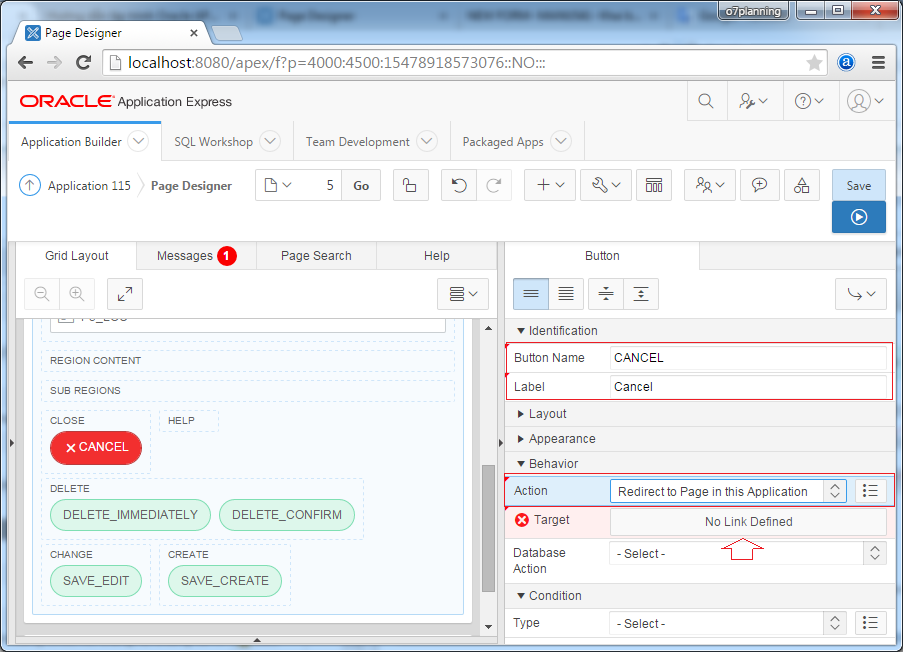
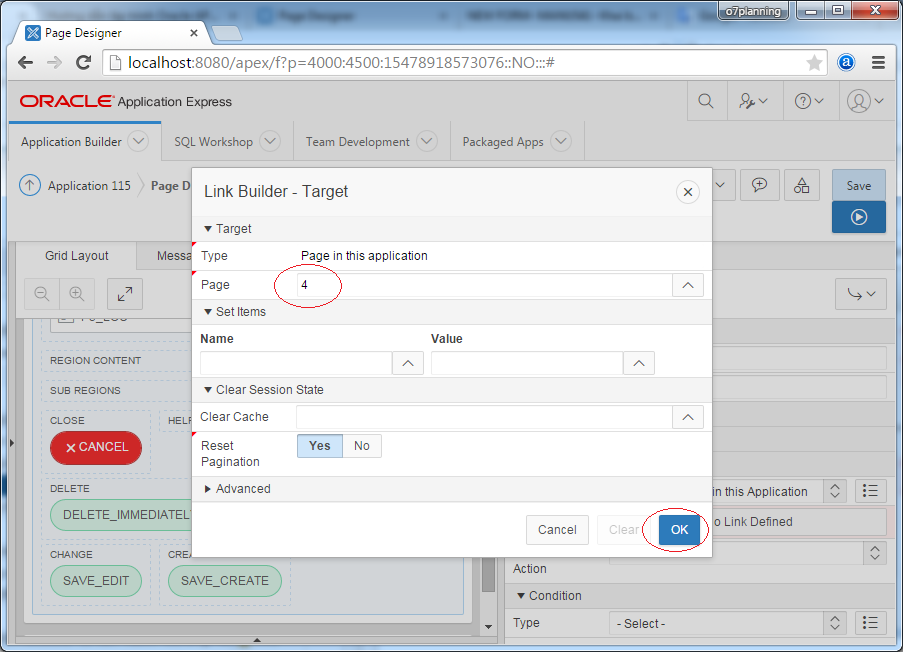
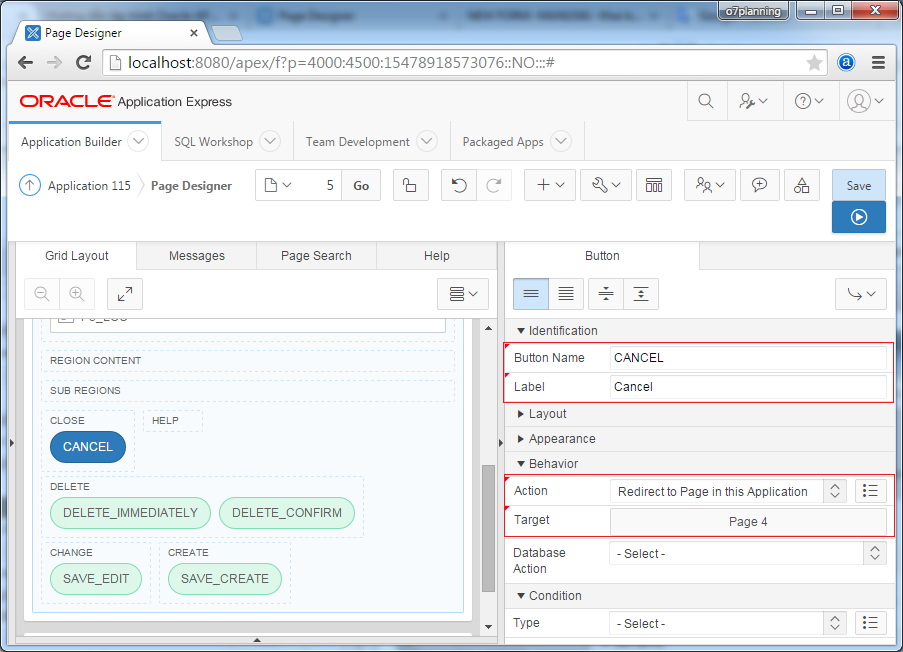
When you click CANCEL on page 5, the website will go to page 4.
Setting properties for CANCEL button:
- Button Name: CANCEL
- Label: Cancel
- Action: Redirect to Page in this Application
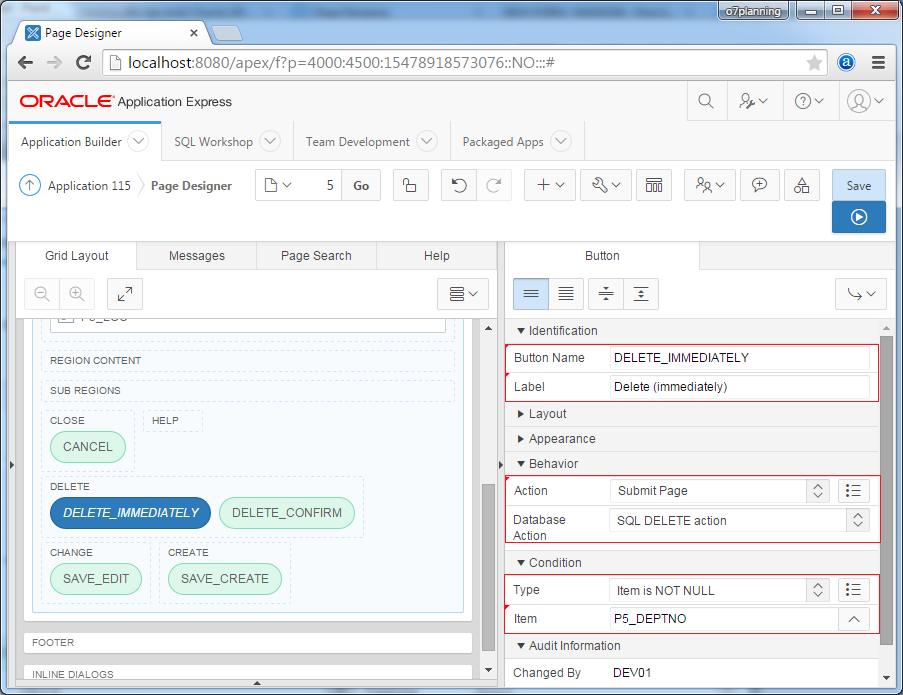
DELETE_IMMEDIATELY
When click button DELETE_IMMEDIATELY, record will be delete without prompting. We'll setting attributes for this button:
- Button Name: DELETE_IMMEDIATELY
- Label: Delete (Immediately)
- Action: Submit Page
- Database Action: SQL DELETE Action
This button will display if the P5_DEPTNO not null:
- Condition Type: Item not null
- Condition Item: P5_DEPTNO
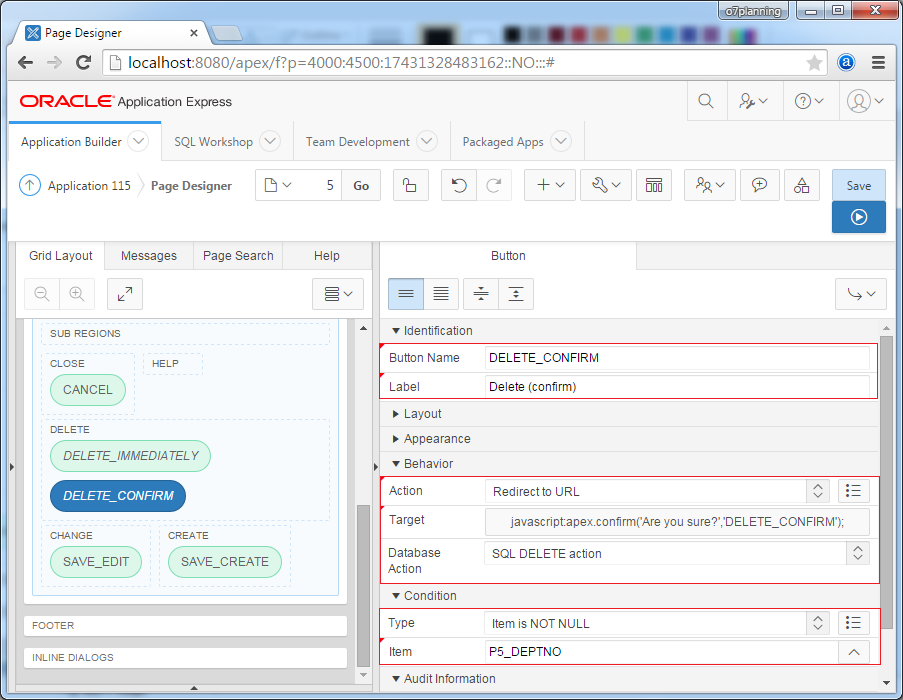
DELETE_CONFIRM
When click this button, the application ask user whether want to delete this record or not.
Set up attributes for DELETE_CONFIRM button:
Set up attributes for DELETE_CONFIRM button:
- Button Name: DELETE_CONFIRM
- Label: Delete (confirm)
- Action: Redirect to URL
- Target: javascript:apex.confirm('Are you sure?','DELETE_CONFIRM');
- Database Action: SQL DELETE action
Condition for this button display on page.
- Condition Type: Item is NOT NULL
- Condition Item: P5_DEPTNO
Note:
apex.confirm (text, BUTTON_NAME) is an available javascript function on APEX, it will display a Dialog requires user confirm action before executing definition action on BUTTON_NAME.
This button will display on web page if P5_DEPTNO is not null.
You can also define a javacript variable and use it on whole web page.
// Declare a variable named htmldb_delete_message
var htmldb_delete_message='Would you like to perform this delete action?';

// Or:
// "DELETE_CONFIRM_MSG" is a constant available in APEX.
// It has value: Would you like to delete this thực action?


var htmldb_delete_message='"DELETE_CONFIRM_MSG"';


// Then can use this variable in the whole page.

apex.confirm(htmldb_delete_message,'DELETE_CONFIRM');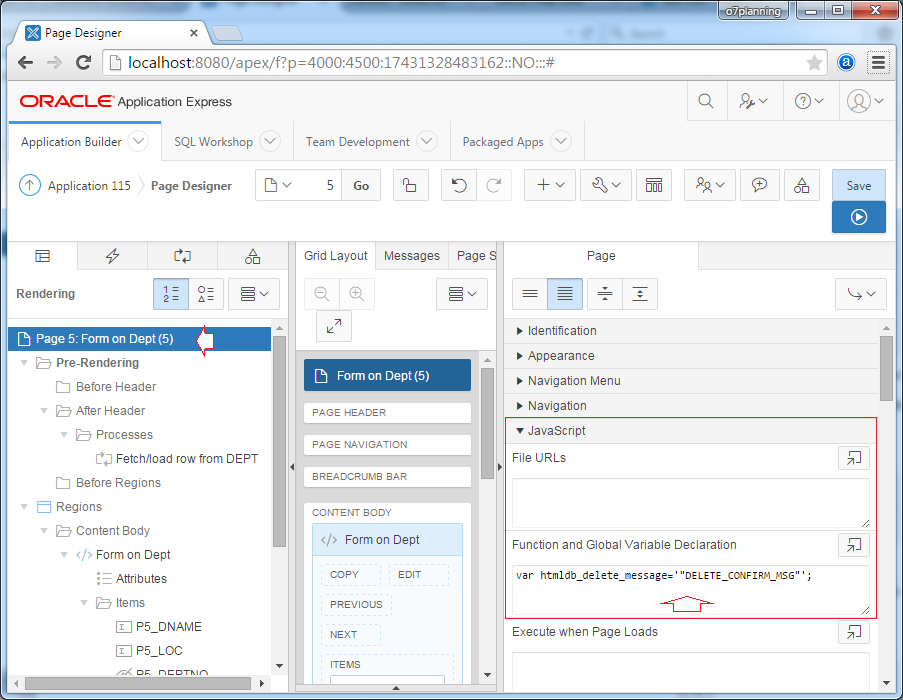
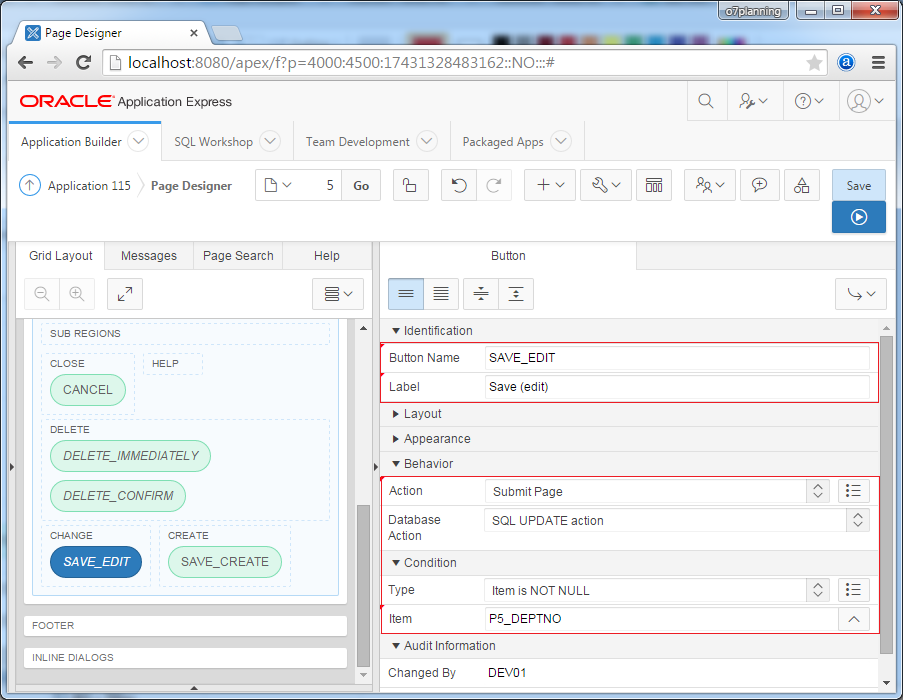
SAVE_EDIT
This button will display for user to modify available record on DB (make an Update statement on DB).
- Button Name: SAVE_EDIT
- Label: Save (edit)
- Action: Submit Page
- Database Action: SQL UPDATE action
Condition for this button display on page.
- Condition Type: Item is NOT NULL
- Condition Item: P5_DEPTNO
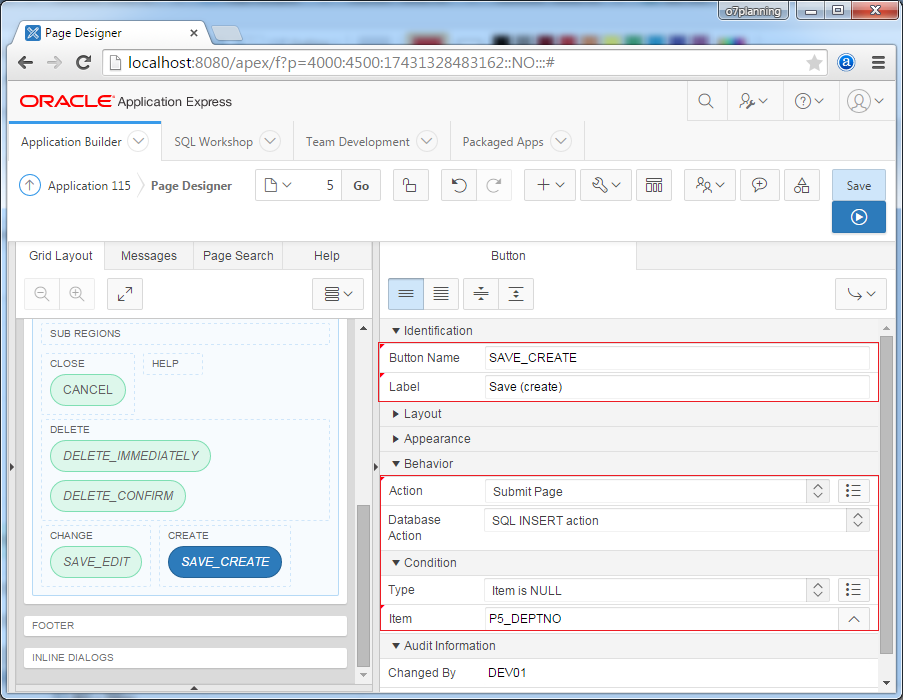
SAVE_CREATE
- Button Name: SAVE_CREATE
- Label: Save (create)
- Action: Submit Page
- Database Action: SQL INSERT action
- Condition
- Type: Item is NULL
- Item: P5_DEPTNO
Process
Next, we add 3 Process:
- Get PK: Check P5_DEPTNO has assigned value or not, if not, we will assign the value for it from DEPT_SEQ (Use in case of Insert).
- Process Row of Dept: Execute actions (Insert, Update, or Delete).
- Reset Page: Delete statuses.
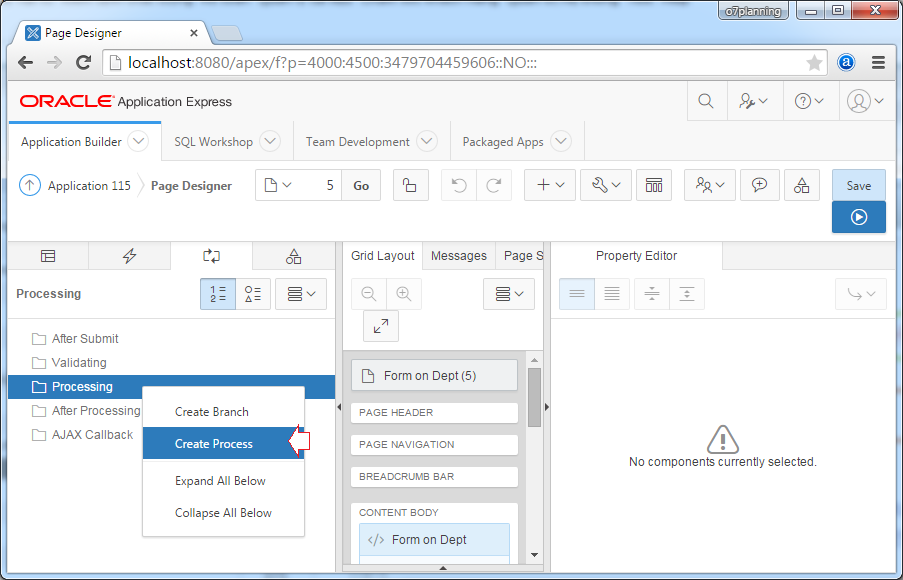
Create a new process named "Get PK", and enter attribute values:
- Name: Get PK
- Type: PL/SQL Code
- PL/SQL Code:
begin
    if :P5_DEPTNO is null then
        select DEPT_SEQ.nextval
          into :P5_DEPTNO
          from dual;
    end if;
end;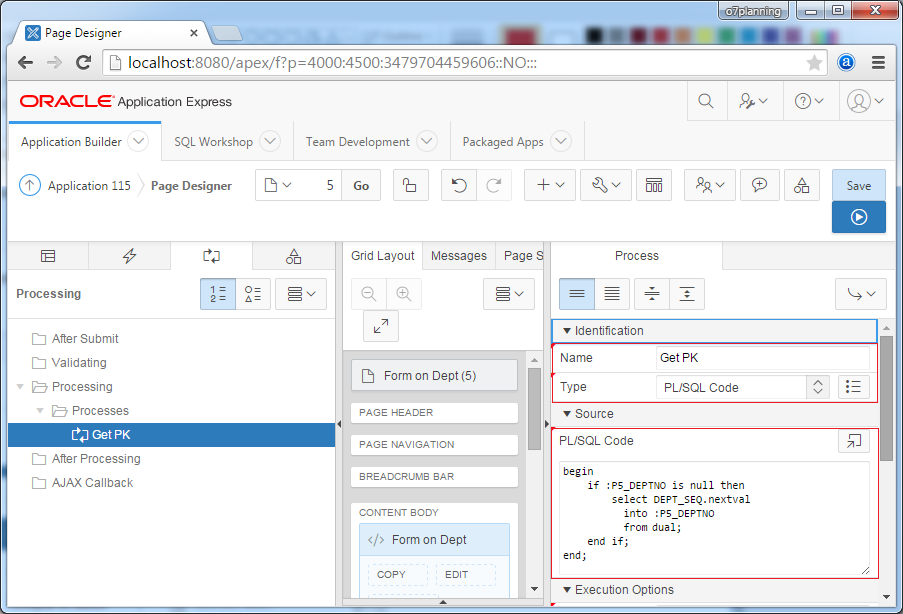
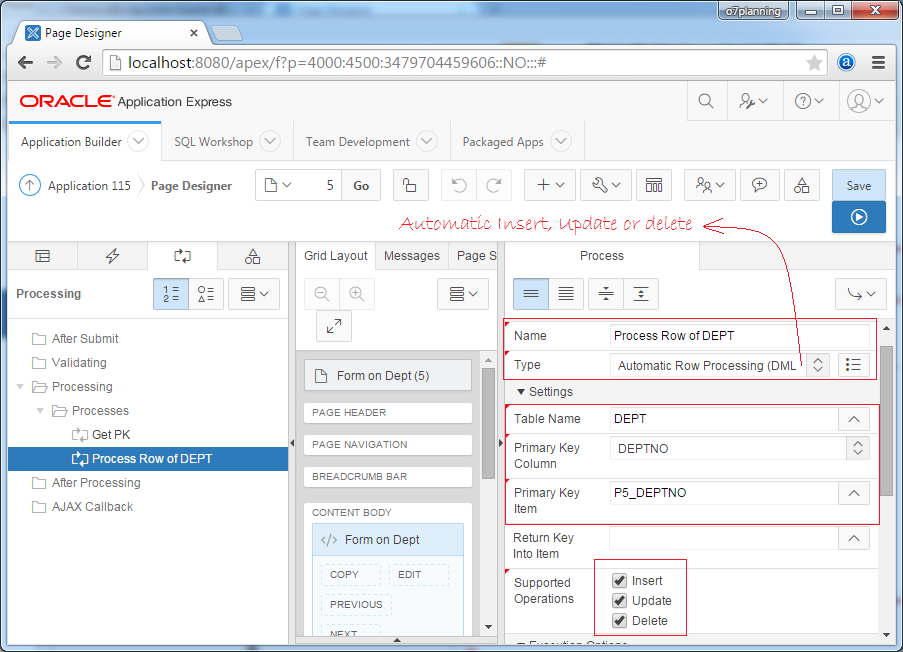
Next, you create the Process "Process Row of DEPT" with attributes:
- Name: Process Row of DEPT
- Type: Automatic Row Processing (DML)
- Table Name: DEPT
- Primary Key Column: DEPTNO
- Primary Key Item: P5_DEPTNO
- Support Operations:
- Insert
- Update
- Delete
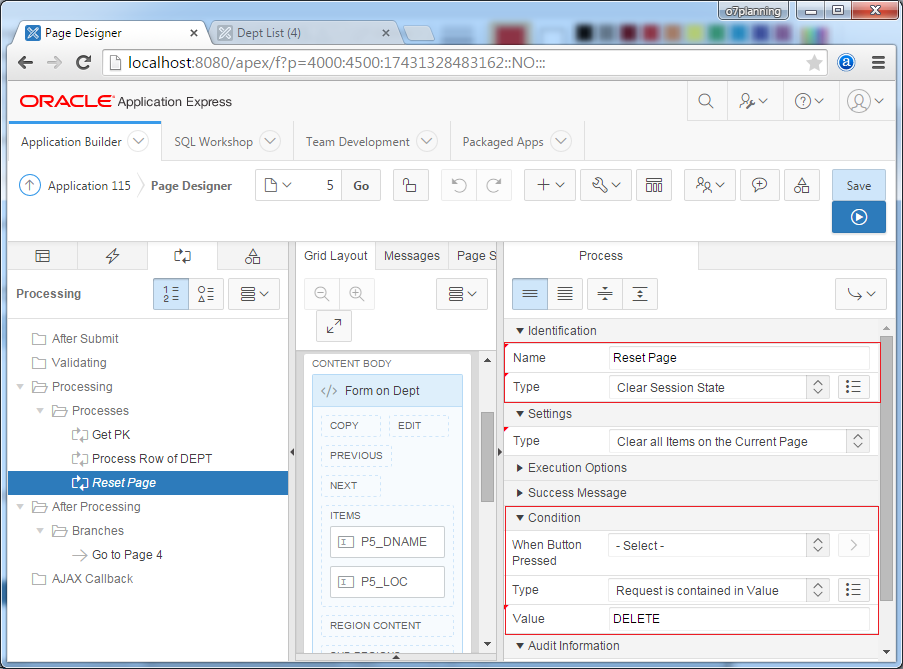
Next, you create process "Reset page" and attribute configuration "Only used for deleting record" for it.
Conditions for this Process to be executed is the request that contains word "DELETE", it means that it will be executed when you click DELETE_IMMIDIATELY or DELETE_CONFIRM button.
Conditions for this Process to be executed is the request that contains word "DELETE", it means that it will be executed when you click DELETE_IMMIDIATELY or DELETE_CONFIRM button.
After the Process is completed (Insert, update, delete) on page 5, to turn back page 4, you need a processing in "After Processing"
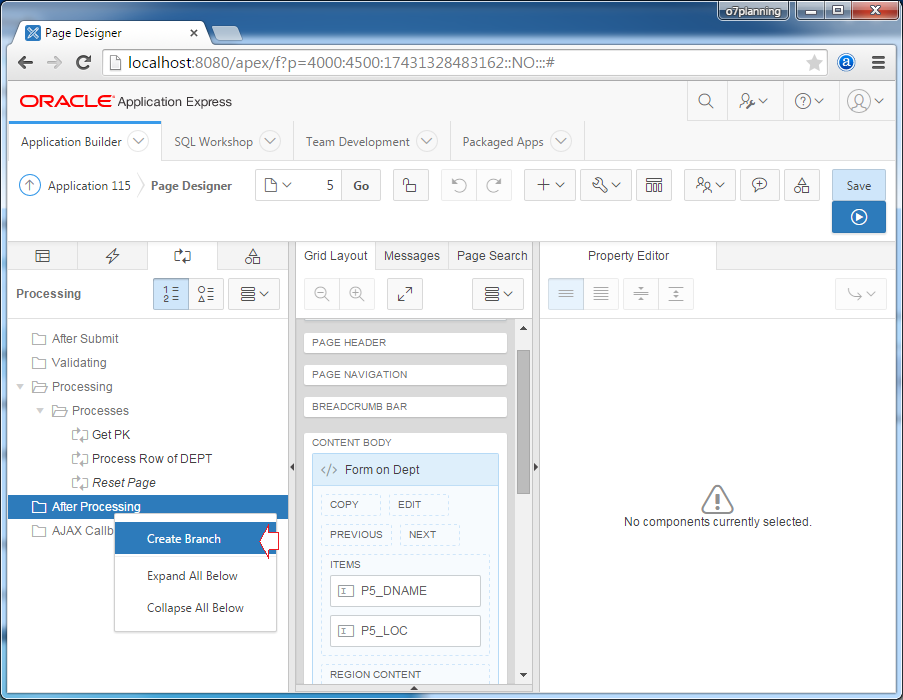
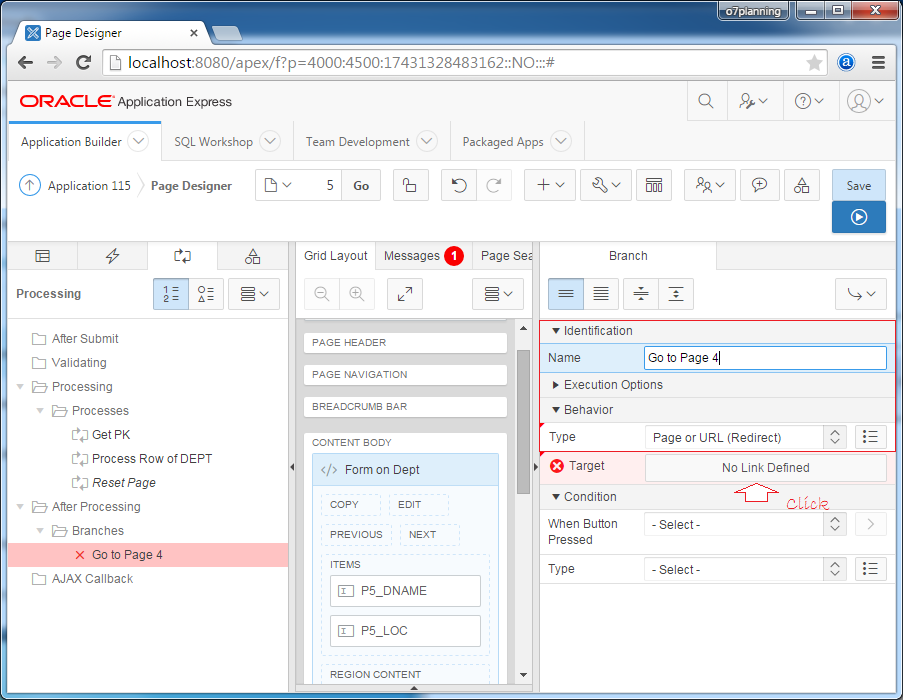
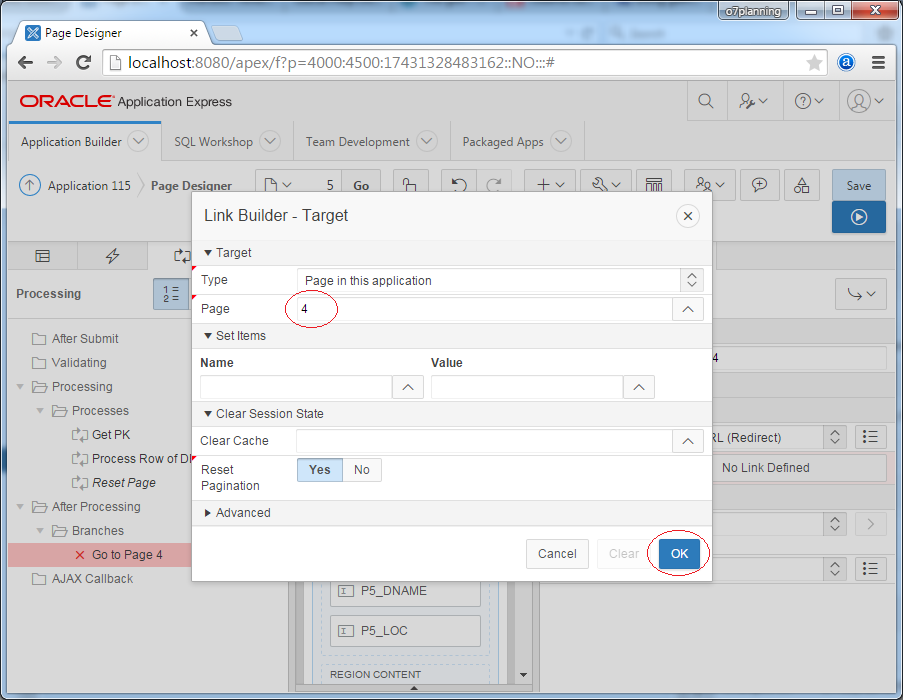
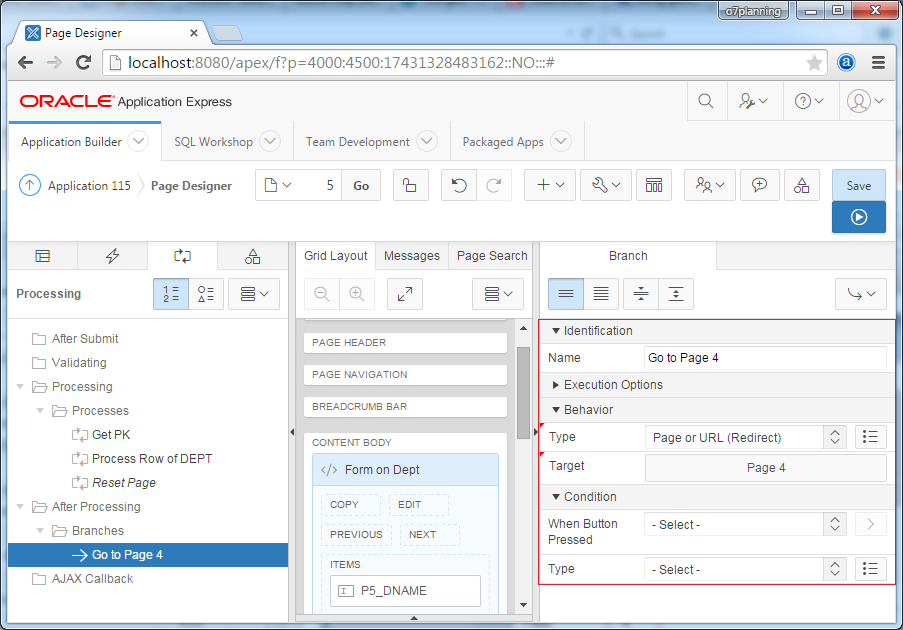
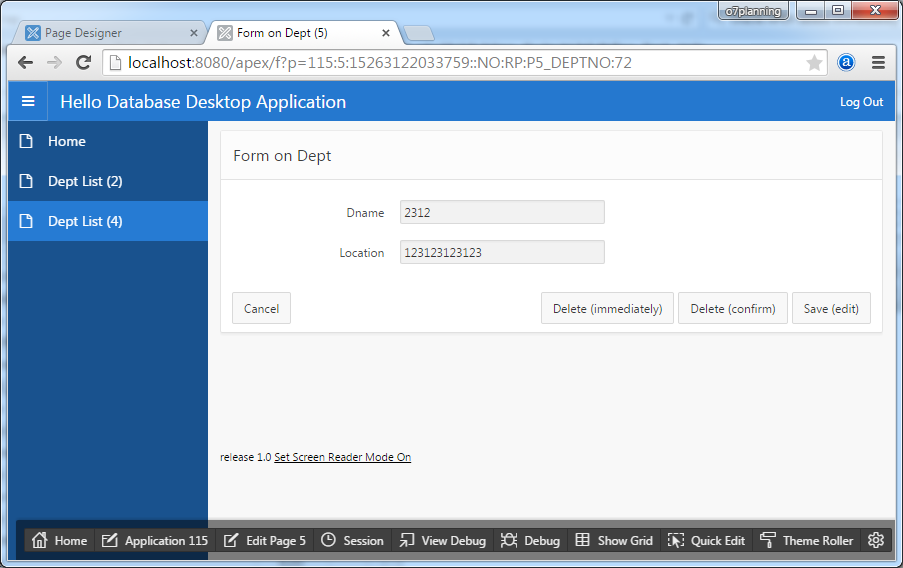
Now, You can Save the changes in design screen and try the application:
Oracle APEX Tutorials
- What is Oracle Application Express?
- Install Oracle Apex 5.0
- Install Oracle REST Data Services (ORDS) for Oracle APEX
- Oracle APEX Tutorial for Beginners (APEX 5.0)
- Oracle APEX Tabular Form Tutorial with Examples
- Oracle APEX Master Details Tutorial with Examples
- Custom Authentication in Oracle APEX
- Oracle APEX Dynamic Action Tutorial with Examples
- Create Dynamic Content Region in Oracle APEX (PL/SQL Dynamic Content)
- What is Business Intelligence?
- Install Oracle BI 11g
Show More